Setting up your email and calendar
Zoom can be configured as your email and calendar client with either Microsoft Outlook or Google Mail. This has many advantages. Users can be more efficient and productive as Zoom can now be used to read, reply, and forward emails just like your current email provider. We can also synchronize the Zoom calendar with either Outlook or Google. You will then be able to see not only all your Zoom meetings but any meeting in your calendar. This is a great time saver because as a user, you will no longer need to switch between Zoom and your email client. This will also help you to use Zoom as your primary email and calendar client.
Getting ready
In order to utilize the Zoom Mail client feature, you will have to be utilizing either Microsoft or Google as your primary email and calendar client before setting up the Zoom Mail & Calendar service.
How to do it...
- Launch your Zoom desktop client. Navigate to your Mail icon located at the top navigation bar and click on your email/calendar provider (Google or Microsoft).
- You will be prompted to log in to your email account. Enter your email address and password and then click Continue.
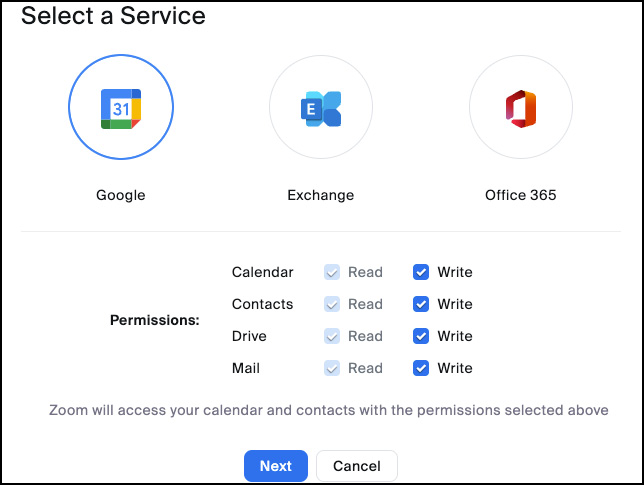
The Zoom Admin portal will open and prompt you with a Select a Service option. Pick which provider you use.
Note
In this example, we will be using Google, but the steps are the same for Office 365. On rare occasions, some businesses might still have Exchange deployed on-premises. This cookbook is outside the scope of that situation. Contact your IT department for appropriate steps to connect Zoom and Microsoft Exchange.
- In this example, we will choose Google. We will choose all settings for Read and Write. This will give Zoom permission to Mail, Calendar, Contacts, and Drive:
Note
We will dive deeper into Google Drive in the How to use Zoom apps recipe, but for now, you can enable this feature if you use the Google productivity suite and want to share files directly from Zoom. If you chose Office 365 as your email provider, we will also cover OneDrive and Zoom integration in the aforementioned recipe.

Figure 1.14: Select a Service
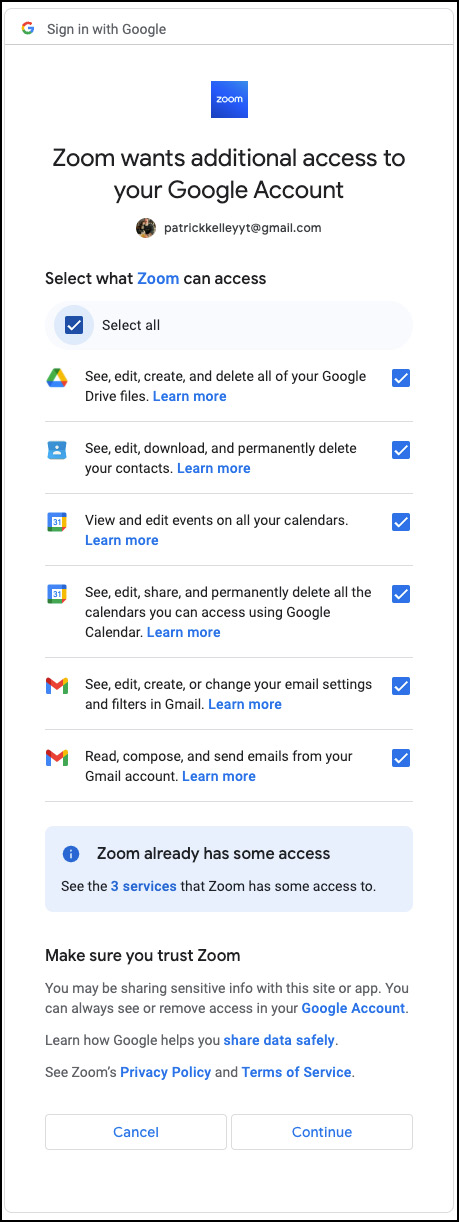
- Next, click Select All to allow Zoom to access your Google account, then click Continue:

Figure 1.15: Google account access
- You’ve now properly configured Zoom to work with your email and calendar.
- Click on the Mail or Calendar icon in your Zoom client. You should now be able to view all your email and calendar items from your provider.
Congratulations!


