Setting up IntelliJ IDEA with Java 17
We have installed our IDE (IntelliJ IDEA) and Java 17 on our machine in the previous sections. Now, we will guide you on how to configure Java 17 on new and existing projects.
Using Java 17 on new projects
We only need the following few steps to use Java 17 on our new Java project:
- Open your IntelliJ IDEA terminal and select File | New | New Project.

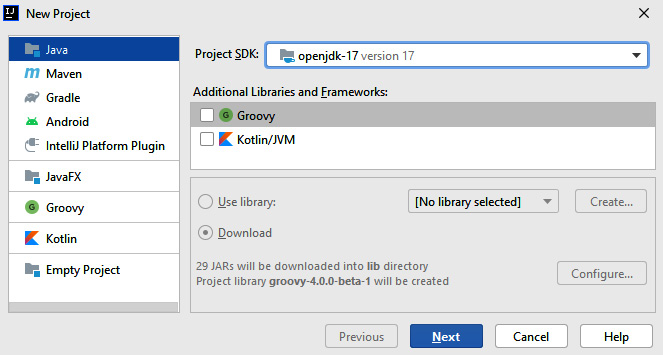
Figure 2.5 – Creating a new project in IntelliJ IDEA
We will see the preceding modal and select the type of project we need to develop. We can also see that we can choose the SDK version we need for our project.
- We will use Java 17, so we need to select OpenJDK-17.
- Click Next and configure your project name and directory. This will set up your Java application with the chosen SDK version.
We have now successfully configured our new project with JDK 17. Now we want to configure existing projects with JDK 17.


