


Creating a rock, paper, scissors wrist game
So far, you have been doing a lot of reading, so let's take some time to do a quick build that covers some of the concepts shared about this new and exciting kit. You are going to build a fun little game of rock, paper, scissors that you can wear on your wrist.
You will need the following parts:
- One Intelligent Hub
- 12 black connector pins
- One black 7x11 open frame
- Two black 5x7 open frames
- Two teal 9L beams
- Two gray H connector brackets
- Eight gray connector pins with a stop bush
To start this build, find your Intelligent Hub:

Figure 2.25 – Intelligent Hub
Locate four black connector pins. Flip the Intelligent Hub over to the back side and insert the four pins into the middle pin holes on the top and bottom of the Hub:

Figure 2.26 – Black pin connectors on the Intelligent Hub
Locate your two black 5x7 open frame parts and attach the 5L side to the pins you just inserted into the Intelligent Hub:

Figure 2.27 – Open frames added to the Intelligent Hub
It is time to locate the following parts:
- Two teal 9L beams
- Four black connector pins
Using two black connector pins with each 9L beam, secure the open frame and the Intelligent Hub with these beams:

Figure 2.28 – Black pins and 9L teal beams
Be sure to leave the bottom pin hole of the open frame open:

Figure 2.29 – 9L beams added to sides
Repeat this process by doing the exact same thing and adding the it to the other side of the Intelligent Hub:

Figure 2.30 – Side view of the build so far
Locate the following parts:
- One black 7x11 open frame
- Four black connector pins:

Figure 2.31 – Open frame and black pins
Add two black connector pins to the middle pin holes on both sides of the 7L side of the open frame:

Figure 2.32 – Black pin added to the open frame
Connect this open frame to the bottom of the other open frames already connected to the Intelligent Hub:

Figure 2.33 – Open frame added to the bottom
You need to locate the following parts:
- Two gray H connector brackets
- Eight gray connector pins with a stop bush:
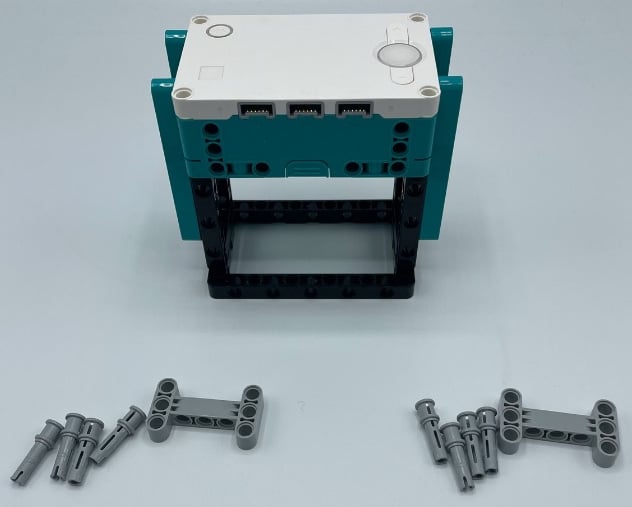
Figure 2.34 – Gray pins and H beams
Insert four of the gray pins to the bottom two holes on each side of the H bracket. Do this to both of the parts:

Figure 2.35 – Gray pins added to H beams
Use these parts to secure the bottom open frame to the sides of this build. If you want to add this to your wrist, insert your wrist first and then secure it with these parts. If you have a tiny wrist, then hold onto the side so it does not fall off when you shake it playing the game!

Figure 2.36 – Completed build
This is a very simple build, but it is designed to be quick and easy to assemble to be able to play your first game of rock, paper, scissors. It is now time to write some code and play the game!


