Recycle bin
As an administrator, we have all been there: a user has deleted a file, an assignment with all its submissions, or even an entire course – all by accident, of course, and usually very close to an urgent deadline. Recovering the lost data is, as always, the highest priority, and you will spend the next hour or so trawling through last night’s backup to help out your panicking colleague.
To avoid scenarios like the ones described, Moodle provides a recycle bin, allowing users to retrieve course elements and courses that were mistakenly deleted. The feature is turned on by default, but you have a range of options to configure the tool’s behavior as an administrator.
To access the Recycle bin configuration, navigate to Site administration | Plugins | Admin tools | Recycle bin, where you will see three groups of settings:

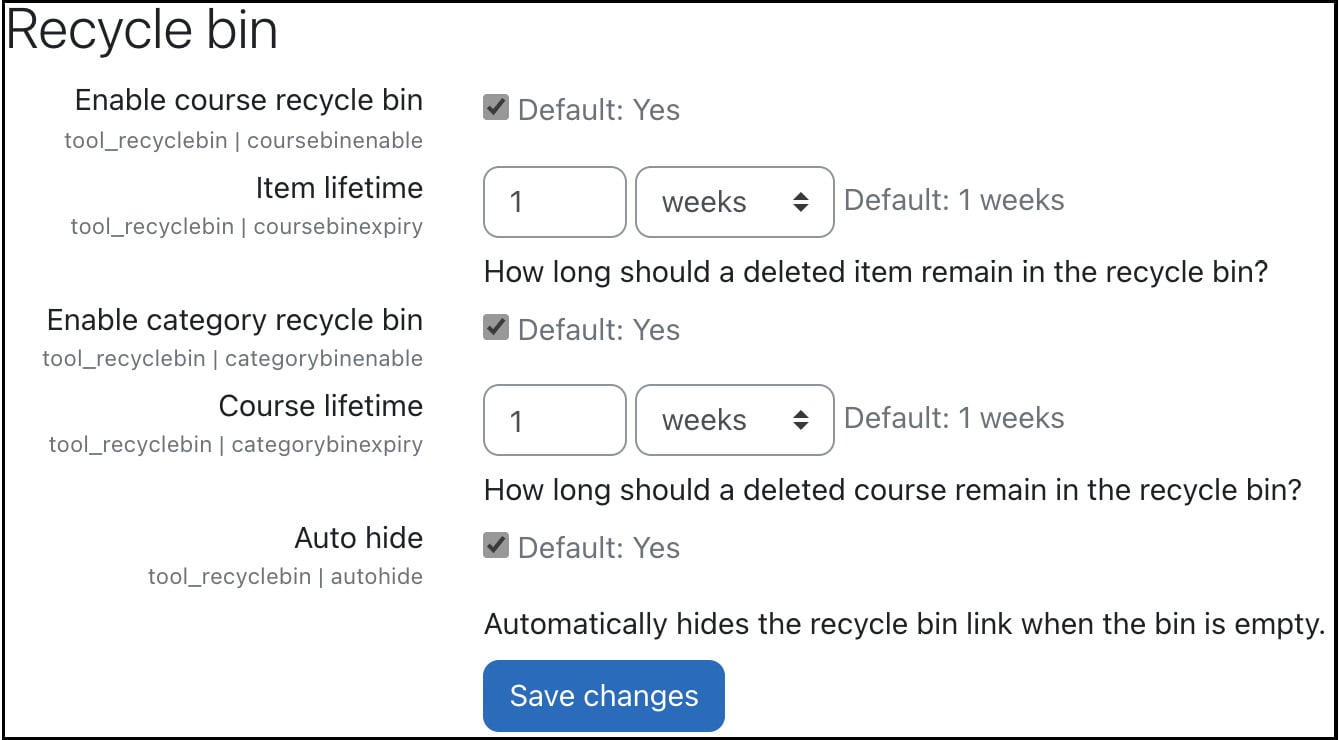
Figure 2.18 – Moodle’s Recycle bin settings
The Recycle bin options are as follows:
- The Enable course recycle bin option collects any deleted resources and activities inside a course. The items will be kept for the period set in the Item lifetime parameter.
- The Enable category recycle bin option collects any deleted courses inside a category. The courses will be kept for the period set in the Course lifetime parameter.
- When the Auto hide checkbox is selected, the corresponding menu item will only be shown if the user’s bin contains any elements; otherwise, it will be hidden from the More menu in the course or category.
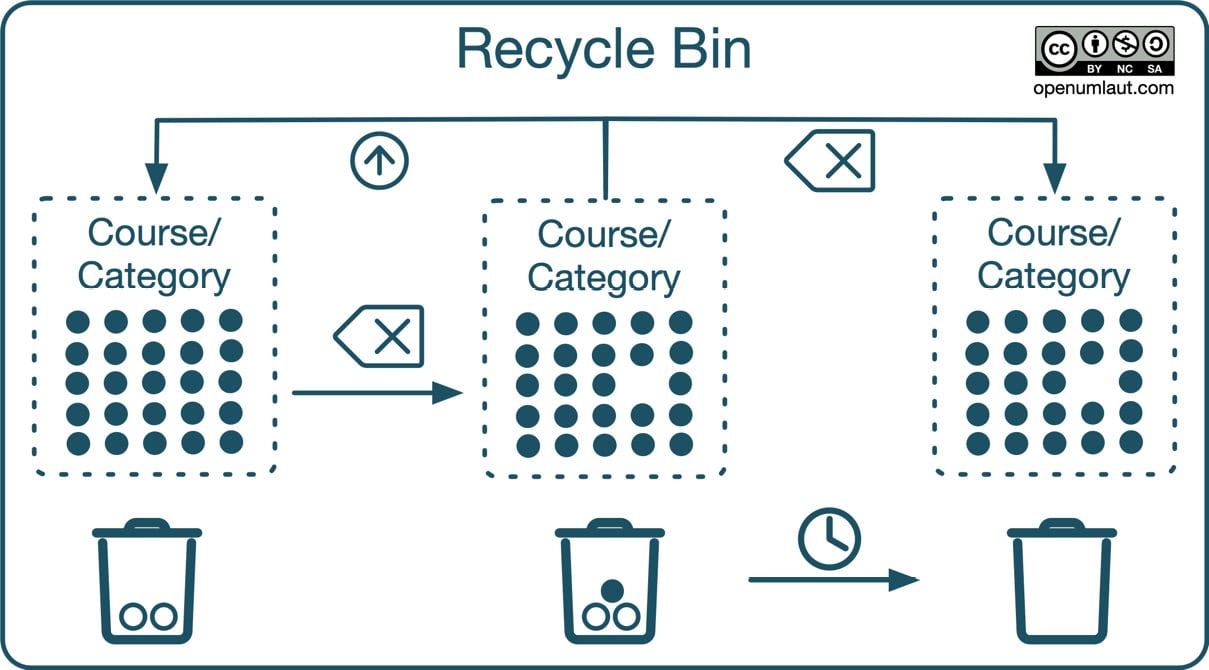
Items and courses will be purged permanently from the recycle bin when the respective lifetime expiry dates have passed. The life cycle of a deleted course item or a course category is depicted in the following diagram:

Figure 2.19 – Moodle Recycle bin
Initially, the recycle bin is empty or may already contain removed items or courses (in our example, two). When an element is deleted, it is moved to the user’s recycle bin, which can either be restored or purged permanently. Suppose, in the meantime, the specified lifetime of the element has expired. In that case, the file or course will be deleted permanently, alongside any other elements where the expiry date has also been reached.
As mentioned previously, the recycle bin works out of the box; if yours doesn’t function as expected, double-check the following three configurations:
- Most processes of the recycle bin are kicked off by the cron process, for example, the regular purging mechanism we just mentioned. Therefore, it is crucial that the cron process is set up correctly and runs every minute (see the dedicated Setting up the cron process section in Chapter 1, Installing Moodle).
- Internally, the recycle bin uses Moodle’s backup and restore functionality. In particular, the following two settings have to be enabled on the Automated backup setup page: Include activities and resources (
backup_auto_activities) and Automated backup setup (backup_auto_users). Additionally, General restore defaults (restore_general_users) must be ticked on the General restore defaults page. You can find more detailed information on these settings in Chapter 16, Avoiding Sleepless Nights – Moodle Backup and Restore. - If your users experience difficulties working with the recycle bin, ensure none of the required capabilities have been revoked from their roles. These are tool/recyclebin:viewitems, tool/recyclebin:restoreitems, and tool/recyclebin:deleteitems. More on roles and capabilities will be provided in Chapter 6, Managing Permissions, Roles, and Capabilities.
Learning how to use the recycle bin concludes this section on files and the management thereof.


