Search icon CANCEL
Subscription
0
Cart icon
Your Cart (0 item)
Close icon
You have no products in your basket yet
Save more on your purchases! discount-offer-chevron-icon
Savings automatically calculated. No voucher code required.
Arrow left icon
Explore Products
Best Sellers
New Releases
Books
Videos
Audiobooks
Learning Hub
Newsletter Hub
Free Learning
Arrow right icon
timer SALE ENDS IN
0 Days
:
00 Hours
:
00 Minutes
:
00 Seconds
Arrow up icon
GO TO TOP
Java EE 8 Development with Eclipse

You're reading from   Java EE 8 Development with Eclipse Develop, test, and troubleshoot Java Enterprise applications rapidly with Eclipse

Arrow left icon
Product type Paperback
Published in Jun 2018
Publisher
ISBN-13 9781788833776
Length 596 pages
Edition 3rd Edition
Languages
Tools
Arrow right icon
Author (1):
Arrow left icon
Ram Kulkarni Ram Kulkarni
Author Profile Icon Ram Kulkarni
Ram Kulkarni
Arrow right icon
View More author details
Toc

Table of Contents (15) Chapters Close

1. Introducing JEE and Eclipse FREE CHAPTER 2. Creating a Simple JEE Web Application 3. Source Control Management in Eclipse 4. Creating JEE Database Applications 5. Unit Testing 6. Debugging the JEE Application 7. Creating JEE Applications with EJB 8. Creating Web Applications with Spring MVC 9. Creating Web Services 10. Asynchronous Programming with JMS 11. Java CPU Profiling and Memory Tracking 12. Microservices 13. Deploying JEE Applications in the Cloud 14. Securing JEE Applications 15. Other Books You May Enjoy

Configuring the GlassFish Server in Eclipse

We are going to use the GlassFish application server in this chapter. We have already seen how to install GlassFish in the Installing GlassFish Server section of Chapter 1, Introducing JEE and Eclipse.

We will first configure the GlassFish Server in Eclipse JEE:

  1. To configure the GlassFish Server in Eclipse EE, make sure that you are in the Java EE perspective in Eclipse. Right-click on the Servers view and select New | Server. It you do not see the GlassFish Server group in the list of server types, then expand Oracle node and select and install GlassFish Tools:
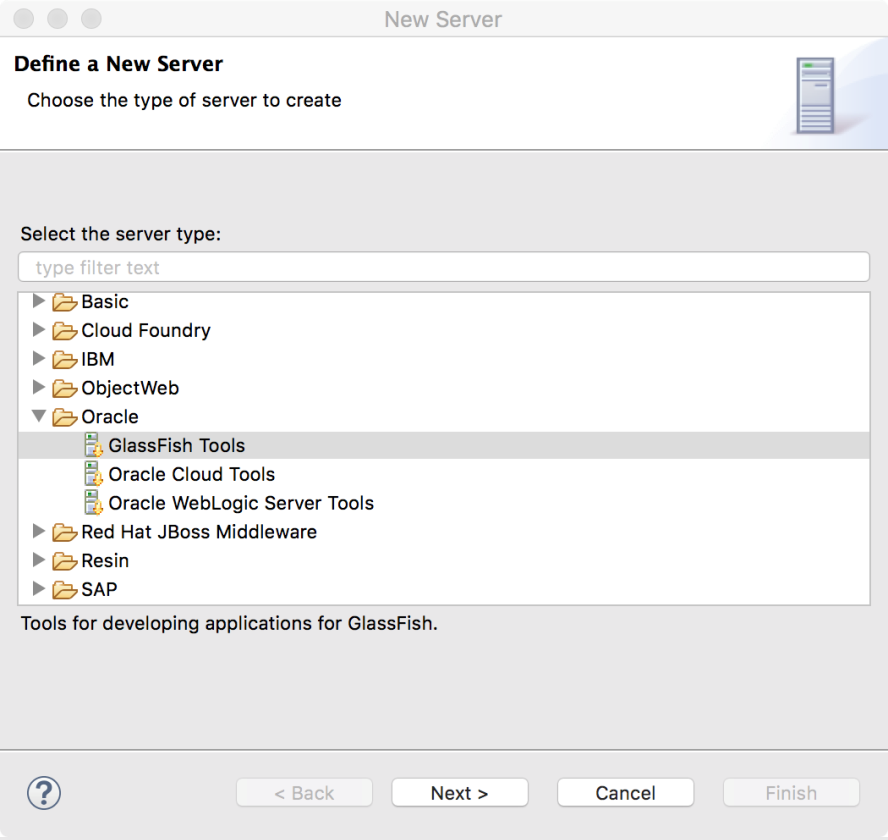
Figure 7.1: Installing GlassFish Tools
  1. If you have already installed GlassFish Tools, or if GlassFish Server type is available in the list, then expand that and select the GlassFish option:
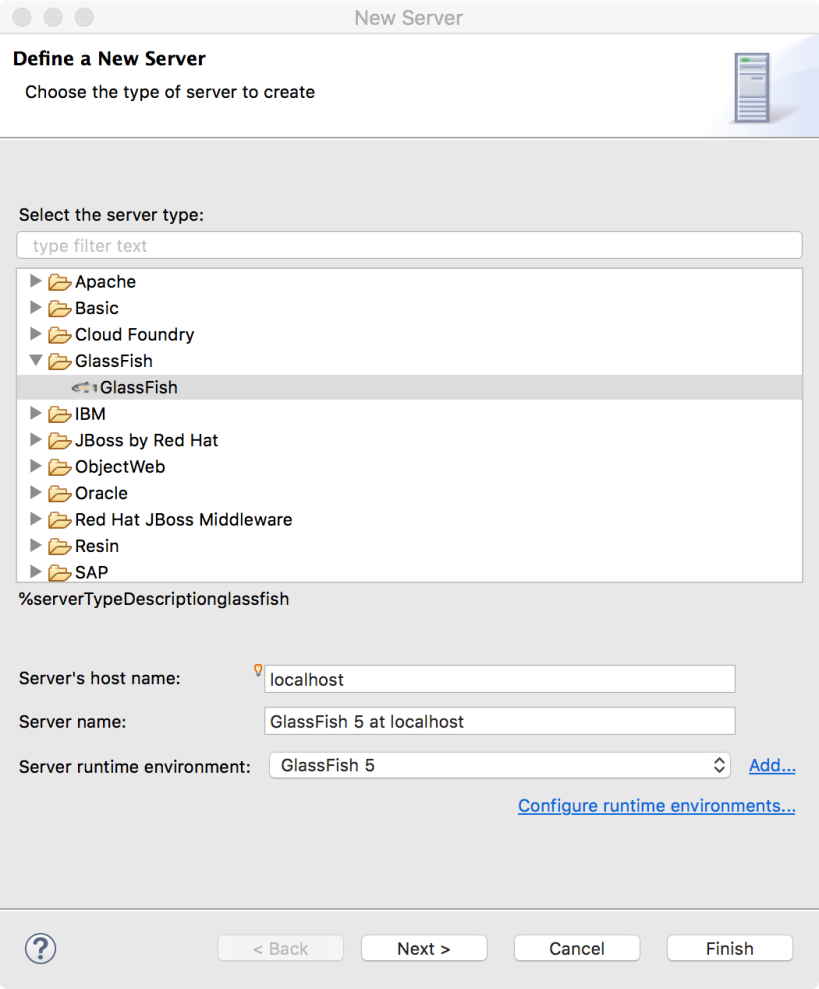
Figure 7.2: Creating GlassFish Server instance in Eclipse
  1. Click Next. ...
lock icon The rest of the chapter is locked
Register for a free Packt account to unlock a world of extra content!
A free Packt account unlocks extra newsletters, articles, discounted offers, and much more. Start advancing your knowledge today.
Unlock this book and the full library FREE for 7 days
Get unlimited access to 7000+ expert-authored eBooks and videos courses covering every tech area you can think of
Renews at $19.99/month. Cancel anytime
Banner background image