Creating a drawing of a part (Should know)
The Drawing workbench lets us create 2D views of 3D objects for presentation in formats that are ideal for printing. In this recipe, we will create a drawing with three views.
Getting ready
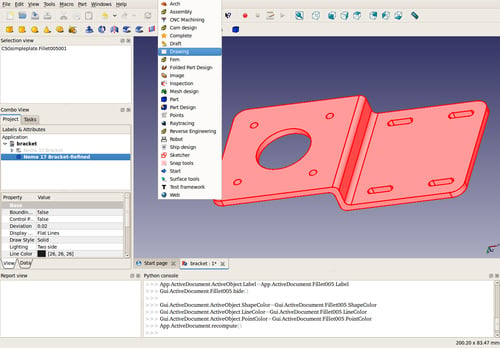
Select a 3D object in a document and open the Drawing workbench:

How to do it...
Select the Insert new drawing icon:

Pick the Insert an orthographic projection icon:

A new task will pop up in the Task panel. Select a Primary View:

Select Secondary Views:

Click on the OK button in the Task panel.
While the Page icon is selected in the Project tree, click on its Data tab.
Double-click on the button that has ... as its label.

A text dialog box will popup. Edit the values, putting in your name, the date, and so on:

Click on the recompute button to see the results:

How it works...
FreeCAD uses algorithms from the OpenCascade CAD kernel to calculate 2D projections from 3D objects. FreeCAD takes advantage of this and inserts those projections onto a SVG canvas. This canvas is actually a template that was imported during step 1.
The Orthographic Projection dialog in the Task panel creates different projections at set angles, scales them, and spaces them in a consistent way.
The text dialog helps us edit SVG editable texts and fills in the text information in the bottom-right corner of the title block.
There's more...
If you want to give your drawing to someone who doesn't have FreeCAD, you might want to export it as a PDF file.
Export a PDF file from your drawing
Select the Page object in the Project tree. From the top menu, select File and then Export PDF. Give your file a name with a *.pdf extension and select a directory to save it to.


