Connecting to data in Looker
You’ll need to connect Looker to the data source to start working on your data models, visualizations, and so on. Looker supports over 30 dialects – therefore, it can connect to more than 30 types of databases and data warehouses. The full list of dialects is here: https://cloud.google.com/looker/docs/looker-core-dialects#supported-dialects-for. In this book, we will use the connection to BigQuery. BigQuery is Google’s fully managed, serverless data warehouse that enables scalable analysis over petabytes of data. BigQuery is quite known as well for its native connection with Google Analytics.
How to do it...
Let’s explore BigQuery first. The steps for this are as follows:
- In your GC console, search for BigQuery in the search bar at the top of the console or in the navigation menu (represented by three horizontal lines) on the left side of the console and you should see your project name in the Explorer section (in our case, it’s
lookerbook, but you might have a different name).
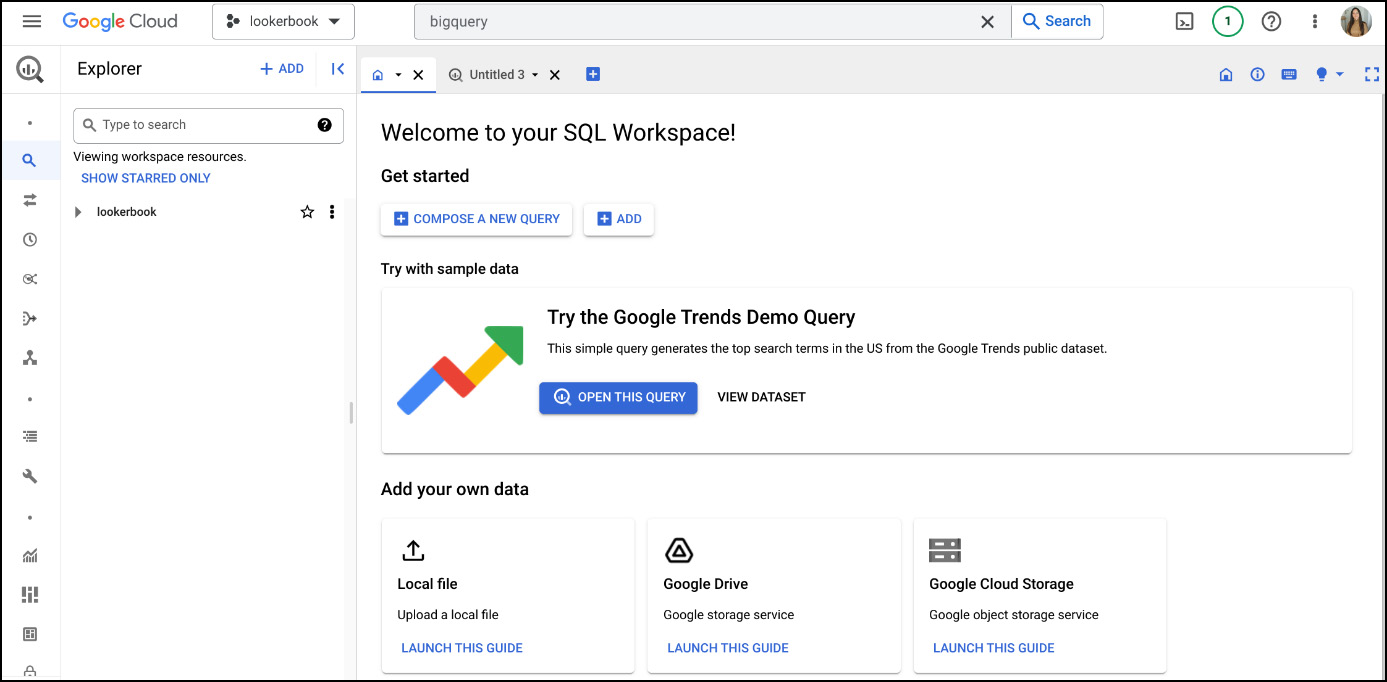
Figure 1.11 – BigQuery welcome page
- In the Explorer section, click on the three dots near your project name (
lookerbookin the preceding figure) and click on Create dataset (Figure 1.12). A dataset is like a folder that will contain your future data tables.
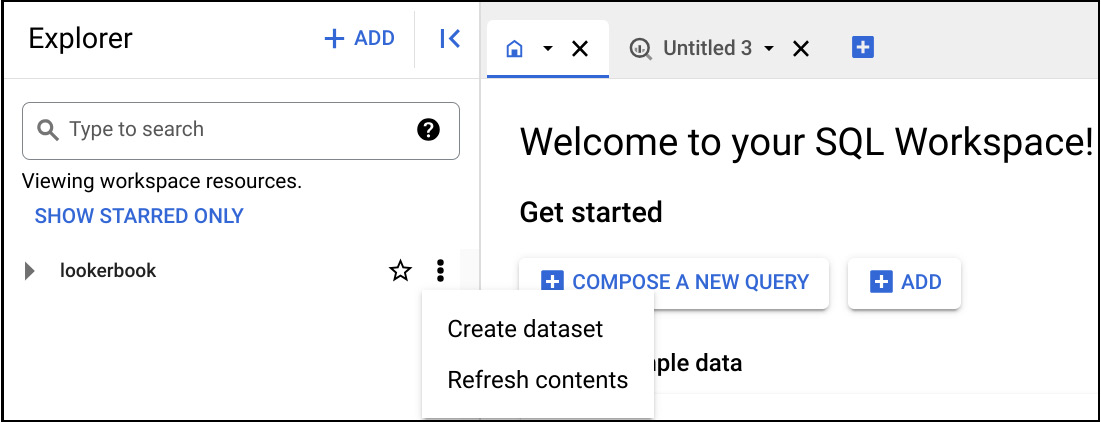
Figure 1.12 – Dataset creation
- Name your dataset, choose US in Multi-region where your data will live, and keep everything else as it is, then click on CREATE DATASET (Figure 1.13).
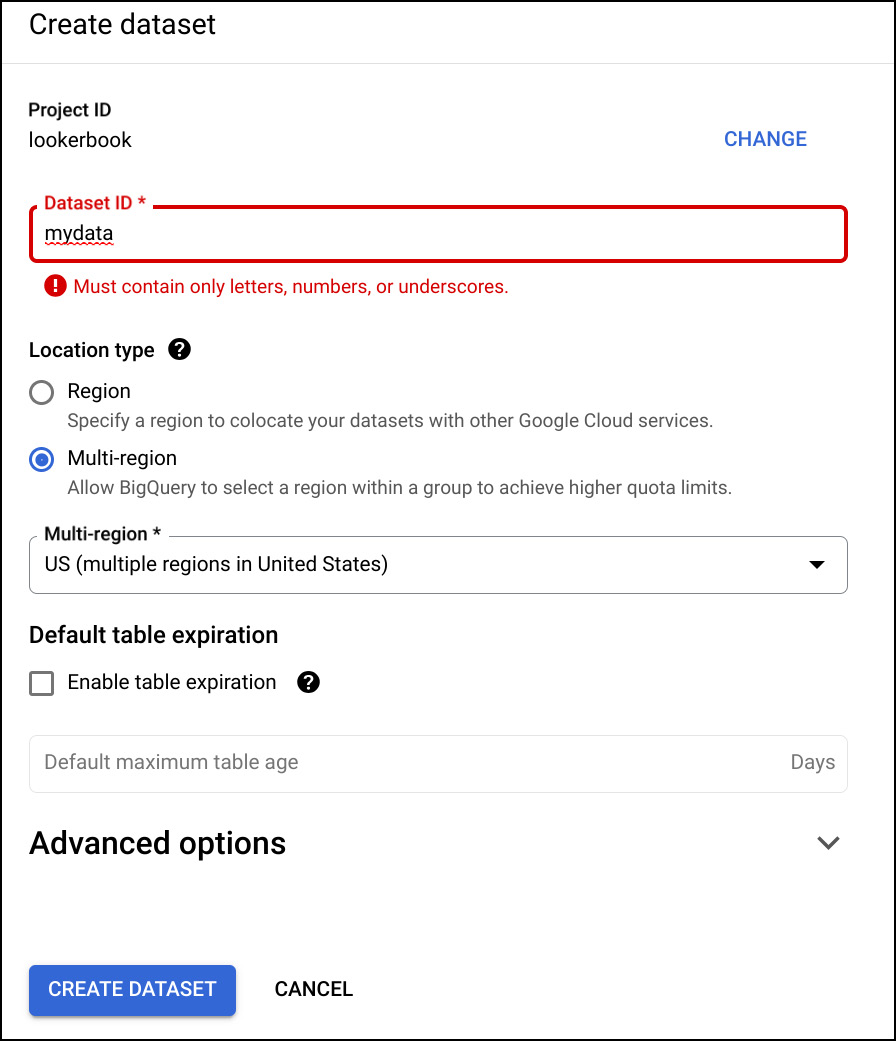
Figure 1.13 – Dataset configurations
- In this book, to avoid searching for data, we will work with BigQuery public datasets. BigQuery public datasets are datasets that are stored in BigQuery and made available to the general public through the Google Cloud Public Dataset Program. These datasets are provided by a variety of organizations, including government agencies, non-profit organizations, and businesses. You can load your own data into BigQuery (for example, click on three dots near your newly created dataset, click on Create table, and then Create table from). For more information on how to load your data into BigQuery, check this link: https://cloud.google.com/bigquery/docs/loading-data.
- To work with the public dataset, you first need to add it to your Explorer section (to make it visible). The public dataset is not stored in your project; it is hosted by Google, so you won’t have to pay for storage. But you can create the table out of the public dataset table to store it in your project.
- To add the public dataset to your BigQuery space, click on ADD in your Explorer section, then click on Star a project by name (Figure 1.14) and add
bigquery-public-data. - Another option to add public datasets is to go to Additional sources in Figure 1.14, and from there, you can scroll to find public datasets.
- You can then explore the different datasets available and click View dataset when there is one you find interesting – usually, after that, you will see the
bigquery-public-dataproject pinned in Explorer with all the datasets in it.
Figure 1.14 – Adding a public dataset
- Find the Google Analytics 4 (GA4) dataset in your starred
bigquery-public-dataproject. It is not real GA4 data but it will give you an idea of how your GA4 data will look in BigQuery. Click onga4_obfuscated_sample_ecommerceand then click on theevents_(92)table (using the SCHEMA, DETAILS, and PREVIEW tabs in Figure 1.15).
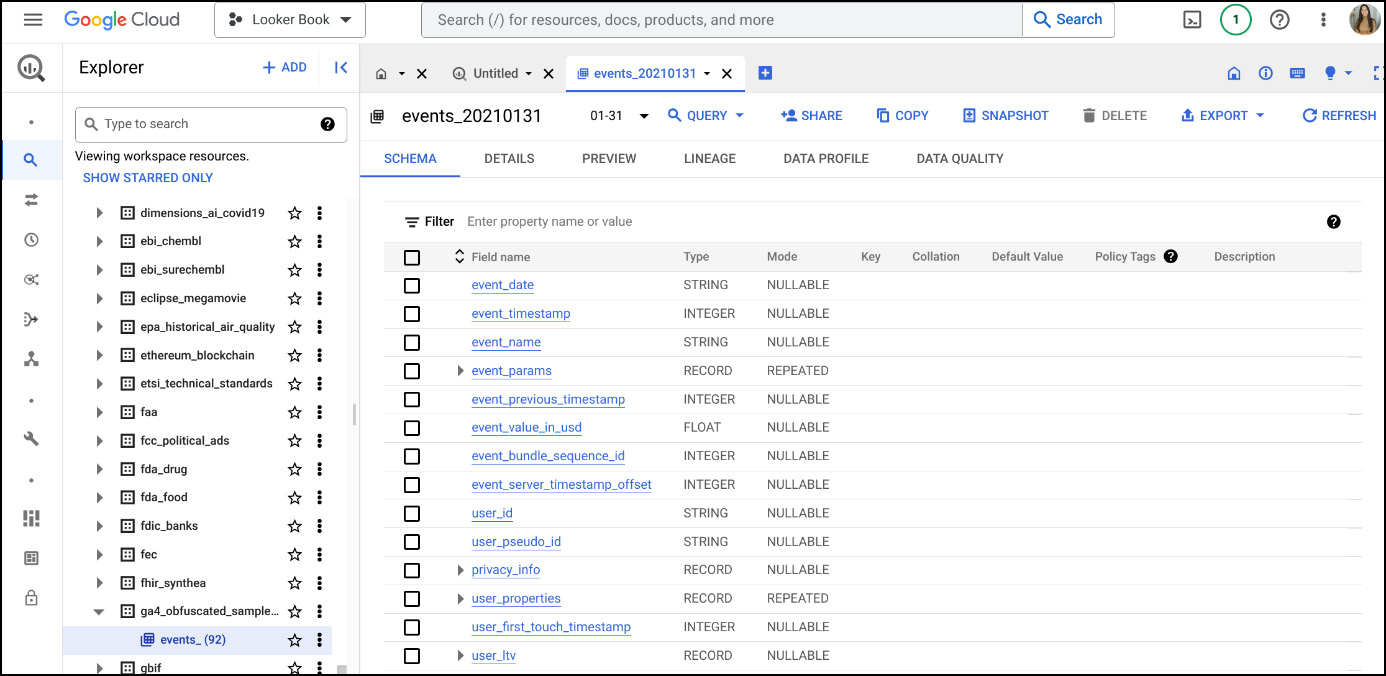
Figure 1.15 – Google Analytics dataset
- Click on QUERY button (located above the SCHEMA, DETAILS and other table-related tabs), then choose In new tab, enter the following SQL query, then click RUN (Figure1.16):
SELECT
PARSE_DATE("%Y%m%d",event_date) as Session_Date,
device.category AS Device_category,
COUNT(*) AS Nb_of_sessions
FROM
  `bigquery-public-data.ga4_obfuscated_sample_ecommerce.  events_202101*`
WHERE event_name = 'session_start'
GROUP BY 1,2
ORDER BY 1,2 ASC;
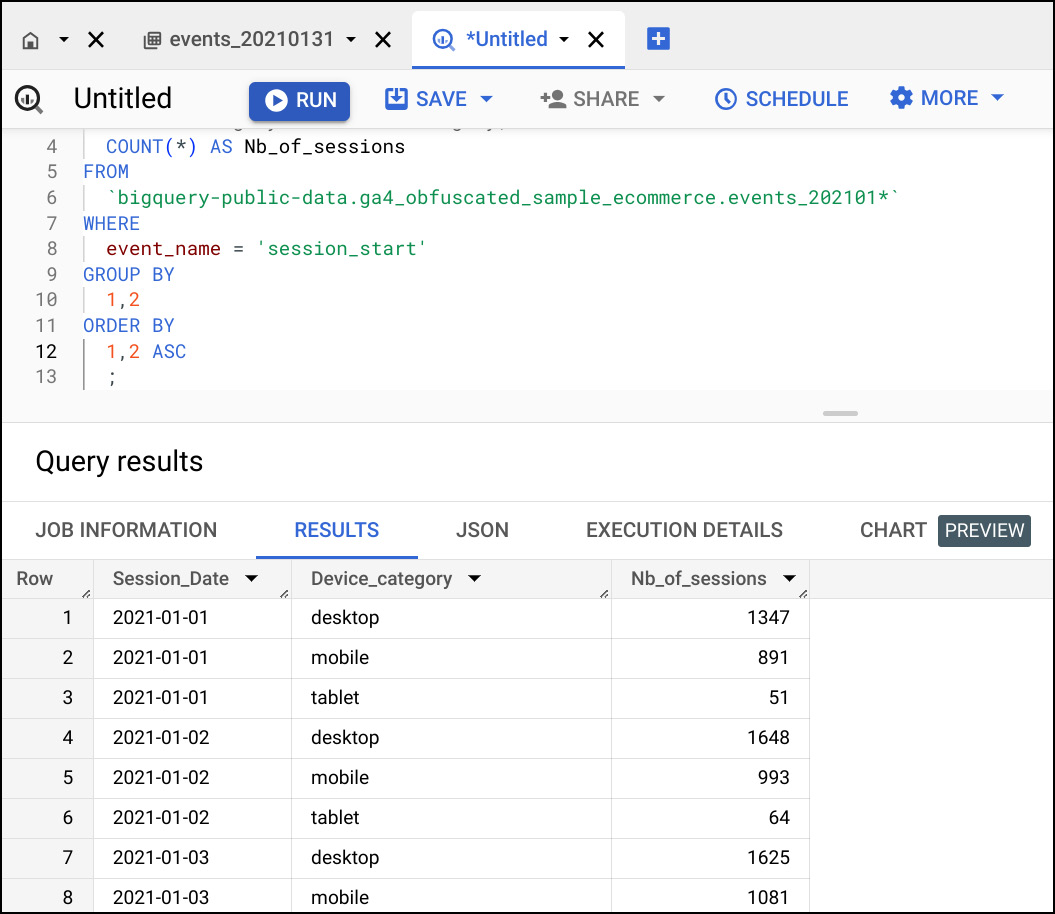
Figure 1.16 – Running a query
- In this query, we’re trying to get the number of sessions on the website per device type by day for January 2021. Click on SAVE RESULTS above your Query results table and save it as BigQuery table (Figure 1.17) to your previously created dataset (
mydataor another name if you decided to name it differently) in your GC project. - Name the table
device_category_jan2021and then click Export.
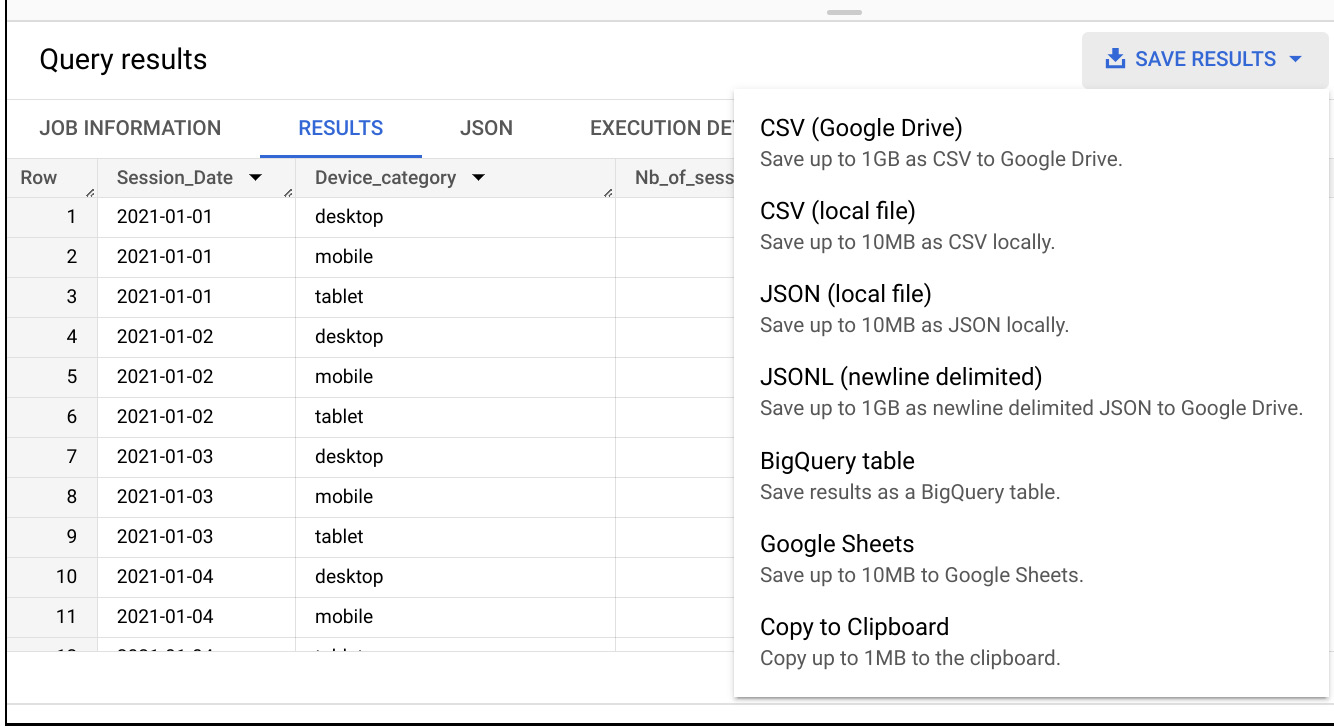
Figure 1.17 – Save the results
- If you see that the job (all tasks are called jobs in BigQuery) failed, it might be because your dataset was created in another region. Getting a table from the public dataset that is in US and exporting it to your dataset in EU is not possible, so make sure that you created your
mydatadataset in the US multi-region. - Go and check whether the table was created. Now, you have your own dataset that contains your own small table (Figure 1.18).
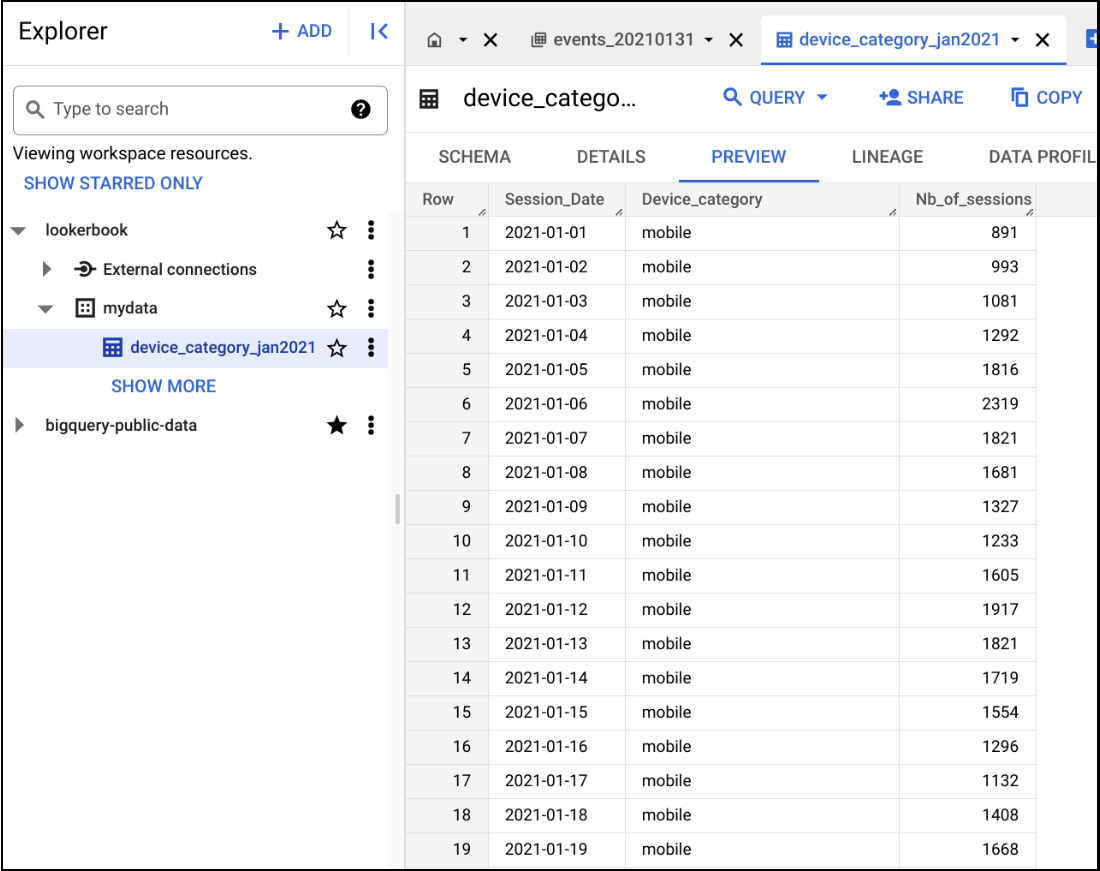
Figure 1.18 – Device category table
Connecting Looker to BigQuery
Let’s go back to our Looker instance to connect Looker to BigQuery. Make sure you have at least two tabs open – one with the GC console and another one with the Looker instance.
Let’s explore the Looker environment. The steps for this are as follows:
- In your Looker instance, click on Admin on the left, then click on Database and Connections, and then click the Add Connection button (Figure 1.19).
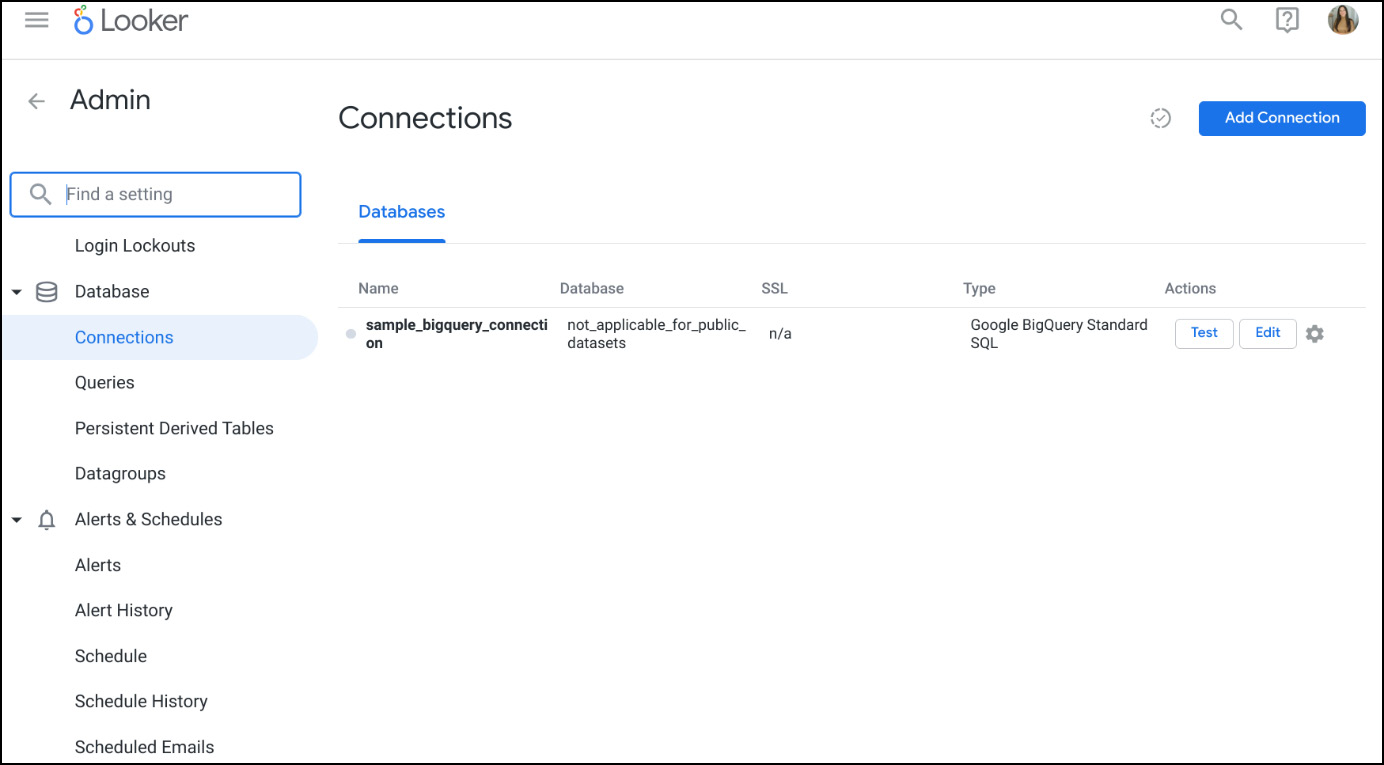
Figure 1.19 – Database connection
- When you click on Add Connection, give your connection a name (
bq_connection1, in our case) and choose a dialect (Google BigQuery Standard SQL in our case). - Fill in the form (Figure 1.20) with your billing project ID and dataset, choose the standard UTC time zone, and for the rest, keep the default values, then click on CONNECT to establish the connection. To find your project ID (where the billing is configured), go to the GC console, click on your project name in the top-left corner near the Google Cloud logo, and copy the ID from the pop-up window.
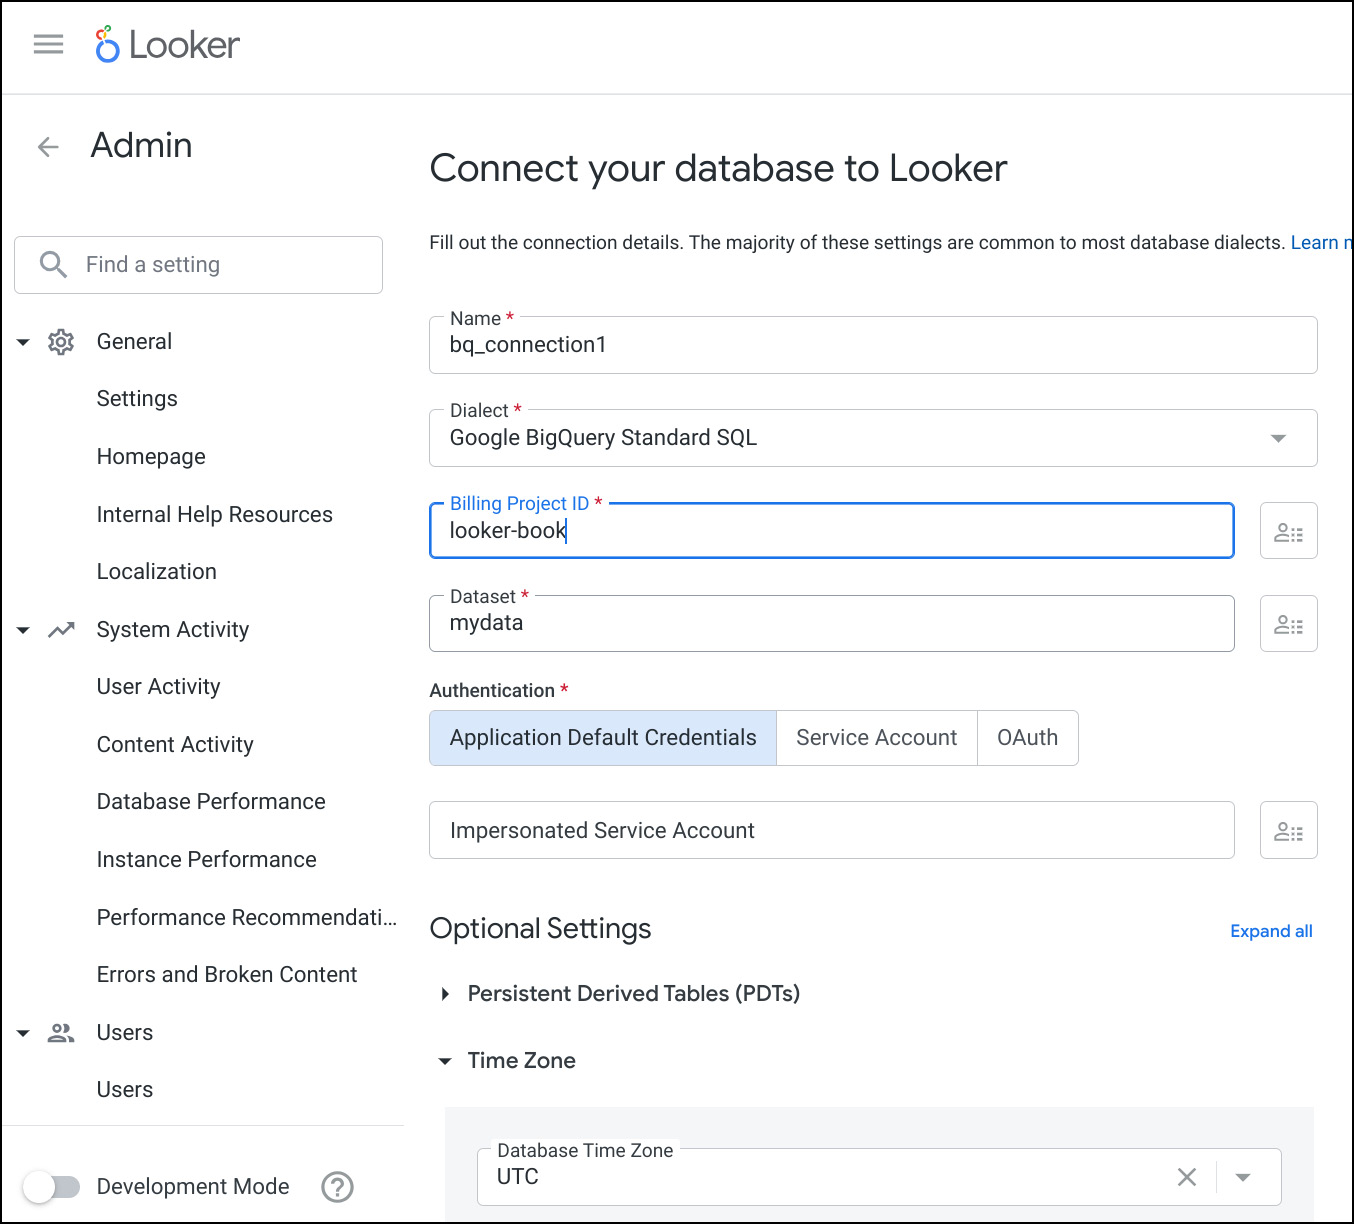
Figure 1.20 – Database connection configuration
How it works...
The connection was relatively simple because Looker (Google Cloud core) has a native connection with GC services. We also configured very few elements, to keep it simple. The goal of this chapter is to quickly go through the Looker basics to give you an overview of how it works. Let’s continue with the LookML project creation.
See also
- Connecting Looker to your database: https://cloud.google.com/looker/docs/looker-core-dialects
- About BigQuery: https://cloud.google.com/bigquery?hl=en


