Configuring private links for an Azure Data Lake account
In this recipe, we will be creating a private link to a storage account and using private endpoints to connect to it.
Private links and private endpoints ensure that all communication to the storage account goes through the Azure backbone network. Communications to the storage account don't use a public internet network, which makes them very secure.
Getting ready
Before you start, perform the following steps:
- Open a web browser and go to the Azure portal at https://portal.azure.com.
- Make sure you have an existing storage account. If not, create one using the Provisioning an Azure storage account using the Azure Portal recipe in Chapter 1, Creating and Managing Data in Azure Data Lake.
- Make sure you have an existing virtual network configured to the storage account. If not, create one using the Configuring virtual networks for an Azure Data Lake account using the Azure portal recipe in this chapter.
How to do it…
Perform the following steps to configure private links to a Data Lake account:
- Log in to the Azure portal and click on the storage account.
- Click on Networking | the Private Endpoints tab.
- Click on the + Private endpoint button, as shown here:
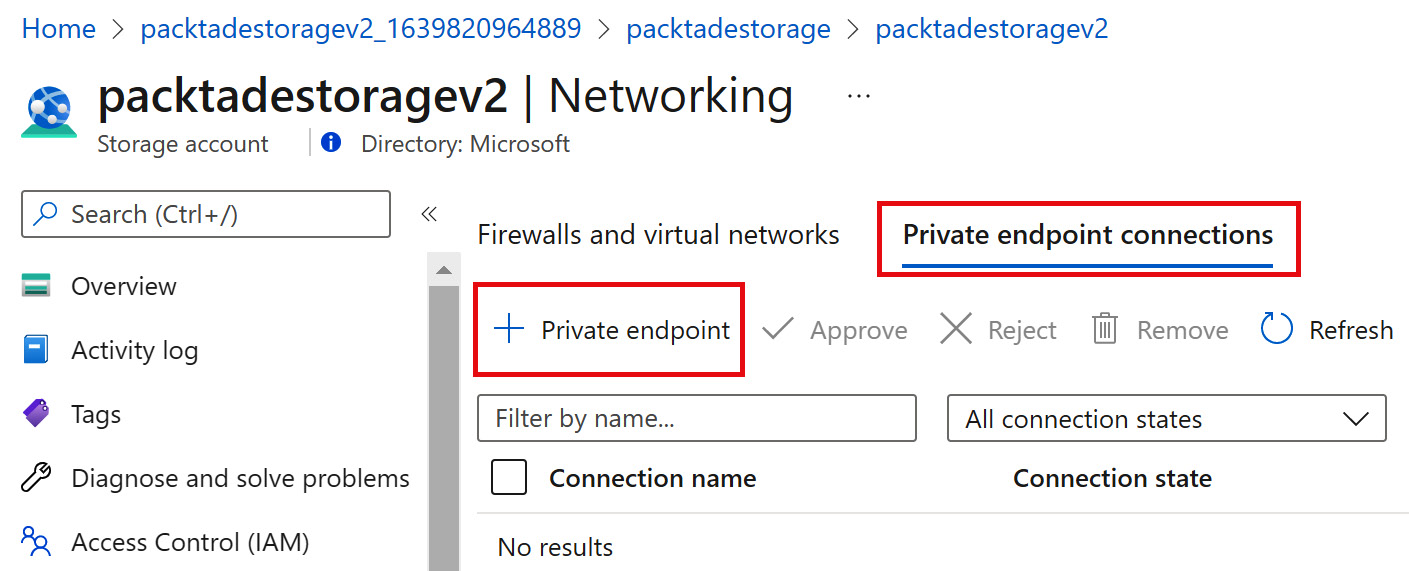
Figure 2.7 – Creating a private endpoint to a storage account
- Provide an endpoint name, as shown in the following screenshot:
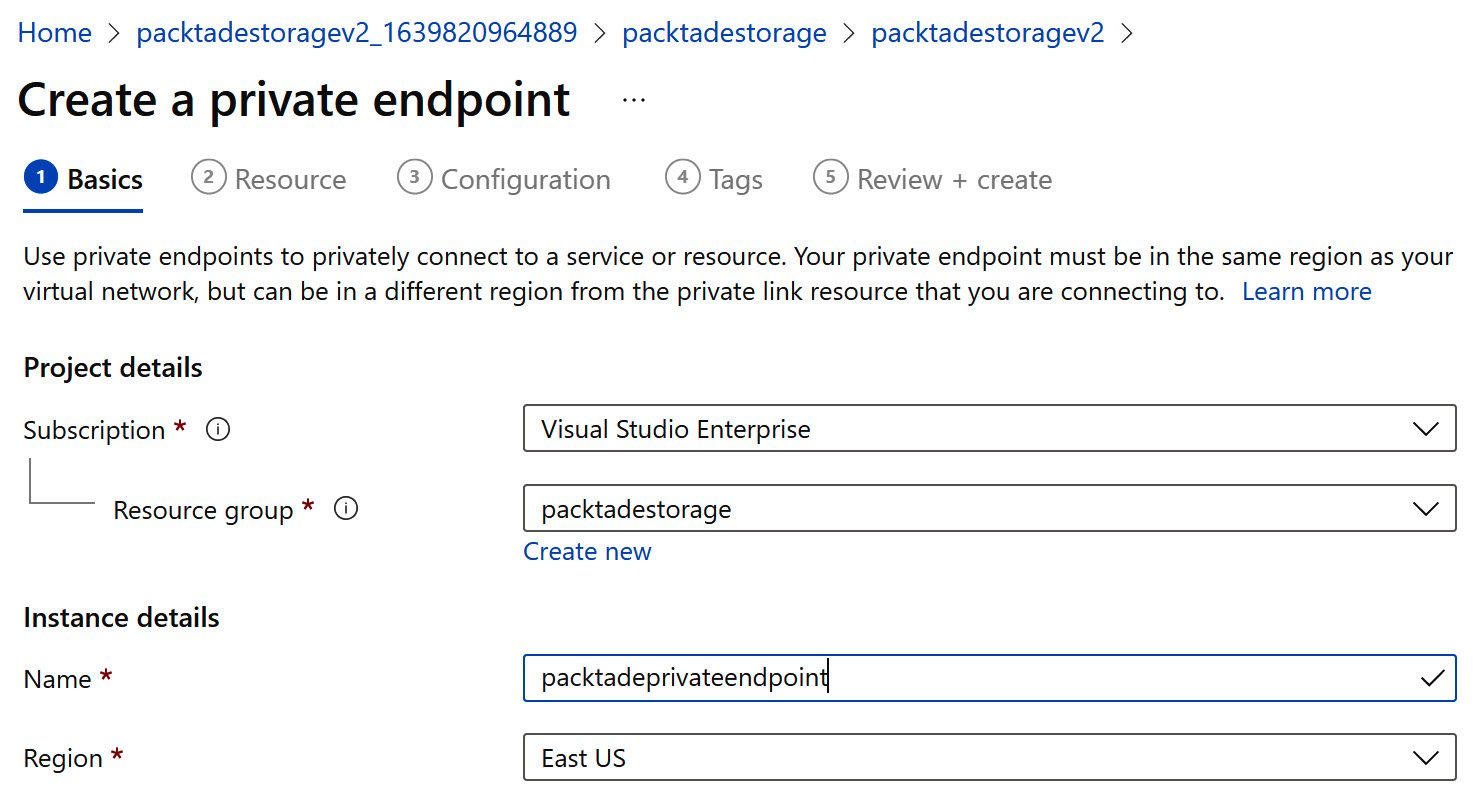
Figure 2.8 – Providing an endpoint name
- In the Resource tab, set Target sub-resource to dfs. Distributed File Systems (DFS) is sub-source if we are connecting to Data Lake Storage Gen2. The rest of the fields are auto-populated. Proceed to the Configuration section:
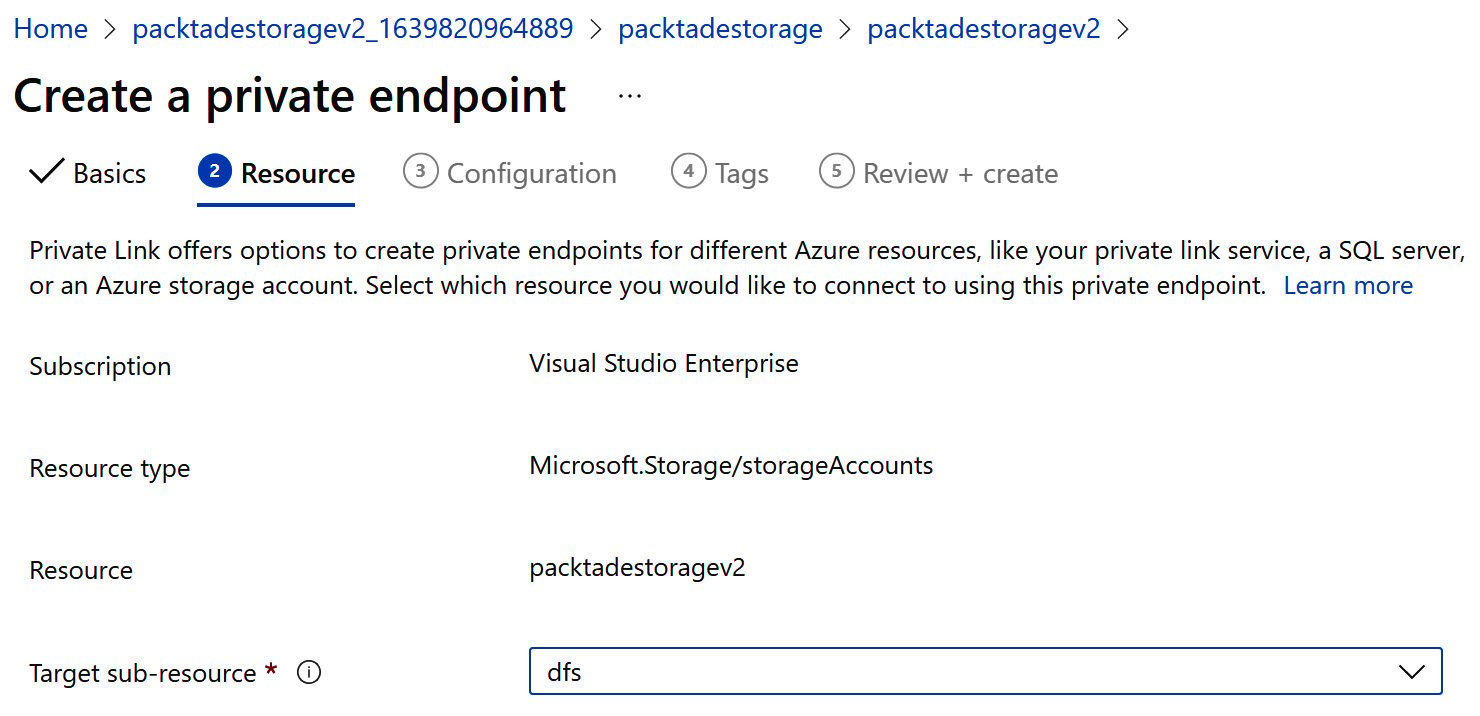
Figure 2.9 – Setting the target resource type to dfs
- Create a private Domain Name System (DNS) zone by picking the same resource group where you created the storage account, as shown in the following screenshot:
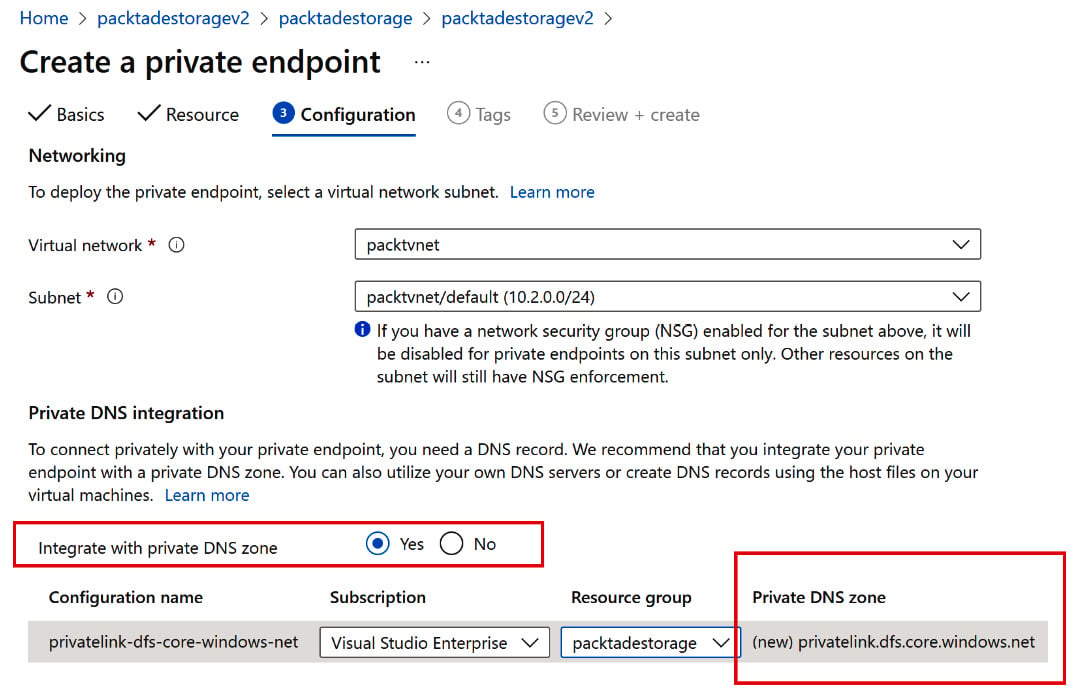
Figure 2.10 – Creating a private DNS
- Hit the Create button to create the private DNS link.
- After the private endpoint is created, open it in the Azure portal. Click on DNS configuration:
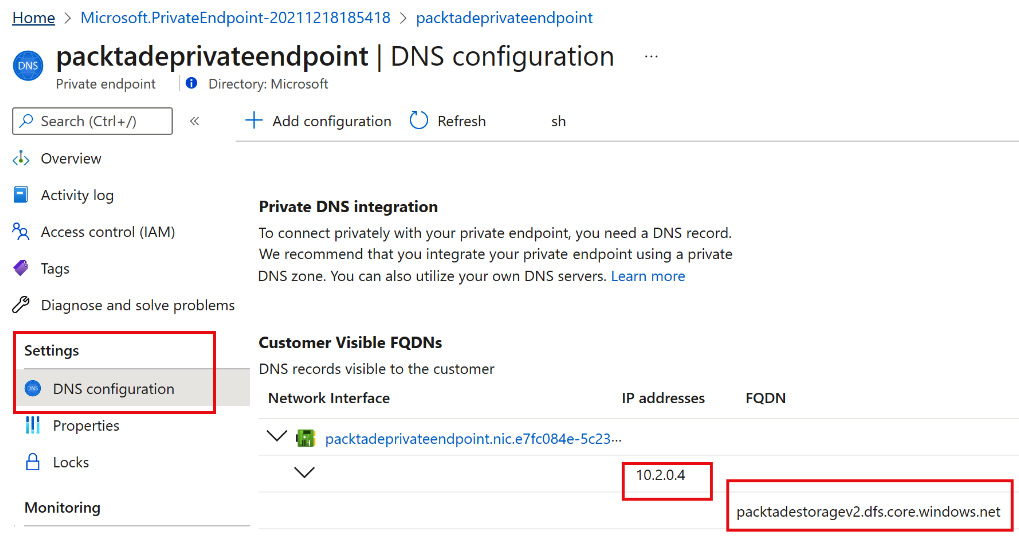
Figure 2.11 – Copy the FQD9
- Make a note of the FQDN and IP addresses details. The FQDN is the Fully Qualified Domain Name, which will resolve to the private IP address if, and only if, you are connected to the virtual network.
With the preceding steps, we have created a private endpoint that will use private links to connect to a storage account.
How it works…
We have created a private link to a storage account and ensured that traffic goes through the Microsoft backbone network (and not the public internet), as we will be accessing the storage account via a private endpoint. To show how it works, let's resolve the private URL link from the following locations. Let's perform the following:
- Use
nslookupto look up a private URL link from your local machine. - Use
nslookupto look up a private URL link from a virtual machine inside the virtual network.
On your machine, open Command Prompt and type nslookup <FQDN of private link>, as shown in the following screenshot:

Figure 2.12 – Testing a private endpoint connection outside of the virtual network
nslookup resolves the private link to an incorrect IP address, as your machine is not part of the virtual network. To see it working, perform the following instructions:
- Create a new virtual machine in the Azure portal. Ensure to allow a remote desktop connection to the virtual machine, as shown in the following screenshot:
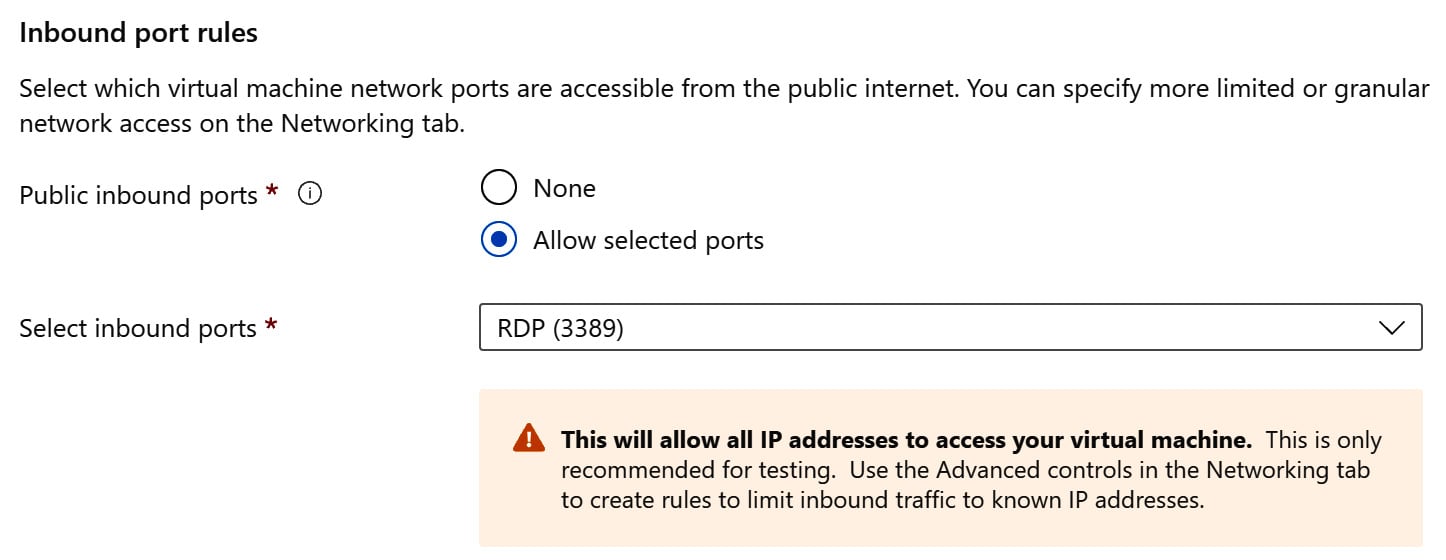
Figure 2.13 – Creating a new virtual machine and allowing a remote desktop
- Under Networking, select the virtual network in which the storage account resides:
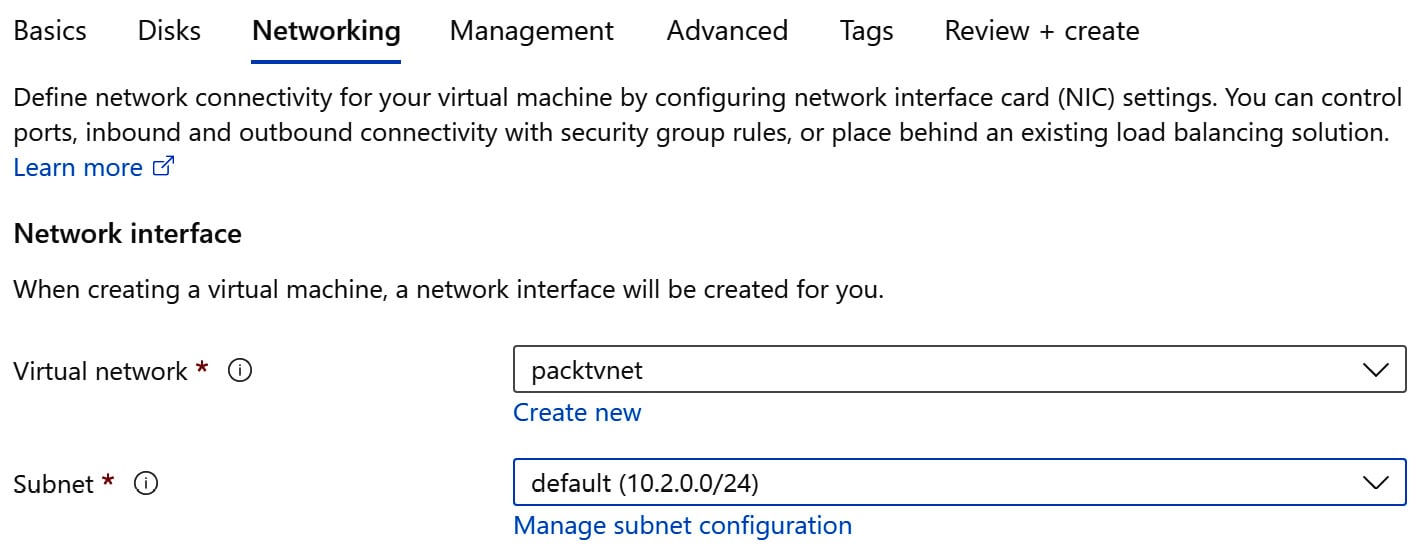
Figure 2.14 – Configuring the virtual machine to use the virtual network
Once the virtual machine is created, log in to the virtual machine using a remote desktop and perform nslookup to look up the private link URL again to resolve its IP address. nslookup is a command that will resolve an URL to an IP address. We will use nslookup to verify whether the private link URL resolves to a private IP address (10.x.x.x) and not a public IP address.
nslookup from a virtual machine inside the virtual network resolves correctly to the private IP address of the private link, as shown in the following screenshot. This shows that the connection goes through a virtual network only and doesn't use public internet:

Figure 2.15 – nslookup from the virtual network
With the previous recipe, we have successfully created a private link to a storage account, configured a private endpoint connection, and accessed it via a virtual machine to verify the connectivity. This recipe covers how you can securely connect to a storage account through virtual networks only by passing a public network.


