


Creating your first users
With our newly created user groups, we've taken our first step toward a more structured and secure Zabbix setup. The next step is to actually assign some users to the newly created user groups to make sure they are assigned our new user permissions from the group.
Getting ready
To get started, we'll need the server and the newly created user groups from the last recipe. So, let's start the configuration.
Now we know there are three departments in the company called Cloud Hoster that are going to use our Zabbix installation. We've created host groups for them but there are also users in those departments that actually want to use our installation. Let's meet them:
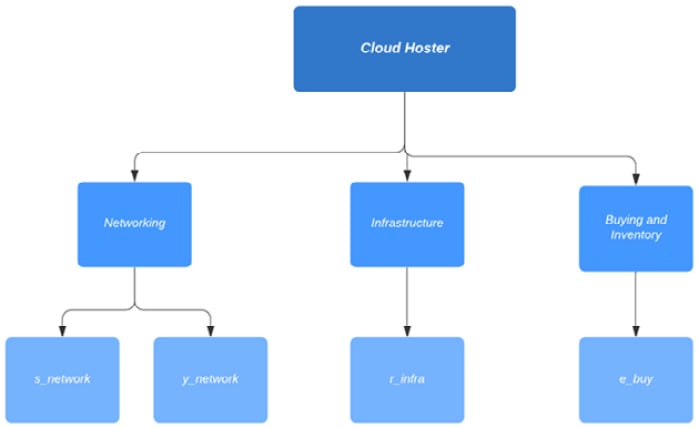
Figure 2.15 – Cloud Hoster users diagram
These are the users we need to configure for Cloud Hoster to use.
How to do it…
Let's start creating the users. We will start with our Networking department:
- Navigate to Administration | Users, which will bring you to this page:
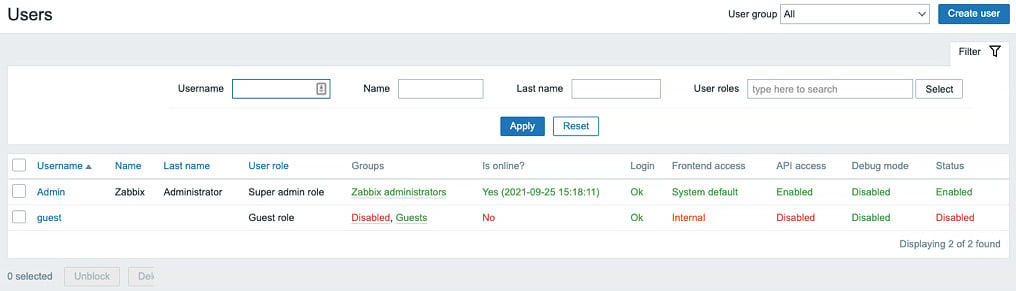
Figure 2.16 – The Zabbix Users window
- This is where all the user creation magic is happening, as we will be managing all of our users from this page. To create our first Networking department user named
s_network, click the Create user button in the top-right corner, bringing us to the following screen:
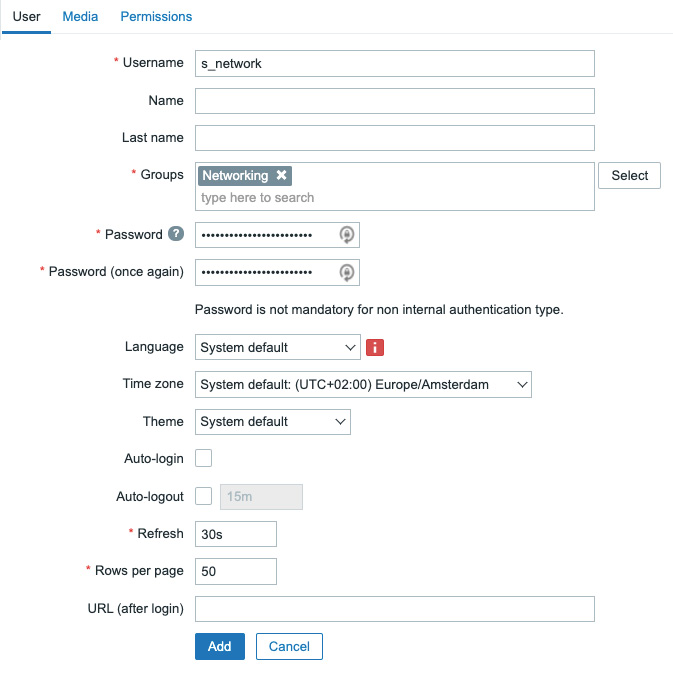
Figure 2.17 – The Zabbix Users configuration window
- Fill out Username to provide us with the username this user will be using, which will be
s_network. - Also, it's important to add this user to the group we have just created to give our user the right permissions. Click Select and pick our group called Networking.
- Last but not least, set a secure password in the Password fields; don't forget it because we will be using it later.
- After this, move on to the Permissions tab as we won't be configuring Media just yet:
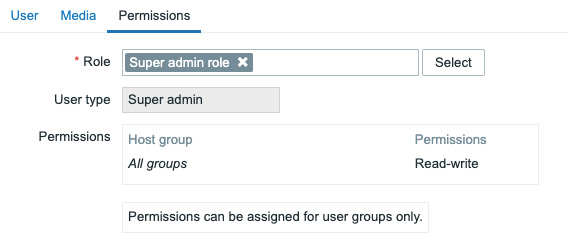
Figure 2.18 – The Zabbix user Permissions configuration window
- Select the Role option named Super admin role here. This will enable our user to access all UI elements and see and edit information about all host groups in the Zabbix server.
The following user roles are available in Zabbix by default:
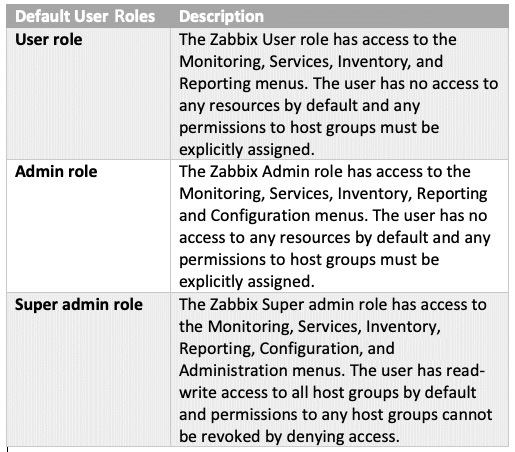
Figure 2.19 – A table detailing the different Zabbix user roles
- Let's repeat the previous steps for the user named
y_networkbut in the Permissions tab, select the Admin role option like this:
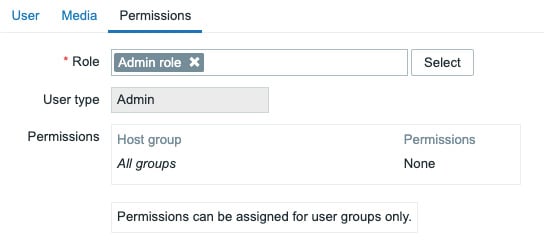
Figure 2.20 – The Zabbix user Permissions configuration window
After creating these two users, let's move on to create the infrastructure user, r_ infra. Repeat the steps we took for s_network, changing the Username, of course. Then, add this user to the group and give our user the right permissions. Click Select and pick our group called Infrastructure. It will look like this:
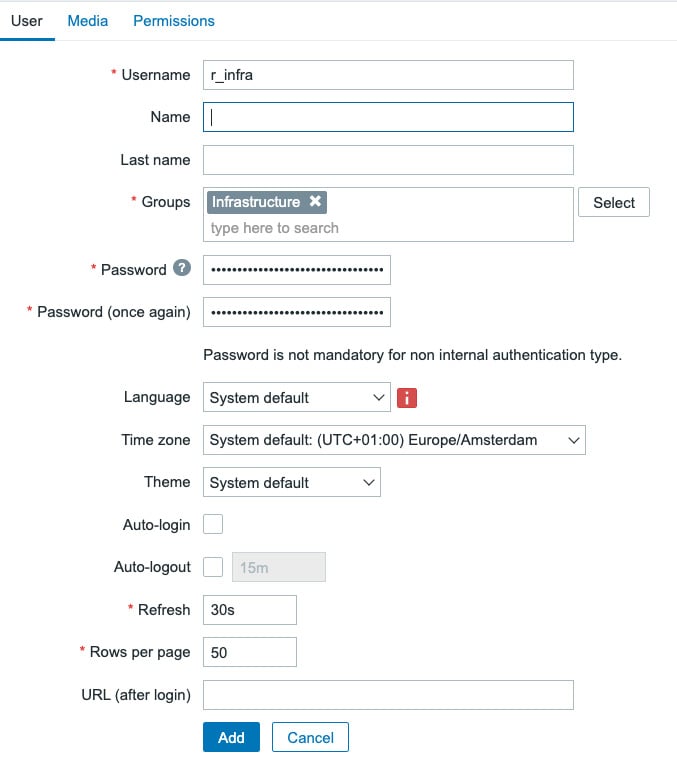
Figure 2.21 – The Zabbix user configuration window for r_infra
Lastly, make this user another Super admin.
- Now, for our last user, let's repeat our steps again, changing the Username and the group in the User tab like this:
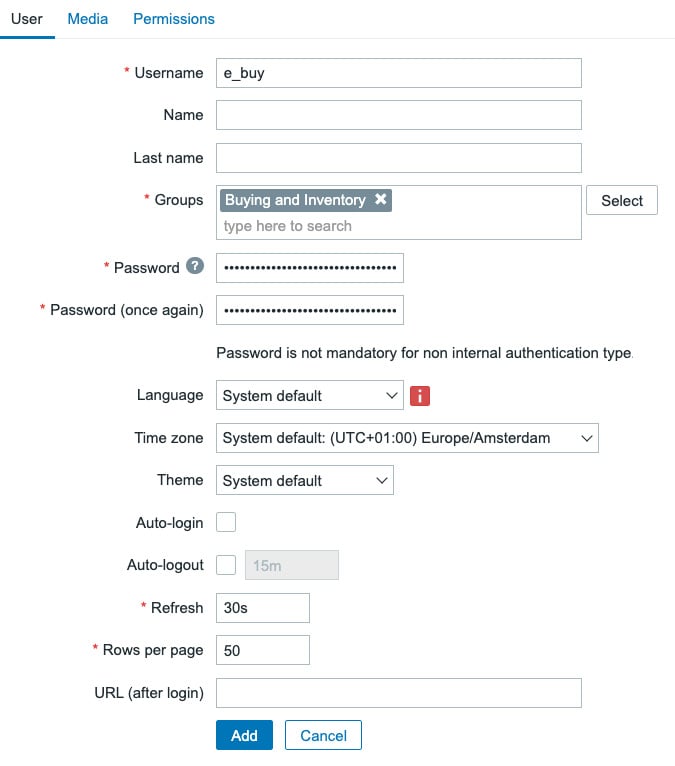
Figure 2.22 – The Zabbix User configuration window for e_buy
- If you didn't follow the previous recipe, you can change this user's Role to
User roleat the Permissions tab. But if you did follow the previous recipe, we can use theUser+ rolewe created like this:
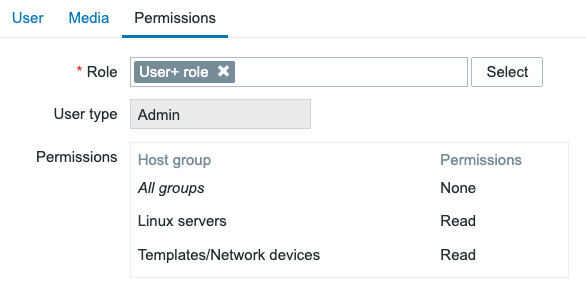
Figure 2.23 – The Zabbix user configuration window for e_buy
Setting the user up with the User+ role will also let the user e_buy create maintenance periods.
When you're done, you'll end up with the following:
s_network: A user with access to the Networking user group permissions and that has the Super admin role.y_network: A user with access to the Networking user group permissions and that has the Admin role.r_infra: A user with access to the Infrastructure user group permissions and that has the Super admin role.e_buy: A user with access to the Buying and Inventory user group permissions and that has theUserrole or theUser+ role.


