


Advanced user authentication with SAML
In this recipe, we will use SAML authentication, a widely used form of authentication in the IT world. We'll be using this as a form of managing passwords for our Zabbix users. Please note that if you've worked with Zabbix before and you've configured LDAP, SAML, like LDAP, allows user authentication with passwords. You still have to create users with their permissions.
Getting ready
To get started with SAML authentication, we will need our configured Zabbix server from the previous recipe. It's important that we have all the configured users from the previous recipe. We will also need something to authenticate with SAML. We will be using Azure Active Directory (AD) SAML.
Make sure to set up users in your (Azure) AD before continuing with this recipe. You can use your existing AD users for authentication, so you can use this recipe with your existing AD setup.
We will be using the s_network user as an example:
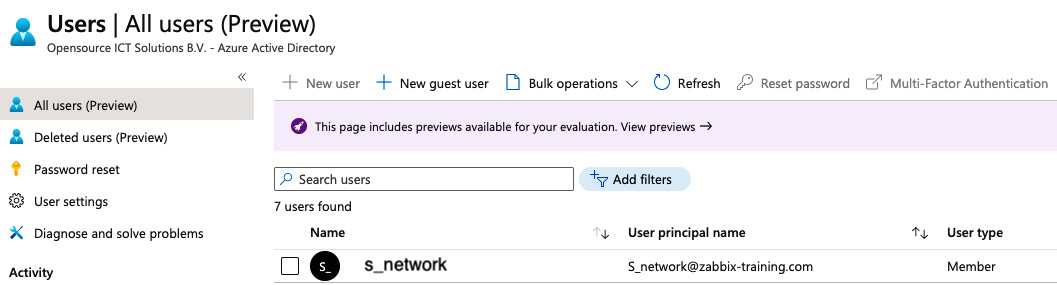
Figure 2.24 – The Azure Users and groups window
These are our user details:
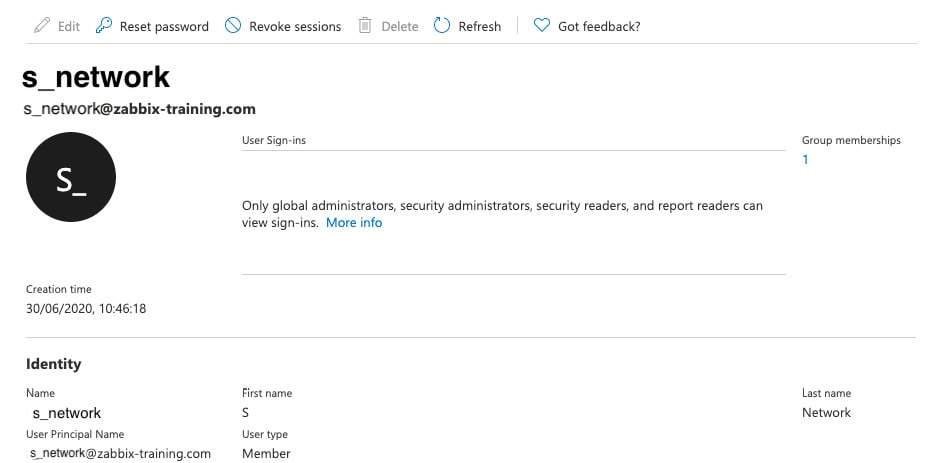
Figure 2.25 – The Azure user details window
To set up SAML, retrieve your SAML settings from your AD or another SAML provider. To work with Zabbix, we will need the following:
- IdP entity ID
- SSO service URL
- SLO service URL
- Username attribute
- SP entity ID
- SP name ID format
How to do it…
Now that we have our Azure AD ready, let's see how we can configure SAML using our setup:
- Let's navigate to the following URL:
portal.azure.com. - After logging in, navigate to Azure AD and click on Enterprise Applications.
- Now click on + New Application to create our new application. At the next window, click on Create your own application:
Figure 2.26 – The Azure enterprise application creation page
- In the next window, name your new application
Zabbixand click on the blue Create button:

Figure 2.27 – The Azure enterprise new application page
- Select your new application from the list and click on Assign Users and Groups to add the correct users. In our case, this will be
s_network:
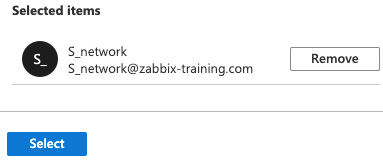
Figure 2.28 – The Azure enterprise application Users and Groups page
- Click on Select and then Assign.
- Now let's move on to the SAML settings by clicking on Single sign-on in the sidebar.
- Now click on SAML on the page shown in the following screenshot and continue:

Figure 2.29 – The Azure enterprise application SAML option
- Now at 1, we can add the following information, where the black marks are our Zabbix server URL:
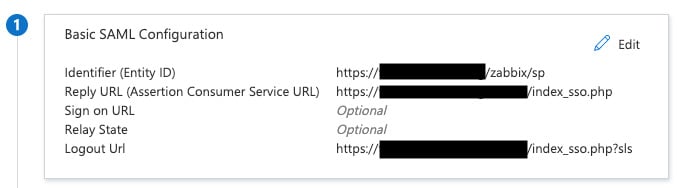
Figure 2.30 – The Azure SAML setting 1
- At 2, fill out the following:
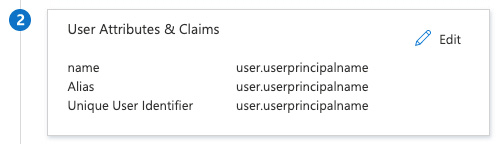
Figure 2.31 – The Azure SAML setting 2
- Number 3 will be automatically filled. Click on Download for Certificate (Base64):
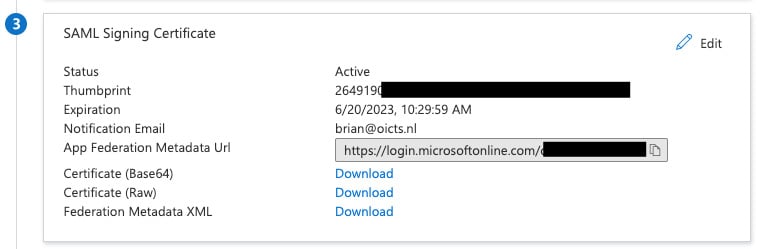
Figure 2.32 – The Azure SAML setting 3
- Log in to the Zabbix server CLI and create a new file with the following command:
vim /usr/share/zabbix/conf/certs/idp.cert
- Paste the contents from the downloaded file in Step 11 here and save the file.
- Now back at Azure for 4, we will get the following information:
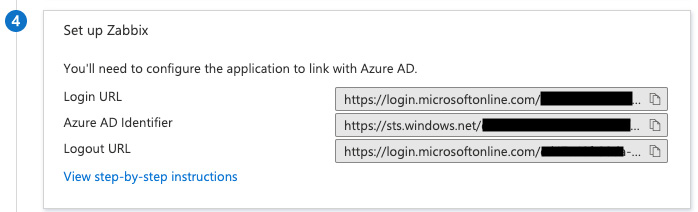
Figure 2.33 – The Azure SAML setting 4
- At the Zabbix frontend, go to the Administration | Authentication | SAML settings page and fill in the following information and click on Update:
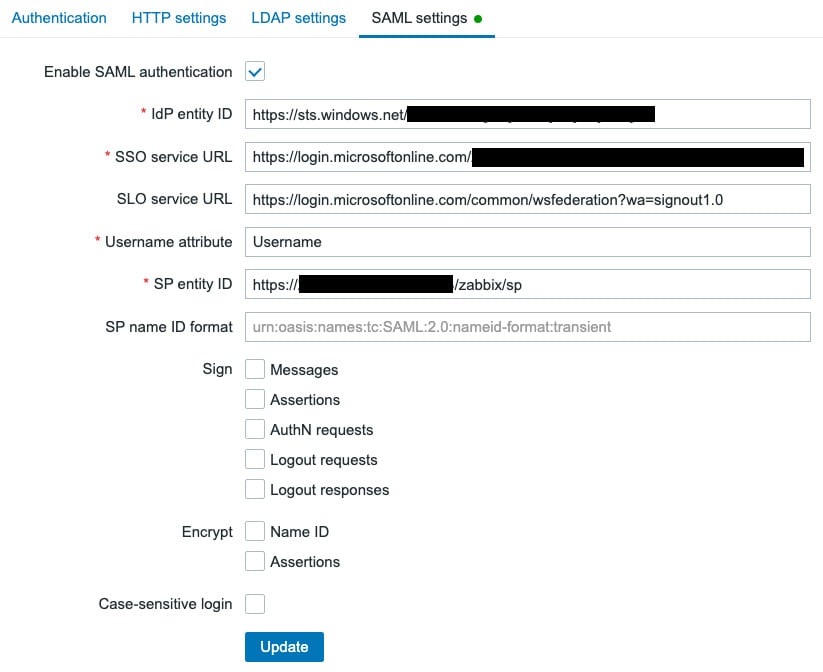
Figure 2.34 – The Zabbix SAML settings
- Navigate to Administration | Users and change the
s_networkuser to include the used Azure domain, for example:
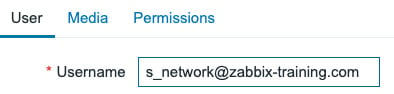
Figure 2.35 – The Zabbix edit user screen for our SAML setup
- After following these steps, it should now be possible to log in with your user configured in Zabbix and use the password set in Azure AD for this:
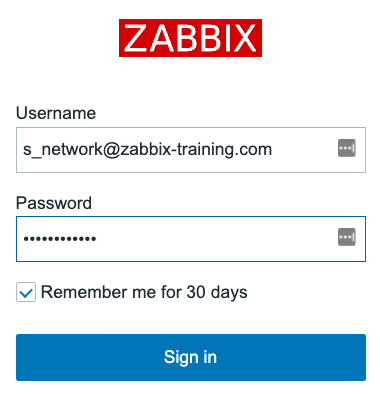
Figure 2.36 – The Zabbix login window
How it works…
Zabbix advanced user authentication is used to centralize password management. While we are not able to actually assign user groups and permissions to users via this setup, we can use it for password management.
This way, we can make sure it is easier for users to keep their passwords centralized in medium to big office environments:
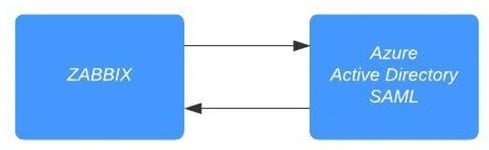
Figure 2.37 – Zabbix SAML authentication diagram
Zabbix communicates with our Azure AD SAML component when we click the Sign in button. The user is then authenticated against your Azure AD user and a confirmation is sent back to the Zabbix server. Congratulations, you are now logged in to your Zabbix server!
There's more…
We can do this kind of authentication not only with SAML but also with HTTP and LDAP. This way, you can choose the right form of advanced authentication for your organization.
Check out the Zabbix documentation for more information on the different forms of authentication:
https://www.zabbix.com/documentation/current/en/manual/web_interface/frontend_sections/administration/authentication
It's also possible to work with an identity provider such as Okta, OneLogin, or any other. Meaning your options aren't limited to Azure AD, as long as it supports SAML you can use it to authenticate against your Zabbix server.


