Creating a plugin file and header
The first step of creating a plugin is to create a directory and a PHP file in the WordPress plugins directory and add the necessary information to have it recognized by the system. This first recipe shows you how to create a basic plugin file for WordPress and how to activate this new extension from the administration interface.
Getting ready
You should have access to a WordPress development environment, either on your local computer or a remote server, where you will be able to load your new plugin files (see Chapter 1, Preparing a Local Development Environment).
How to do it...
Follow these steps to create your first plugin header and activate the plugin in WordPress:
- Navigate to the WordPress
pluginsdirectory (wp-content/plugins) of your development installation. - Create a new subdirectory called
ch2-plugin-headerwithin the plugin directory. - Navigate to this directory and create a new text file called
ch2-plugin-header.php. - Open the new file in a code editor and add the following code:
<?php
/*
Plugin Name: Chapter 2 - Plugin Header
Plugin URI:
Description: Declares a plugin that will be visible in
the WordPress admin interface
Version: 1.0
Author: Yannick Lefebvre
Author URI: http://ylefebvre.ca
License: GPLv2
*/
Note
While the
Descriptiontext is shown on two separate lines in the code example, it should be entered as a single line in your code file to be completely displayed in the WordPress Plugins list. - Save and close the new file.
- Log in to the administration page of your development WordPress installation.
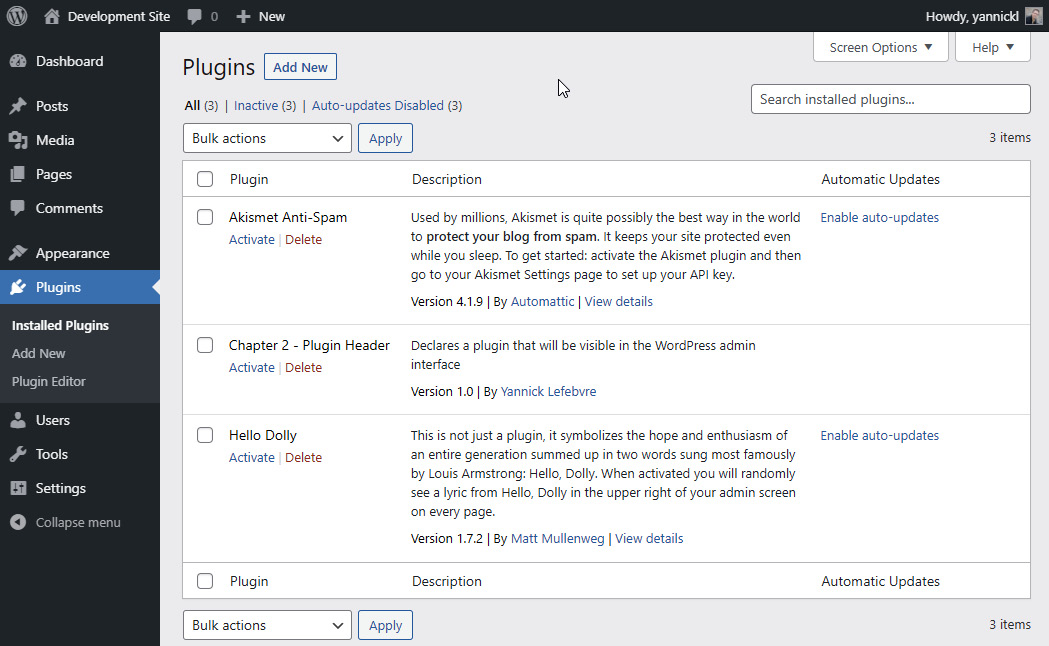
- Click on Plugins in the left-hand navigation menu to show a list of all installed plugins. You should see your new plugin listed next to the two default ones that come pre-packaged with WordPress:

Figure 2.1 – The WordPress Plugins page showing the newly created plugin
Note
The list of default plugins may vary depending on how you built your development environment. You will see Akismet and Hello Dolly if you installed WordPress manually but might not see them if you are running a local development tool such as Local.
- Enable the plugin by clicking on the Activate link under its name. You will see that the background color of your new plugin changes to indicate that it has been activated, along with a message specifying that the activation was successful.
How it works...
Plugin files can either be located directly in the wp-content/plugins directory or in a subdirectory under this location, with most following this second approach. When you access the installed plugins list in the administration interface, WordPress scans the entire plugins directory, looking for PHP files that contain comments following the format specified in this recipe. In some cases, there can be more than one PHP file containing plugin header data in any of these directories, and each of them will show up as a separate entry in the Plugins list.
Taking a closer look at the code that we entered in the file, the first line of the plugin file (<?php) is a tag that identifies the beginning of the PHP code that will be analyzed and executed by the PHP interpreter. Optionally, we could include a closing PHP tag (?>) at the end of the file. However, most PHP developers omit the closing tag, since having any spaces after that tag will cause warnings to be displayed by the interpreter.
Tip
To ensure compatibility with most WordPress installations, it is important to use the complete <?php open tag syntax in your plugin code instead of the <? shorthand version. Not all PHP installations are configured to support the shorthand version, and many users don't have access to change this type of configuration on their server.
The second and last lines (/* and */) indicate that the text between these special delimiters should be considered as comments. Finally, each line within the comment contains a specific label, indicating the type of information that follows it. When this information is found, WordPress retrieves data about the plugin and adds it to the list.
When a plugin is activated, WordPress validates the file's content to be sure that it is valid PHP code. It will then execute this content every time any page is rendered on the site, whether that page is front-facing or a backend administration section. For this reason, it is preferable to activate plugins only when they are in use, to avoid site slowdowns.
Of course, at this point, our new plugin does not add or modify any functionality in our WordPress installation, since it does not contain any code, but this is still an important first step.
See also
- The Installing a local web server on your computer recipe in Chapter 1, Preparing a Local Development Environment


