


Getting to know the Unity Editor and installing packages
Having just created a new 2D URP project and opened up the Editor, let’s take a tour of the Unity 2022 interface! We’ll cover only the most common features in this section and dig deeper into the features of the specific windows and toolbars as we work through our projects in the later chapters, providing the information in the context of the required task.
When we open the Unity Editor for the first time, it will use the default Windows layout, as shown in the following screenshot:
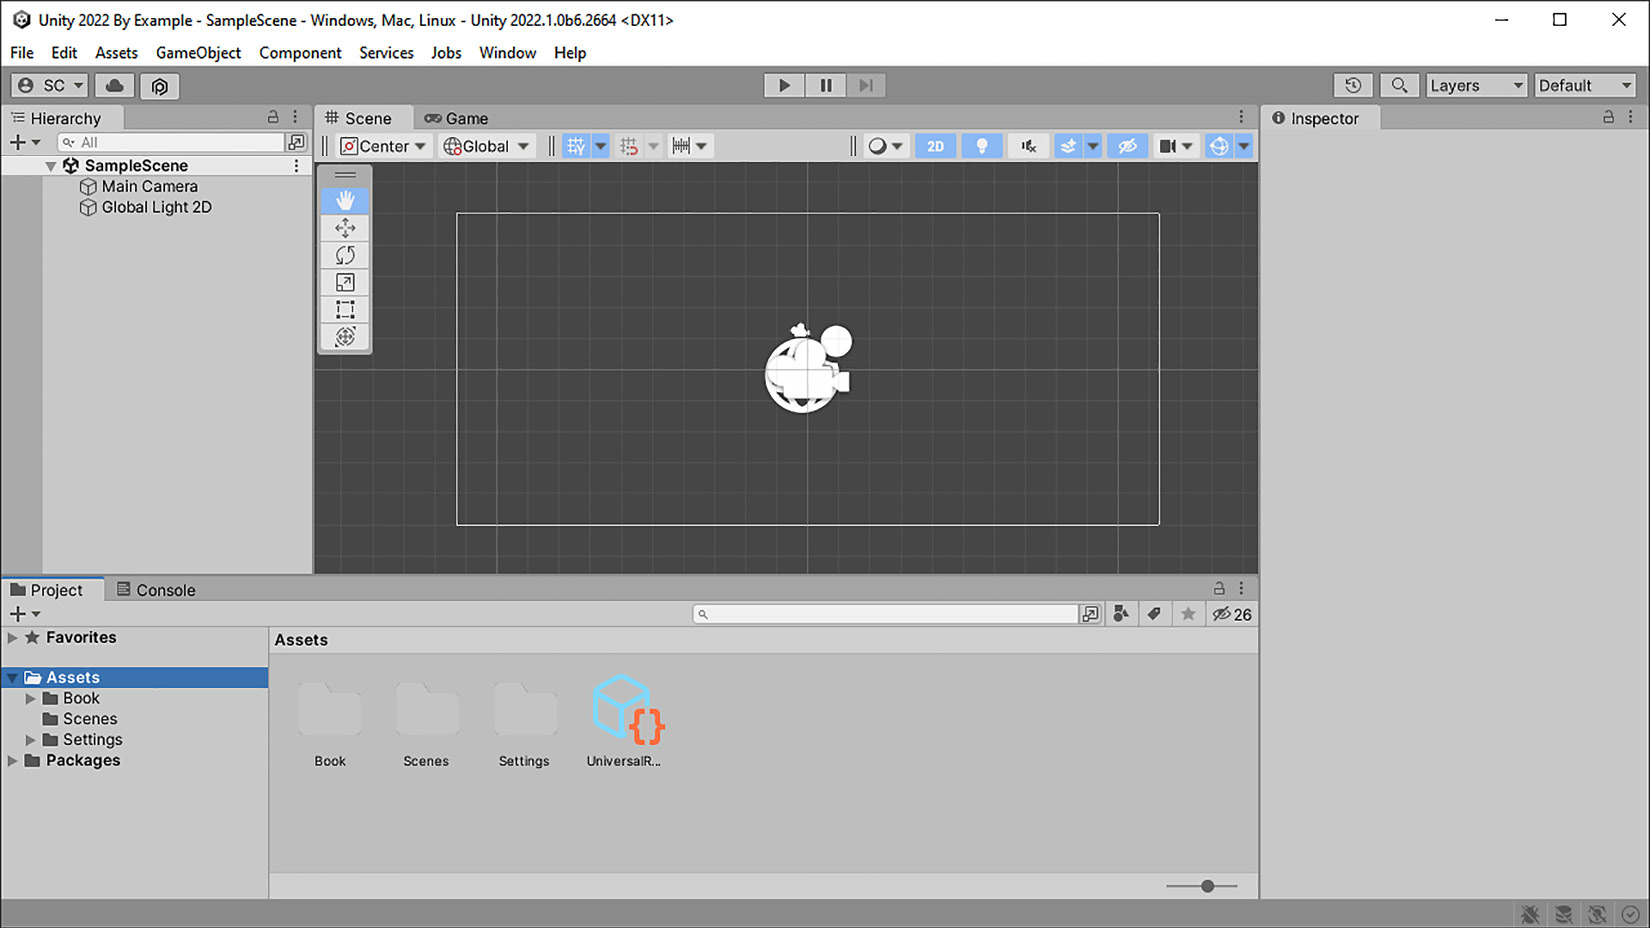
Figure 1.3 – The Unity 2022 Editor default layout
The common Editor windows that you’ll be using most of the time are the following:
- Scene – this is the window where we build our content visually. Objects added to the Scene Hierarchy with renderer components will be visible in the scene and game views.
- Game – the simulation you see in the game view represents what players will see rendered in your final playable distribution builds. You will also playtest your game in this window when entering Play Mode.
- Project – the Project window is comparable to your OS’s file manager. It’s where you’ll import and organize the files that make up the Assets for the project you’re creating (such as 3D models, 2D images, sounds & music, plugins, and so on).
- Hierarchy – this is the scene’s GameObject Hierarchy (more on GameObjects in the next section). Understanding how to organize your scene’s objects in the Hierarchy window (as in parent-child relationships) will be essential to work on your projects effectively, so this will be a topic of discussion in the coming chapters.
- Inspector – in the natural order of things in Unity, the Inspector window comes next as it’s tied directly to the GameObjects’ in the Hierarchy window. When an object is selected in the Scene Hierarchy, the Inspector shows all its details (Transform and components).
- Console – information, warnings, errors, and any relevant trace information are displayed in a list view that can be sorted and filtered. Debugging any problems occurring in your project will be performed from the Console information displayed.
Note that in the default layout, clicking on a tab, such as Game or Console in Figure 1.3, will bring it to the “front” for interaction. Tabs can also be dragged and docked to other windows to provide a fully customized layout.
In addition to these windows, Unity also has some toolbars, such as the following:

Figure 1.4 – The Unity 2022 Editor toolbars
- Main Toolbar (A) – the buttons on the upper left provide access to your Unity Account (Unity ID), Unity Cloud Services, and the current version control system (VCS) (we’ll tackle version control in a later chapter). The centered buttons are the play (for entering Play Mode), pause, and step controls. On the right side, the buttons are Undo History, Global Search, the Layers Visibility dropdown, and finally, the Editor Layout dropdown (as noted earlier, we’re looking at the default window layout; you can change the layout using one of the presets or save your own).
- Scene Toolbar (B) – the tools, starting on the left side, are:
- Tool Handle Position (Center, Pivot) – when moving objects in the scene, the action will be based on this position, either the Center of the object or the object’s Pivot.
Tip
If the Anchor position of your GameObject in the scene View doesn’t look correct, don’t forget to check this setting!
- Tool Handle Rotation (Global, Local) – when rotating objects in the scene, they rotate relative to their Transform in Global or Local space.
Tip
You may need to change between Global or Local space settings to rotate an object correctly. If your rotations don’t look correct, don’t forget to check this setting!
- The remainder of the tools include grid visibility and snapping settings, Draw Mode, 2D or 3D scene View (we are currently in 2D), toggles for scene lighting, audio, effects, hidden objects, scene View camera settings, and Gizmos. There’s a lot to unpack here, but don’t worry, we’ll touch on these as we work through the projects we’ll be creating in the coming chapters.
- Manipulation Tools Toolbar (C) – a floating toolbar, also known as Overlays, within the Scene window. This toolbar provides the essential tools for working with GameObjects within the scene View. The tools include View, Move, Rotate, Scale, Rect, and Transform.
One more “toolbar” along the bottom of the Editor window is called the Status bar (not pictured). The Status bar mostly provides the current status of specific processes, such as the last Console warning or error message (left-side), the progress of lighting generation (right-side), and the code compilation spinner (right-corner).
Additional reading | Unity documentation
You can find more information on Unity’s interface at https://docs.unity3d.com/2022.3/Documentation/Manual/UsingTheEditor.html
In this section, you learned about the familiar Editor windows and toolbars and how they can manipulate objects in the scene View. Let’s see how we can extend the features and tooling in the Editor now with Packages.
The Unity Package Manager
Without knowing, you were already introduced to packages earlier when we discussed the Universal RP. Since we started with a URP template, we didn’t have to do anything special, but Unity provides Scriptable Render Pipeline support through packages! Packages provide a way for Unity to offer multiple versions of an engine feature or service without requiring a new installation of the Editor. You can even try out the latest pre-release version of a package to stay on the cutting edge of the technology and quickly revert to a stable or alternate version should you encounter any problems. The Package Manager is accessible from the top menu: Window | Package Manager.
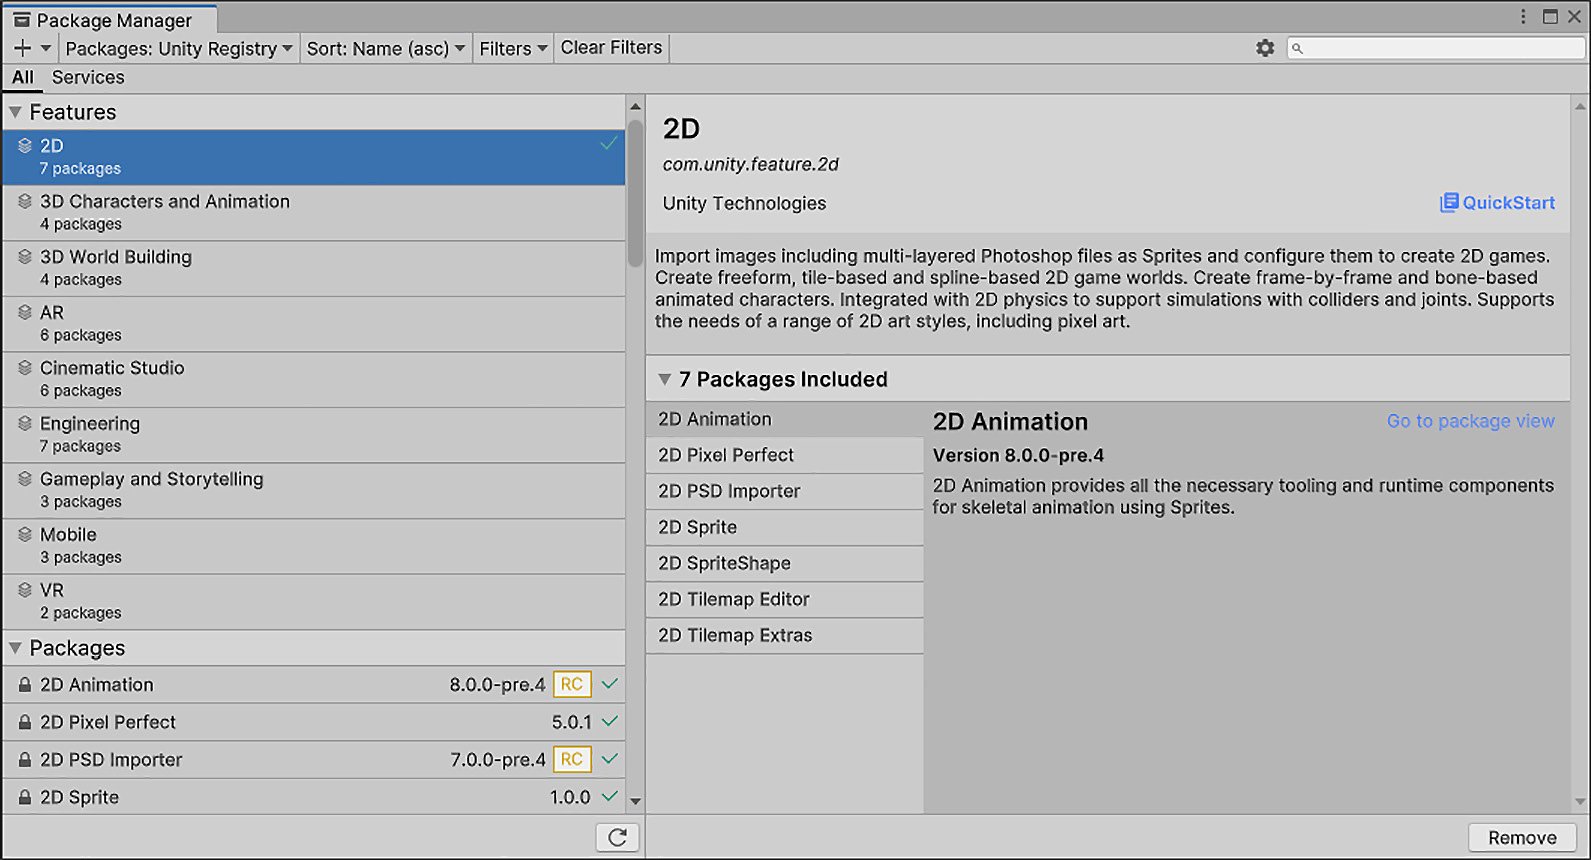
Figure 1.5 – The Unity Package Manager
Feature sets in the Package Manager are bundles of common tooling that provide a simpler and more streamlined install experience. The 2D feature set (selected in Figure 1.4) is for creators working with 2D projects. In our case, again, having started from the 2D URP template, the 2D feature set has already been imported to our project (indicated by the green checkmark). We’re good to go!
Should you need to make any changes to the packages in your project, from the dropdown in the Package Manager top menu, you can see what packages are available from what is already in your project via In Project, or either the Unity Registry or My Assets (which are assets you’ve purchased in the Unity Asset Store) selections. Managing a package is as simple as selecting it in the list and choosing an available function from the buttons displayed in the bottom-right window. For example, Download, Install, Remove, or Update.
Tip
Packages are project-specific, so you will need to ensure you have the desired packages installed for each new project you create!
New to Unity 2022
In the Package Manager window, you can now multi-select packages in the list for adding, updating, or removing in a single operation.
In this section, you learned about the Editor windows and toolbars and how to add/remove features and tooling with packages that extend the Editor’s capabilities. Next, we’ll start learning about the GameObject.


