Installing Spark from sources
Spark is distributed in two ways: either as precompiled binaries or as a source code that gives you the flexibility to choose, for example, whether you need support for Hive or not. In this recipe, we will focus on the latter.
Getting ready
To execute this recipe, you will need a bash Terminal and an internet connection. Also, to follow through with this recipe, you will have to have already checked and/or installed all the required environments we went through in the previous recipe. In addition, you need to have administrative privileges (via the sudo command) which will be necessary to move the compiled binaries to the destination folder.
Note
If you are not an administrator on your machine, you can call the script with the -ns (or --nosudo) parameter. The destination folder will then switch to your home directory and will create a spark folder within it. By default, the binaries will be moved to the /opt/spark folder and that's why you need administrative rights.
No other prerequisites are required.
How to do it...
There are five major steps we will undertake to install Spark from sources (check the highlighted portions of the code):
- Download the sources from Spark's website
- Unpack the archive
- Build
- Move to the final destination
- Create the necessary environmental variables
The skeleton for our code looks as follows (see the Chapter01/installFromSource.sh file):
#!/bin/bash
# Shell script for installing Spark from sources
#
# PySpark Cookbook
# Author: Tomasz Drabas, Denny Lee
# Version: 0.1
# Date: 12/2/2017
_spark_source="http://mirrors.ocf.berkeley.edu/apache/spark/spark-2.3.1/spark-2.3.1.tgz"
_spark_archive=$( echo "$_spark_source" | awk -F '/' '{print $NF}' )
_spark_dir=$( echo "${_spark_archive%.*}" )
_spark_destination="/opt/spark"
...
checkOS
printHeader
downloadThePackage
unpack
build
moveTheBinaries
setSparkEnvironmentVariables
cleanUp
How it works...
First, we specify the location of Spark's source code. The _spark_archive contains the name of the archive; we use awk to extract the last element (here, it is specified by the $NF flag) from the _spark_source. The _spark_dir contains the name of the directory our archive will unpack into; in our current case, this will be spark-2.3.1. Finally, we specify our destination folder where we will be going to move the binaries to: it will either be /opt/spark (default) or your home directory if you use the -ns (or --nosudo) switch when calling the ./installFromSource.sh script.
Next, we check the OS name we are using:
function checkOS(){
 _uname_out="$(uname -s)"
 case "$_uname_out" in
   Linux*) _machine="Linux";;
   Darwin*) _machine="Mac";;
   *) _machine="UNKNOWN:${_uname_out}"
 esac
if [ "$_machine" = "UNKNOWN:${_uname_out}" ]; then
echo "Machine $_machine. Stopping."
exit
fi
}First, we get the short name of the operating system using the uname command; the -s switch returns a shortened version of the OS name. As mentioned earlier, we only focus on two operating systems: macOS and Linux, so if you try to run this script on Windows or any other system, it will stop. This portion of the code is necessary to set the _machine flag properly: macOS and Linux use different methods to download the Spark source codes and different bash profile files to set the environment variables.
Next, we print out the header (we will skip the code for this part here, but you are welcome to check the Chapter01/installFromSource.sh script). Following this, we download the necessary source codes:
function downloadThePackage() {
 ...
 if [ -d _temp ]; then
    sudo rm -rf _temp
 fi
mkdir _temp cd _temp
 if [ "$_machine" = "Mac" ]; then
    curl -O $_spark_source
 elif [ "$_machine" = "Linux"]; then
    wget $_spark_source
 else
    echo "System: $_machine not supported."
    exit
 fi
}
First, we check whether a _temp folder exists and, if it does, we delete it. Next, we recreate an empty _temp folder and download the sources into it; on macOS, we use the curl method while on Linux, we use wget to download the sources.
Note
Did you notice the ellipsis '...' character in our code? Whenever we use such a character, we omit some less relevant or purely informational portions of the code. They are still present, though, in the sources checked into the GitHub repository.
Once the sources land on our machine, we unpack them using the tar tool, tar -xf $_spark_archive. This happens inside the unpack function.
Finally, we can start building the sources into binaries:
function build(){
 ...
cd "$_spark_dir" ./dev/make-distribution.sh --name pyspark-cookbook -Phadoop-2.7 -Phive -Phive-thriftserver -Pyarn
}
We use the make-distribution.sh script (distributed with Spark) to create our own Spark distribution, named pyspark-cookbook. The previous command will build the Spark distribution for Hadoop 2.7 and with Hive support. We will also be able to deploy it over YARN. Underneath the hood, the make-distribution.sh script is using Maven to compile the sources.
Once the compilation finishes, we need to move the binaries to the _spark_destination folder:
function moveTheBinaries() { ...
if [ -d "$_spark_destination" ]; then
sudo rm -rf "$_spark_destination"
ficd .. sudo mv $_spark_dir/ $_spark_destination/
}
First, we check if the folder in the destination exists and, if it does, we remove it. Next, we simply move (mv) the $_spark_dir folder to its new home.
Note
This is when you will need to type in the password if you did not use the -ns (or --nosudo) flag when invoking the installFromSource.sh script.
One of the last steps is to add new environment variables to your bash profile file:
function setSparkEnvironmentVariables() {
 ...
if [ "$_machine" = "Mac" ]; then
_bash=~/.bash_profile
else
_bash=~/.bashrc
fi
_today=$( date +%Y-%m-%d ) # make a copy just in case
if ! [ -f "$_bash.spark_copy" ]; then
cp "$_bash" "$_bash.spark_copy"
fiecho >> $_bash echo "###################################################" >> $_bash echo "# SPARK environment variables" >> $_bash echo "#" >> $_bash echo "# Script: installFromSource.sh" >> $_bash echo "# Added on: $_today" >>$_bash echo >> $_bash
 echo "export SPARK_HOME=$_spark_destination" >> $_bash
 echo "export PYSPARK_SUBMIT_ARGS=\"--master local[4]\"" >> $_bash
 echo "export PYSPARK_PYTHON=$(type -p python)" >> $_bash
 echo "export PYSPARK_DRIVER_PYTHON=jupyter" >> $_bash
 echo "export PYSPARK_DRIVER_PYTHON_OPTS=\"notebook --NotebookApp.open_browser=False --NotebookApp.port=6661\"" >> $_bash

 echo "export PATH=$SPARK_HOME/bin:\$PATH" >> $_bash
}
First, we check what OS system we're on and select the appropriate bash profile file. We also grab the current date (the _today variable) so that we can include that information in our bash profile file, and create its safe copy (just in case, and if one does not already exist). Next, we start to append new lines to the bash profile file:
- We first set the
SPARK_HOMEvariable to the_spark_destination; this is either going to be the/opt/sparkor~/sparklocation. - The
PYSPARK_SUBMIT_ARGSvariable is used when you invokepyspark. It instructs Spark to use four cores of your CPU; changing it to--master local[*]will use all the available cores. - We specify the
PYSPARK_PYTHONvariable so, in case of multiple Python installations present on the machine,pysparkwill use the one that we checked for in the first recipe. - Setting the
PYSPARK_DRIVER_PYTHONtojupyterwill start a Jupyter session (instead of the PySpark interactive shell). - The
PYSPARK_DRIVER_PYTHON_OPSinstructs Jupyter to:- Start a
notebook - Do not open the browser by default: use the
--NotebookApp.open_browser=Falseflag - Change the default port (
8888) to6661(because we are big fans of not having things at default for safety reasons)
- Start a
Finally, we add the bin folder from SPARK_HOME to the PATH.
The last step is to cleanUp after ourselves; we simply remove the _temp folder with everything in it.
Now that we have installed Spark, let's test if everything works. First, in order to make all the environment variables accessible in the Terminal's session, we need to refresh the bash session: you can either close and reopen the Terminal, or execute the following command (on macOS):
source ~/.bash_profile
On Linux, execute the following command:
source ~/.bashrc
Next, you should be able to execute the following:
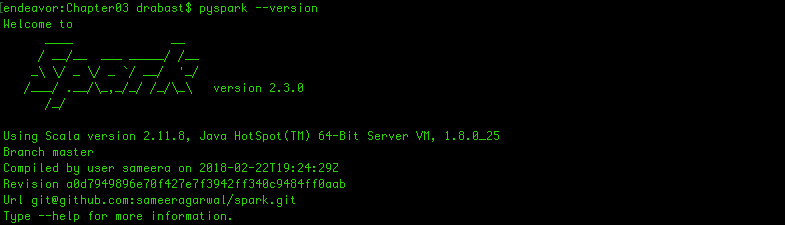
pyspark --version
If all goes well, you should see a response similar to the one shown in the following screenshot:
There's more...
Instead of using the make-distribution.sh script from Spark, you can use Maven directly to compile the sources. For instance, if you wanted to build the default version of Spark, you could simply type (from the _spark_dir folder):
./build/mvn clean package
This would default to Hadoop 2.6. If your version of Hadoop was 2.7.2 and was deployed over YARN, you can do the following:
./build/mvn -Pyarn -Phadoop-2.7 -Dhadoop.version=2.7.2 -DskipTests clean package
You can also use Scala to build Spark:
./build/sbt package
See also
- If you want to study more on how to build and/or enable certain features of Spark, check Spark's website: http://spark.apache.org/docs/latest/building-spark.html