


Connecting non-Azure virtual machines using Microsoft Defender for Cloud portal pages
Before Microsoft Defender for Cloud can monitor your security posture and display security recommendations for your non-Azure computers, you must connect them to Azure. This recipe will show you how to connect a non-Azure server using Microsoft Defender for Cloud portal pages.
Getting ready
Before you start connecting servers to Azure using Microsoft Defender for Cloud portal pages, you must have administrative permissions on a target server to install and configure it.
Open a web browser and navigate to https://portal.azure.com.
How to do it…
To enable Microsoft Defender for Cloud on multiple subscriptions at once, complete the following steps:
- In the Azure portal, open Microsoft Defender for Cloud. You can open Microsoft Defender for Cloud in multiple ways: typing Microsoft Defender for Cloud in a search bar, clicking on a link to it via Favorite, or by going to All Services. On the left-hand side menu, select Inventory:
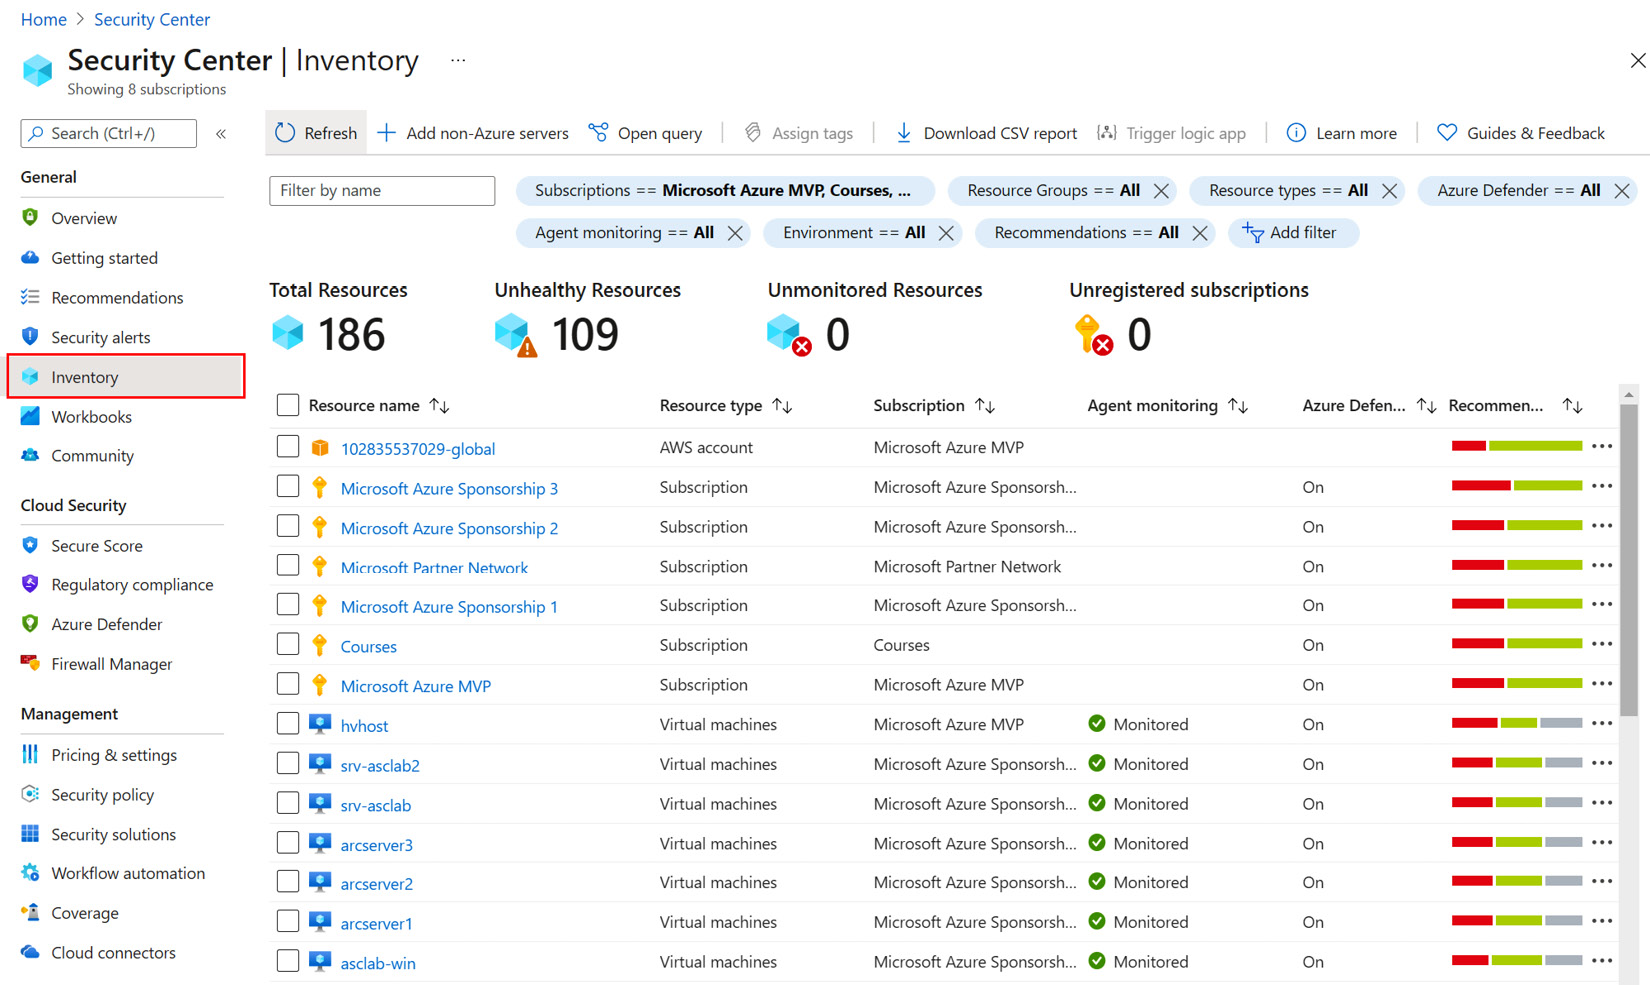
Figure 2.10 – Defender for Cloud – Inventory
- On the Onboard servers to Security Center page, you will see the list of Log Analytics workspaces that you have permission for. Click on Upgrade next to the workspace name where you want to store the data. Otherwise, if you want to create a new workspace or if there are no Log Analytics workspaces available, click on Create New Workspace:
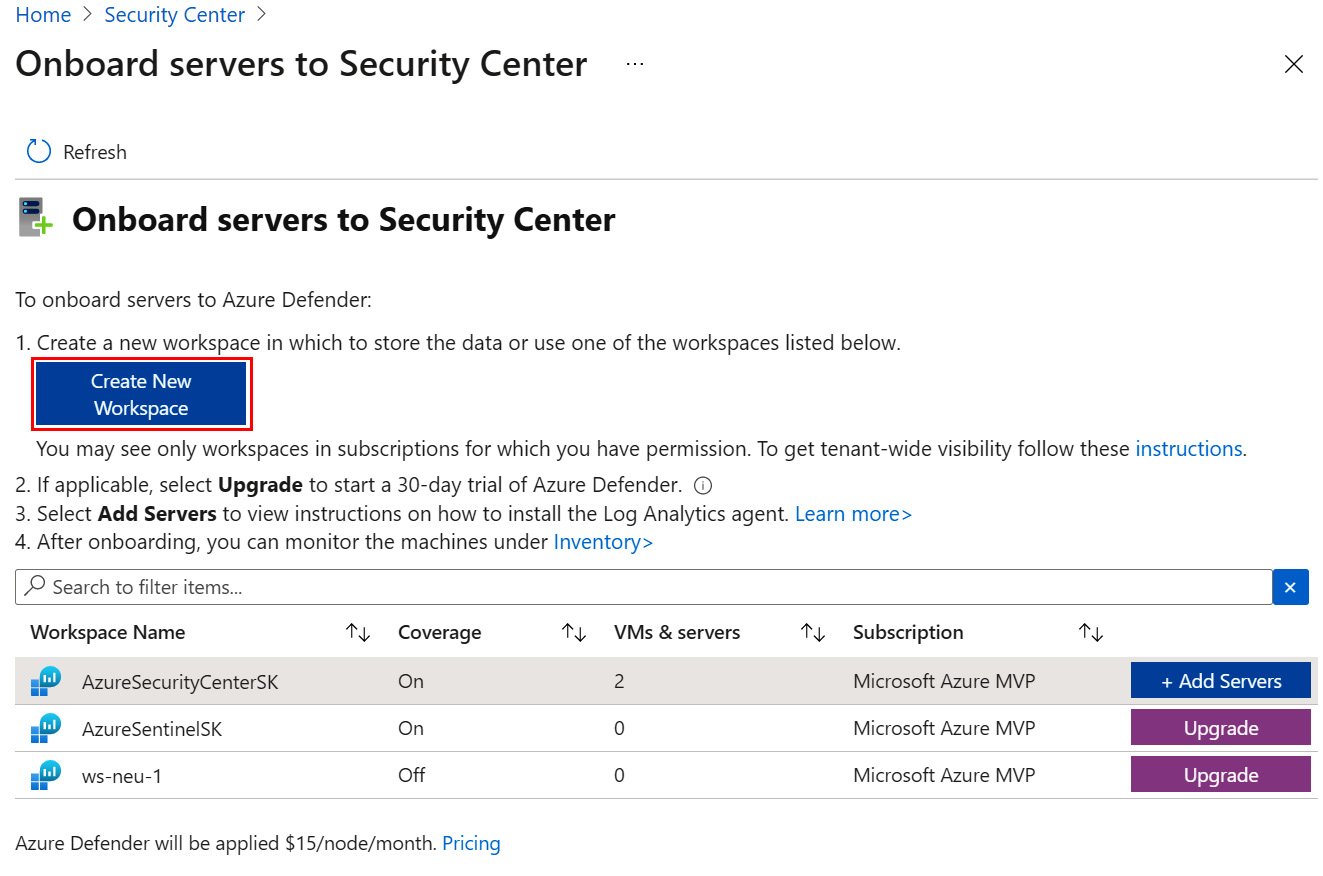
Figure 2.11 – The Onboard servers to Security Center page – Add Servers
- On the right-hand side of the Onboard server to Security Center page, click on the + Add Servers button:
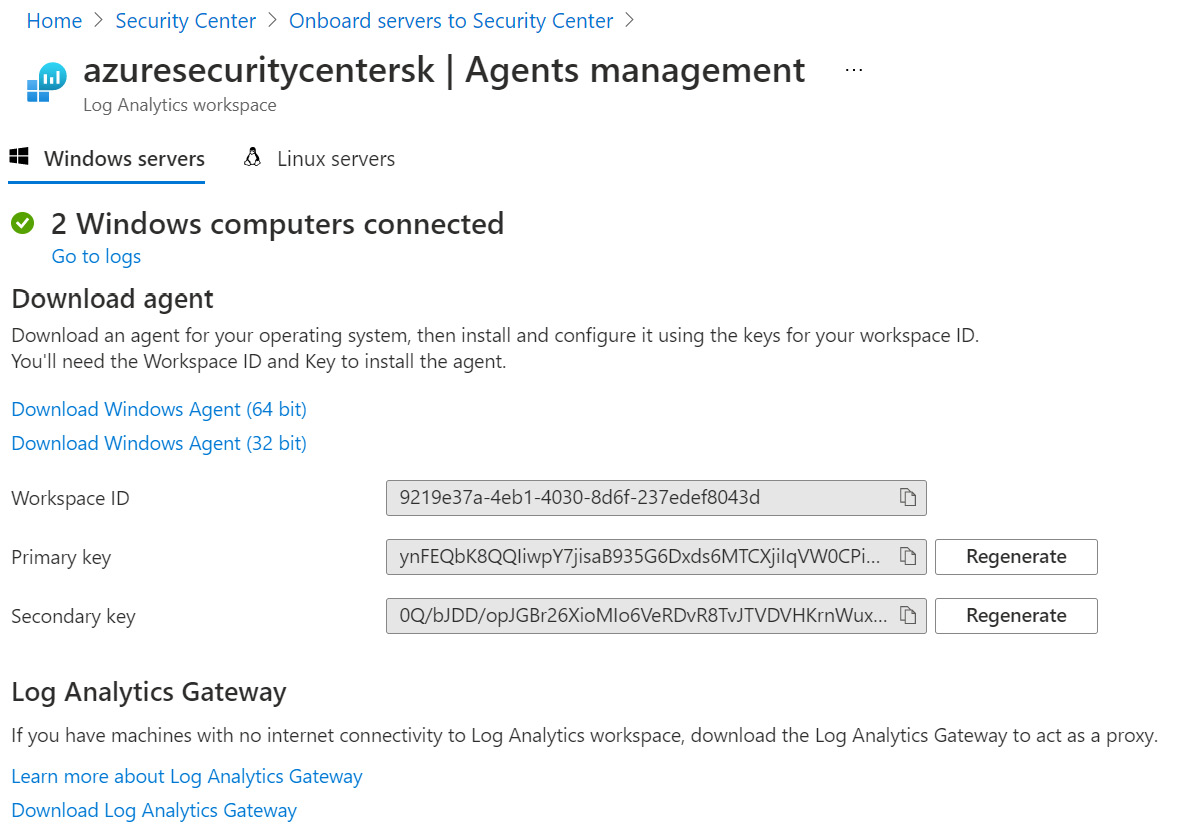
Figure 2.12 – Log Analytics workspace connection – Agents management
- On the workspace Agents management page, download and install an appropriate version (64-bit or 32-bit) of Windows Agent (Microsoft Monitoring Agent) on a machine you are onboarding to Microsoft Defender for Cloud. Note the fields showing the Workspace ID, Primary Key, and Secondary Key values. Leave the Agents Management page open as you will need the Workspace ID and Key values later:
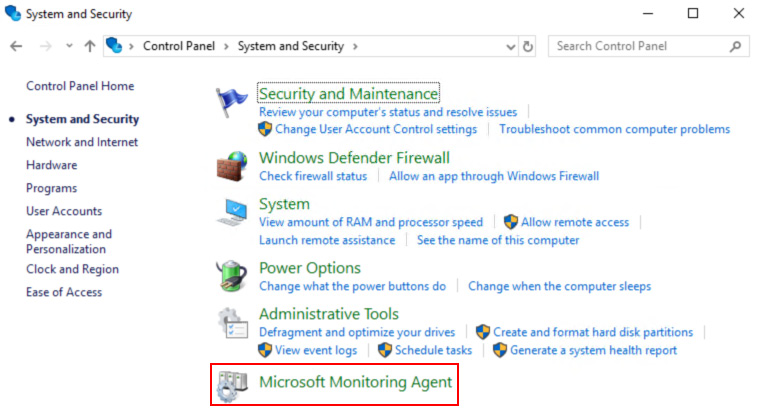
Figure 2.13 – Control Panel displaying the installed Windows Agent (Microsoft Monitoring Agent)
- After successfully installing Windows Agent (Microsoft Monitoring Agent), open Control Panel and click System and Security. Click on Microsoft Monitoring Agent to run the application:
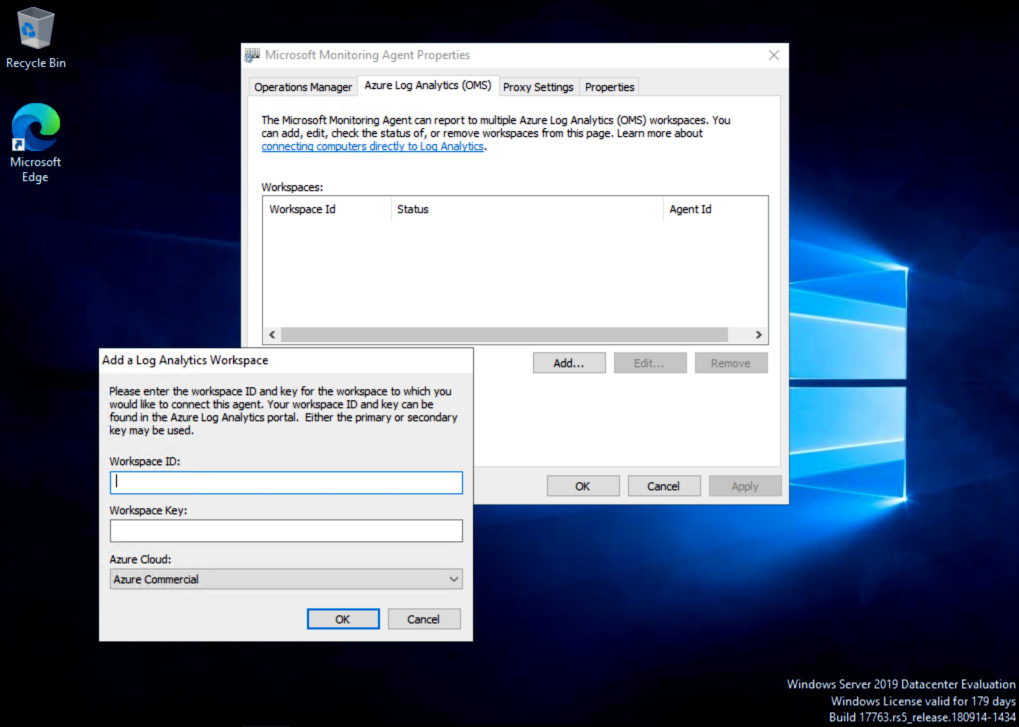
Figure 2.14 – Microsoft Monitoring Agent Properties
- On the Microsoft Monitoring Agent Properties window, select the Azure Log Analytics (OMS) tab and click the Add… button. The Add a Log Analytics Workspace dialog box will open.
- At the Add a Log Analytics Workspace dialog box, enter the Workspace ID value and either the primary or secondary Workspace Key. Both Step 4 and Figure 2.12 refer to the Agent Management page in the Azure portal, which is where these values can be found. Click OK to close the dialog box:
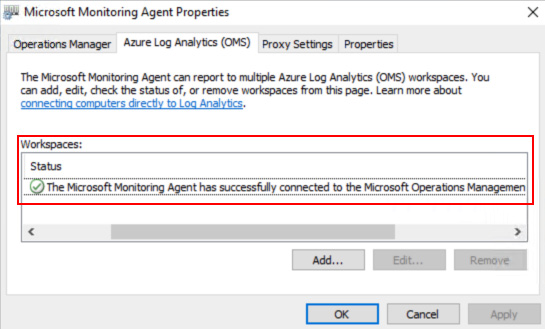
Figure 2.15 – Microsoft Monitoring Agent Properties window showing a successfully connected message
- After a few moments, on the Azure Log Analytics (OMS) tab, an entry in the Workspaces field should show a message confirming that a successful connection has been established to a Log Analytics workspace in Azure. Click OK to close this window.
- In a browser, in the Azure portal, in the search bar, type Log Analytics and click on a Log Analytics workspaces entry in the search results. In the newly opened Log Analytics workspaces blade, click on the workspace name you selected in Step 3; that is, the workspace you chose to store the data in.
- From the left menu, in the General section, select Logs:
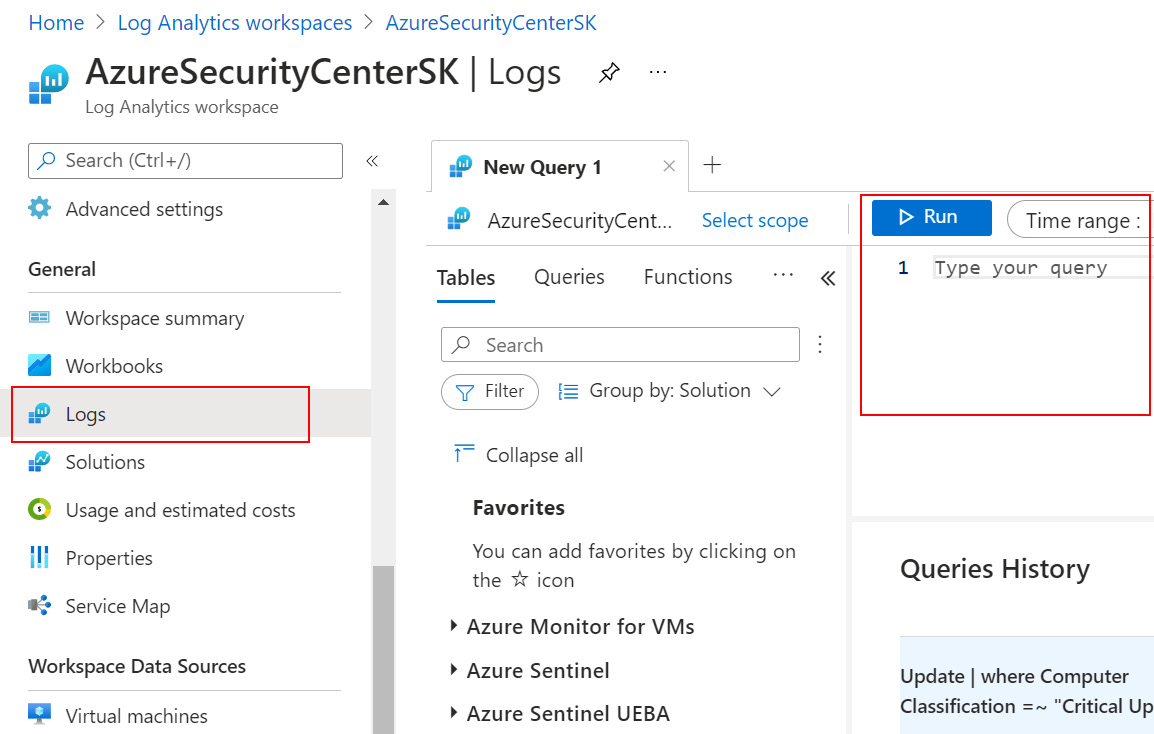
Figure 2.16 – Log Analytics workspace – The Logs blade
- On the right, type and run the following Kusto Query Language (KQL) query to check if a machine you onboarded is connected to the workspace:
Heartbeat
| where OSType == 'Windows'
| summarize arg_max(TimeGenerated, *) by SourceComputerId
| sort by Computer
| render table
- The query results list should contain the name of the newly onboarded (that is, connected) machine:
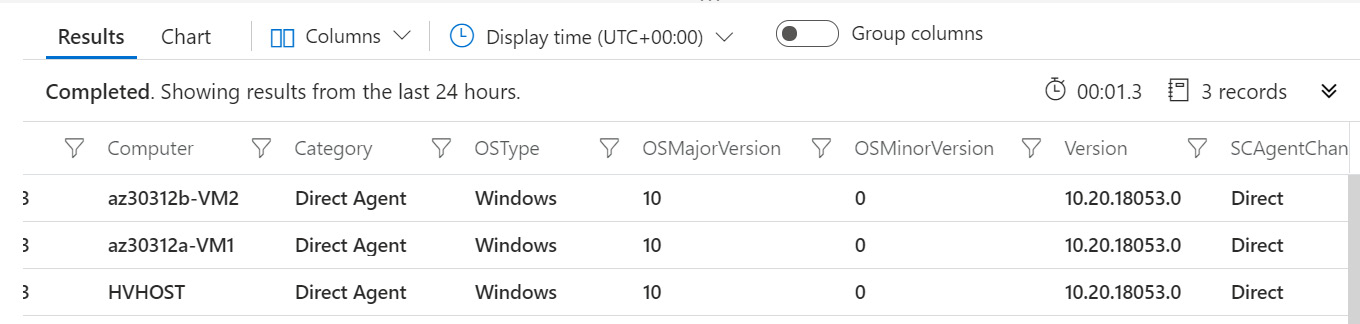
Figure 2.17 – KQL query results showing the newly onboarded machine
- Finally, open Microsoft Defender for Cloud and navigate to the Inventory blade. Use an existing filter entry or add a filter-to-filter resource by going to Resource types. A newly onboarded machine should be displayed in the inventory list.
Check if Microsoft Defender for Cloud is connected:
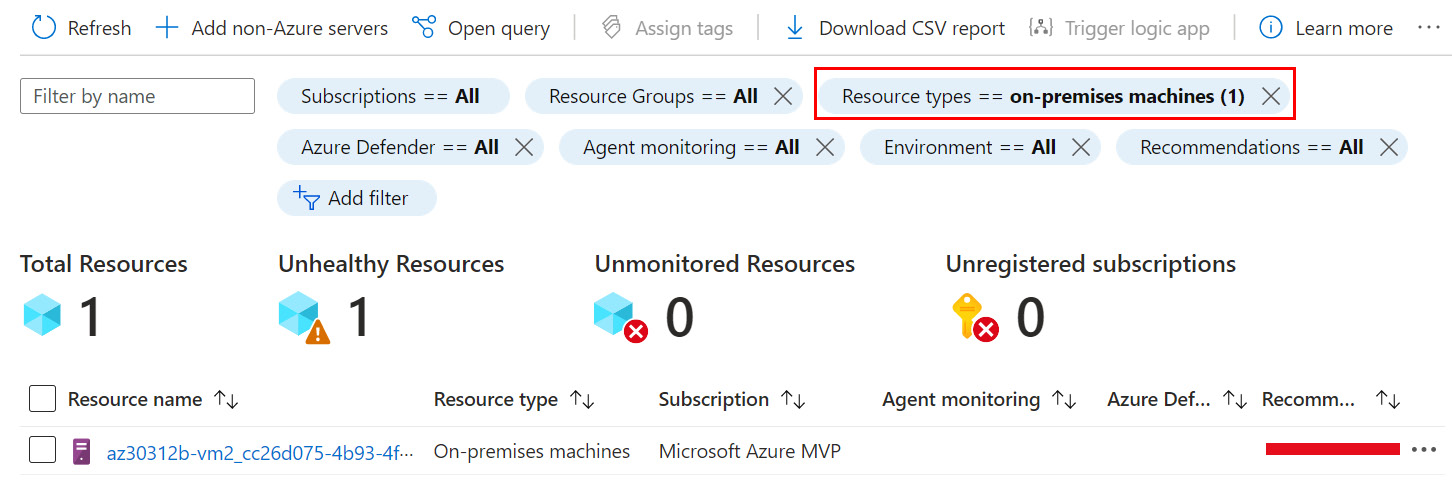
Figure 2.18 – Microsoft Defender for Cloud – Inventory list, filtered by Resource types
- Click on the link representing an on-premises virtual machine. The Resource Health page opens.
- The Resource Health page shows resource information and recommendations applicable to the resource, that is, the on-premises virtual machine.
How it works…
Microsoft Defender for Cloud supports adding a non-Azure machine from Security Center's pages in the Azure portal. To complete this, you must enable Microsoft Defender for Cloud Plans on a Log Analytics workspace, install Microsoft Monitoring Agent on a target server, and connect it securely to the workspace. To check whether the newly onboarded machine has successfully connected to a Log Analytics workspace, you can use a KQL query and check the presence of a machine in Microsoft Defender for Cloud, on the Inventory page.


