Introducing VirtualBox and Cygwin
Whenever I write or teach, I try very hard not to provide students with a cure for insomnia. Throughout this book, you’ll see a bit of theory whenever it’s necessary, but I mainly like to provide good, practical information. There will also be plenty of step-by-step hands-on labs and an occasional bit of humor.
The best way to do the labs is to use Linux virtual machines. Most of what we’ll do can apply to any Linux distro, but we will also do some things that are specific to either Red Hat Enterprise Linux (RHEL) or Ubuntu Linux. (RHEL is the most popular for enterprise use, while Ubuntu is the most popular for cloud deployments.) SUSE is the third big enterprise Linux distro. We won’t be doing too much with SUSE, but on occasion, I’ll point out some of its little quirks.
Red Hat is a billion-dollar company, so there’s no doubt about where they stand in the Linux market. But since Ubuntu Server is free of charge, we can’t judge its popularity strictly on the basis of its parent company’s worth. The reality is that Ubuntu Server is the most widely used Linux distribution for deploying cloud-based applications.
See here for details: http://www.zdnet.com/article/ubuntu-linux-continues-to-dominate-openstack-and-other-clouds/.
Since Red Hat is a fee-based product, we’ll substitute CentOS 7, AlmaLinux8, and AlmaLinux9, which are built from Red Hat source code and are free of charge. (We’re using all three of these distros because there are some differences between them, and all of them will be supported for quite some time to come.) CentOS and AlmaLinux offer various download images. You’ll want to download the DVD images, because they contain necessary things that are missing from the minimal images. Specifically, download these image files:
- CentOS 7: CentOS-7-x86_64-DVD-2009.iso
- AlmaLinux 8: AlmaLinux-8-latest-x86_64-dvd.iso
- AlmaLinux 9: AlmaLinux-9-latest-x86_64-dvd.iso
For Ubuntu, we’ll concentrate on version 22.04, since it’s the newest Long Term Support (LTS) version. (We’ll also take an occasional look at Ubuntu 20.04, since it’s still supported and there are a few differences between it and 22.04.) A new LTS version of Ubuntu comes out in April of every even-numbered year, and non-LTS versions come out in April of every odd-numbered year and every October. For production use, you’ll mainly want to stick with the LTS versions, because the non-LTS versions can sometimes be a bit problematic.
There are several different virtualization platforms that you can use, but my own preferred choice is VirtualBox.
VirtualBox is available for Windows, Linux, and Mac hosts, and is free of charge for all of them. (It’s also available for Solaris hosts, but I doubt that many of you will be running that.) It has features that you have to pay for on other platforms, such as the ability to create snapshots of virtual machines.
Some of the labs that we’ll be doing will require you to simulate creating a connection from your host machine to a remote Linux server. If your host machine is either a Linux or a Mac machine, you’ll just be able to open the terminal and use the built-in Secure Shell (SSH) tools. If your host machine is running Windows, you’ll need to install some sort of Bash shell, such as Cygwin, or just use the Bash shell that’s built into Windows 10/11 Pro.
Installing a virtual machine in VirtualBox
For those of you who’ve never used VirtualBox, here’s a quick guide to get you going:
- Download and install VirtualBox and the VirtualBox Extension Pack. You can get them from https://www.virtualbox.org/.
- Download the installation
.isofiles for Ubuntu Server 22.04, CentOS 7, AlmaLinux8, and AlmaLinux9. You can get them from https://ubuntu.com/, https://almalinux.org/, and https://www.centos.org/. - Start VirtualBox and click the New icon at the top of the screen. Fill out the information where requested. Increase the virtual drive size to 20 GB, but leave everything else as the default settings, as shown here:
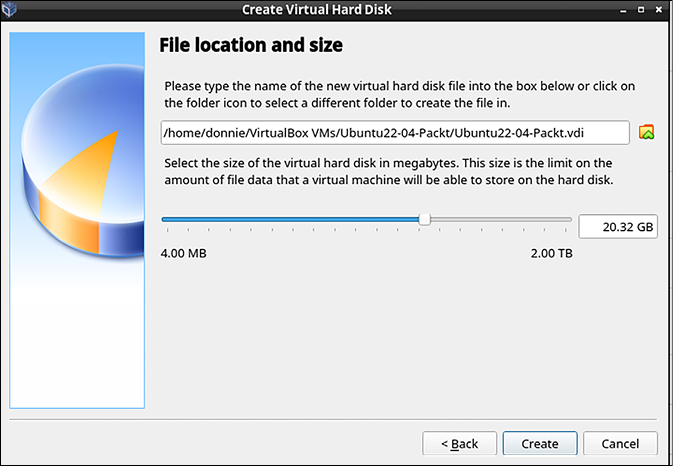
Figure 1.1:Create the virtual drive
- Start the new virtual machine. Click on the folder icon that’s beside the Location dialog box and navigate to the directory where you stored the
.isofiles that you downloaded. Choose either the Ubuntu ISO file, the CentOS ISO file, or one of the AlmaLinux ISO files, as shown in the following screenshot. (If the ISO file doesn’t show up in the list, click the Add button in the top-left corner to add it.)
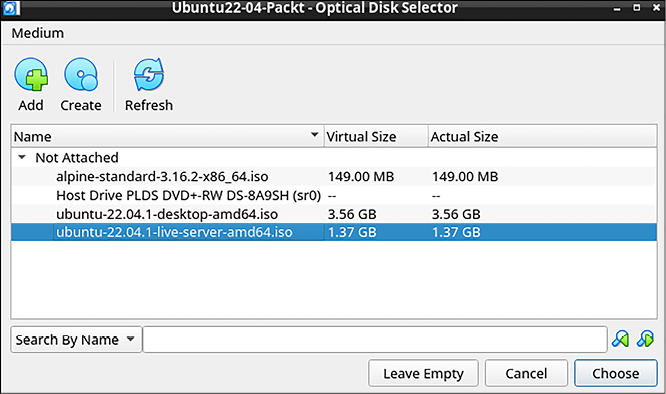
Figure 1.2: Choose the .iso file
- Click the Start button on the dialog box to start installing the operating system. Note that for Ubuntu Server, you won’t be installing a desktop interface. For the CentOS 7 and AlmaLinux virtual machines, choose to install a Server without a graphical interface. (Later on, we’ll go through at least one exercise that will require a desktop interface for an AlmaLinux machine. You can create a virtual machine with a graphical interface at that time.)
- When installing Ubuntu, choose Try or Install Ubuntu Server when you get to this screen:
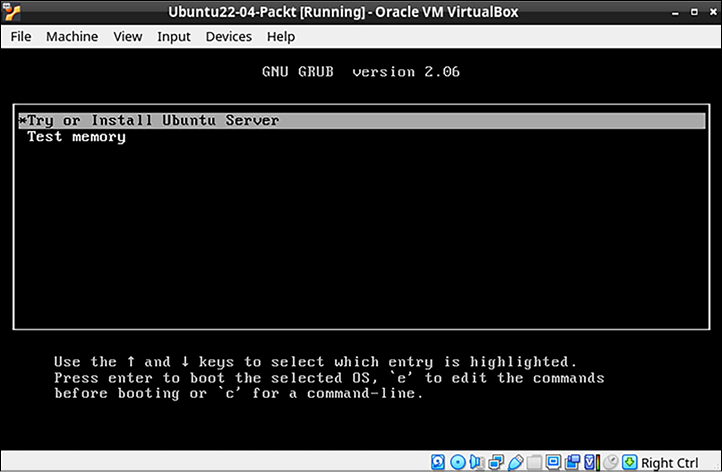
Figure 1.3: Installing Ubuntu
- Repeat the procedure for the other Linux distros.
- Update the Ubuntu virtual machine with these two commands:
sudo apt update sudo apt dist-upgrade - Hold off on updating the CentOS and AlmaLinux virtual machines because we’ll do that in the next exercise.
- For Ubuntu, choose to install the OpenSSH Server on the SSH setup screen.
When installing Ubuntu, you’ll be asked to create a normal user account and password for yourself. It won’t ask you to create a root user password, but will instead automatically add you to the sudo group so that you’ll have admin privileges.
When you get to the user account creation screen of the CentOS or AlmaLinux installer, be sure to check the Make this user administrator box for your own user account, since it isn’t checked by default. It will offer you the chance to create a password for the root user, but that’s entirely optional. (In fact, I never do.)
The user account creation screen of the AlmaLinux 9 installer—which looks the same as the one on CentOS 7 and AlmaLinux 8—is shown here:
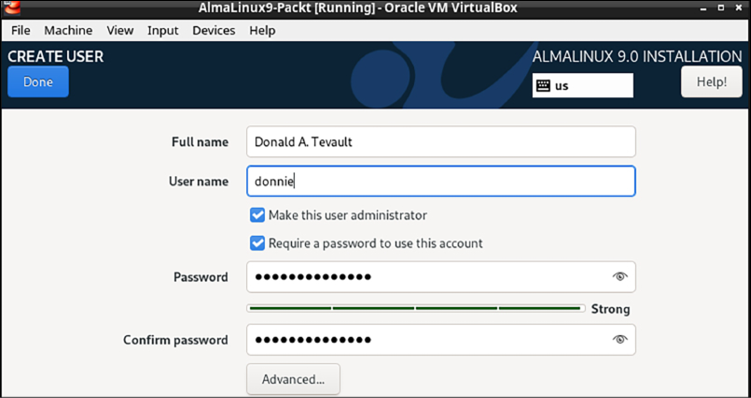
Figure 1.4: User creation for AlmaLinux
Important:
RHEL 9.1 and all of its clones were released a few months after I wrote the first draft of this chapter. You might already have noticed that there’s a bug in the 9.1 installer that wasn’t in the 9.0 installer. That is, the option to create a normal user account isn’t visible on the installer screen. I mean, it’s there, but you can’t see it and can’t scroll down to it. To bring it up, just keep hitting the Tab key until you’ve highlighted the option to create the root user password. Then, hit the Tab key once more, and then hit the Enter key. (Of course, there’s always the chance that the problem will get fixed by the time you read this.)
For Ubuntu 22.04, you’ll see just one self-explanatory screen to set up your real name, a username, and a password. The Ubuntu installer will automatically add your user account to the sudo group, which will give you full administrator privileges.
Here’s the user account creation screen for Ubuntu 22.04:
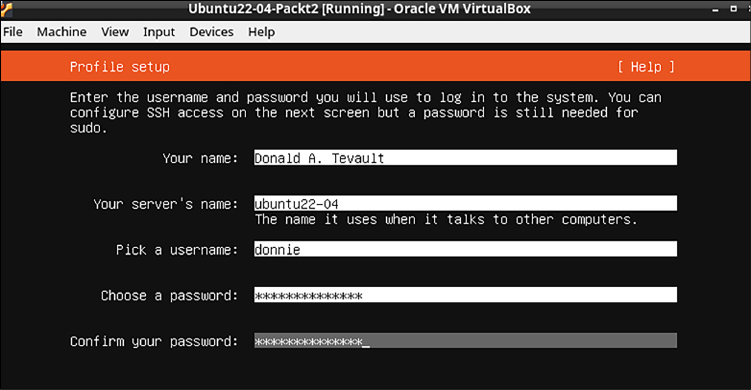
Figure 1.5: Ubuntu user creation
Now, let’s change gears and move on to CentOS 7.
Installing the EPEL repository on the CentOS 7 virtual machine
While the Ubuntu package repositories have pretty much everything that you need for this course, the CentOS and AlmaLinux package repositories are—shall we say—lacking. To have the packages that you’ll need for the CentOS and AlmaLinux hands-on labs, you’ll need to install the EPEL repository. (The EPEL project is run by the Fedora team.) When you install third-party repositories on Red Hat 7 and CentOS 7 systems, you’ll also need to install a priorities package and edit the .repo files to set the proper priorities for each repository. This will prevent packages from the third-party repository from overwriting official Red Hat and CentOS packages if they just happen to have the same name. The following steps will help you install the required packages and edit the .repo files:
- The two packages that you’ll need to install EPEL are in the normal CentOS 7 repositories. To install them, just run this command:
sudo yum install yum-plugin-priorities epel-release - When the installation completes, navigate to the
/etc/yum.repos.ddirectory, and open theCentOS-Base.repofile in your favorite text editor. After the last line of thebase,updates, andextrassections, add the linepriority=1. After the last line of thecentosplussection, add the linepriority=2. Save the file and close the editor. Each of the sections that you’ve edited should look something like this, except with the appropriate name and priority number:[base] name=CentOS-$releasever – Base mirrorlist=http://mirrorlist.centos.org/? release=$releasever&arch=$basearch&repo=os&infra=$infra #baseurl=http://mirror.centos.org/centos/ $releasever/os/$basearch/ gpgcheck=1 gpgkey=file:///etc/pki/rpm-gpg/RPM-GPG-KEY-CentOS-7 priority=1 - Open the
epel.repofile for editing. After the last line of theepelsection, add the linepriority=10. After the last line of each remaining section, add the linepriority=11. - Update the system and then create a list of the installed and available packages by running the following commands:
sudo yum upgrade
sudo yum list > yum_list.txt
Now, let’s move on to AlmaLinux.
Installing the EPEL repository on the AlmaLinux 8/9 virtual machines
To install the EPEL repository on AlmaLinux, all you have to do is run this command:
sudo dnf install epel-release
There’s no priorities package as there is on CentOS 7 and earlier, so we won’t have to worry about configuring the repository priorities.
When the package installation is complete, update the system and create a list of available software packages with these two commands:
sudo dnf upgrade
sudo dnf list > dnf_list.txt
Next, let’s configure our network.
Configuring a network for VirtualBox virtual machines
Some of our training scenarios will require you to simulate creating a connection to a remote server. You would do this by using your host machine to connect to a virtual machine. When you first create a virtual machine on VirtualBox, the networking is set to NAT mode. In order to connect to the virtual machine from the host, you’ll need to set the virtual machine’s network adapter to Bridged Adapter mode. Here’s how you can do this:
- Shut down any virtual machines that you’ve already created.
- On the VirtualBox Manager screen, open the Settings dialog for a virtual machine.
- Click the Network menu item. Change the Attached to setting from NAT to Bridged Adapter, and change the Promiscuous Mode setting to Allow All, as shown in this screenshot:
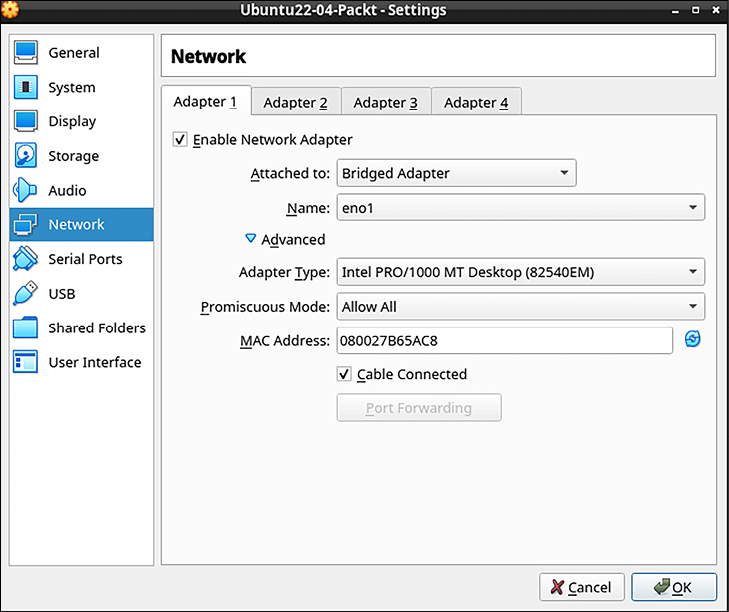
Figure 1.6: Configuring the network
- Restart the virtual machine and set it to use a static IP address.
Tip
If you assign static IP addresses from the high end of your subnet range, it will be easier to prevent conflicts with low-number IP addresses that get handed out from your internet gateway.
Creating a virtual machine snapshot with VirtualBox
One of the beautiful things about working with virtual machines is that you can create a snapshot and roll back to it if you mess something up. With VirtualBox, that’s easy to do, by following these steps:
- From the Machine menu of the VirtualBox Manager screen, select Tools/Snapshots.
- Further right on the screen, click on the Take icon to bring up the Snapshot dialog box. Either fill in the desired Snapshot Name or accept the default name. Optionally, you can create a description, as you see in this screenshot:
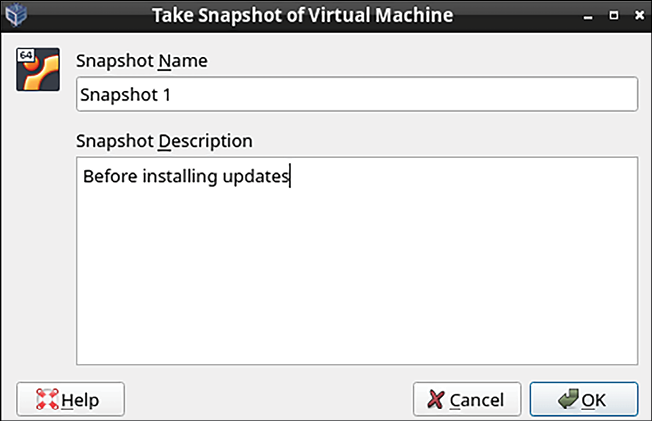
Figure 1.7: Taking a snapshot
After you’ve made changes to the virtual machine, you can roll back to the snapshot by shutting down the virtual machine, then highlighting the snapshot name, and clicking on the Restore button.
Using Cygwin to connect to your virtual machines
If your host machine is either a Linux or Mac machine, you’ll simply open the host’s terminal and use the tools that are already there to connect to the virtual machine. Windows 10 and Windows 11, even in the base Home Edition, now come with a Secure Shell client that’s built into both the normal Command Prompt and PowerShell, and you can use that if you desire. But if you’d prefer to use something that comes closer to the actual Linux experience, you might consider Cygwin.
Cygwin, a project of the Red Hat company, is a free open source Bash shell that’s built for Windows. It’s free of charge and easy to install.
Installing Cygwin on your Windows host
Here’s a quick how-to to get you going with Cygwin:
- In your host machine’s browser, download the appropriate
setup*.exefile for your version of Windows from http://www.cygwin.com/. - Double-click on the setup icon to begin the installation. For the most part, just accept the defaults until you get to the package selection screen. (The one exception will be the screen where you select a download mirror.)
- At the top of the package selection screen, select Category from the View menu.
- Expand the Net category, as shown in the following screenshot:

Figure 1.8: Installing Cygwin packages
- Scroll down until you see the
opensshpackage. Under the New column, click on Skip (this causes a version number to appear in place of Skip), as you see in this screenshot:

Figure 1.9: Select the OpenSSH package

- After you have selected the proper package, your screen should look like this:

Figure 1.10: After selecting the OpenSSH package
- In the bottom right-hand corner, click Next. If a Resolving Dependencies screen pops up, click Next on it as well.
- Keep the setup file that you downloaded, because you’ll use it later to either install more software packages or to update Cygwin. (When you open Cygwin, any updated packages will show up on the Pending view on the View menu.)
- Once you open Cygwin from the Windows Start menu, you can resize it as you desire, and use either the Ctrl + + or Ctrl + - key combinations to resize the font.
Next, we’ll look at the Windows 10/11 Bash shell.
Using the Windows 10 SSH client to interface with Linux virtual machines
If you’re using Windows 10, you already have an SSH client built into your operating system.
So, let’s see how to do this:
- To get to it, you can open the traditional Command Prompt from the Windows System menu, like so:
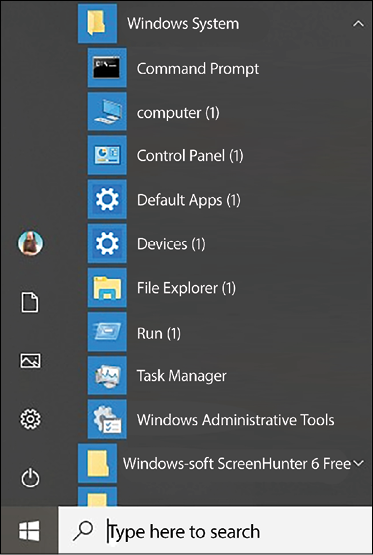
Figure 1.11: Windows 10 Command Prompt
- Then, just type in the SSH commands the same as you would from a Mac or Linux machine, like this:
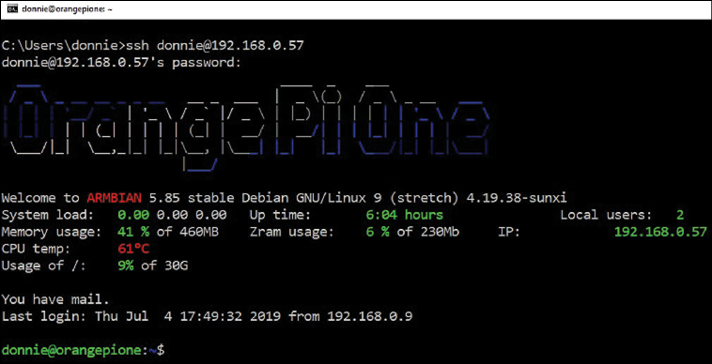
Figure 1.12: SSH remote from Windows Command Prompt
- A better option is to use Windows PowerShell instead of the normal Command Prompt. Get to it as you see here:
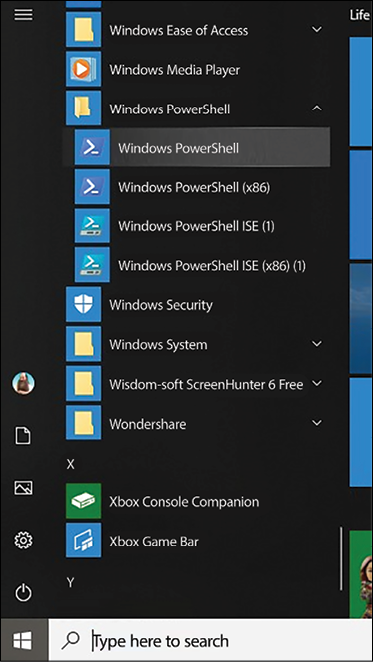
Figure 1.13: PowerShell command prompt
- As before, let’s use it to log in to my Orange Pi device, as you see here:
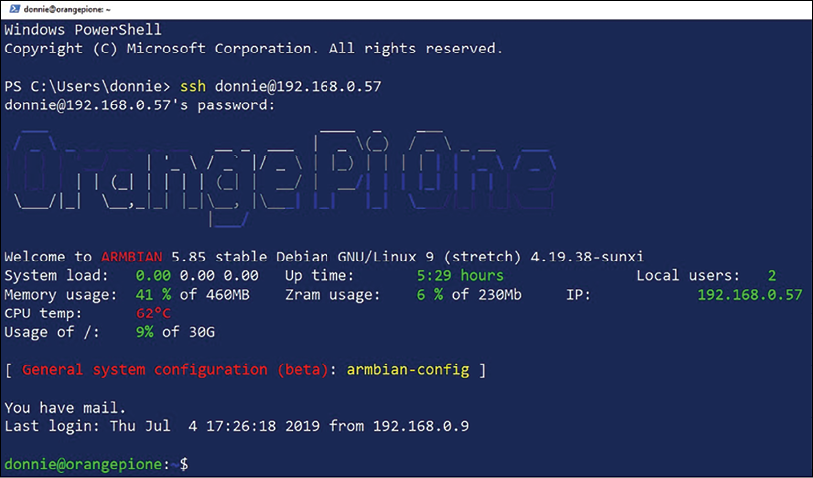
Figure 1.14: Remote login from PowerShell
If you have the choice, go with PowerShell instead of Command Prompt. PowerShell is a bit closer to the Linux Bash shell experience, and you’ll be much happier with it.
Using the Windows 11 SSH client to interface with Linux virtual machines
You’ll work with Windows 11 the same way, except that the menu entries for the Command Prompt and PowerShell are in different places. The Command Prompt now has its own Terminal item on the main menu, and PowerShell is now under the Windows Tools submenu. Windows 11 also has a third option, which is a built-in Ubuntu virtual machine. You’ll see an icon for that in the bottom taskbar.
Cygwin versus the Windows shell
Both Cygwin and the SSH client that’s built into Windows 10/11 have their pros and cons. In favor of Cygwin, you can install a variety of packages to customize it pretty much any way you want. Also, Cygwin stores the SSH known_hosts and keys files in the .ssh directory of the user’s home directory, which is where you’d expect to find them if you’re used to working with Linux. If you use the SSH client that’s built into Windows, you’ll have to search for these files in other locations.
In favor of the Windows 10/11 built-in SSH client, there’s the fact that it’s already there. Also, it’s much easier to use if you need to access your normal Windows folders because Cygwin traps you in its own sandboxed directory structure.