In this section, we will look at the mandatory inventory used to start development with WildFly 10.
Development in WildFly
Operating system
WildFly is open source. Open source is a vast world of applications and ideas. So an open source operating globally system will get a regard point by us. In this book, we will work with Linux, a very important open source operating system. So we will guide you through bash console samples. Bash is the most used command line tool for managing an operative system, mainly Linux. Of course, any OS can work.
Java
Usually Java EE and Java Standard globally follow the same path. For example Java EE 7 specifications recommend Java standard 7 as the JDK but none denies to use a major version of Java. A JDK version greater than 7 respect the EE never gave problems, even WildFly recommends using the last version of Java 8 and WildFly 10 denies to use Java 7. So we assume in our exercises that Java standard 8 is installed in your machine.
Application server
Of course, we will use the latest version of WildFly to work with enterprise components and web applications. WildFly, as an application server, provides a deploy system that you can install inside your application and use. It can be done through a filesystem, adding a package in the deploy directory, or through the console. The deployment system will be seen in detail in Chapter 18, Deployment.
The new version is 10.1.0. It can be downloaded from http://download.jboss.org/wildfly/10.1.0.Final/wildfly-10.1.0.Final.zip . The installation is very simple. Just extract the downloaded ZIP and put it in your preferred folder.
Before we start the application server, we need to create a default admin user so that we can use the management web console. Through the command line, go to the WildFly root folder under the bin directory and execute this command:
./add-user.sh
After you will get the following output:
What type of user do you wish to add?
a) Management User (mgmt-users.properties)
b) Application User (application-users.properties)
(a): a
Enter the details of the new user to add.
Using realm 'ManagementRealm' as discovered from the existing property files.
Username : admin
The username 'admin' is easy to guess
Are you sure you want to add user 'admin' yes/no? yes
Password recommendations are listed below. To modify these restrictions edit the add-user.properties configuration file.
- The password should be different from the username
- The password should not be one of the following restricted values {root, admin, administrator}
- The password should contain at least 8 characters, 1 alphabetic character(s), 1 digit(s), 1 non-alphanumeric symbol(s)
Password : admin
WFLYDM0098: The password should be different from the username
Are you sure you want to use the password entered yes/no? yes
Re-enter Password : admin
What groups do you want this user to belong to? (Please enter a comma separated list, or leave blank for none)[  ]:
About to add user 'admin' for realm 'ManagementRealm'
Is this correct yes/no? yes
Added user 'admin' to file '/Users/lucastancapiano/wildfly-10.1.0.Final/standalone/configuration/mgmt-users.properties'
Added user 'admin' to file '/Users/lucastancapiano/wildfly-10.1.0.Final/domain/configuration/mgmt-users.properties'
Added user 'admin' with groups  to file '/Users/lucastancapiano/wildfly-10.1.0.Final/standalone/configuration/mgmt-groups.properties'
Added user 'admin' with groups  to file '/Users/lucastancapiano/wildfly-10.1.0.Final/domain/configuration/mgmt-groups.properties'
Is this new user going to be used for one AS process to connect to another AS process?
e.g. for a slave host controller connecting to the master or for a Remoting connection for server to server EJB calls.
yes/no? yes
To represent the user add the following to the server-identities definition <secret value="YWRtaW4=" />
Now you have an admin user with credentials--,user: admin and password: admin
Once you have created the user you can start WildFly with the following command inside the bin directory of the root of WildFly:
./standalone.sh
When you log in, the console will show the row:
INFO [org.jboss.as] (Controller Boot Thread) WFLYSRV0025: WildFly Full 10.1.0.Final (WildFly Core 2.2.0.Final) started in 20718ms - Started 580 of 816 services (405 services are lazy, passive or on-demand)
This means that the WildFly application server has started.
The web management console can be used by connecting from http://localhost:9990/console.
In the next chapter, we will see how to work with it.
Build system
Many tools can be used in Java to build applications. Open source products are Ant, Ivy, Maven, and the more recent Gradle. For convenience, as Maven the most popular in this book we will use it to build our examples.
Apache Maven is a software project management and comprehension tool. Based on the concept of project object model (POM), Maven can manage a project's build, reporting, and documentation from a central piece of information.
We will use Maven to manage our projects. With Maven we will get a simple starting point to build, execute, and test our projects. Maven 3.3.9 is downloadable from https://maven.apache.org/download.cgi.
Since we have installed JDK 8 in our machine, we can extract the downloaded Maven ZIP and put it in any folder that we prefer. After that, we will need a system variable, MAVEN_HOME, for our system. In Linux, you can set MAVEN_HOME by editing the .bash_profile file in your home directory:
vi $USER_HOME/.bash_profile
export MAVEN_HOME=/$your_home_path/apache-maven-3.3.9
export path:$MAVEN_HOME/bin
The second row lets you use Maven in any folder path. So, for example, in /etc, you can run the Maven command mvn. A Maven guide is not given in this book, but for those who don’t know Maven, we will use only three commands:
- mvn clean: Used to clean the project
- mvn install: Used to build, install, and test the project and create the packages to deploy in WildFly
- mvn test: Used only to execute test cases
All the commands can be used together. For example:
The mvn clean install command will execute both the commands, first cleaning the project and then installing it. If you avoid tests it's enough add the property:
mvn clean install -DskipTests
Maven can be used only in the folder for Maven projects. A Maven project is recognized by a file contained in the root of the folder, pom.xml. It is the key descriptor of the Maven projects. For example in this POM file you put the dependency libraries of the projects. When you install a project, it automatically downloads the mandatory dependencies if they are not present and it compiles with them.
Structure of the exercises
This book provides different examples structured by projects divided by part and chapter. Each chapter excluding the introduction has its own project Maven sample. The exercises can be downloaded from the link provided in the Preface of this book.
Once you have downloaded the project, you will notice a tree similar to this:
Wildfly-book
    Business-components
        Injection
            pom.xml
Persistence
            pom.xml
…
        pom.xml
  Class-loading
        …
        pom.xml
  …
  pom.xml
If you are interested only in testing the examples inside the Chapter 3, Persistence, you need only to go in the persistence folder and start the Maven commands seen before.
Tests
All our examples are testable inside WildFly containers. A good test framework to execute the tests inside components is Arquillian. Arquillian is the official test framework of WildFly. With Arquillian, by starting simple JUnit integration tests by command line or an IDE, we can see the execution inside a container. So in a hide mode, Arquillian starts the WildFly containers, deploys the components, and in the end executes the tests inside the containers. It's a very important product for the integration tests.
Arquillian is configured through Maven in the pom.xml files. Now, we see the details of the wildfly-book root pom.xml and see the dependencies introduced before in the build system paragraph:
<dependency>
   <groupId>junit</groupId>
   <artifactId>junit</artifactId>
   <scope>test</scope>
</dependency>
<dependency>
   <groupId>org.jboss.arquillian.junit</groupId>
   <artifactId>arquillian-junit-container</artifactId>
   <scope>test</scope>
</dependency>
<dependency>
   <groupId>org.wildfly.arquillian</groupId>
   <artifactId>wildfly-arquillian-container-managed</artifactId>
</dependency>
There are three important dependencies to work with Arquillian and integration tests:
- JUnit is one of the most important frameworks used to write repeatable tests. It is the first Java framework that introduces test-driven development. It uses assertion concepts and Java annotations as configuration. Here's a basic test case:
public class MyTestCase {
   @Test
   public void shouldSumMyNumbers() {
      Assert.assertEquals(10, Numbers.sum(8,2));
   }
}
This class can be executed directly through Maven or the IDE using its instruments:
- The Arquillian JUnit container provides the components to hook to JUnit. It provides the Arquillian class configuration. Simply add this configuration to your JUnit test case and it will work inside a container:
@RunWith(Arquillian.class)
public class MyTestCase {
   ….
}
- The Arquillian WildFly container manager tells Arquillian what container to start when the unit test is launched. Through system or Maven properties, it automatically starts a WildFly instance if the deployment is configured. Here a sample deploy configuration in our test:
@Deployment
public static WebArchive createWebDeployment() {
       final WebArchive war = ShrinkWrap.create(WebArchive.class, "resource-injection-test.war");
       war.addAsWebInfResource(MyTestCase.class.getPackage(), "web.xml", "web.xml");
       return war;
}
Through the @Deployment annotation, we ask Arquillian to create an empty enterprise package to deploy. Once the JUnit test is launched, Arquillian automatically deploys the enterprise package and puts it inside the test class so that it can be executed inside the WildFly container exposed in the type of package, in this case, a WAR (web archive).
IDE
Three IDEs are recommended.
Netbeans IDE
You can quickly and easily develop desktop, mobile, and web applications with Java, JavaScript, HTML5, PHP, C/C++, and very importantly Java EE 7 support.
NetBeans IDE is free, open source, and has a worldwide community of users and developers.
IntelliJ IDEA
Each aspect of IntelliJ IDEA is exclusively organized to enhance the productivity of the developer. It provides a complete support for Java EE 7.
Moreover, the analysis and the design of the code make development a comfortable experience and very productive.
Eclipse IDE
Eclipse is a moduleable open source IDE written in Java to work in Java and other languages thanks to a good plugin management. It was started by IBM and later donated to the community. It manages all the Java EE components with good graphics tools. In this book, we will use Eclipse, the Neon.2a Release (4.6.2) version. It can be downloaded from https://www.eclipse.org/downloads/.
Importing exercises
Now, see how to import the exercises inside Eclipse. Eclipse works with a workspace and working sets. The workspace is a physical directory where we put our projects.
Working sets are logical folders used inside Eclipse as collectors of projects usually organized by argument.
For example, a set of projects that describe a forum can all be put together in a working set and we can call it forum. Another set of projects can be used for an air reservation application, so we can put them in another working set called air-reservation.
The exercises projects, as we mentioned before, are written as a modular tree structure with parents and children. The parent folders are used as collectors of chapters, so they are not important in our system environment. We now create two Eclipse working sets, one for the children (book) and one for the parents (book-parent).
So, when we start Eclipse for the first time, we should set the workspace by choosing the directory we want to use:
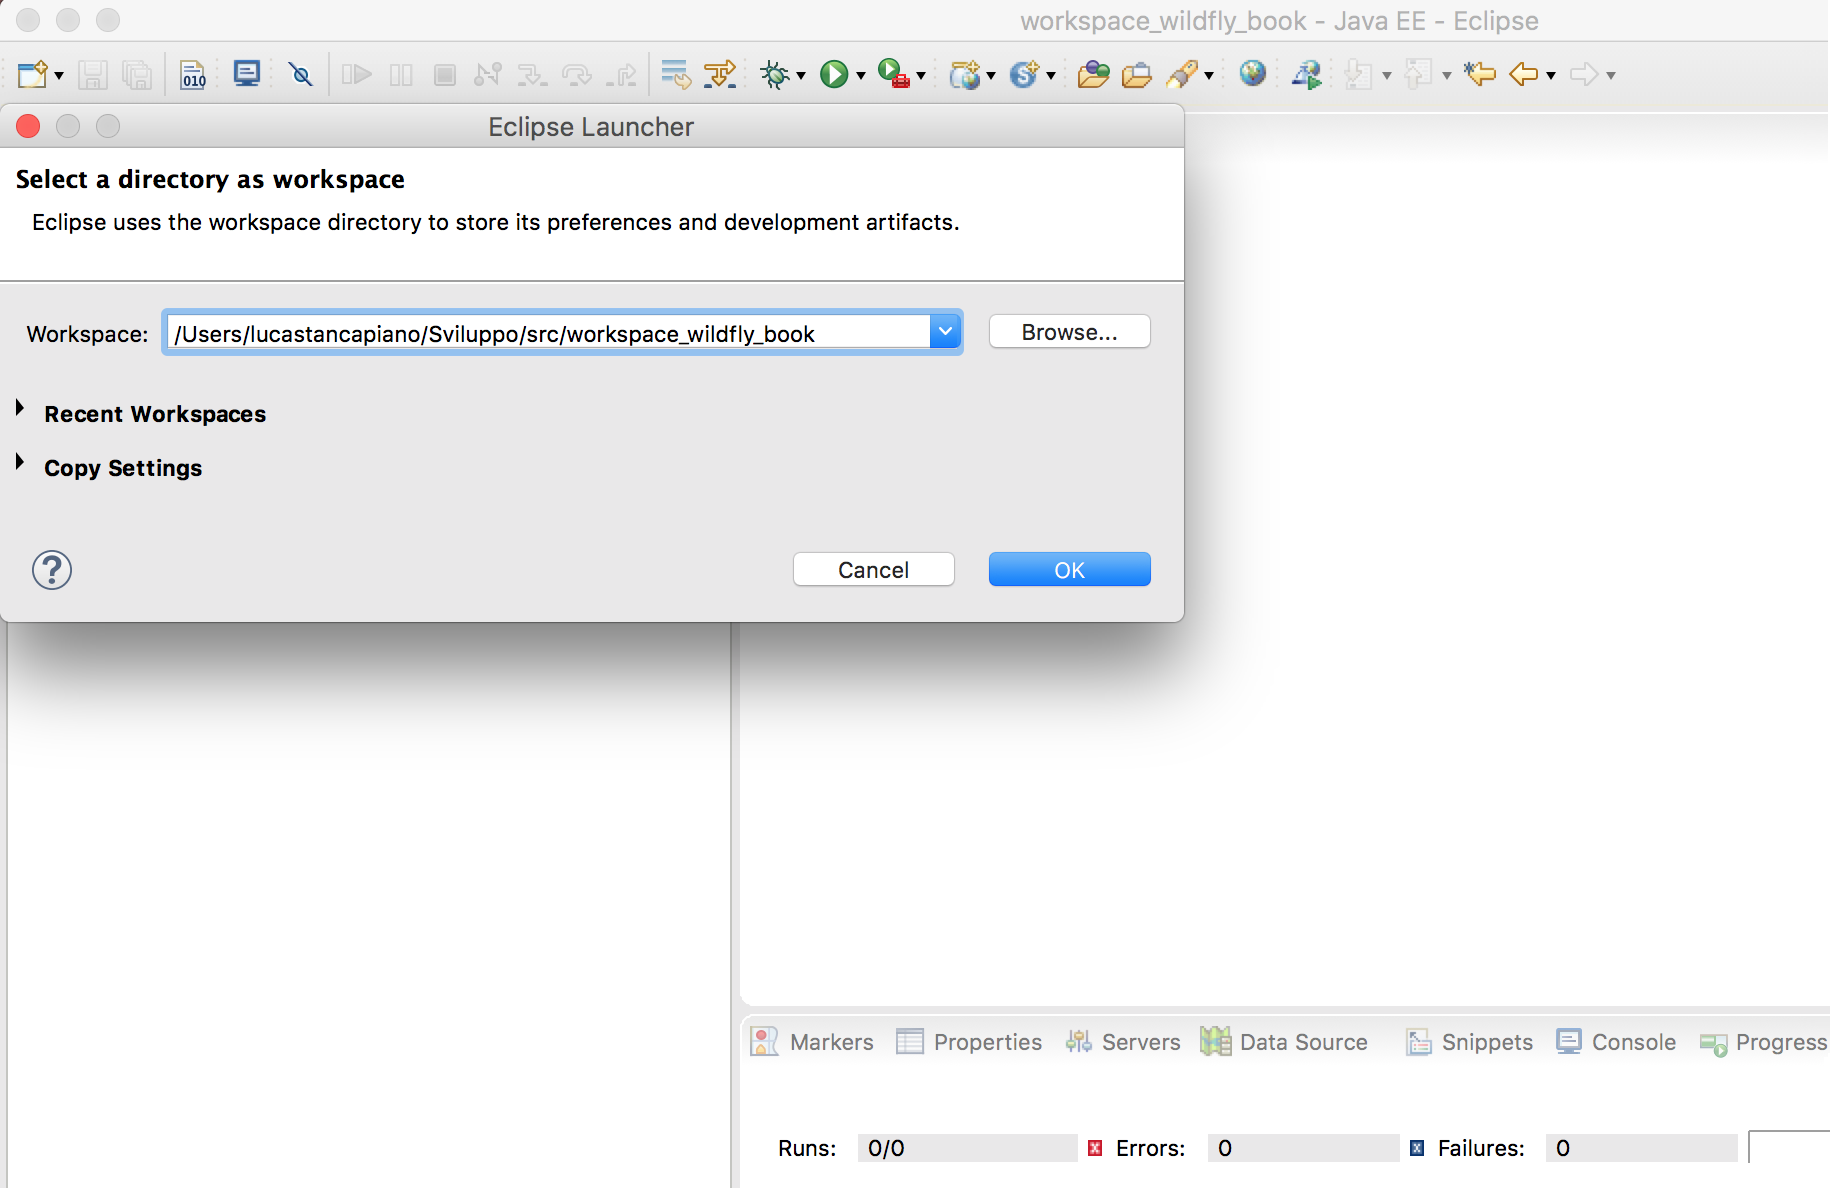
Okay, the workspace is ready. Now configure the view with the working sets. Click on the little down arrow near the Project Explorer title and choose Working Sets:
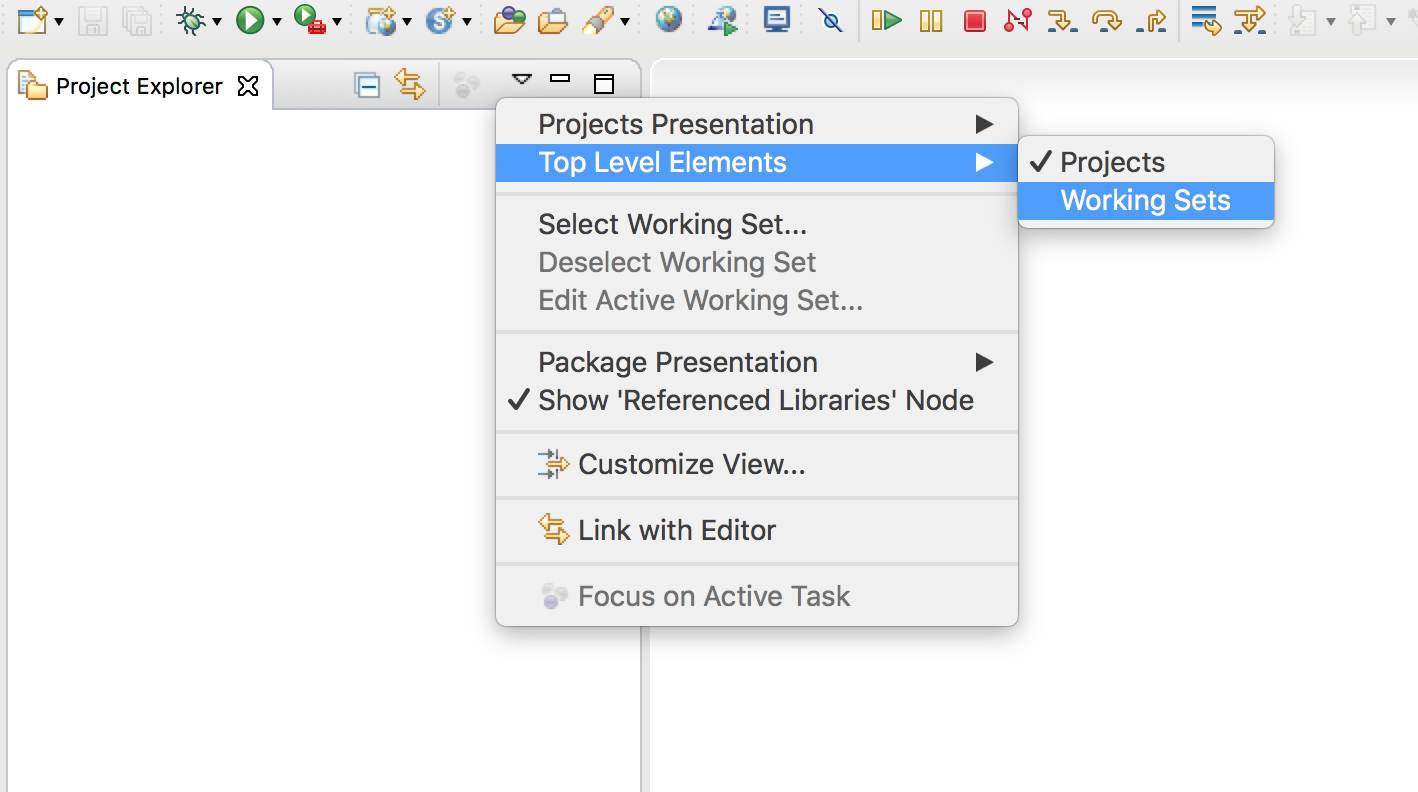
A new window will be opened. In this window, choose the following dialog so we can start to create the working sets:
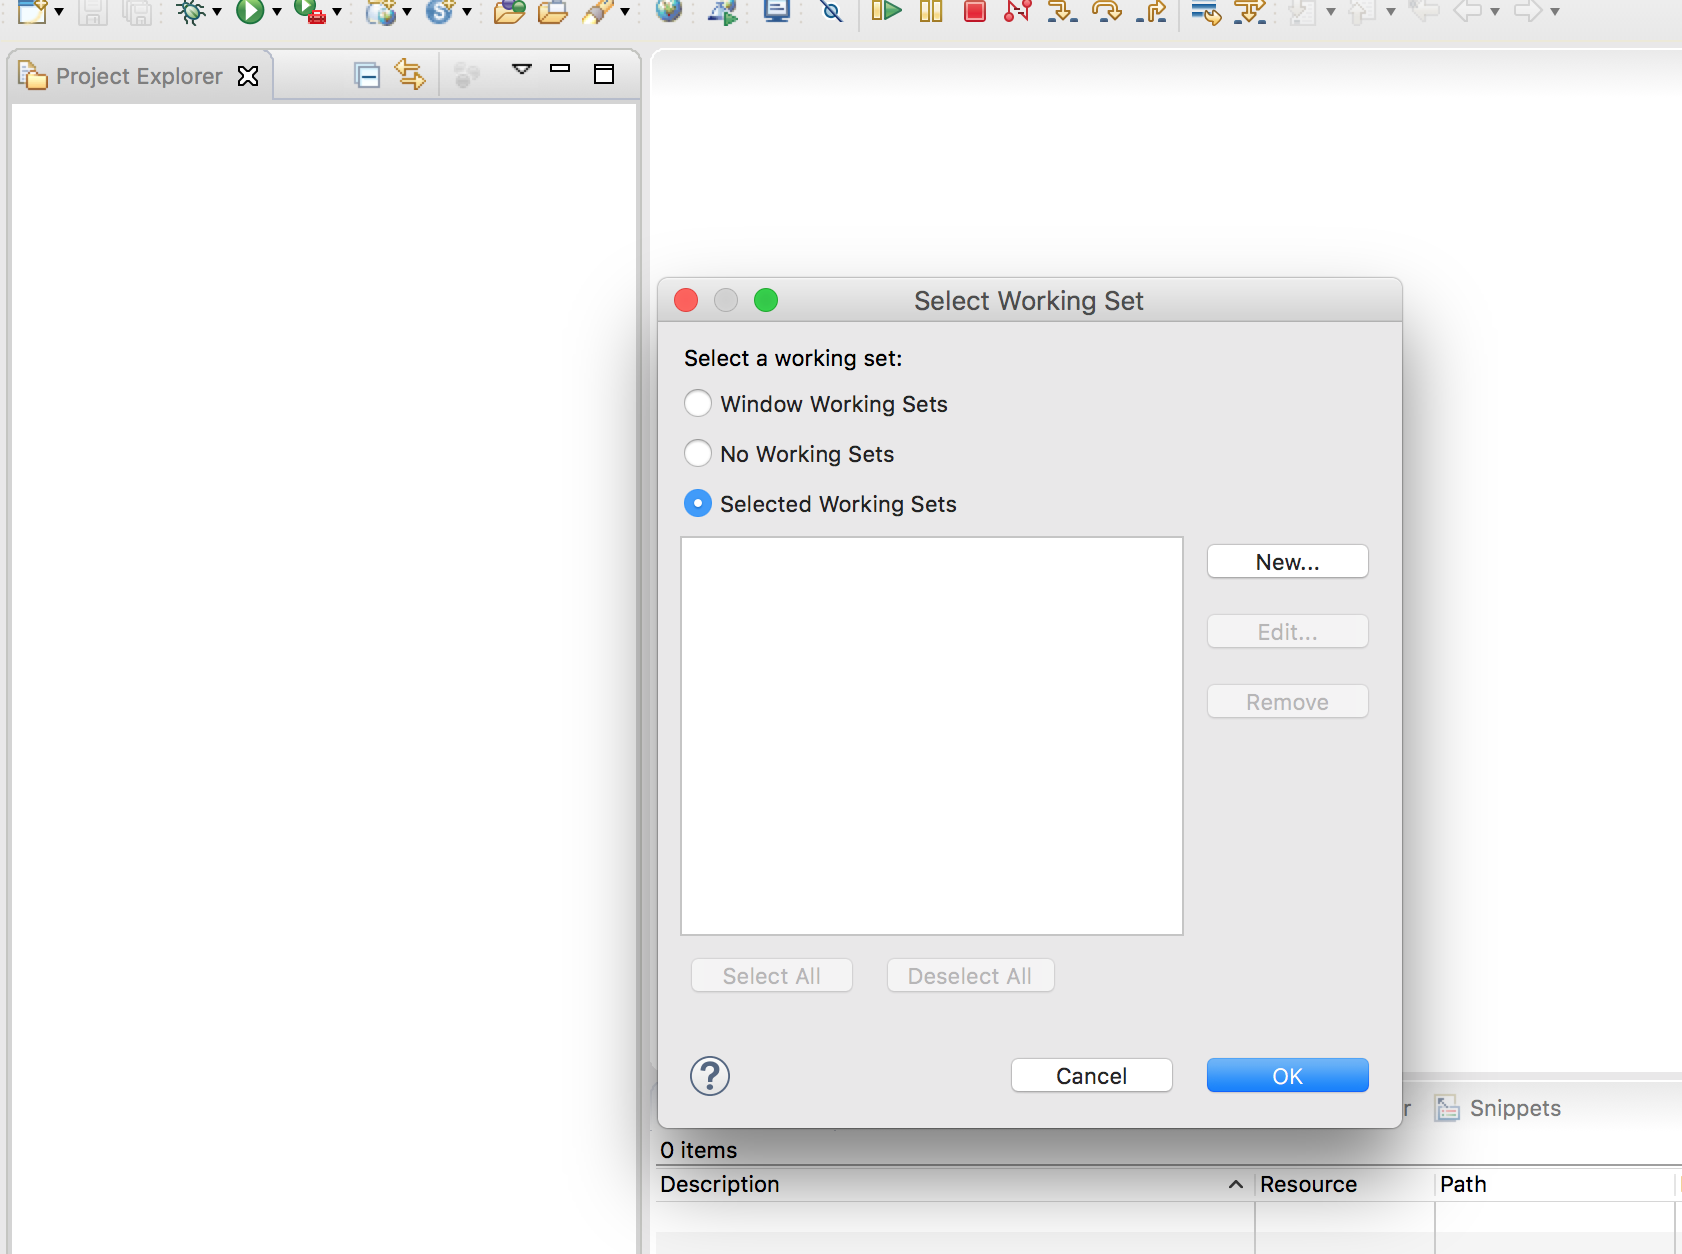
After that click on the New... button and choose the working set type:
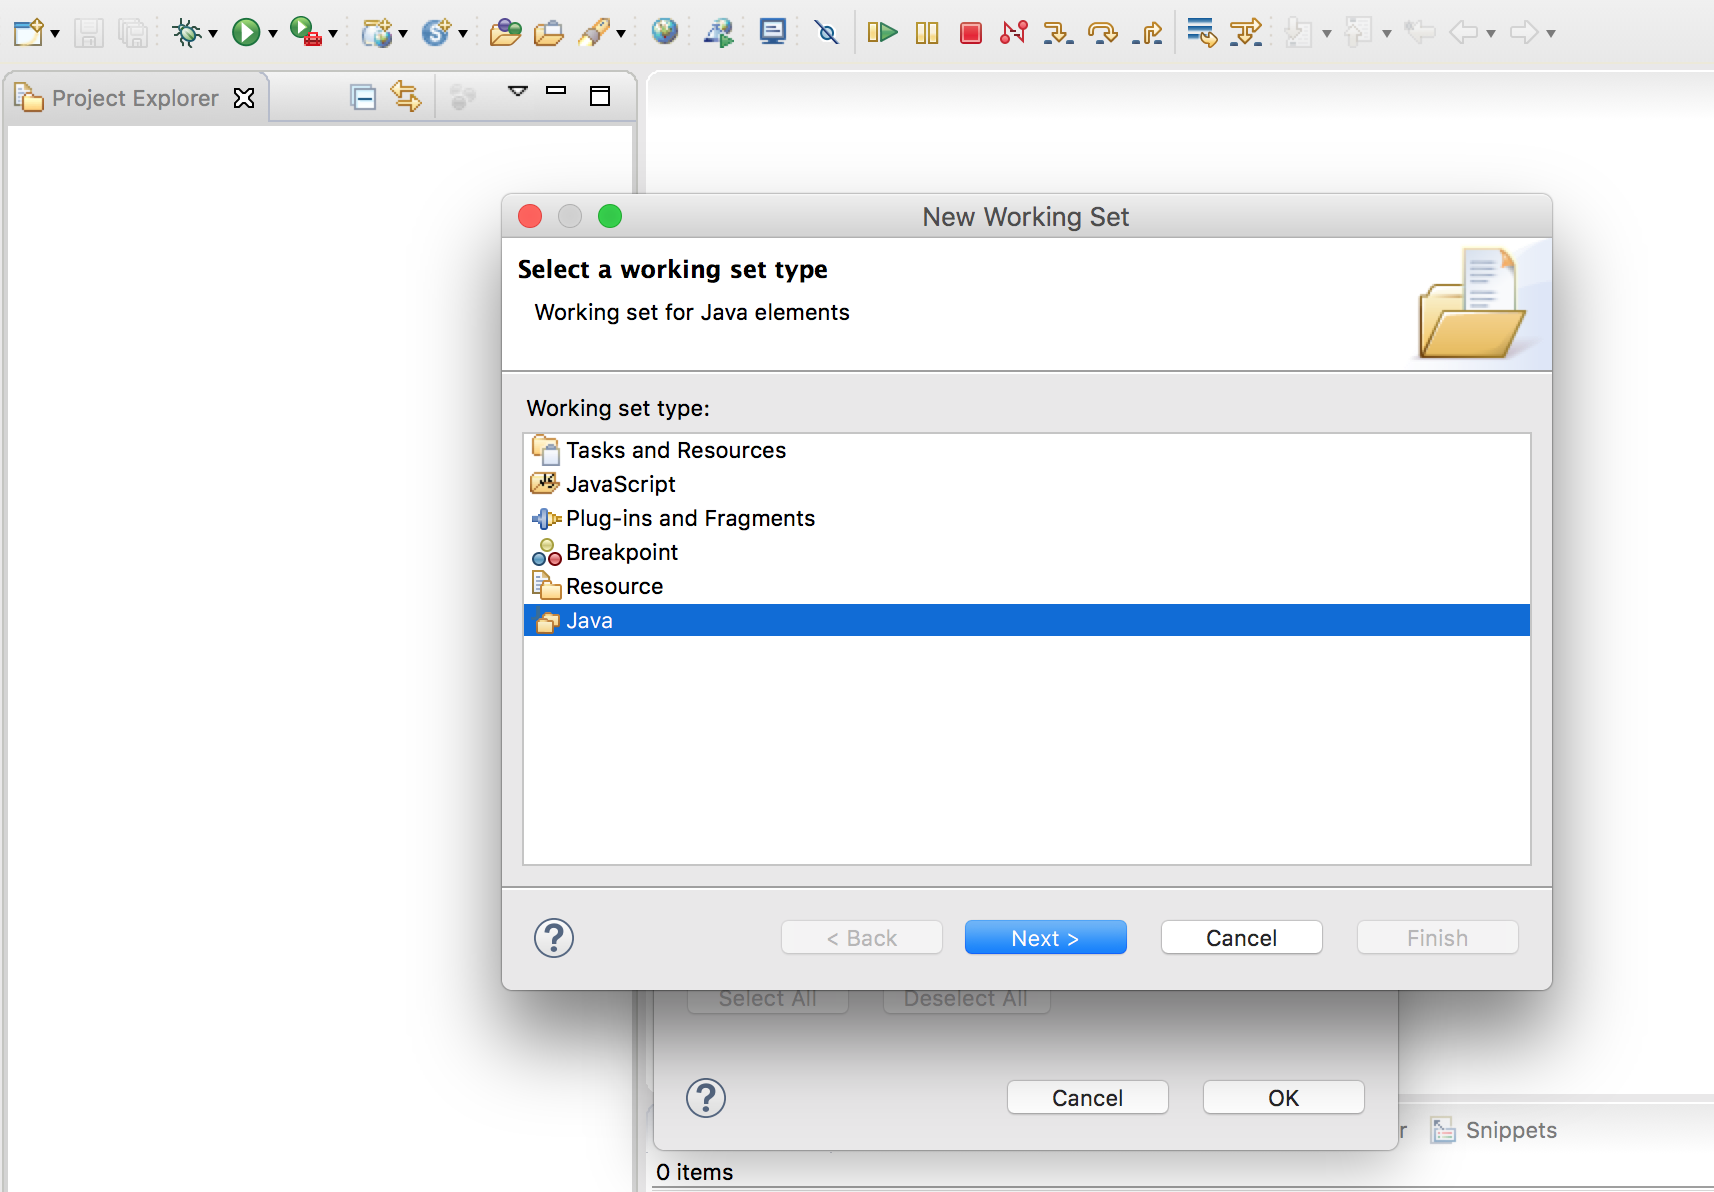
Java is the better type for us. After you have done this, click on the Next > button and create the new book working set:

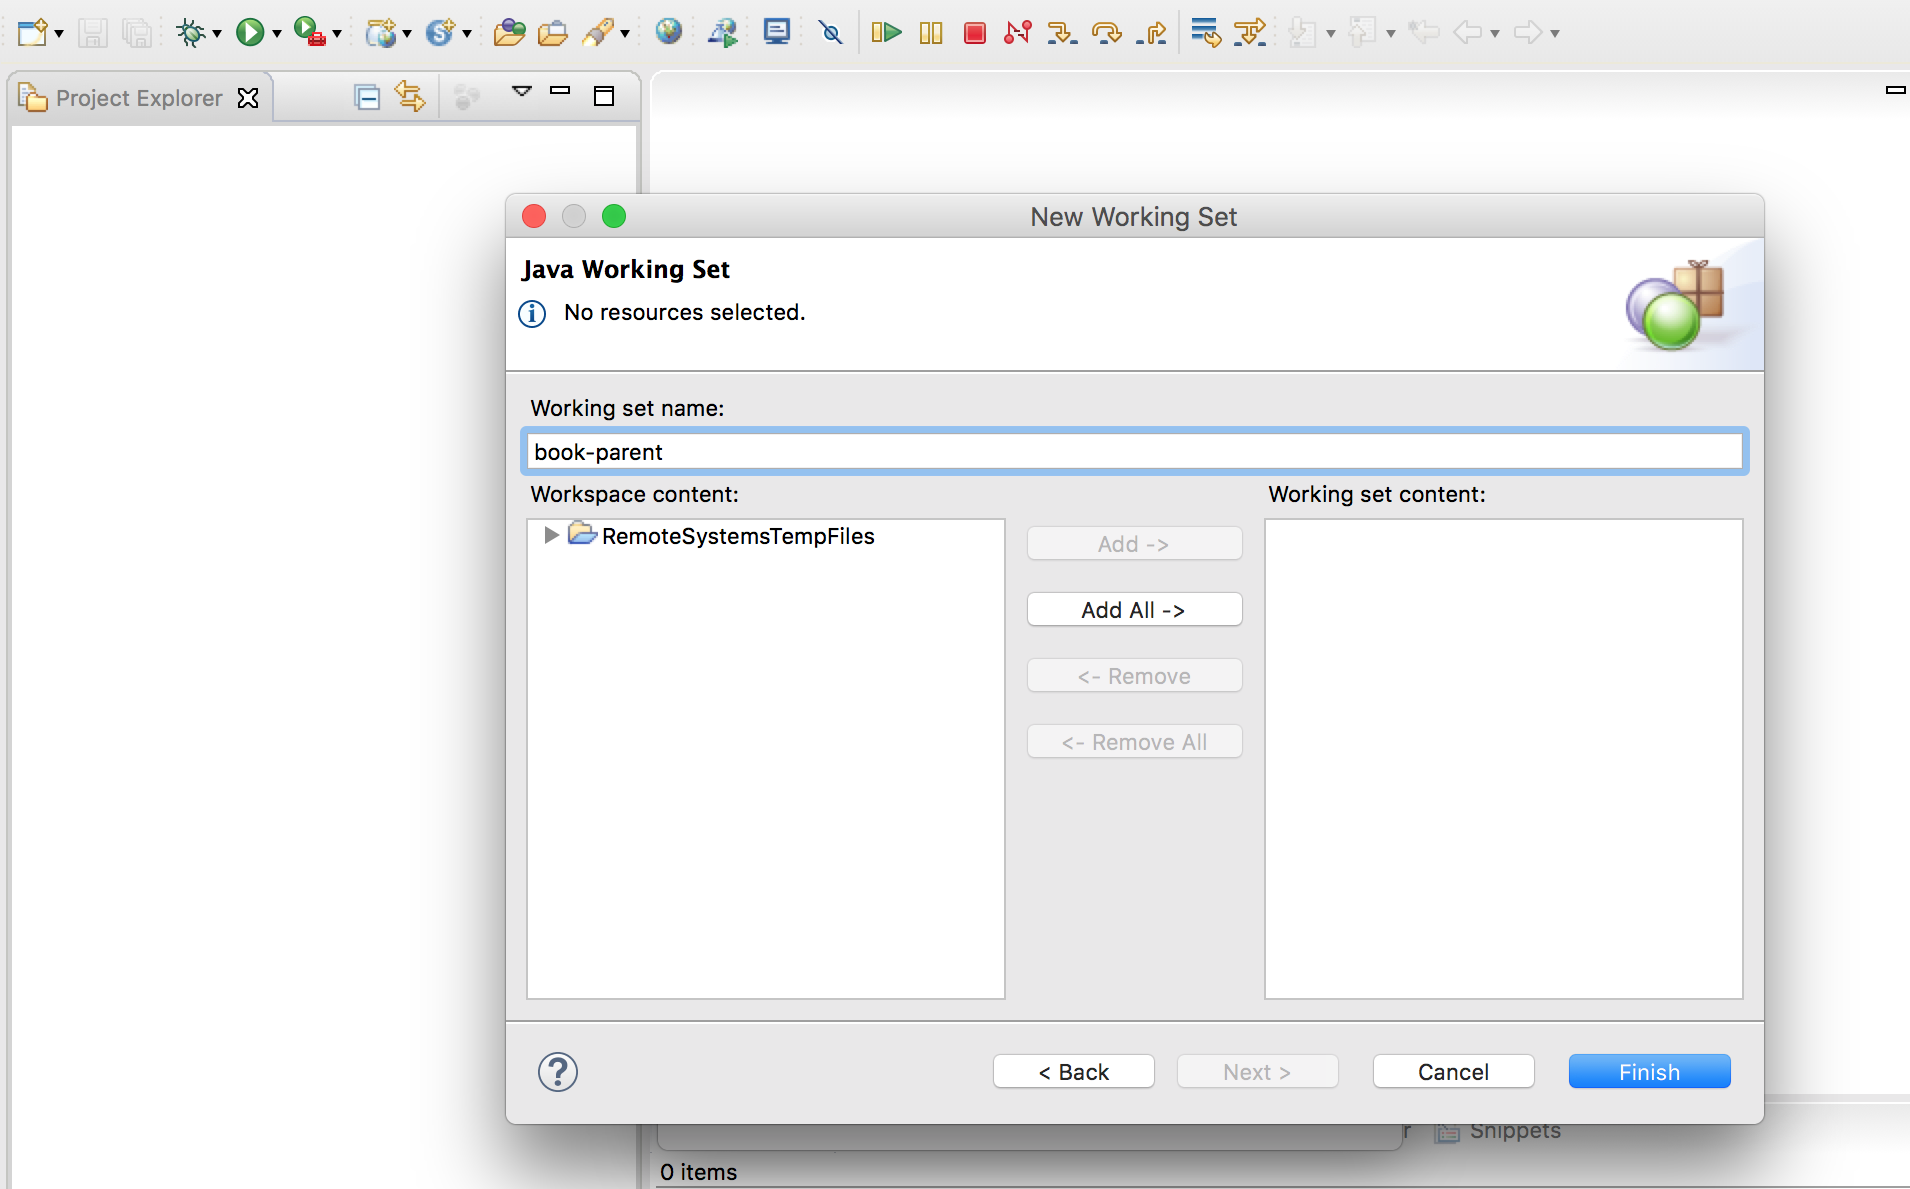
Repeat the same operations for the second working set: book-parent:
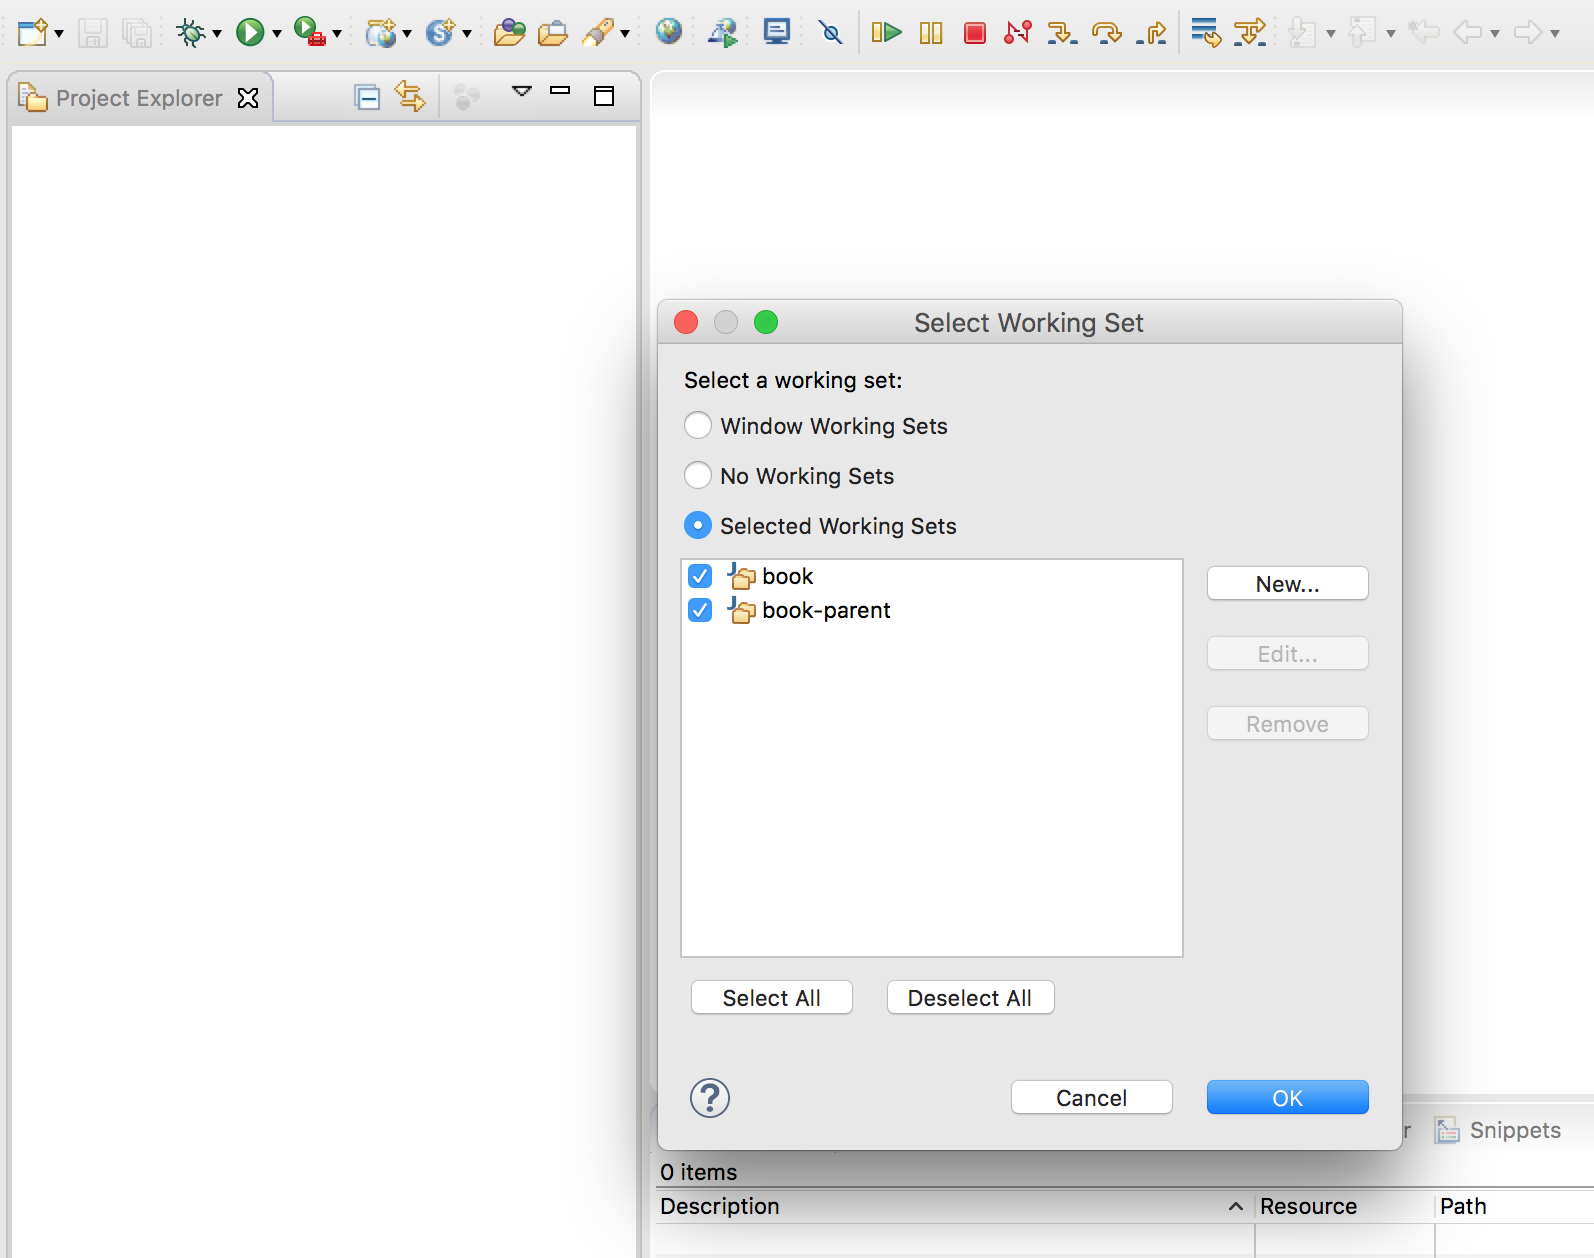
Now select all the created working sets and click on OK to end the configuration of the working sets:
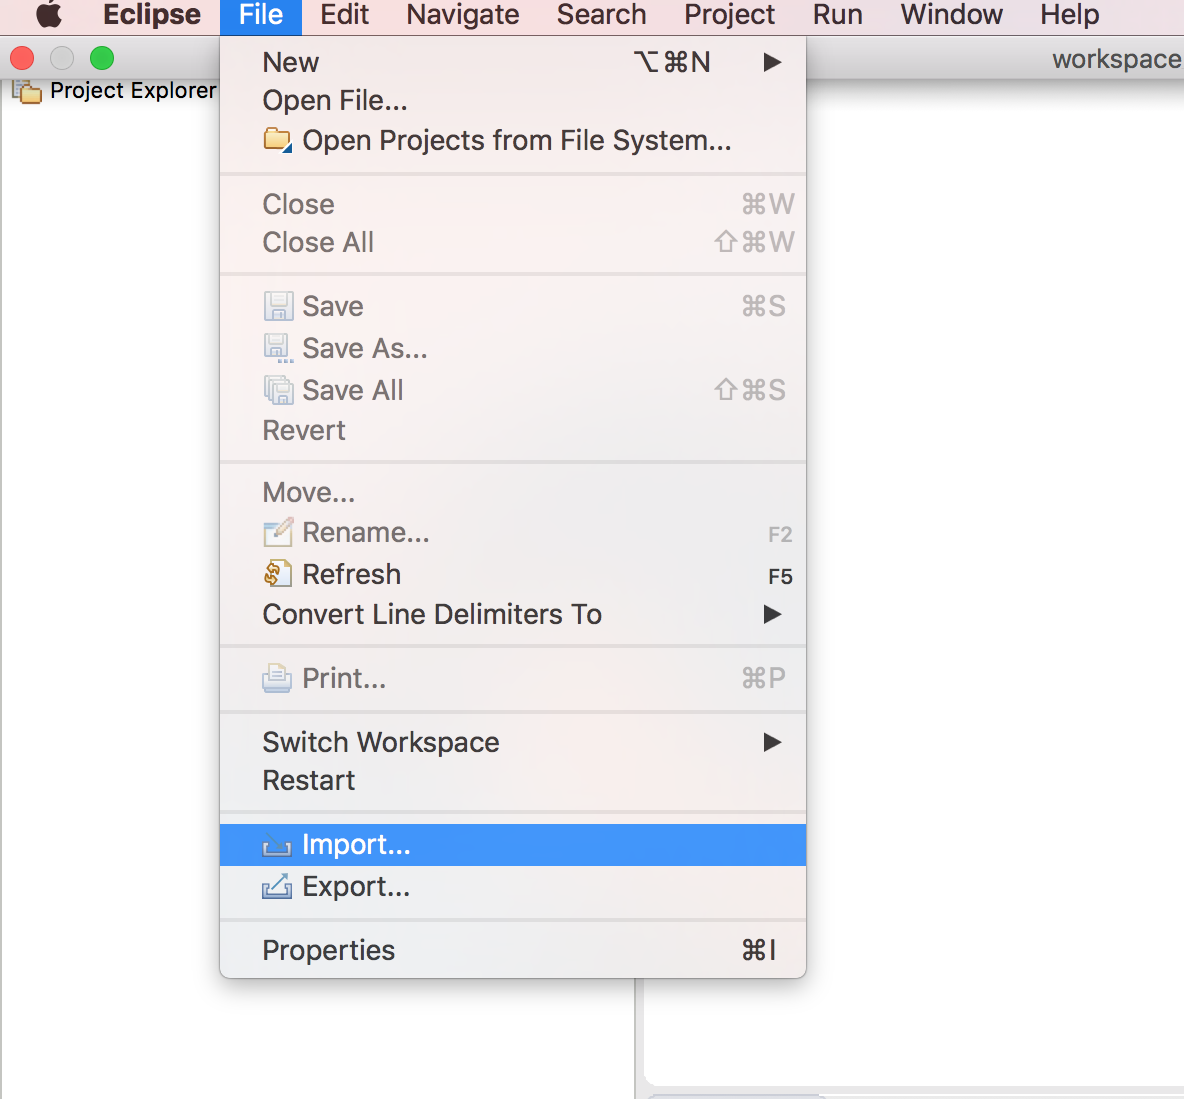
Now we have to import the exercises. Click on File | Import:
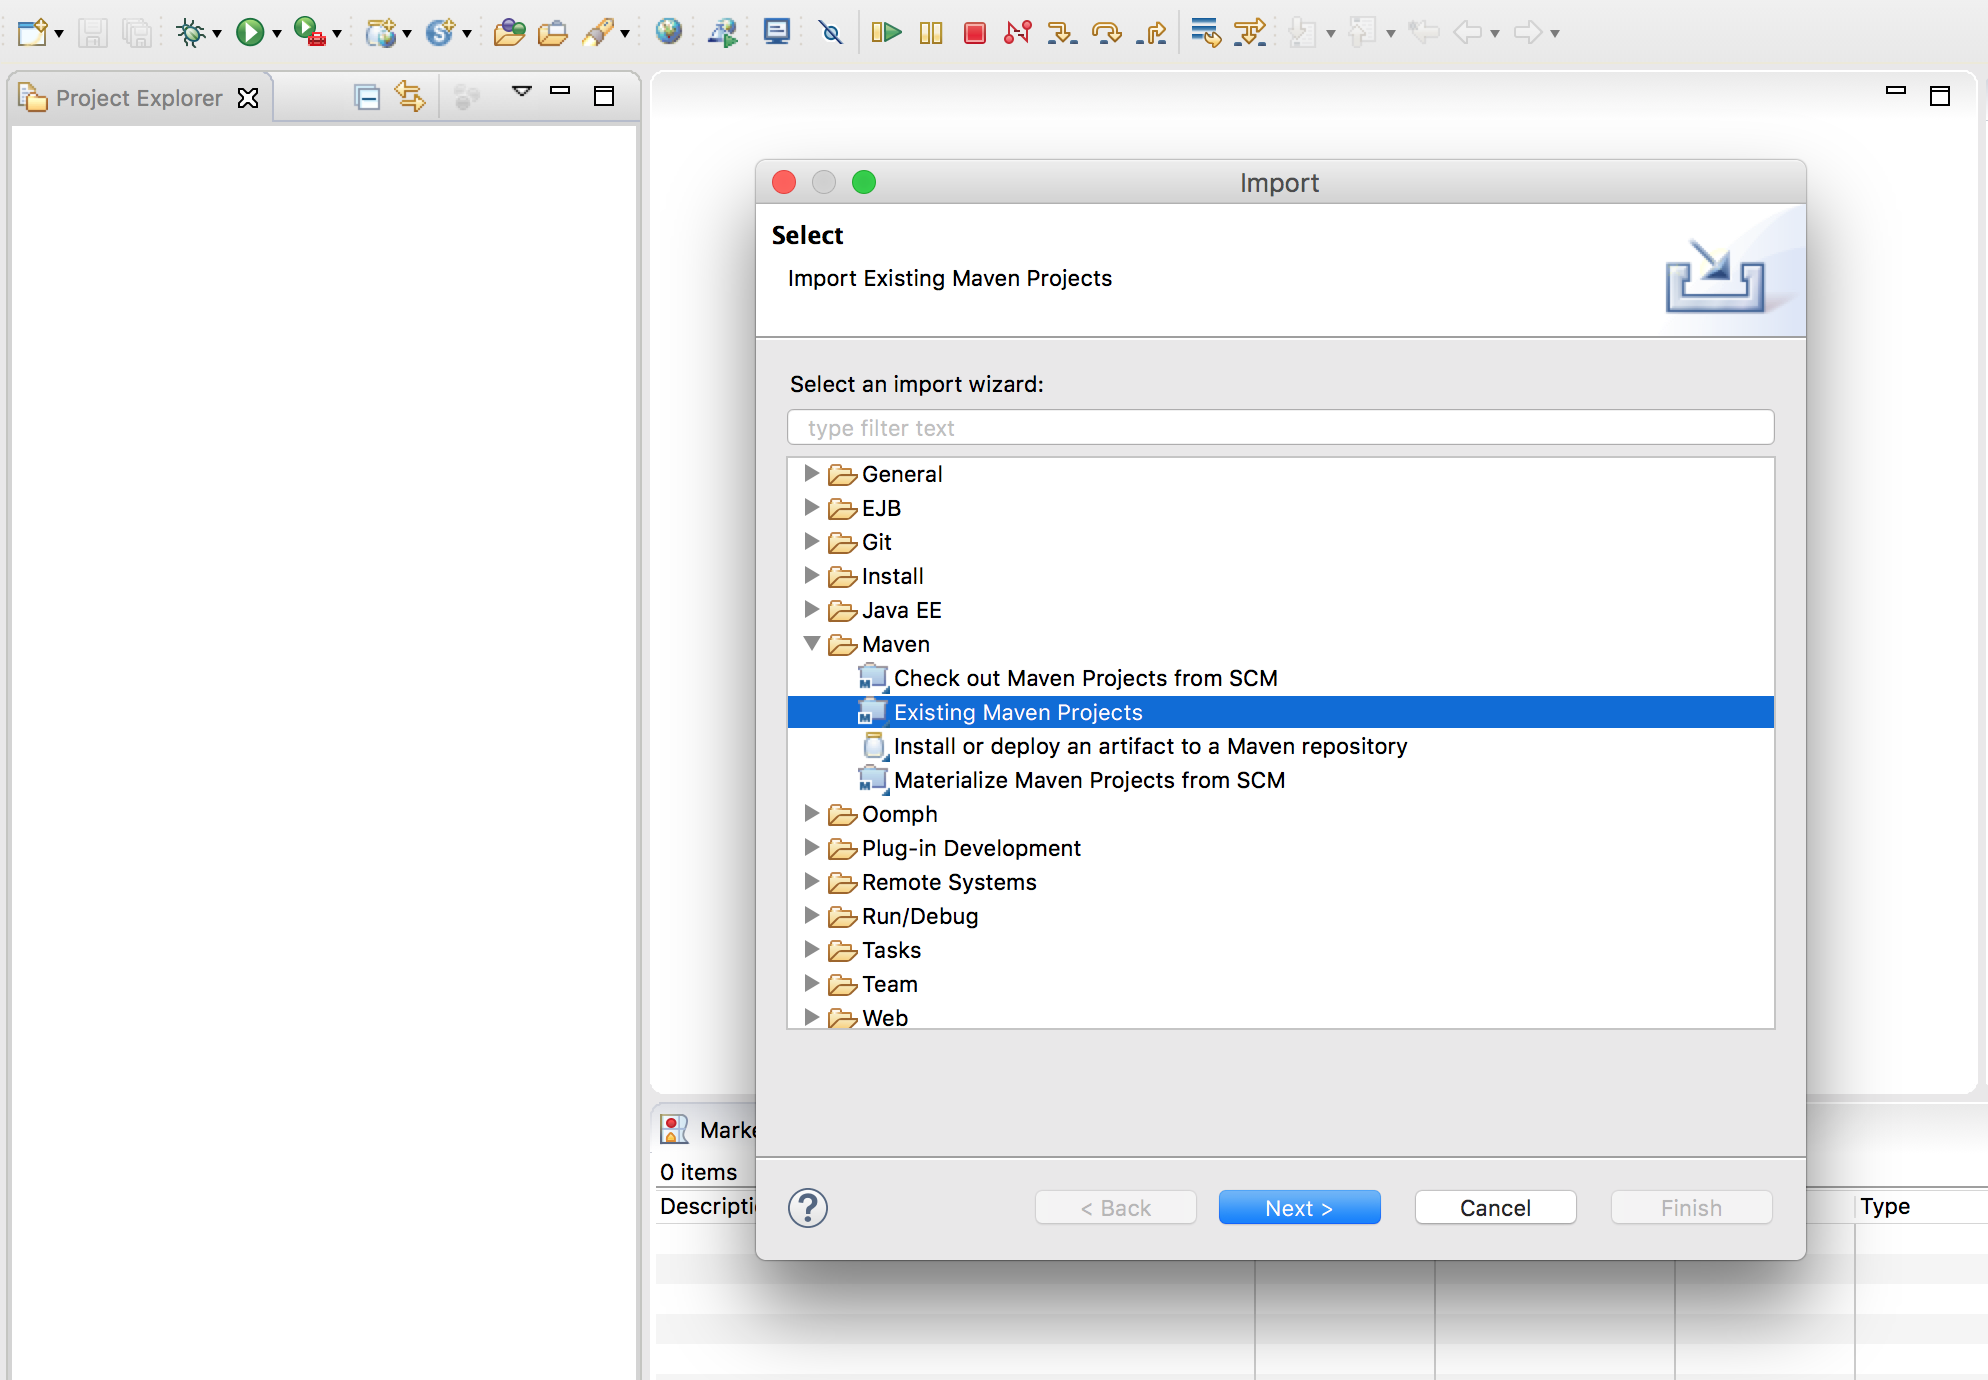
We are importing a Maven project so select Maven | Existing Maven Projects:
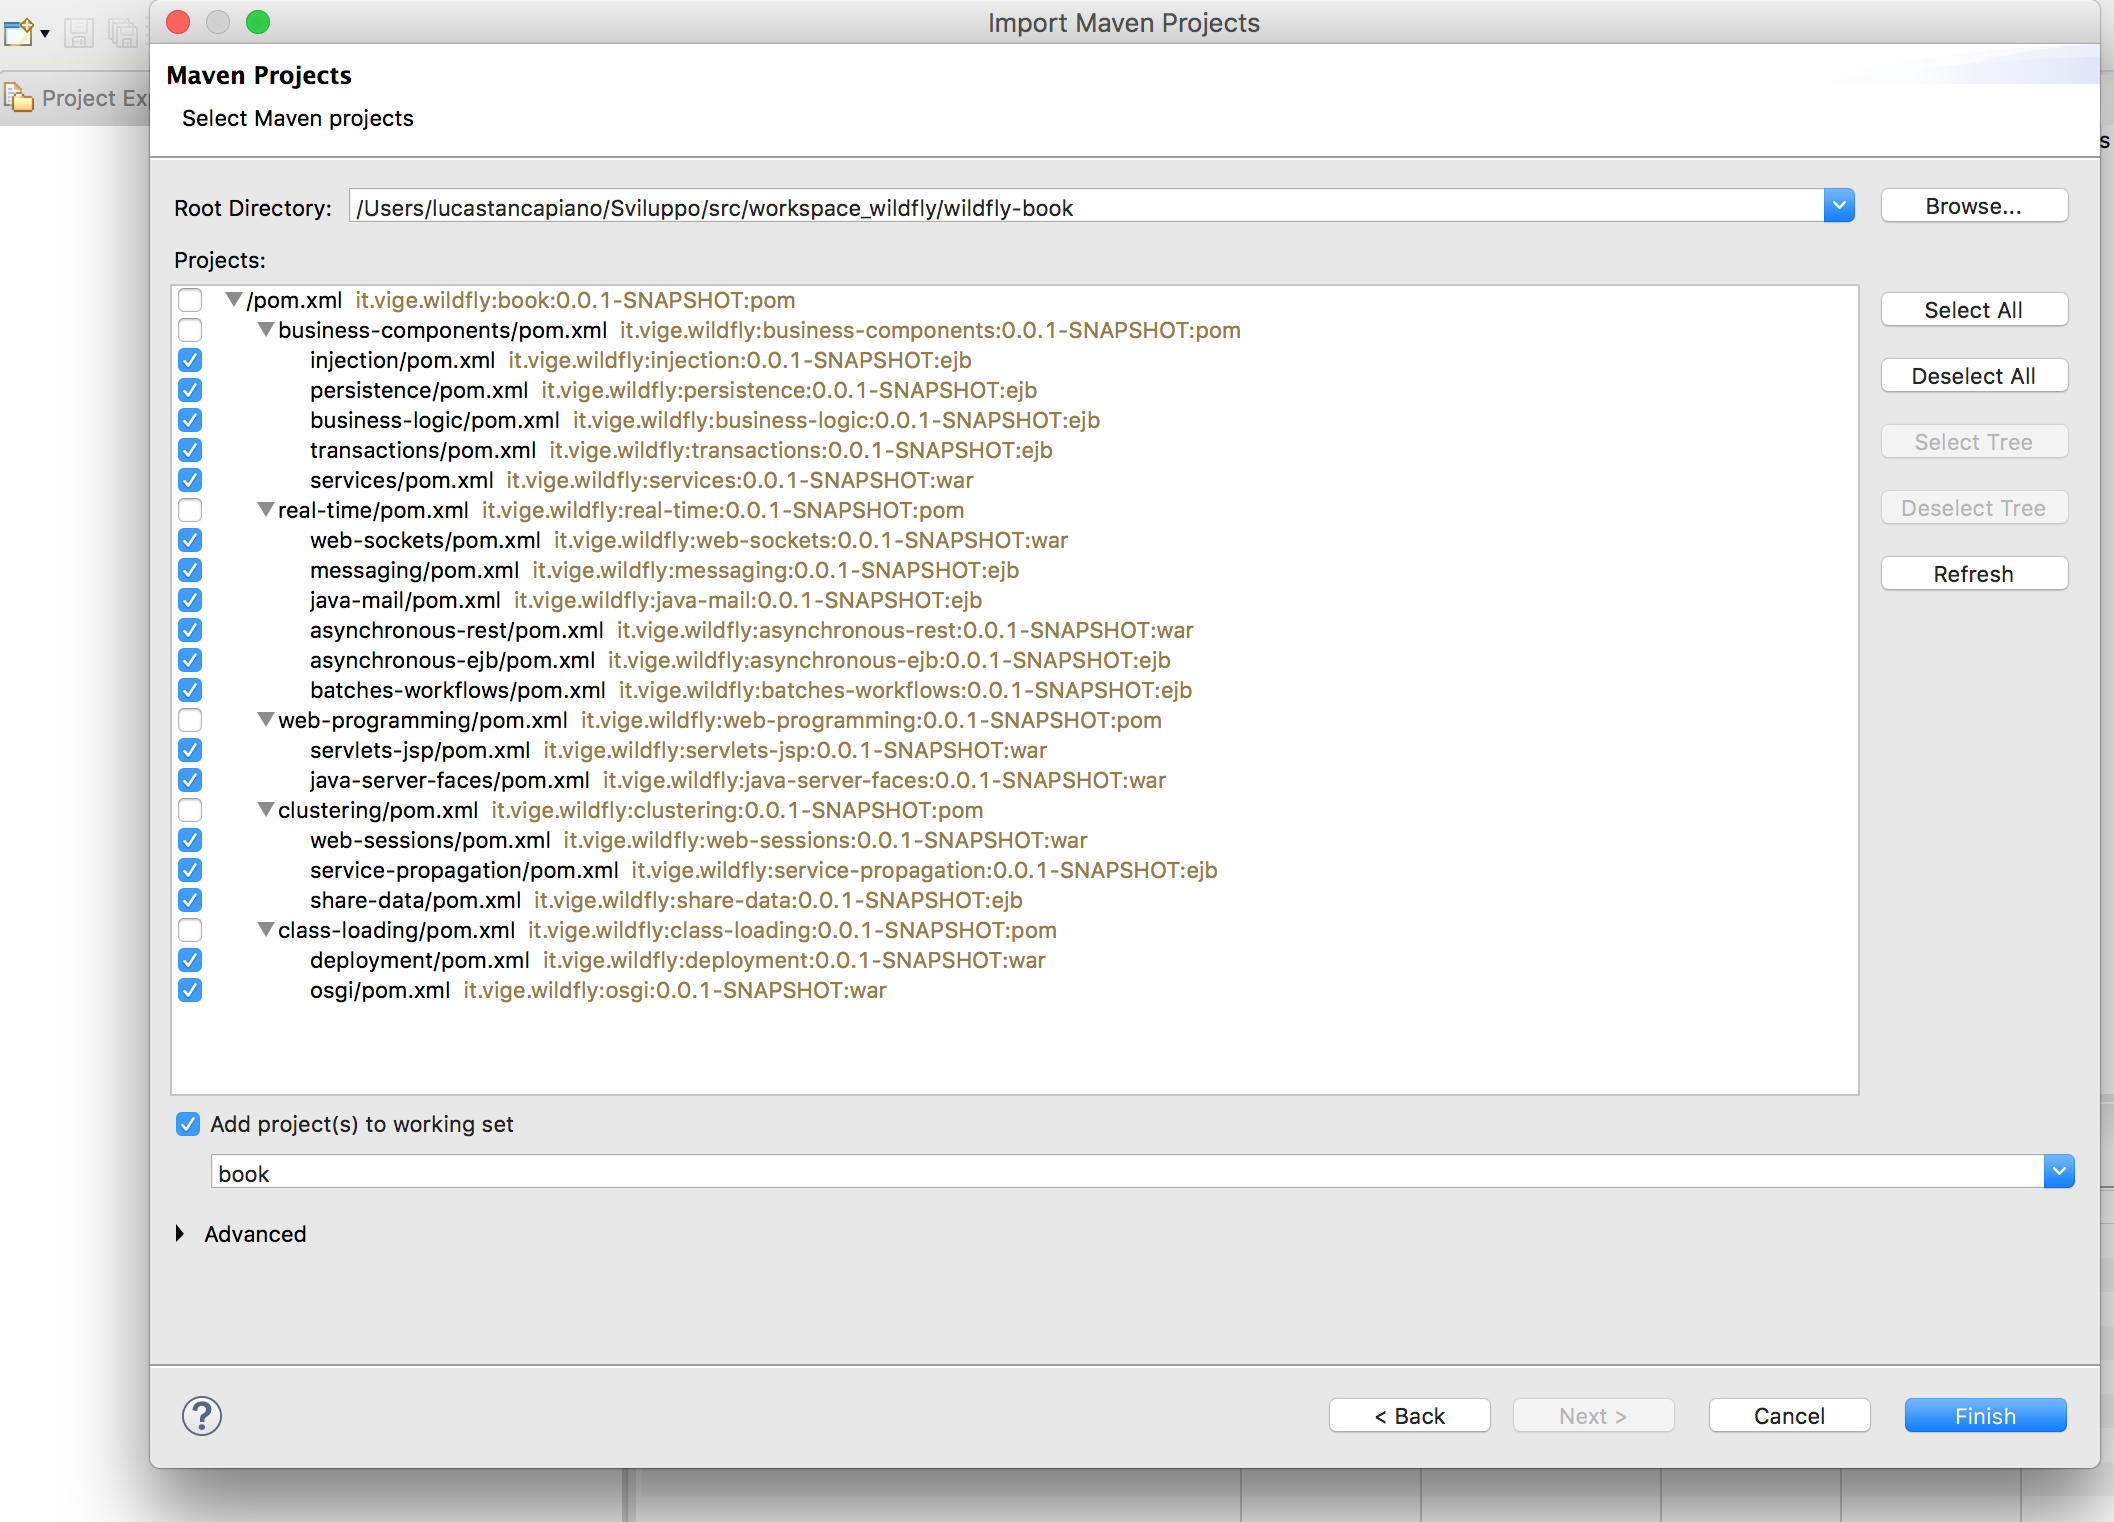
Click on Next; you should select the root directory for the exercises that you have downloaded. Once you have selected it, you will see a list of all sub- projects. By default the first working set you have created is selected, so choose child projects to add to it and click on Next >:
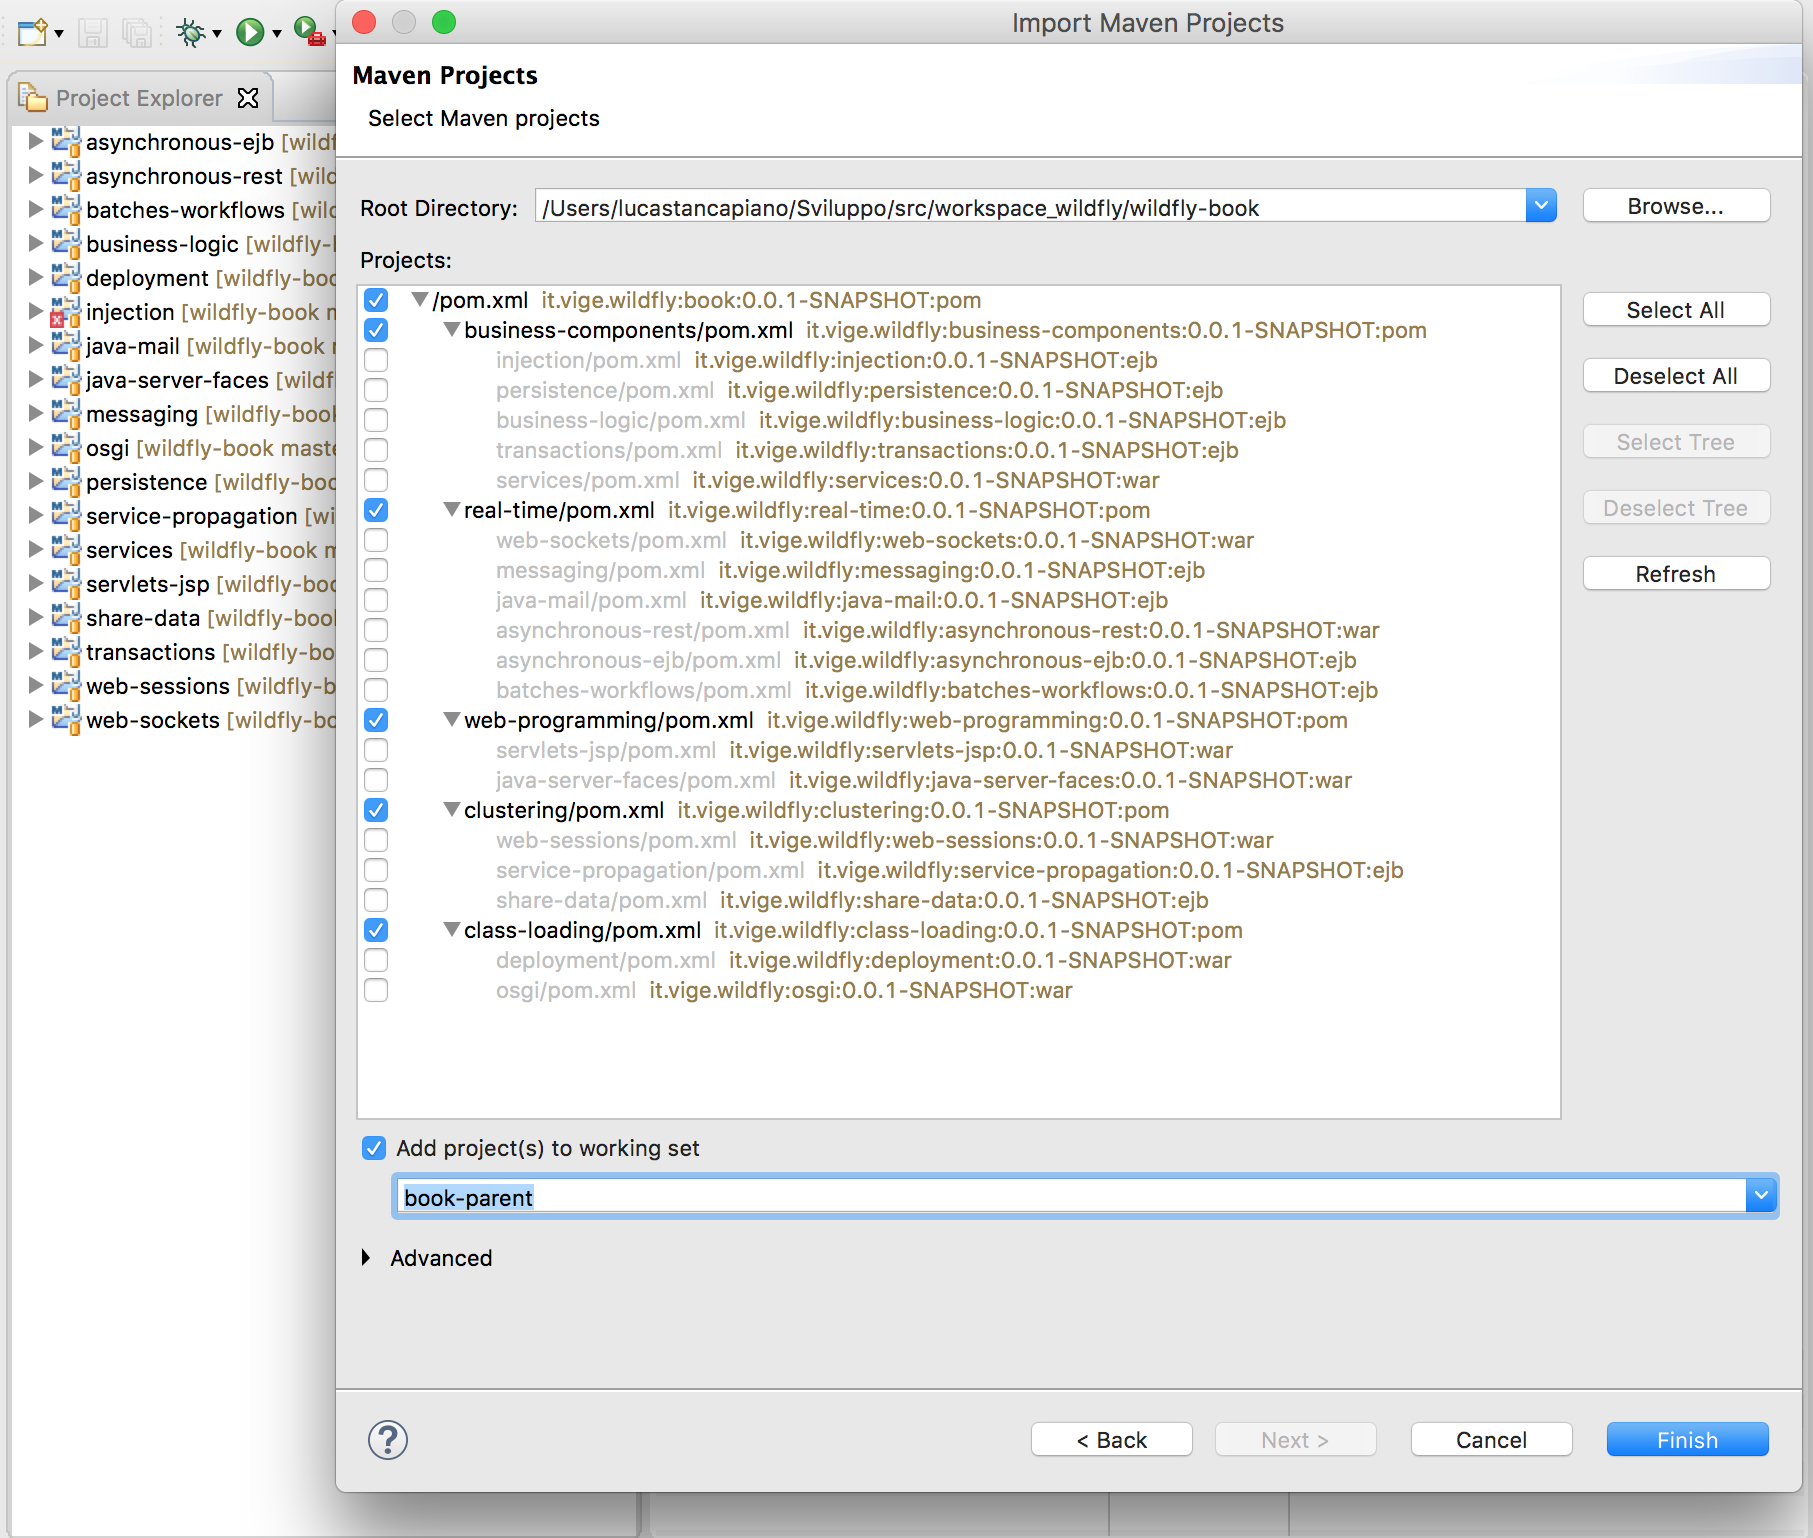
The same operation must be done with the parent projects. So now select the book-parent working set and click on Next >:
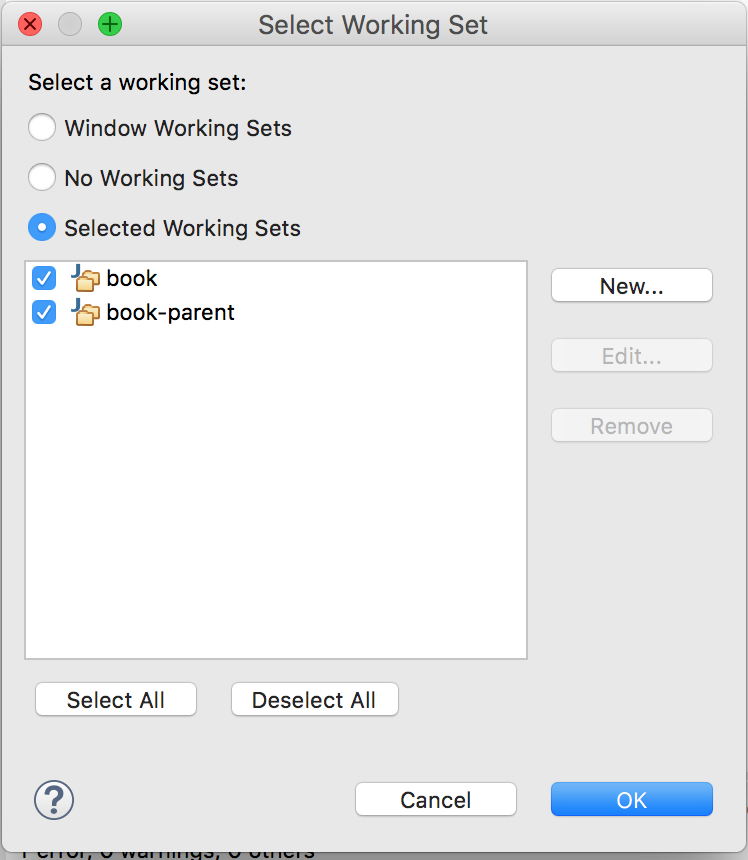
Once done, go to the Select Working Set screen again and click on OK to refresh:
Now we will see a list of working sets:
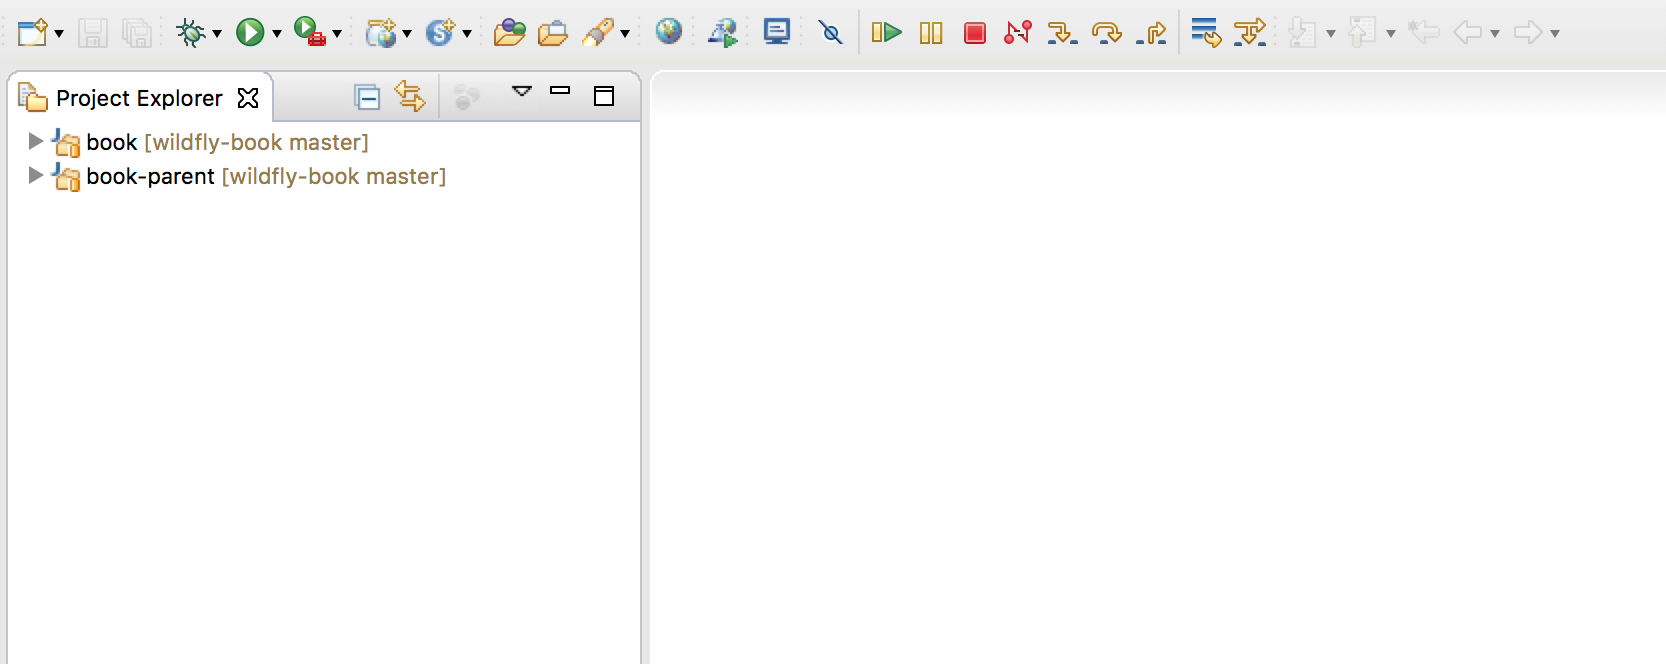
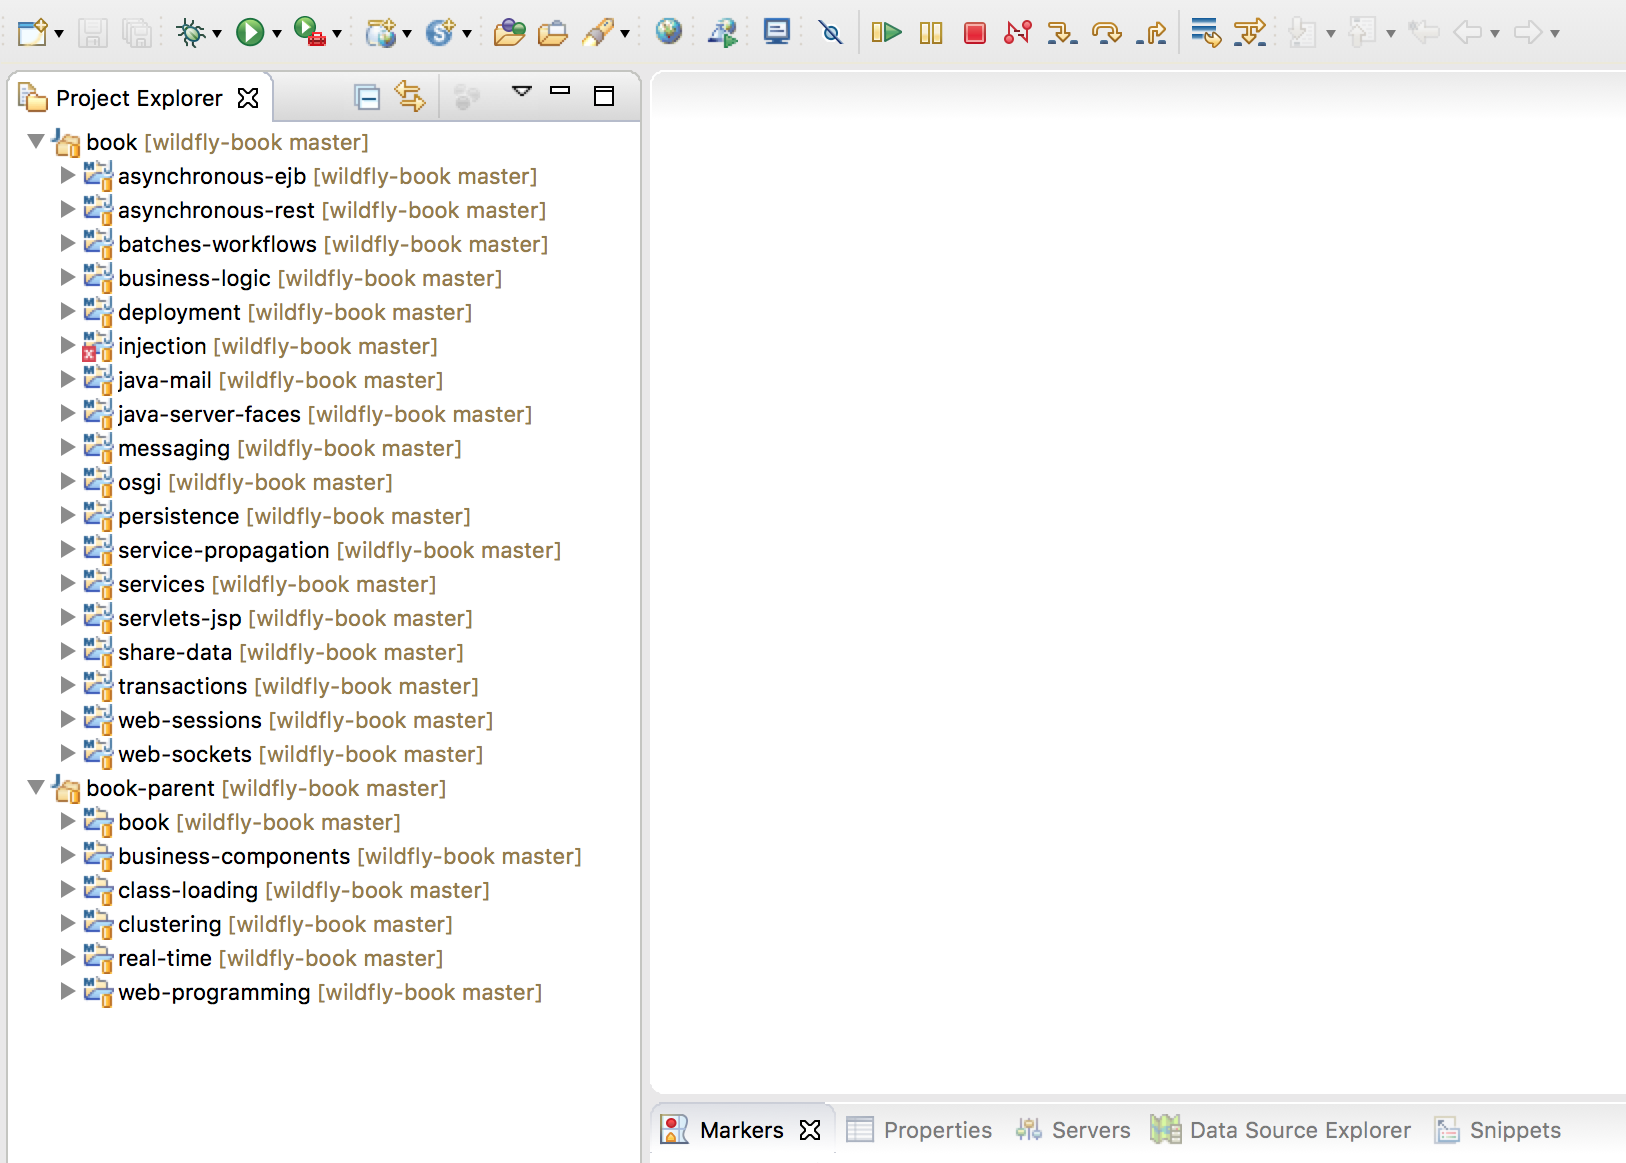
If we open the working set we can see all ordered parent and child projects:
Debug exercises
With this environment, we can debug our components too. It would be very useful to see how our components work inside the WildFly container. To start the debug process, simply enter the sub-project you want to test and enter, for example, the following command:
mvn test -Djboss.options="-Xdebug -Xrunjdwp:transport=dt_socket,address=8001,server=y,suspend=y"
Jboss.options is a property used by the Arquillian container managed subproject to add external properties to the start of WildFly startup process. So you can pass Java properties to set the debug environment.
In our case, we force WildFly to use the following parameters:
- debug: This activates debug mode. If set to false, the next parameters will not be considered.
- runjdwp: transport JDWP is the common communication protocol used to start the debug. The transport can be of type DT_SOCKET used in Linux or DT_SHMEM used in Windows.
Other parameters to add in the transport are:
- Address: The client/server connection URL. It can be valorized as 8001. Adding only the port we presume the transport running on localhost, the same machine we will start the debug. When WildFly starts, after setting these properties, a JDWP server automatically starts on the specified port:
- Server: It must be set to y or else no server can be started:
- Suspend: If set to y, WildFly will wait for one connection by a JDWP client; otherwise it will be waiting. If set to n, WildFly will start anyway, leaving the connections free to start at another time.
Here is the complete command you need to start the debug:
-Xdebug -Xrunjdwp:transport=dt_socket,address=8001,server=y,suspend=n
Once the test starts, thanks to the suspend property. WildFly will be suspended till we start the JPDA client. This client is ready to work in Eclipse. Here's how to configure and start it.
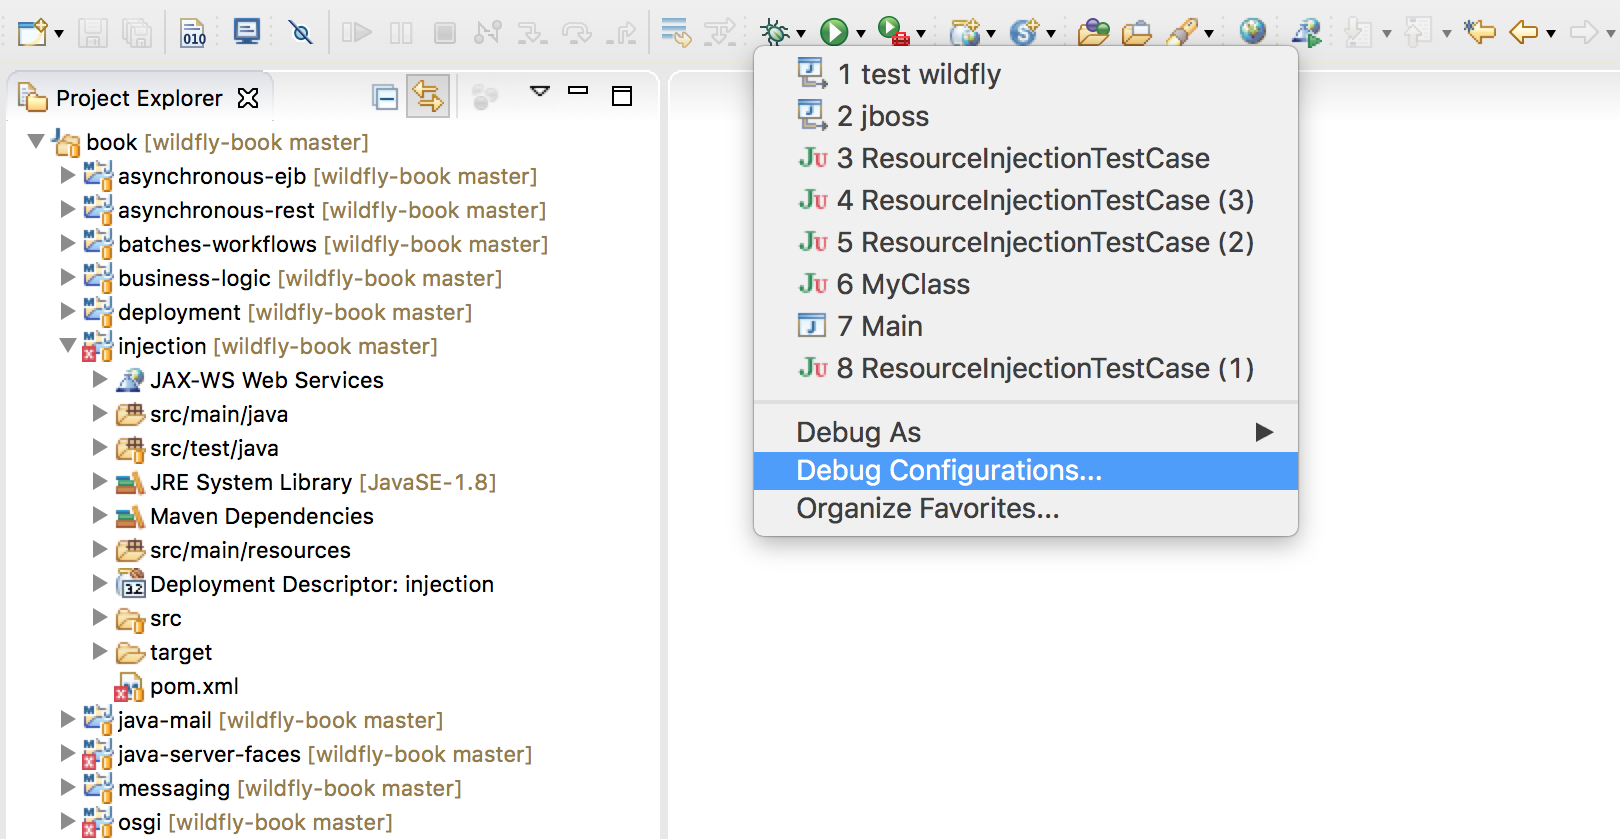
Click on the row near the debug figure and select Debug Configurations...:
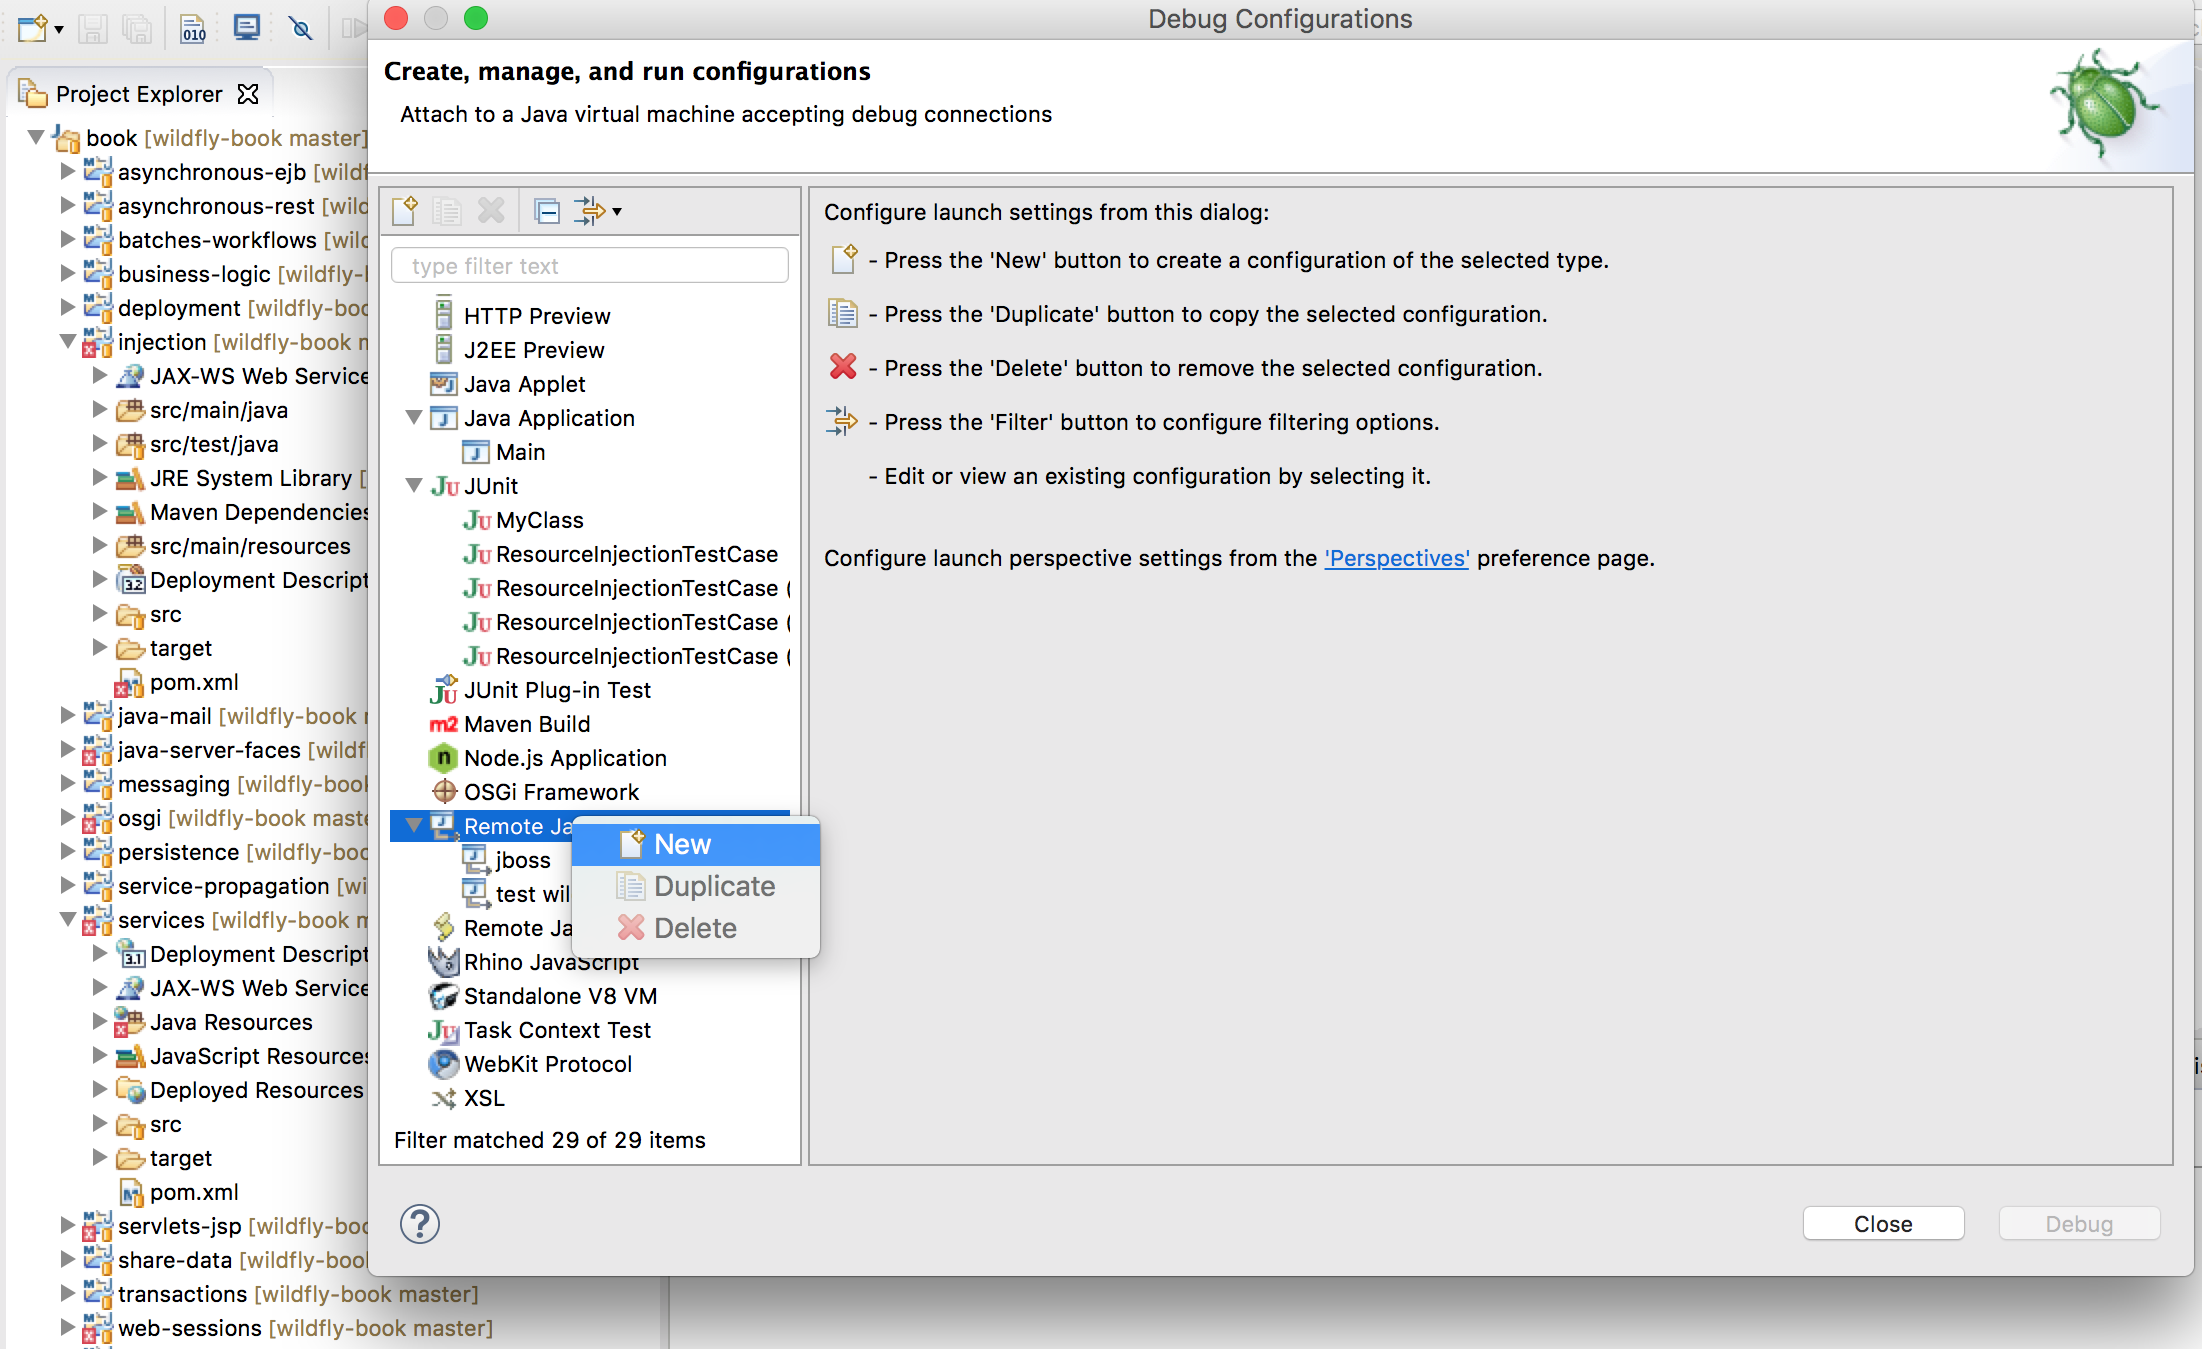
On, the item remote Java debugger right-click and select New:
You will see a new window. Fill in the fields like this:
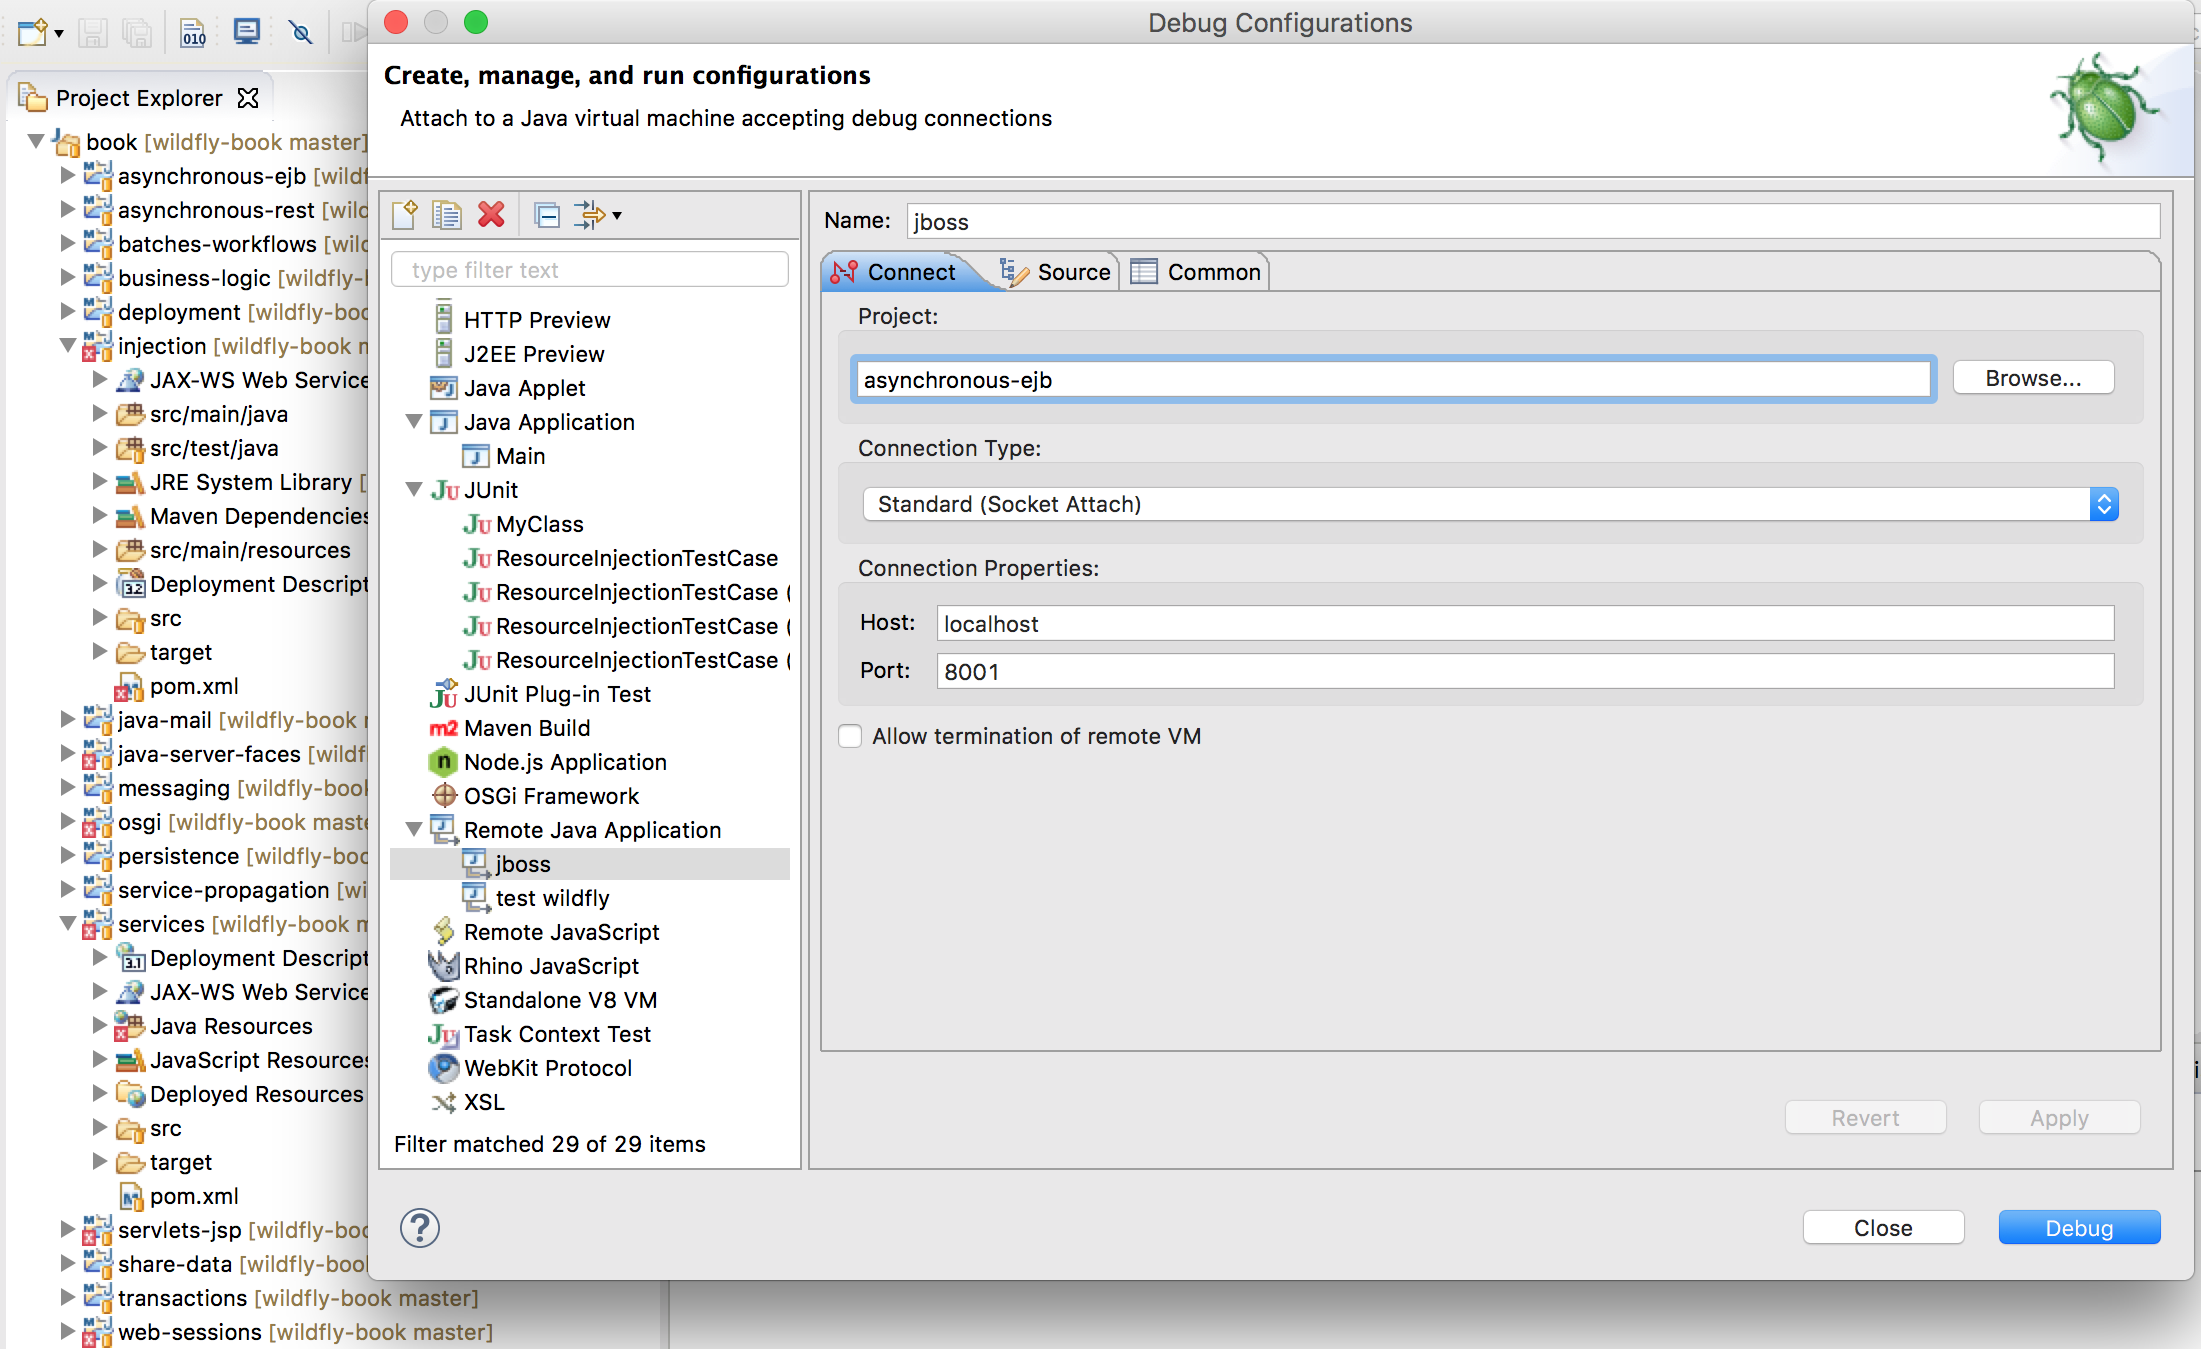
The field port must be the same as the one used in jboss.options so that the client can connect to the JPDA server that was started in the test. The Project field can be one of the subprojects inside our exercises.
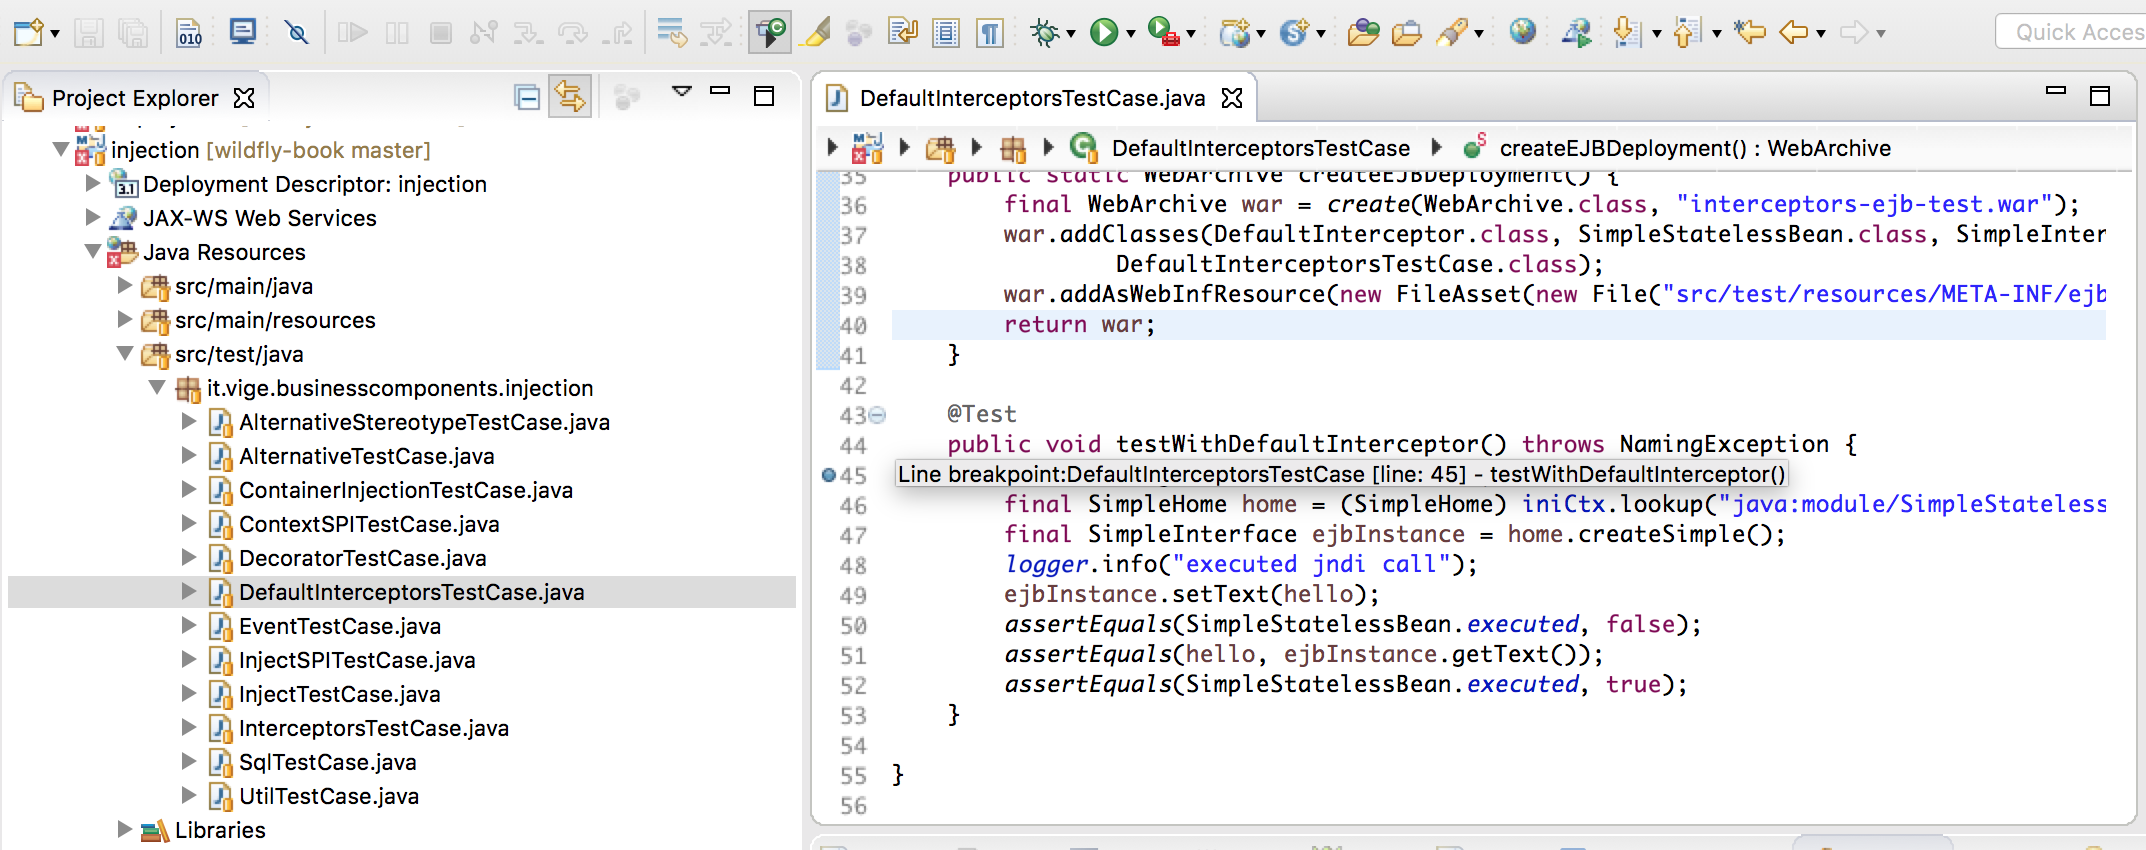
Now close the window. We need to put in a breakpoint, so we show the debugger at work. Simply, take a code class of the project you would like to test and click twice on a row, for example:
Again launch Debug Configurations and start the debugger:
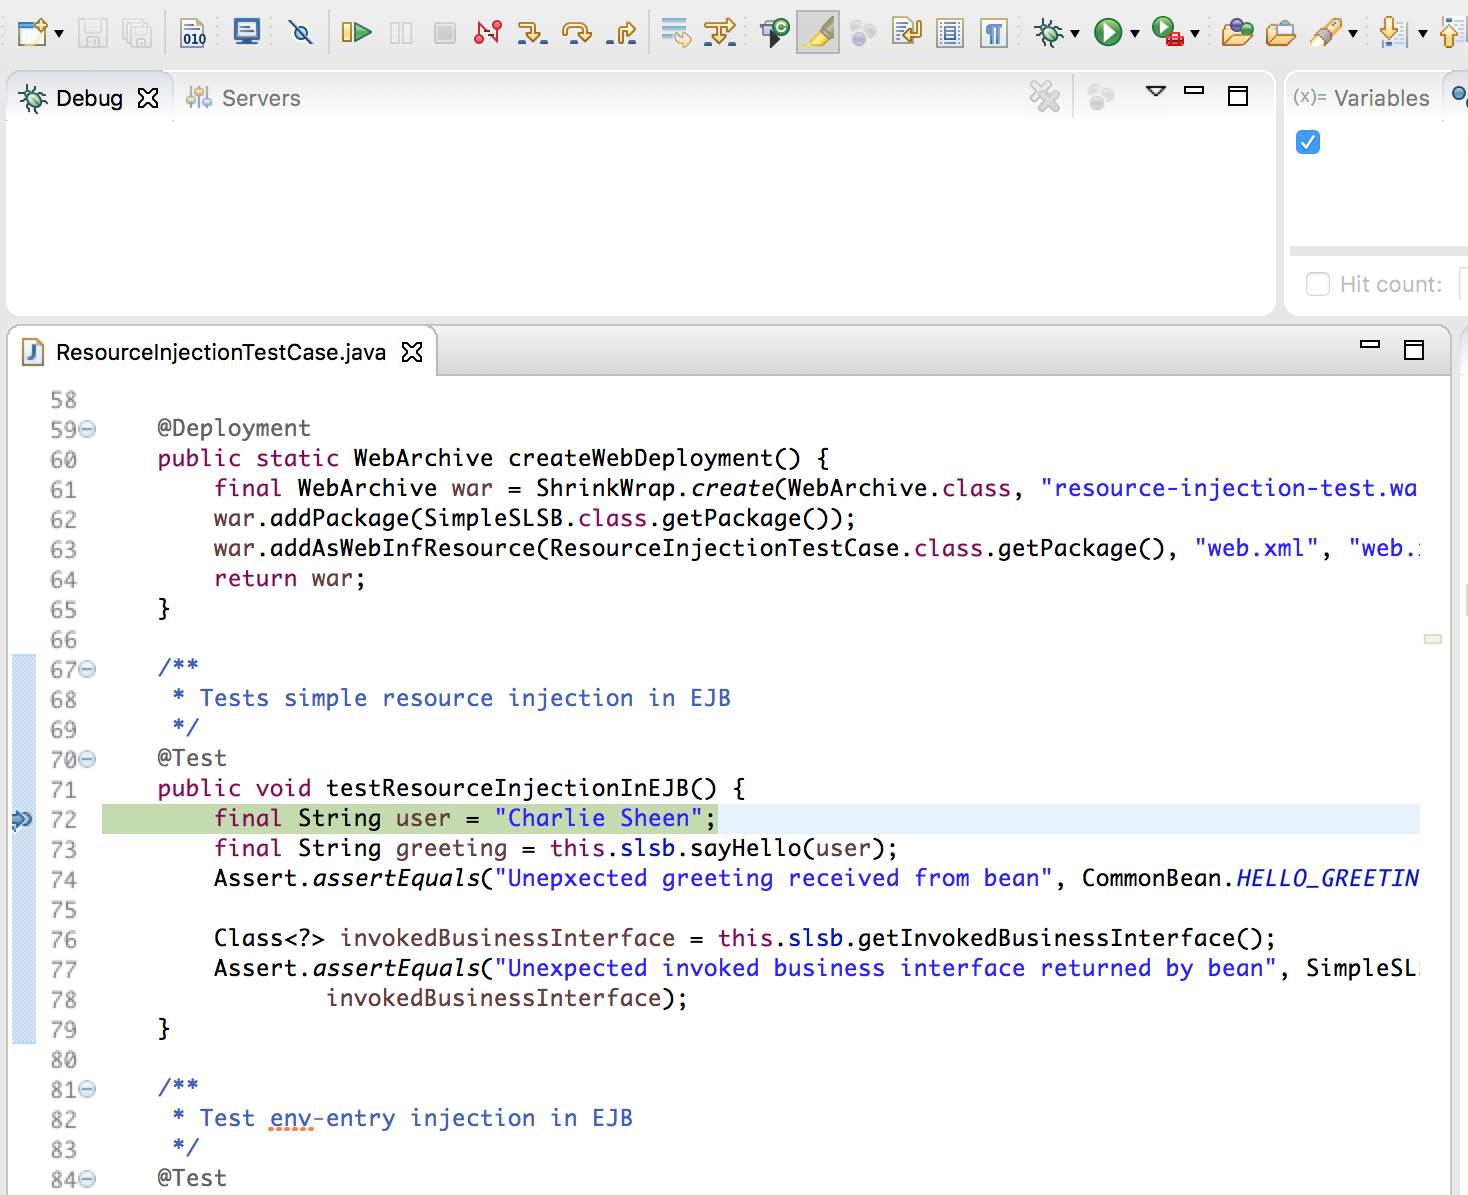
Your breakpoint is now active!
Now we have all of the environment ready to work. In the next chapter, we will see tests and how to start them depending on the argument.
In other samples, you will find that Arquillian uses an annotation called @RunAsClient that lets you start test cases outside the container as remote clients. In that case, you cannot use jboss.options to start the debug because it starts the debug only inside the container.
To debug remote clients annotated with the @RunAsClient annotation, use this script:
mvn test -Dmaven.surefire.debug
And configure your JPDA client with the default port, 5005.


