Airship (Simple to intermediate)
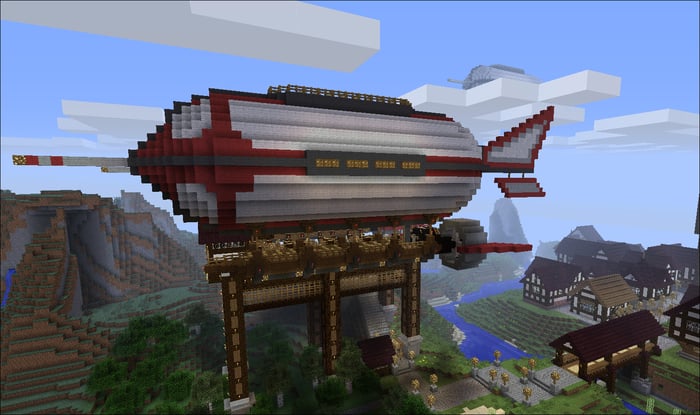
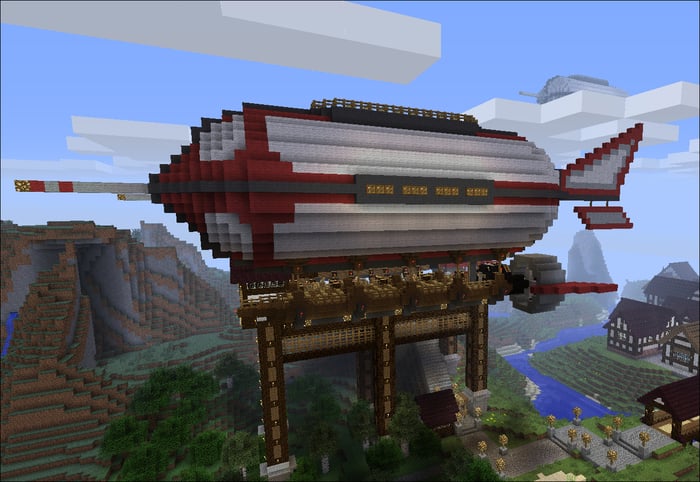
In this recipe, we'll be creating an airship. We'll start with a sphere, split it in half, and extend a section between the two hemispheres to build the blimp. Airships are great fun as you can customize them in any way you like. After completing this project, you may decide to build a much larger version or a double-blimp version. The sky is the limit!

How to do it…
Let's get started with creating our airship by performing the following steps:
Go somewhere out in the open and execute the following commands:
//up 28
//hsphere 35 8
Note
hspheremakes a hollow sphere, whereasspherecreates a solid one.Break your way out and select the section shown in the following screenshot (don't forget to replace the White Wool blocks that you broke):

We're now going to select half of this sphere, move it 32 blocks, and then fill in the gap to make the blimp. Make the selection by selecting the furthest horizontal points on both sides of the sphere. It should be about 16 x 5 in size.
Look down and do
//expand 6, and then look up and do//expand 6.Look in the direction you want your airship to stretch along and do
//expand 8.Keep looking in that direction and do
//move 32.On the far hemisphere, place four lots of two blocks of Wool (the color of your choice) protruding by one block on each side, as shown in the following screenshot:

Select the very top and very bottom colored Wool blocks, face one way across the hemisphere, and do
//expand 9; and then face the opposite way and do//expand 9.You should now have one vertical layer at the end of the hemisphere with the additional colored blocks selected.
Face the other hemisphere and do
//stack 32.Now just trace along the center line contours with the colored blocks (I've used Dark Gray Wool as you can see in the previous screenshot) to meet at the center point at either end.
Locate the center of the Zeppelin by counting 16 blocks from the selection we made previously. Make a 14 x 3 section of Gray Wool on either side of the blimp and place some evenly spaced Glowstones with Trapdoors on them.

Now go up on top and break a block in line with the front of the side panels we just made. Stand in it and type
//cyl 35:7 3 1.Go to the other end and do the exact same thing.
Tip
You can hit your T key and then click the up and down arrows to scroll through all of your previous commands. When you get to the command you want to re-use, simply hit Enter.
Select the middle area and type
//set 35:7.
Fill in underneath as shown in the preceding screenshot using either
stackorsetcommands. Put a fence around this top-deck section. You can add some seating or whatever you like here. You can make seats by placing a step block with signs attached directly to each side.
On the bottom side of the Zeppelin, fill in most of the bottom layer up to three blocks away from the end of the Wool block layer above it, as shown in the previous screenshot.

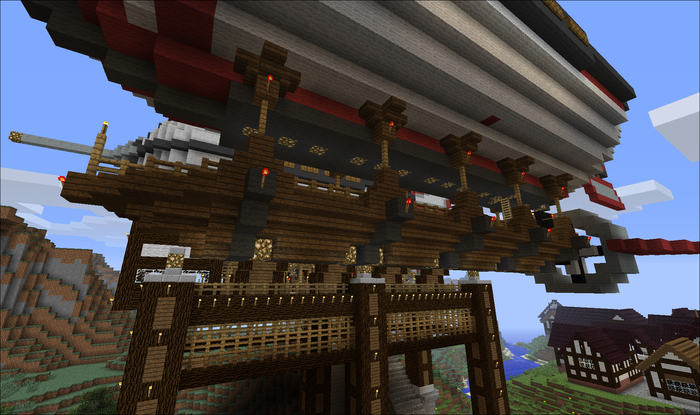
Construct some uprights for the lower deck using Wood Planks, Fence, and Wood step blocks as shown in the following screenshot. I've also added some Glowstone lights to help with illumination in this dark area.

Create and then select the deck portion, including the uprights, shown in the previous screenshot.
Face down towards the other end and do
//stack 3.Fill in the empty deck area between the two end uprights.

Place a Wooden block on the inside of both end uprights and run a line of six Fence blocks up either side, stopping one short of center on the next set of uprights. Select this area you just made and do
//stack 3.Go to the other end and place the two end blocks, make the front a little more pointed; and for the back, round it off slightly. You can also add some fence posts or whatever you would like as design features to the front of the deck.
Add another layer underneath the lower deck just to give it a little more volume. I've added the Glowstones in the following screenshot so you can see what I've done more clearly:

Now we'll build the propeller. Go to the rear of the deck and place four Black Wool blocks off the center rear of the deck. We'll call this the shaft.

Standing (flying) behind the craft, have the very end face of the Black Wool shaft directly in front of you (unlike on an angle as shown in the preceding screenshot :P).

Hit your V key, make the following settings, and then hit Escape:
Facing the back of the shaft, select your Arrow tool, aim at the back face at the end of the shaft, and right-click. You should now have a gray upright disc shape in front of you. If you make a mistake do
/u.With the Arrow still aimed in the exact same spot, bring up the VoxelSniper console again by hitting the V key, change the Wool in the Place panel to blank, and then change Brush Size to
3.Exit the console with the Esc or V key and right-click on the same position again. The disk should now be a hollow circle. Place a Black Wool block on the end of the shaft, and now using your Wooden Axe tool select the circle we just made. Facing away from the deck do
//stack 4.
Make a propeller in the center of this cylinder. I've just used Black Wool and some White Wool. Build some reinforcements for the shaft, and then we will build an engine house.

Make an engine house by adding a section roughly 3 x 3 x 5 in size, hollowed out, with some dispensers and some lights inside; and then an iron door for an entrance. You'll notice I have also put two rows of powered rail tracks along the floor outside, just to give the deck that "industrial" sort of look.

Note
On the outside of the engine house, I have added some extremely hi-tech features, just so people know we're not messing around here. You can decorate this part of the airship however you like. I've kept mine pretty simple for now just for brevity.
Once you are happy with the design, add a nose cone section to the front of the balloon. I have used Gray Wool for mine and placed a Glowstone at the very tip.

With VoxelSniper, you can snipe a design onto the Zeppelin like I have with the replacement Red Wool blocks in the previous screenshot. At the other end, we'll make a control fin.

Copy the shape I have made or make some wings of your own design. The way I made mine is from the center of the balloon using Dark Gray Wool. I placed 17 blocks and then built the fin up from there. You should be able to copy the outline of the fin from the previous screenshot if you need to. And that by itself is not a bad looking airship if I may say so myself.
But let's not stop there. Select the entire structure making sure everything, including the little trapdoors on the sides, is in the selection area.
Remember, if you are using
//expand, make sure you are looking in the correct direction that you wish to expand the selection in. You should also know that//expandcan't be undone using//undo, so it's better off to expand in shorter distances if you're not too sure. You can, however, use//contract. From the center point it should be//expand 10on either side. Up is roughly 14 and down is 18. Of course, yours may differ slightly.Go to the rear of your selection and face in the direction that you wish your other balloon to be. Stay in that spot for the next couple of commands and be patient with each command as they can take a little while to process.

Type
//copy.Move somewhere on the map. Remember, the object you copy will be pasted relative to you. So if you were five blocks south of the airship when you did
//copy, wherever you move to the pasted airship will appear five blocks to the south of wherever you are now.Type
//paste.Rinse, repeat, add in some rotates, move wherever you like and paste, and you have an airship squadron. Then you can go around and customize each one however you like.
So that's the structure of an airship and entire fleet of airships done very quickly. Like most of my tutorial projects, I have kept them limited to the structure itself; the foundations of a design, rather than a really completed project because I would like you to finish it off. I also think people get more satisfaction out of customizing their designs in their own way.

You can then build some landing decks and control towers using the skills learnt so far. Sally forth and have fun Sky Captain :).


