Working with glyphs
Glyphs are the individual symbols that together make up the content of a font face. They generally represent a single character (although can sometimes represent more than one character—for example, with ligatures), and the InDesign Glyphs panel gives you a useful window through which to both see and access characters that you may not typically find on your keyboard.
One common use of glyphs I encounter is for accessing international character sets—for example, when writing people’s names that contain characters you generally won’t find on a standard British or North American keyboard.
In this recipe, we will look at adding glyphs to your text frames as well as creating reusable glyph sets, which make it quick and easy to find the glyphs you commonly use when you are working.
Getting ready
In order to complete this recipe, simply open InDesign on your system and create a new document with 12 pages, as shown in the Creating a new document recipe in Chapter 1. You will also need to create a text frame containing some text, as shown in the Creating text frames and adding placeholder text recipe.
How to do it…
In order to use glyphs in your content, follow these steps:
- Start by opening the Glyphs panel, which can be found under the Window menu under the Type and Tables section.
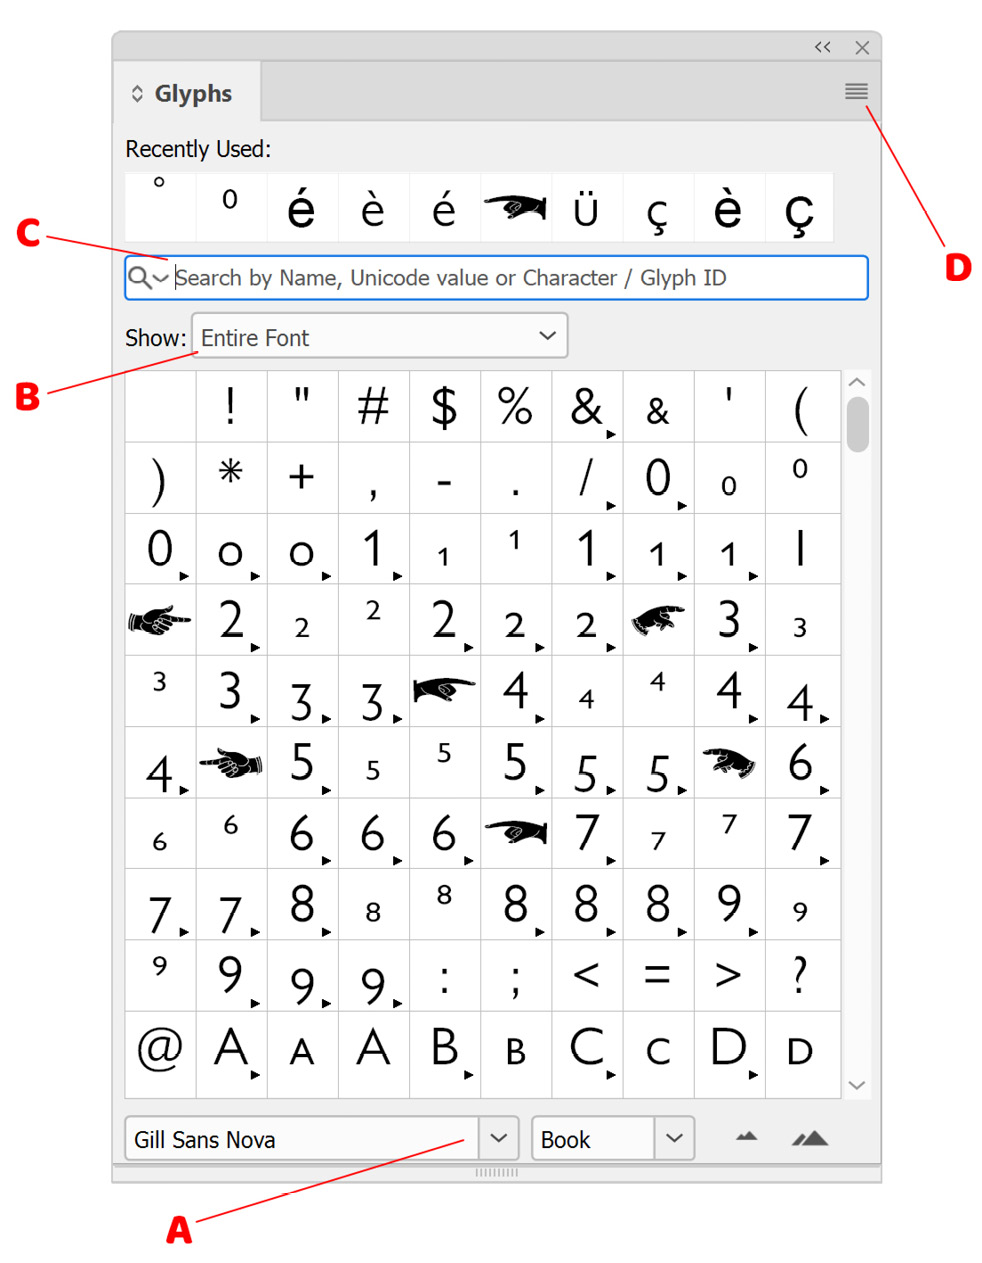
- The Glyphs panel is where you can see all the glyphs within the fonts that you have installed. Here, you can switch to different fonts (marked as A in Figure 2.5), and then choose to show the entire font or a particular subset from the dropdown (marked as B in Figure 2.5) such as math symbols or currency symbols.
It is worth noting that if you are trying to find a specific glyph, you can also search by name, Unicode value, or character/glyph ID using the search bar (marked as C in Figure 2.5):

Figure 2.5: The Glyphs panel in InDesign
- With our cursor in the place where we would like to insert our glyph, double-click on a glyph within the Glyphs panel, and it will be inserted at that position.
- This allows us to easily insert a single glyph, but you might want to reuse a small group of glyphs on a regular basis, so let’s have a look now at how to do that using glyph sets.
- A glyph set is a reusable collection of glyphs, and it can be a good time saver when it comes to finding and using glyphs. To create a glyph set, click the Glyphs panel menu icon (marked as D in Figure 2.5) to open the Glyphs panel menu, and then select New Glyph Set. A small pop-up box will appear for creating your new glyph set; here, you can give your set a name and control how new glyphs will be added to the set, with the options being:
- Insert at Front: Adds them at the top of the glyph set
- Append at End: Adds them at the end of the glyph set
- Unicode Order: Inserts them in the order they appear within the font
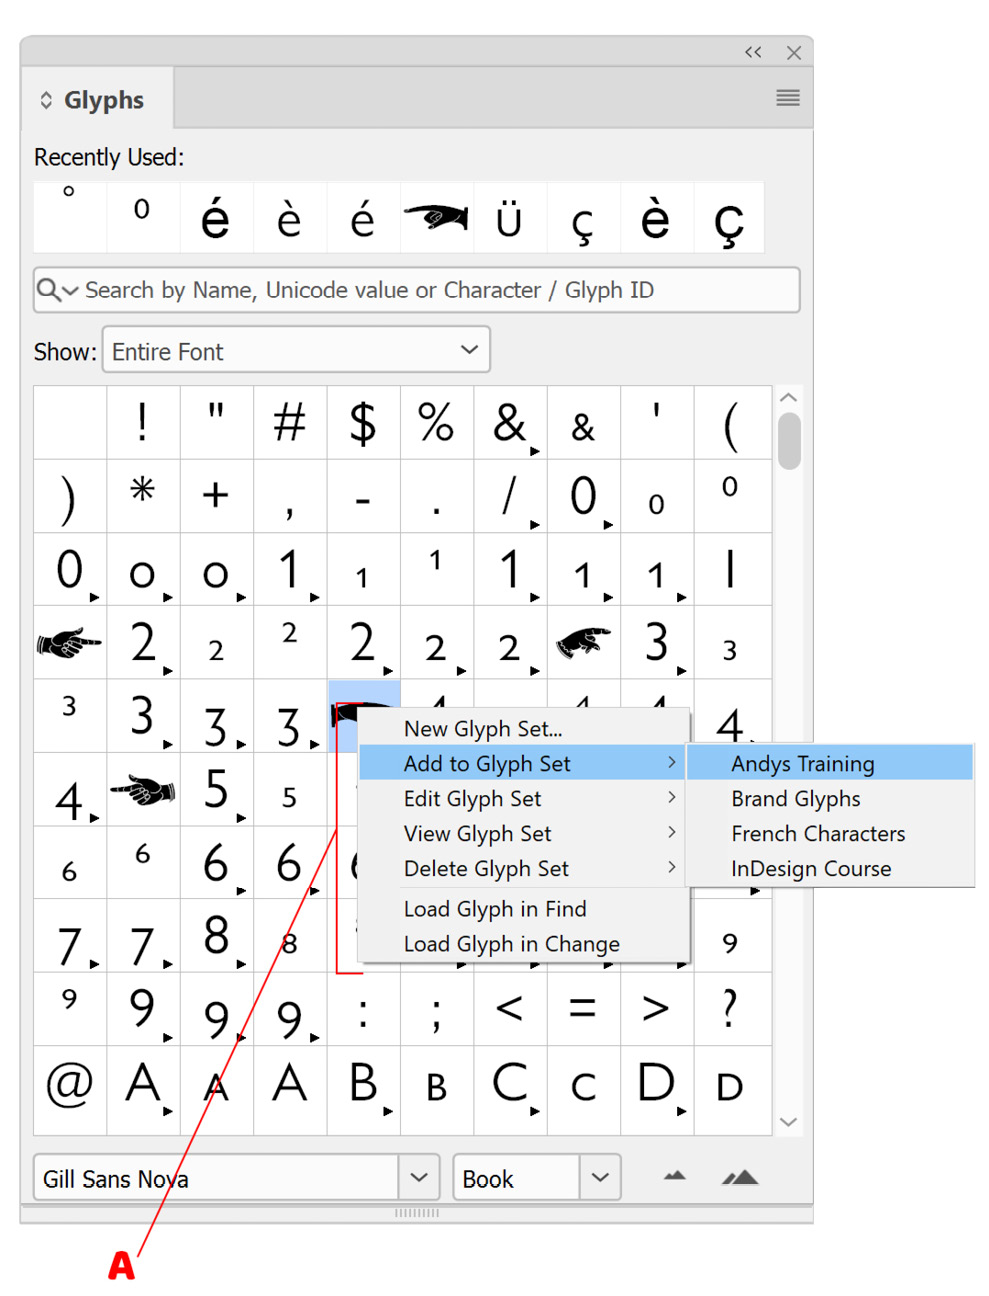
- With our glyph set created, we now need to add some glyphs to it. To do this, simply find a glyph you like within the panel and right-click on it with the mouse. You will see a pop-up menu appear (marked as A in Figure 2.6) containing an Add to Glyph Set option, and you can then choose the glyph set you created earlier. Add a few glyphs to your glyph set, such as é, ç, or è, or, if you prefer, choose others:

Figure 2.6: The Glyphs panel menu
- If you are unable to right-click with the mouse, you can always select a glyph and then add it to the glyph set from the panel menu, marked as D in Figure 2.5.
- Having created a glyph set and added some glyphs to it, we now need to view the glyph set rather than the whole font. This can be done from the dropdown marked as B in Figure 2.5. To view just the glyphs in your glyph set, scroll to the top of the list in the dropdown and choose your glyph set. To then go back to viewing the whole font—for example, to add more glyphs to the set—select Entire Font.
- If you decide you want to delete a glyph set, just go to the panel menu and select Delete Glyph Set, then the name of the glyph set you wish to delete:

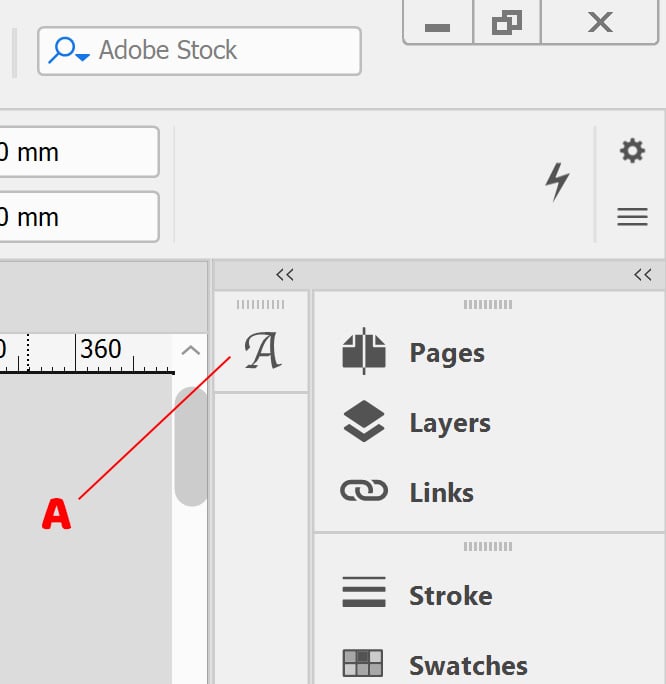
Figure 2.7: Glyphs panel docked for quick and easy access
Tip
I find keeping the Glyphs panel docked on the right as a small icon (shown in Figure 2.7) can be a quick and easy way to access it without taking up much space at all. Just one click on the icon expands it, and another click hides it again. For more details, see the Opening and repositioning panels recipe in Chapter 1.


