Adding a tabgroup to your app
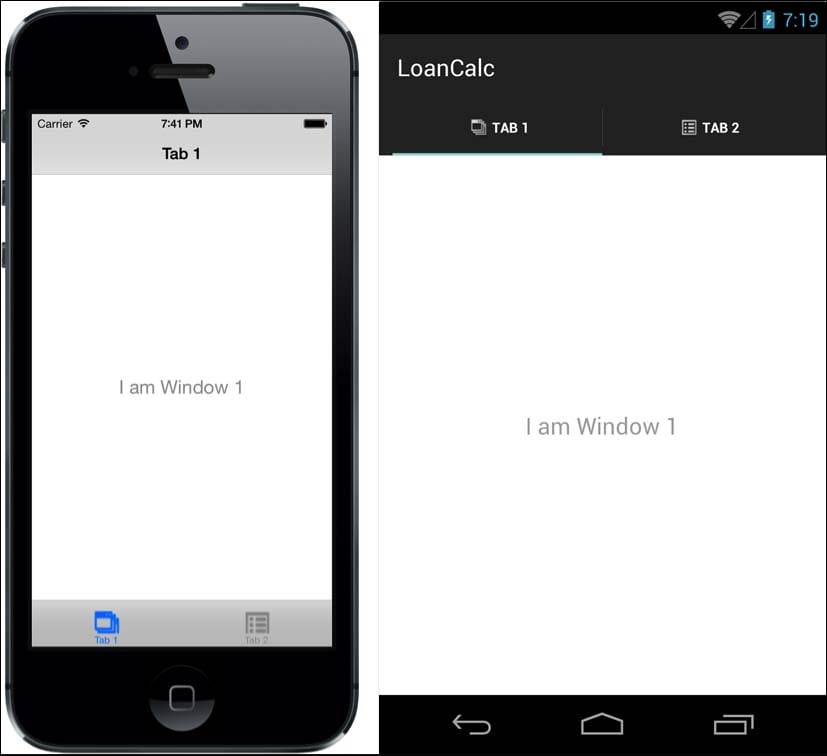
Tabgroups are one of the most commonly used UI elements and form the basis of the layout for many iOS and Android apps in the market today. A tabgroup consists of a sectioned set of tabs, each containing an individual window, which in turn contains a navigation bar and title. On iOS devices, these tabs appear in a horizontal list at the bottom of screen, whereas they appear as upside-down tabs at the top of the screen on Android devices by default, as shown in the following image:

How to do it...
We are going to create two separate windows. One of these will be defined inline, and the other will be loaded from an external CommonJS JavaScript module.
Before you write any code, create a new JavaScript file called window2.js and save it in your Resources directory, the same folder in which your app.js file currently resides.
Now open the window2.js file you just created and add the following code:
//create an instance of a window
module.exports = (function(){
var win = Ti.UI.createWindow({
  backgroundColor: '#BBB',
  title: 'Settings'
});

return win;
})();
If you have been following along with the LoanCalc app so far, then delete the current code in the app.js file that you created and replace it with the following source. Note that you can refer to the Titanium SDK as Titanium or Ti; in this book, I'll be using Ti:
//create tab group
var tabGroup = Ti.UI.createTabGroup();

//create the window
var win1 = Ti.UI.createWindow({
  backgroundColor: '#BBB',
  title: 'Loan Calculator'
});

//create the view, this will hold all of our UI controls
var view = Ti.UI.createView({
top: 10,
  bottom: 10,
  left: 10,
  right: 10,
  backgroundColor: '#fff',
  borderRadius: 2,
  layout: 'vertical'
});

//now let's add our logo to an imageview and add that to our //view object
var logo = Ti.UI.createImageView({
  image: 'logo.png',
  width: 253,
  height: 96,
  top: 10
});

view.add(logo);

//add the view to our window
win1.add(view);

//add the first tab and attach our window object (win1) to it
var tab1 = Ti.UI.createTab({
    icon:'calculator.png',
    title:'Calculate',

    window: win1
});

//create the second window for settings tab
var win2 = require("window2");


//add the second tab and attach our external window object //(win2 / window2) to it
var tab2 = Ti.UI.createTab({
    icon:'settings.png',
    title:'Settings',
    window: win2
});


//now add the tabs to our tabGroup object
tabGroup.addTab(tab1);
tabGroup.addTab(tab2);

//finally, open the tabgroup to launch the app
tabGroup.open();
How it works...
Logically, it's important to realize that the tabgroup, when used, is the root of the application and it cannot be included via any other UI component. Each tab within the tabgroup is essentially a wrapper for a single window.
Windows should be created and assigned to the window property. At the time of writing this book, it may be possible to still use the url property (depending on the SDK you are using), but do not use it as it will be removed in later SDKs. Instead, we'll be creating windows using a CommonJS pattern, which is considered the proper way of developing modular applications.
The tabs icon is loaded from an image file, generally a PNG file. It's important to note that in both Android and the iPhone, all icons will be rendered in grayscale with alpha transparency—any color information will be discarded when you run the application.
You'll also notice in the Resources folder of the project that we have two files for each image—for example, one named settings.png and one named settings@2x.png. These represent normal and high-resolution retina images, which some iOS devices support. It's important to note that while specifying image filenames, we never use the @2x part of the name; iOS will take care of using the relevant image, if it's available. We also specify all positional and size properties (width, height, top, bottom, and so on) in non-retina dimensions.
This is also similar to how we interact with images in Android: we always use the normal filename, so it is settings.png, despite the fact there may be different versions of the file available for different device densities on Android.
Finally, notice that we're in the view and we're using vertical as a layout. This means that elements will be laid out down the screen one after another. This is useful in avoiding having to specify the top values for all elements, and, if you need to change one position, having to change all the elements. With a vertical layout, as you modify one element's top or height value, all others shift with it.
There's more...
Apple can be particularly picky when it comes to using icons in your apps; wherever a standard icon has been defined by Apple (such as the gears icon for settings), you should use the same.
A great set of 200 free tab bar icons is available at http://glyphish.com/.


