Creating a Toast with a custom layout
We've used Toasts quite a bit already in previous chapters as they provide a quick and easy way to display information, both for user notification and for ourselves when debugging.
The previous examples have all used the simple one-line syntax, but Toasts aren't limited to this. Toasts, like most components in Android, can be customized, as we'll demonstrate in this recipe.
Android Studio offers a shortcut for making a simple Toast statement. As you start to type the Toast command, you'll see the following:

Press Enter to auto-complete. Then, press Ctrl + spacebar and you'll see the following:

When you press Enter again, it will auto-complete with the following:
Toast.makeText(this, "", Toast.LENGTH_SHORT).show();
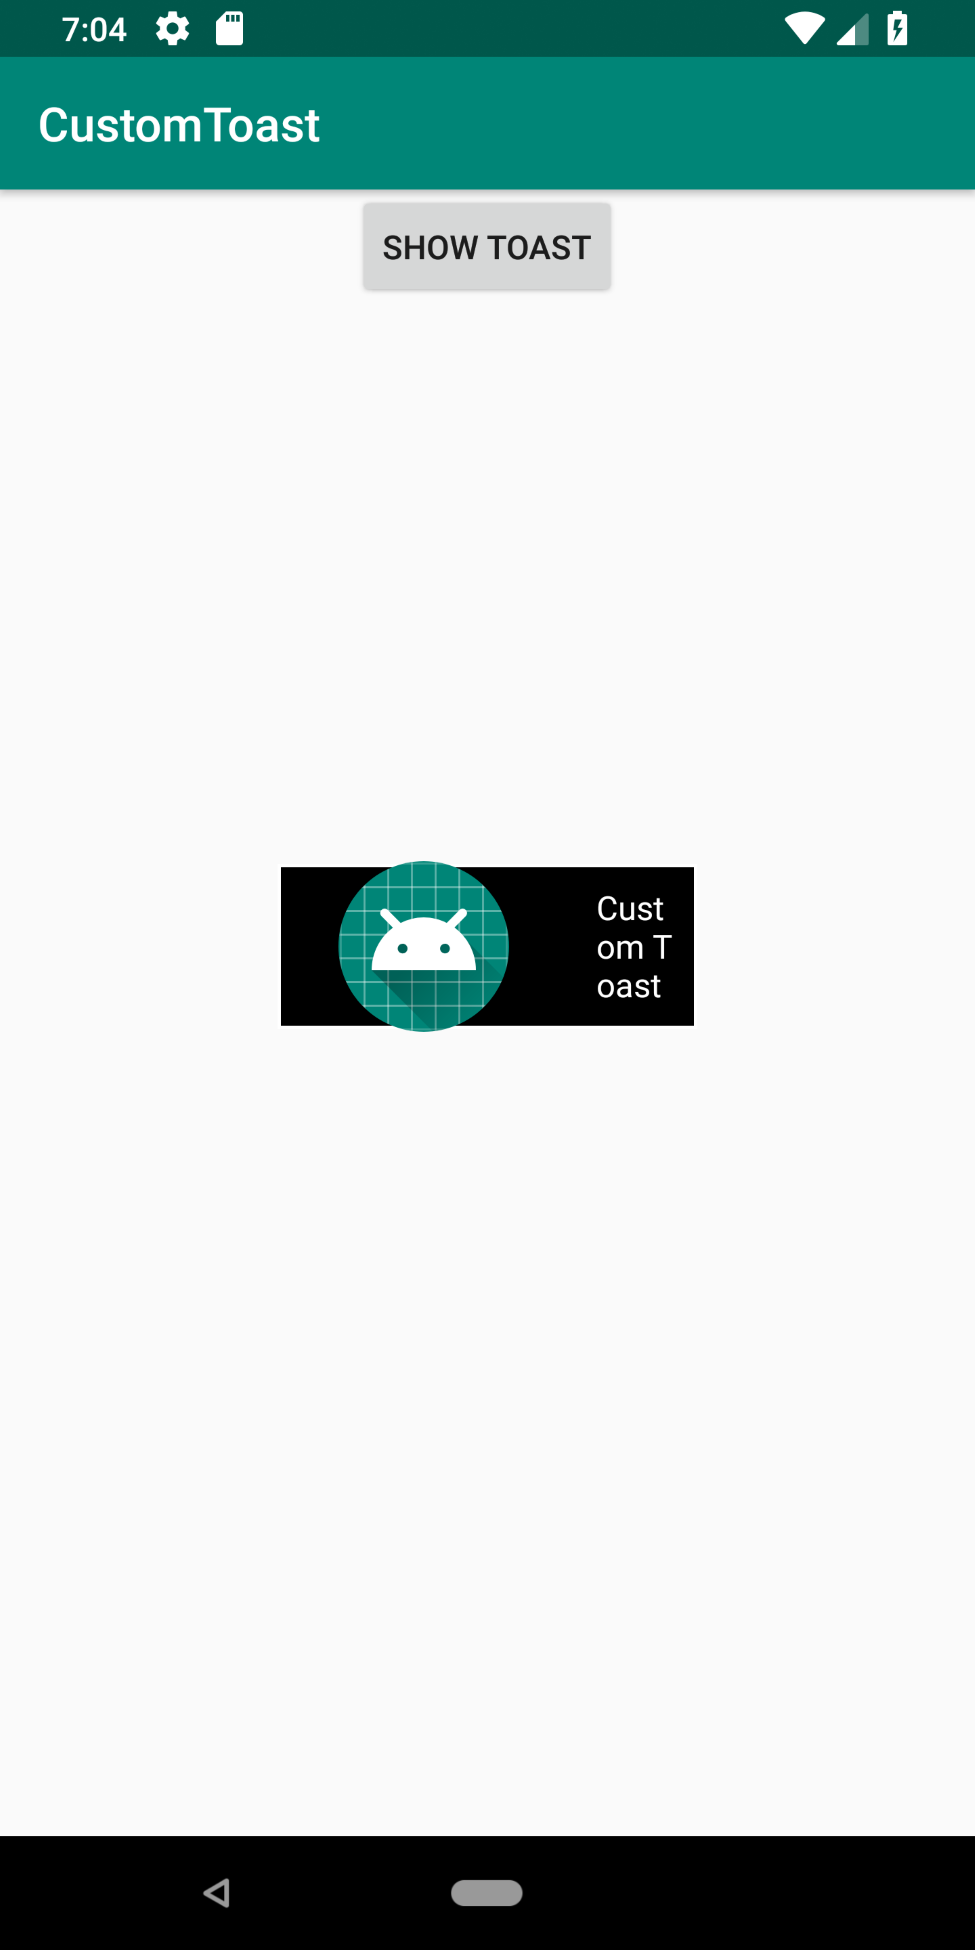
In this recipe, we'll use the Toast Builder to change the default layout, and gravity to create a custom Toast, as shown in the following screenshot:
Getting ready
Create a new project in Android Studio and call it CustomToast. Use the default Phone...