Let's take a deep dive into learning how to add Fluid Boxes, change their properties, and add content to these Fluid Boxes:
- If you still have the project open from the last exercise, close it. Then, open the Chapter10/FluidBoxes.cptx file.
- Go to slide 3. You can start adding Fluid Boxes to this blank slide.
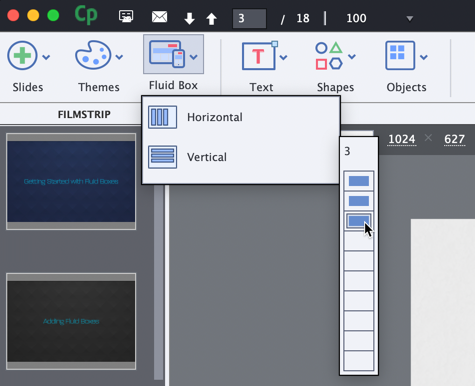
- On the Toolbar, click Fluid Box. It gives you the option of selecting either a Horizontal or Vertical flow based on your screen layout requirements. Let's select Vertical in this example.
- Add 3 vertical Fluid Boxes in this example:
Note that you can add up to 10 Fluid Boxes in each direction.

This creates one main Fluid Box on the screen, with three child Fluid Boxes. You can see the hierarchy of the Fluid Boxes anytime in the Select Fluid Box section in the Properties inspector. Please note that the Fluid Box number you see on your computer might be different from the number you see here in the screenshot:

- You can then resize the...


