This section assumes that you have never installed Unity before and will take you through a step-by-step exercise on download and installation. If you have installed Unity before, you may still want to quickly review this section, just to confirm you have installed the required components.
Getting started with unity
Downloading unity
Follow the instructions to download Unity:
- Enter the following URL, https://store.unity.com/, into your favorite web browser or just click on the link.
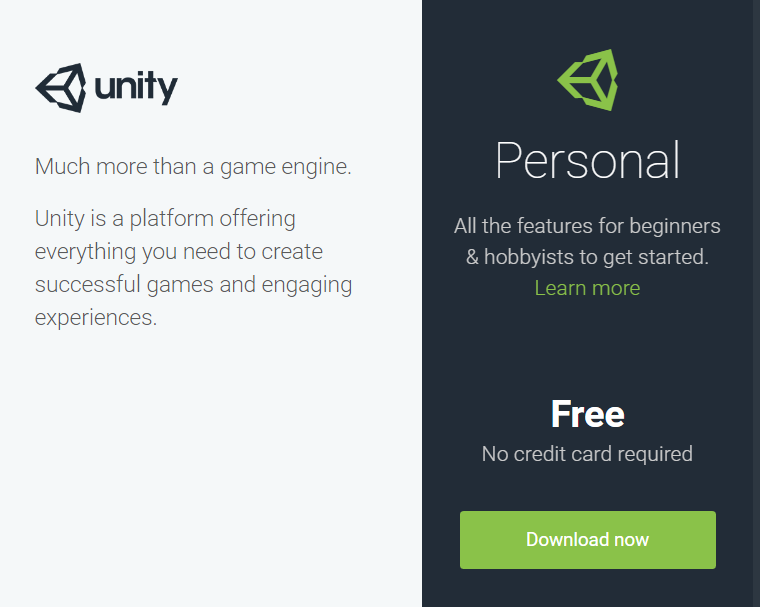
- After the page loads, you will see several licensing options. For the purposes of this book, all you need is the Personal Unity license. So, just click on the Download now button on the Personal license as shown in the following screenshot:
- A new page will load, showing a big green button labeled Download Installer. Click on the button to download the Unity Download Assistant with your web browser.
- After the package has completed downloading, open it as you would any other program. The Unity Download Assistant is relatively small so it should download quite quickly.
- Agree to any security notifications or notifications you normally encounter when installing new software on your computer. After the installer launches, you will see a screen similar to the following screenshot:
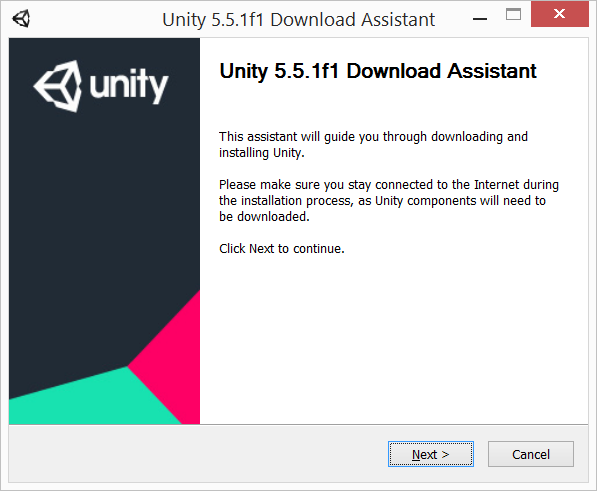
- Click on the Next button to continue. Then on the next page, select the checkbox to agree to the Unity license as shown in the following screenshot:
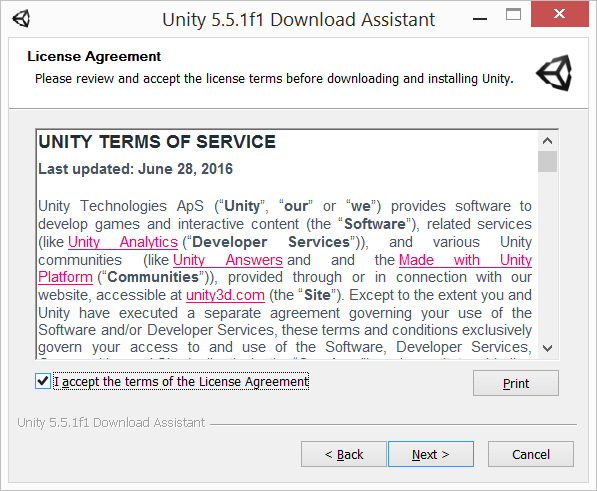
- Click on the Next button to continue. The next page will likely offer you an option to choose between 32 and 64-bit architecture. It is usually best to take the default (64 bit in most cases) and click on the Next button to continue.
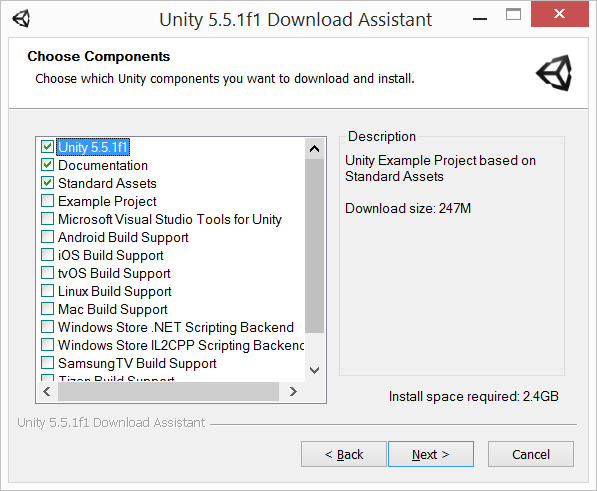
- The next page will allow you to choose the Unity components you want to install. This page allows you to choose from a number of components to install along with Unity. For the purposes of this book, you only need to install the default components. However, if you feel you may need or want other components, such as Android or iOS, feel free to select those as well. Just be sure to have the three main components selected as shown in the following screenshot:
- After you have made your component selections, click on the Next button to continue. For the next couple of dialog pages, just keep the defaults and let the installation download and install Unity. Since this can take a while, feel free to grab your beverage of choice while you wait for the installation to complete.
The Unity installation will generally run very smoothly, but if you do encounter some issues, it is best to follow the recovery instructions the installer may provide. If that doesn't fix the issue, just do a quick search and check the Unity forums. Unity has a huge community of developers that are very eager to assist newcomers with any issues, and it is almost certainly likely someone has already encountered a similar issue to yours.
Once the Unity installer has finished installing Unity, follow the instructions here:
- On the last page of the installer, you will usually be prompted with an option to launch Unity right away. Be sure that option is selected and then exit the installer.
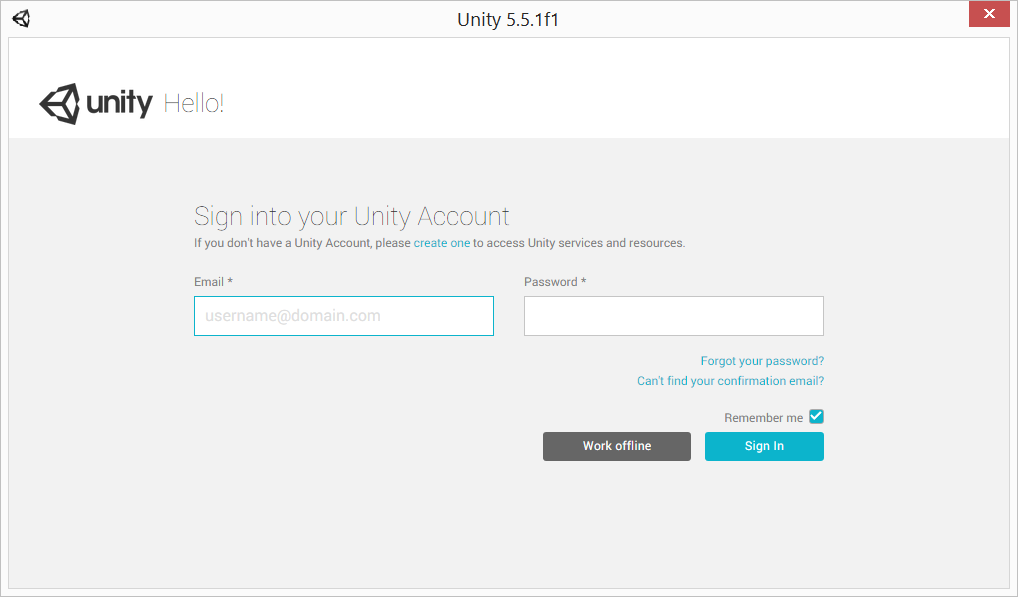
- As the program launches, you may get a notice to provide an exception in your firewall; be sure to allow this. After Unity launches, you will be welcomed by a login screen as shown in the following screenshot:
-
If you have never installed Unity before, you will need to create a Unity Account. Just click on the blue create one text as shown in the preceding screenshot. This will take you to a registration area of the Unity site. From there, complete that account setup, and when you are done, return to this item.
-
Now that you have a Unity account created, enter your email and password in the dialog and then click on the Sign In button. After you sign in, you will be directed to the project page.
That completes your first step to becoming a Unity developer. In the next section, we will create a new project and explore the Unity interface.
An introduction to unity
Now that we have Unity installed, let's dive right in and create a project and then take a quick overview of the interface. Perform the following directions to create a new Unity project:
- If this is your first time running Unity, at this stage, you will have a dialog with a button allowing you to create a new project; click on the NEW. For those of you who have jumped here from another section in the book, be sure to launch Unity and make sure you are logged in with your Unity account. From there select the NEW project button at the top of the Unity start page.
- The project dialog will open. Enter the project name as GameAudioBasics and then keep the defaults for all the other settings as shown in the following screenshot:
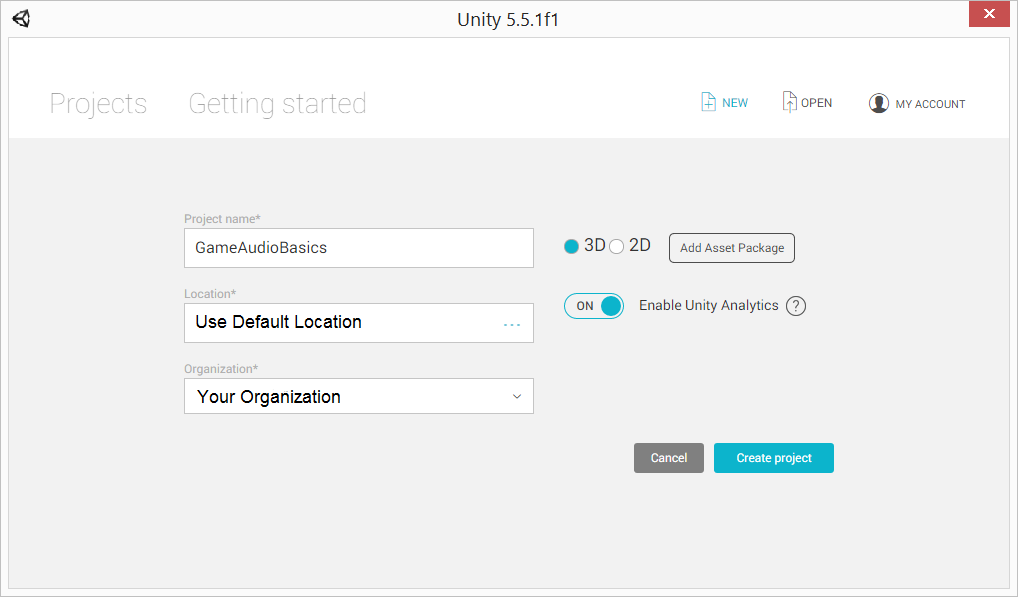
- After you fill in the Project name, click on the Create Project button.
- Unity will close the dialog, and you will see a progress dialog flash as the project is initialized and the interface loads. When Unity is done loading, you will see a screen that looks similar to the following window:
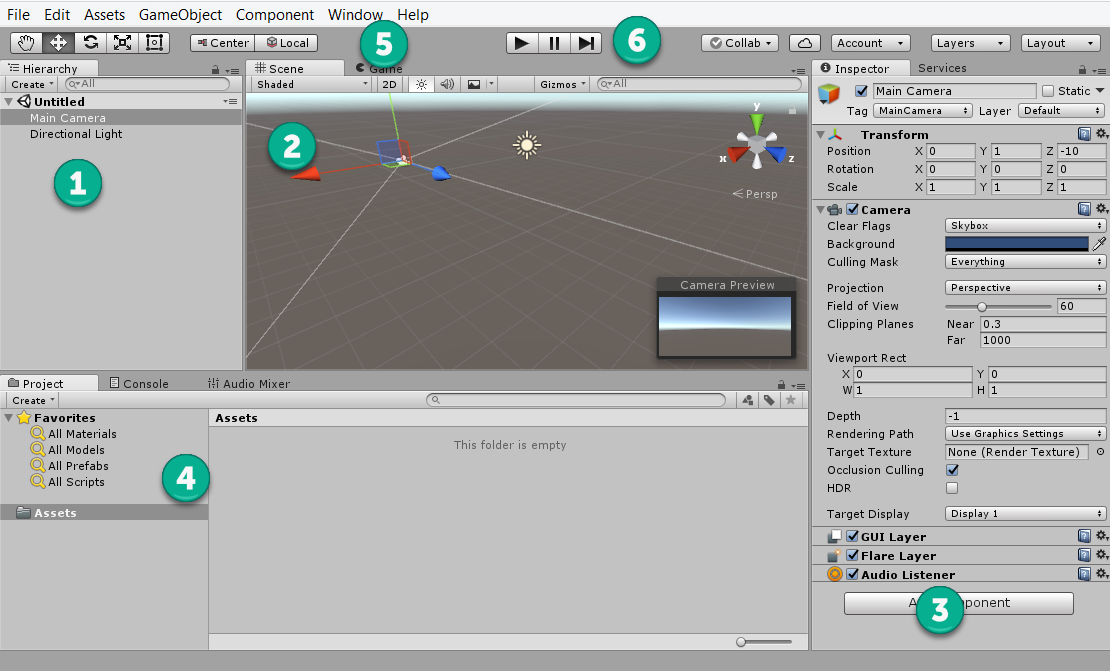
Now that we have Unity running, let's review what each of the main windows or elements are for. You can follow along using the reference numbers shown in the preceding window screenshot to match the items in the list here:
- Hierarchy window (1): This window shows the currently displayed scenes and scene elements called a GameObject in Unity. Currently, there should be a scene labeled Untitled in the window. Click on the arrow beside the scene to expand it and then click on the items beneath the scene. Notice how the other windows change depending on your selection.
- Scene view (2): You can think of the scene window or the view as the design canvas for your game project. In this view, you can select and move objects around using the mouse or the principal direction arrows (the colored arrows). Feel free to select objects in the view and move them around. Don't worry about moving things out of place or getting lost as we are creating a new scene before we start building anything of importance.
- Inspector window (3): This window exposes and allows you to edit the properties and components of the currently selected GameObject. A lot of the time you spend working in Unity will be editing values in this window. Again, feel free to explore this window by editing some properties of a GameObject.
- Project window (4): This window shows all the resources or assets you have in the entire Unity project. As you can, see the project is currently quite bare. Not to worry, we will be quickly adding new assets.
- Game view (5): This window or view shows how the game will look to the player. It differs from the Scene view because it only shows what the player sees. If you click on the game window tab, you will see a sparse view of the ground layer and sky. Again, this is because we have yet to add anything interesting.
- Play mode (6): This is the set of buttons at the top of the Unity interface control running the game in the editor. The buttons allow you to play and pause the game play. If you click on the play button right now, not much will happen other than the Game view will present itself.
At an advanced level, that covers the main elements of the Unity interface without getting bogged down in too many details. It could very well take you months or years to become an expert in using all the features of Unity. So, in order to not overwhelm you, we will only focus on the relevant information you need to complete an exercise.
So far we have been looking at an empty project and scene. In the next section, we will import a project from the Unity Asset Store.
Downloading and importing project assets
One of the really great features of Unity is the Unity Asset Store. Game development is a complex process that requires many artistic skills in multiple areas to develop quality assets, such as 3D models, animation, textures, sound, music, shaders, and more. Chances are, if your development team is just you or a small group of developers and artists, your team will lack the skillset or time to develop all the assets for your project. Fortunately, the Unity Asset Store provides professional game quality assets at very competitive pricing or in some cases for free. Unity itself also provides a number of high-quality sample projects free of charge on the store. We will be using a couple of those projects in this book as the base for our exercises in audio development.
Follow the instructions here to download and import the project we will use for the rest of the exercises in this chapter:
- From the menu select Window | Asset Store. This will open a new tab beside the Scene and Game views called Asset Store.
- After the page loads in the window, there should be a search box visible at the top of the window. Enter the text unity viking village in the search box and click on the search button as shown in the following screenshot:

- When the search completes, there will be a list of search results. The first result in the list should match Viking Village from Unity Technologies. Click on this item, and you should see the asset page as shown in the following screenshot:
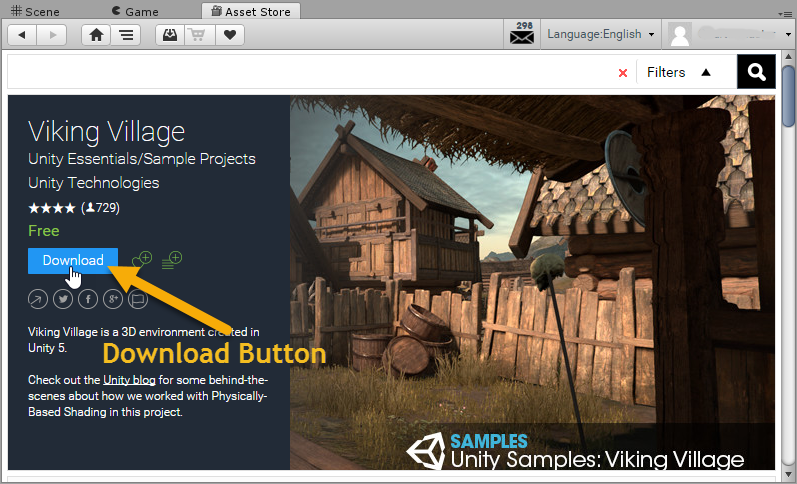
- Click on the blue button labeled Download, as shown in the screenshot to start downloading the asset.
- As the asset downloads, the button will show the progress. The download may take a while, so be patient and of course feel free to grab another one of your favorite beverages.
- When the download completes, the button will read Import. Click on the button to import the project into Unity. You will be immediately prompted by a dialog informing you that this is a complete project, as shown here:

- Click on the Import button on the dialog to continue the project import. Importing a new project over our project is entirely okay since we have nothing we wanted to save at this point.
- A dialog will appear showing you the progress of the import. This take a couple minutes after which you will be prompted with the Import Unity Package dialog, as shown here:
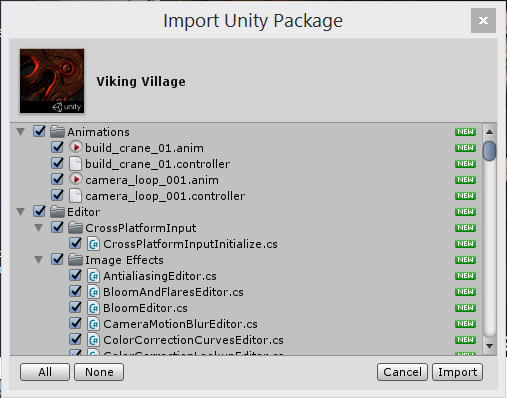
- The Import Unity Package dialog shows all the assets to be imported as a part of the project. Feel free to scroll through the list and review the items being imported. Then, click on the Import button on the dialog to complete the project import.
- Yet another dialog will open showing you the progress of the last stage of the import. Just be patient and enjoy that beverage or grab another, the asset will load in several more minutes.
This project asset we are importing is on the large side, at around 900 MB. Fortunately, we will only need to do this once. As we will continue to reuse this project throughout the book. Generally, the assets you download from the Asset Store will often be under 100 MB.
The amount of time to import a project will be determined by the size of the asset and the content. Assets such as textures, for instance, will be compressed and often take extra time to load. Unfortunately, the sample project we are loading is composed of several compressed assets.
- When the import is complete, you will now find that the Project window is now showing several new asset folders.
Now, that we have our base project imported, in the next section, we take a quick look at the main scene and several features that will help us going forward.
A tour of the village
After doing all that work getting the project loaded; okay, perhaps not so much work as waiting, let's load the project scene and take a quick tour of the asset by following the directions here:
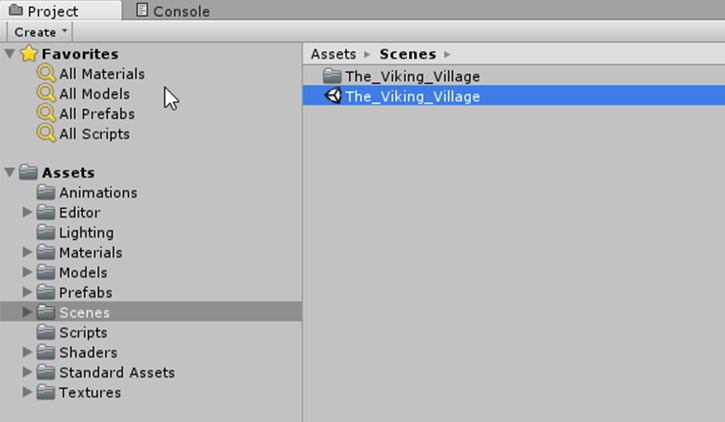
- Click on the Scenes folder in the Project window and then double-click on the The_Viking_Village.unity file to open the scene. The screenshot here shows the Project window:
- After the scene loads, you will notice that the Hierarchy window is now filled with objects. Click on the Scene view tab to open the view and you should now see something very similar to what is shown in the following screenshot:
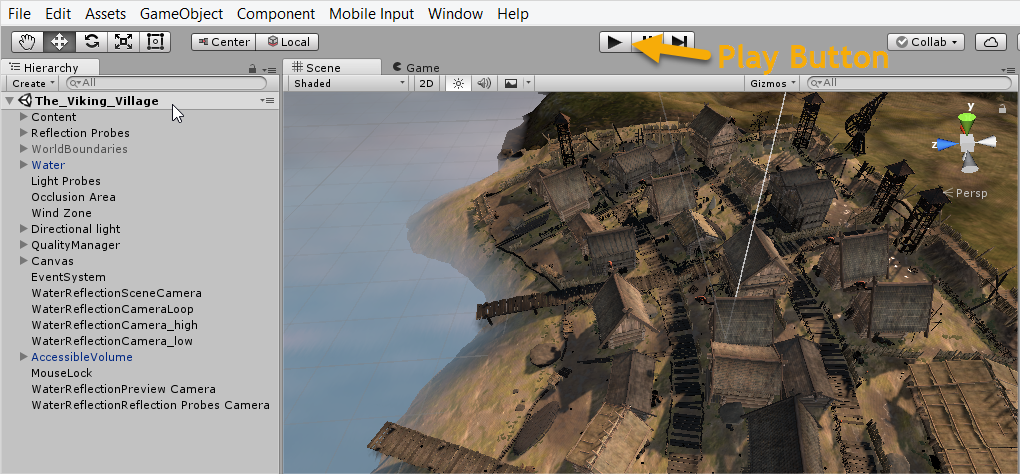
- Press the editor play button, as shown in the preceding screenshot to start the scene and run the game.
- As the game is running, the Game view will automatically present itself. Use the following commands to move around the game and explore the environment and features:
- W, A, S, D: The standard first person movement commands. Use these keys or the arrow keys to move around the scene.
- Mouse: This controls the look direction.
- Spacebar: This is used to jump up. Quickly taping the Spacebar key will cause the camera to hover/fly while in manual mode.
- C: This toggles between a controlled camera walkthrough and the manual or keyboard movement (first person).
- Esc: This exits the mouse lock and makes the mouse visible in the editor again.
- Take your time to explore the environment and feel free to move around as much as you like. When you are ready to move on, press the Esc key to make the mouse visible again and then press the play button again to stop the game running.
- Hopefully, you noticed, as you were moving around the game, how quiet everything was. Fortunately, that makes this scene the perfect canvas for us to develop our own game audio. This is exactly what we will do for the next several chapters in this book.
Installing Unity and getting your first project loaded is a great first step to becoming a Unity game developer. Congratulate yourself for your patience in spending the time to work through this section. In the next section, we will get back to more audio development basics.


