Learning about Virtual Learning Environments
A Virtual Learning Environment (VLE) is a type of virtual environment that supports both resources and learning activities; therefore, students can have both passive and active roles. There is also social interaction, which can take place through collaborative work as well as video conferencing. Students can also be actors since they can also construct the VLE.
VLEs can be used for both distance and blended learning since they can enrich courses. Mobile learning is also possible because mobile devices have access to the Internet, allowing teachers and students to log in to their courses.
VLEs are designed in such a way that they can carry out the following functions or activities:
- Design, create, store, access, and use course content
- Deliver or share course content
- Communicate, interact, and collaborate with students and teachers
- Assess and personalize the learning experience
- Modularize both activities and resources
- Customize the interface
We are going to deal with each of these functions and activities and see how useful they might be when designing our VLE for our class. When using Moodle, we can perform all the functions and activities mentioned here, because Moodle is a VLE.
Designing, creating, storing, accessing, and using course content
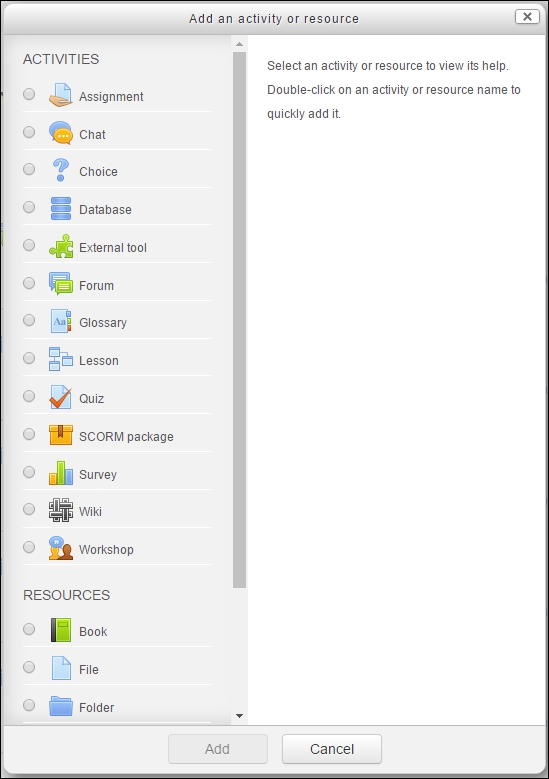
If we use the Moodle platform to create the course, we have to deal with course content. Therefore, when we add a course, we have to add its content. We can choose the weekly outline section or the topic under which we want to add the content. We click on Add an activity or resource and two options appear, resources and activities; therefore, the content can be passive or active for the student. When we create or design activities in Moodle, the options are shown in the following screenshot:

Another option for creating course content is to reuse content that has already been created and used before in another VLE. In other words, we can import or export course materials, since most VLEs have specific tools designed for such purposes. This is very useful and saves time.
There are a variety of ways for teachers to create course materials, due to the fact that the teacher thinks of the methodology, as well as how to meet the student's needs when creating the course. Moodle is designed in such a way that it offers a variety of combinations that can fit any course content.
Delivering or sharing course content
Before using VLEs, we have to log in, because all the content is protected and is not open to the general public. In this way, we can protect property rights, as well as the course itself. All participants must be enrolled in the course unless it has been opened to the public.
Teachers can gain remote access in order to create and design their courses. This is quite profitable since they can build the content at home, rather than in their workplace. They need login access and they need to switch roles to course creator in order to create the content. Follow this to switch roles to course creator:
Under Administration, click on Switch role to... | Course creator, as shown in the following screenshot:

When the role has been changed, the teacher can create content that students can access. Once logged in, students have access to the already created content, either activities or resources. The content is available over the Internet or the institution's intranet connection. Students can access the content anywhere if any of these connections are available.
If MoodleCloud is being used, there must be an Internet connection, otherwise it is impossible for both students and teachers to log in.
Communicating, interacting, and collaborating with students and teachers
Communication, interaction, and collaborative working are the key factors to social interaction and learning through interchanging ideas. VLEs let us create course content activities, because these actions give our class a social element. There is no need to be an isolated learner, because learners have the ability to communicate between themselves and with the teachers.
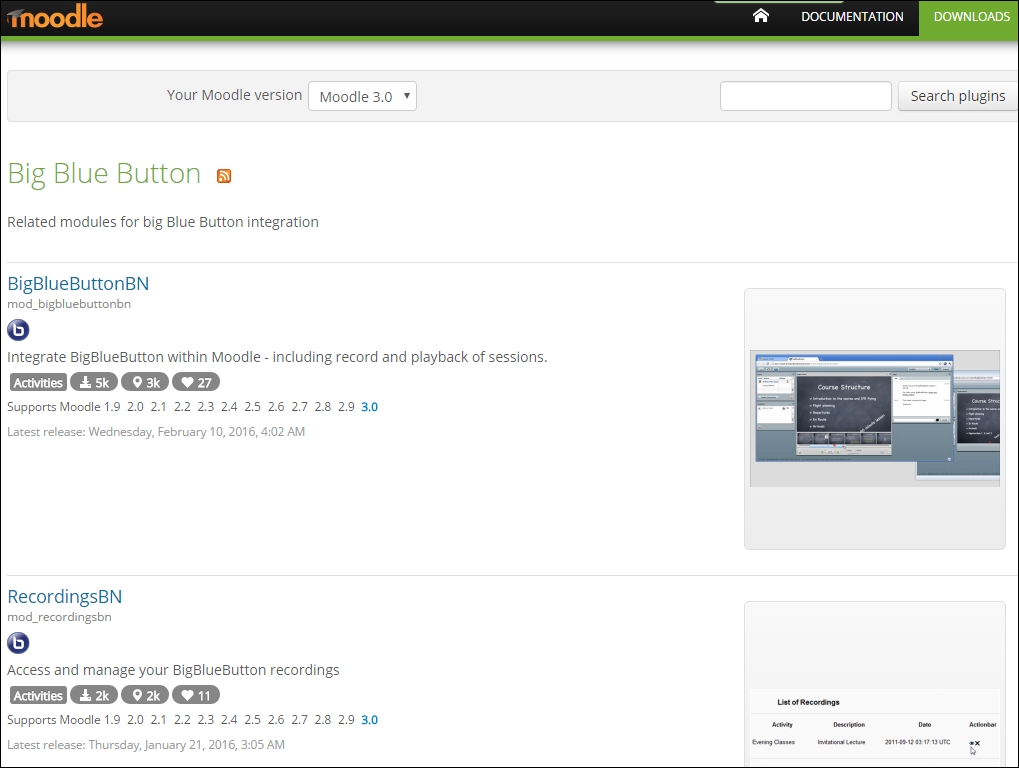
Moodle offers the possibility of video conferencing through the Big Blue Button. In order to install the Big Blue Button plugin in Moodle, visit the following link: https://moodle.org/plugins/browse.php?list=set&id=2 . This is shown in the following screenshot:

If you are using MoodleCloud, the Big Blue Button is enabled by default, so when we click on Add an activity or resource, it appears in the list of activities, as shown in the following screenshot:

Assessing and personalizing the learning experience
Moodle allows the teacher to follow the progress of students so that they can assess and grade their work, as long as they complete the activities. Resources cannot be graded, since they are passive content for students, but teachers can also check when a participant last accessed the site.
Badges are another element used to personalize the learning experience. We can create badges for students when they complete an activity or a course; they are homework rewards. Badges are quite good at motivating young learners.
Modularizing both activities and resources
Moodle offers the ability to build personalized activities and resources. There are several ways to present both, with all the options Moodle offers. Activities can be molded according to the methodology the teacher uses.
In Moodle 3, there are new question types within the Quiz activity. The question types are as follows:
- Select missing words
- Drag and drop into text
- Drag and drop onto image
- Drag and drop markers
The question types are shown after we choose Quiz in the Add an activity or resource menu, in the weekly outline section or topic that we have chosen. The types of question are shown in the following screenshot:

Customizing the interface
Moodle allows us to customize the interface in order to develop the look and feel that we require; we can add a logo for the school or institution that the Moodle site belongs to.
We can also add another theme relevant to the subject or course that we have created. The main purpose in customizing the interface is to avoid all subjects and courses looking the same. Later in the chapter, we will learn how to customize the interface.


