Every time you start a new project in Xcode, you have the option to pick a template for your application. Every template contains a small amount of code to get you started. Sometimes, a basic layout will even be set up for you. Throughout this book, you should default to using the Single View Application template. Don't be fooled by its name; you can add as many views to your app as you would like, this template only provides you with only one simple view. Using this template allows you to build your application from scratch, giving you the freedom to set up all the components as you like.
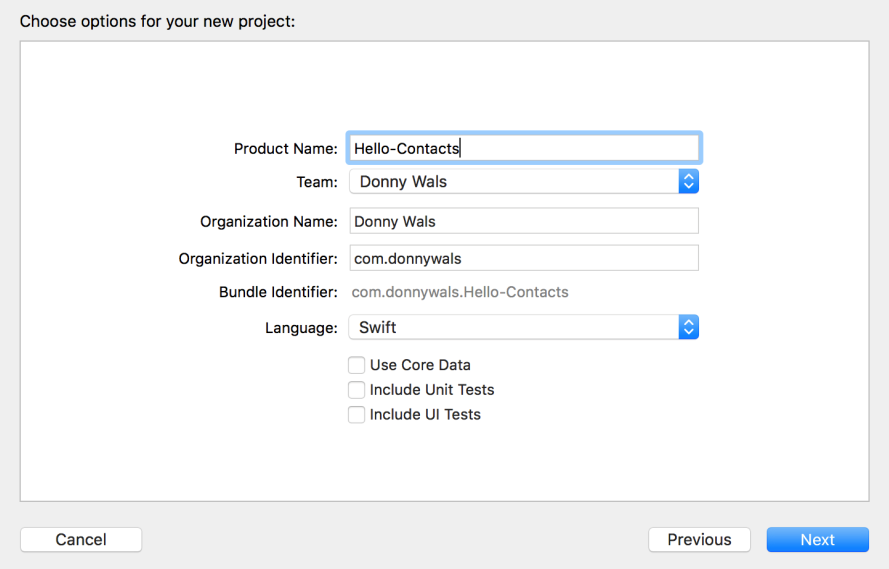
In this chapter, you will create an app that is called Hello-Contacts. This app renders your user's contact list in a UITableView that you will set up. Let's create a project for this app right now. Select File | New | Project in the menu bar. Next, select Single View Application from the list of project templates. When prompted to give your project a name, call it Hello-Contacts. Make sure that Swift is selected as the programming language for your app and uncheck all the Core Data and testing-related checkboxes; we won't need those right now.
Your configuration should resemble the following screenshot:
Once your application is configured, open the file named Main.storyboard. The storyboard file is used to lay out all of your application's views and to connect them to the code you write. The editor you use to manipulate your storyboard is called Interface Builder. Storyboards are a great way to edit your files and see the results of your actions immediately.
If you have used UITableView in the past, you may have used UITableViewController. The UITableViewController class is a subclass of a regular UIViewController. The difference is that UITableViewController contains a lot of setup that you would otherwise have to perform on your own. To fully understand how UITableView is configured and set up, you will not use UITableViewController now.
Take a look at the top bar in the Interface Builder window. There is a button there that has a circle with a square in it. This button opens the Object Library. The following screenshot shows you the Object Library and the button you can click to access it:
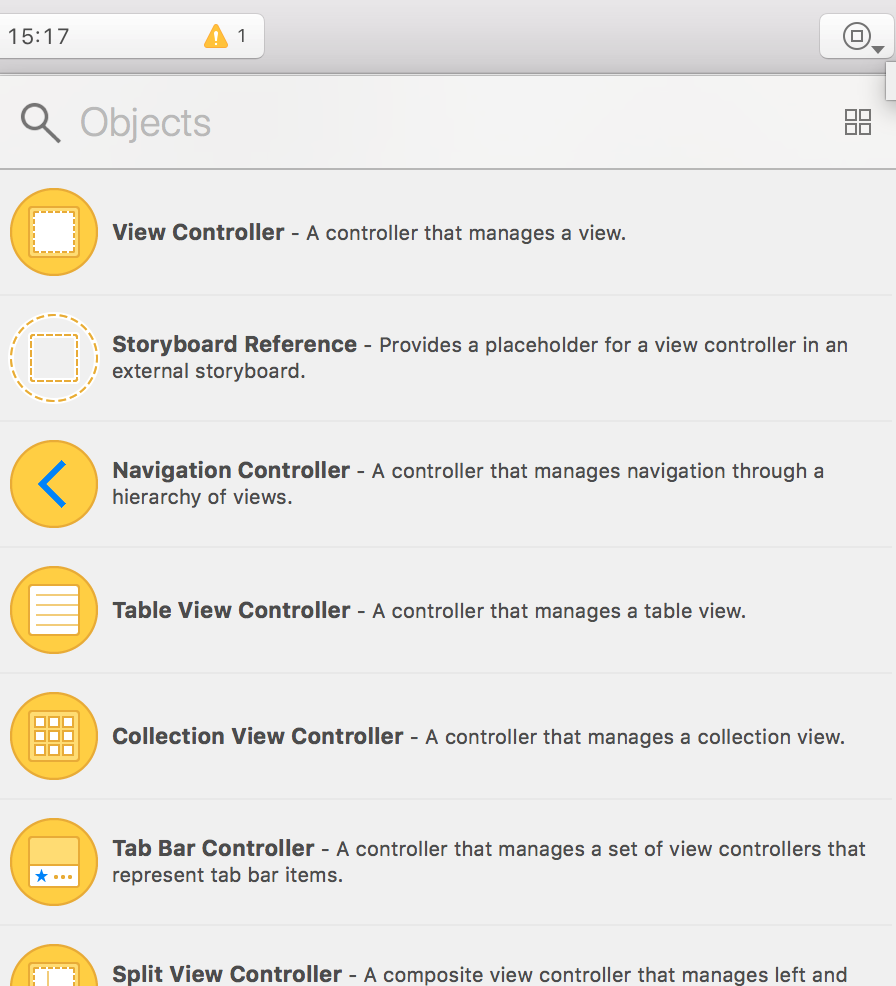
With the Object Library opened, look for UITableView. If you begin typing the name of the component you're looking for in the Object Library, all potential matches should automatically be filtered. Once you find the table view, drag it to the app's view. After doing this, use the white squares at the corners of the table view to make sure that the table covers the entire view.
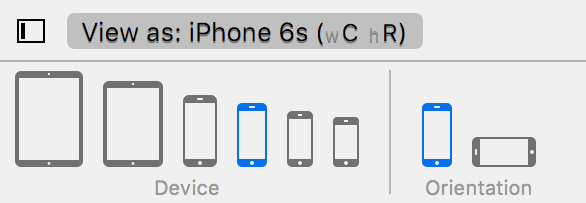
If you look at the bottom of the window, you can see the dynamic viewport inspector. If you don't see it, try clicking on the name of the current preview device. In the inspector, select a device that either has a larger or a smaller screen than the current device. When you have done this, you will notice that the table view doesn't cover the viewport as nicely anymore. On smaller screens, you'll see that the table view has become larger than the view and on larger screens, the table view isn't large enough to cover the viewport:
To make sure your layout scales properly to fit any screen size you select, you use Auto Layout. Auto Layout enables you to create layouts that automatically adapt to any screen size that exists. Your layout currently uses fixed coordinates and dimensions to lay out the table view. For instance, your table view is set up to be positioned at (0, 0) with a size of (375, 667). This size is perfect for devices such as the iPhone 6, 6S, 7, and 8. But it wouldn't fit nicely with the iPhone Xs or iPad Pro. This combination of a view's position and size is called the frame.
Auto Layout uses constraints to define a layout instead of a frame. For instance, to make the table view fit the entire screen, you would add constraints that pin every edge of the table view to the corresponding edge of its superview. Doing so would make the table view match its superview's size at all times. The simplest way to set up constraints for this is to let Xcode add them for you. Let's use the dynamic viewport inspector to switch back to the initial device you had selected so we can add constraints from there.
First, ensure that the table view covers the entire viewport again, then click on the Resolve Auto Layout Issues button in the bottom-right corner of the Interface Builder screen and select Reset to Suggested Constraints from the menu that pops up:
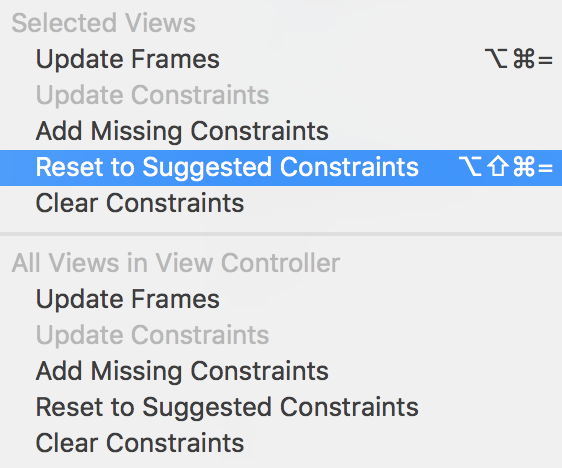
Selecting this option automatically adds the constraints that Xcode considers required for your view. The constraints that were added by Xcode pin all of the table view's edges to its superview edges, which is precisely what you wanted to happen. You can manually inspect these constraints in the Document Outline on the left-hand side of the Interface Builder window:
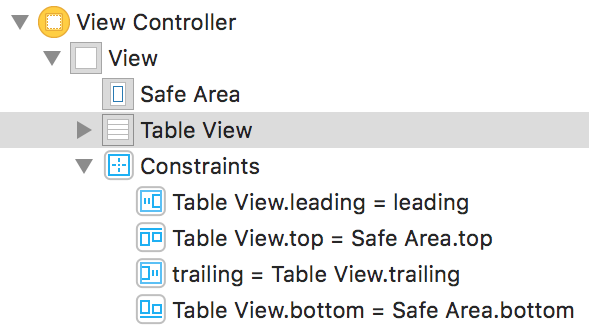
Each constraint that got added describes how the table view should behave relative to another view. In this case, the other view is the superview. If you change the preview device in the dynamic viewport inspector, you should see that the table view always covers the entire screen. Try picking a couple of different screen sizes to make sure this works.
Now that you have a table view added to your view and its layout is exactly what you need, it is time to provide the table with some contents to display. To do this, you're going to write some code that uses Apple's Contacts.framework to fetch the app user's contacts list from their address book.


