Search icon CANCEL
Subscription
0
Cart icon
Your Cart (0 item)
Close icon
You have no products in your basket yet
Save more on your purchases! discount-offer-chevron-icon
Savings automatically calculated. No voucher code required.
Arrow left icon
Explore Products
Best Sellers
New Releases
Books
Videos
Audiobooks
Learning Hub
Newsletter Hub
Free Learning
Arrow right icon
timer SALE ENDS IN
0 Days
:
00 Hours
:
00 Minutes
:
00 Seconds
Arrow up icon
GO TO TOP
Learning Geospatial Analysis with Python-Second Edition

You're reading from   Learning Geospatial Analysis with Python-Second Edition An effective guide to geographic information systems and remote sensing analysis using Python 3

Arrow left icon
Product type Paperback
Published in Dec 2015
Publisher Packt
ISBN-13 9781783552429
Length 394 pages
Edition 1st Edition
Languages
Arrow right icon
Author (1):
Arrow left icon
Joel Lawhead Joel Lawhead
Author Profile Icon Joel Lawhead
Joel Lawhead
Arrow right icon
View More author details
Toc

Table of Contents (12) Chapters Close

Preface 1. Learning Geospatial Analysis with Python FREE CHAPTER 2. Geospatial Data 3. The Geospatial Technology Landscape 4. Geospatial Python Toolbox 5. Python and Geographic Information Systems 6. Python and Remote Sensing 7. Python and Elevation Data 8. Advanced Geospatial Python Modeling 9. Real-Time Data 10. Putting It All Together Index

Clipping images


Very rarely is an analyst interested in an entire satellite scene, which can easily cover hundreds of square miles. Given the size of satellite data, we are highly motivated to reduce the size of an image to our area of interest only. The best way to accomplish this reduction is to clip an image to a boundary that defines our study area. We can use shapefiles (or other vector data) as our boundary definition and basically get rid of all the data outside this boundary. The following image contains our stretched.tif image with a county boundary file layered on the top, visualized in Quantum GIS (QGIS):
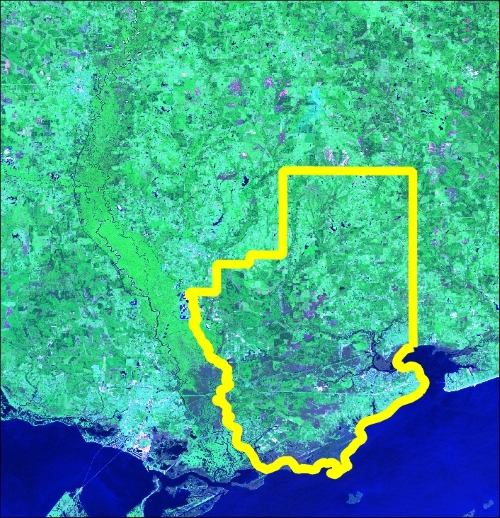
In order to clip the image, our next example executes the following steps:

  1. Load the image in an array using gdal_array.

  2. Create a shapefile reader using PyShp.

  3. Rasterize shapefile into a georeferenced image (convert from a vector into raster).

  4. Turn the shapefile image into a binary mask or filter to grab only the image pixels that we want within the shapefile boundary.

  5. Filter the satellite...

lock icon The rest of the chapter is locked
Register for a free Packt account to unlock a world of extra content!
A free Packt account unlocks extra newsletters, articles, discounted offers, and much more. Start advancing your knowledge today.
Unlock this book and the full library FREE for 7 days
Get unlimited access to 7000+ expert-authored eBooks and videos courses covering every tech area you can think of
Renews at $19.99/month. Cancel anytime
Banner background image