Getting started with IBM Quantum Experience
This section provides a quick way to launch either Circuit Composer or the notebooks located in the Quantum Lab views, herein simply referred to as Qiskit notebooks, each of which we will cover in detail in Chapter 2, Circuit Composer – Creating a Quantum Circuit, and Chapter 3, Creating Quantum Circuits Using Qiskit Notebooks, respectively, so hang in there. But as with other views, know that you can kick-start either from the main dashboard view or from the left panel. Each button easily provides a quick launch for either of the two circuit generators.
Learning about your backends
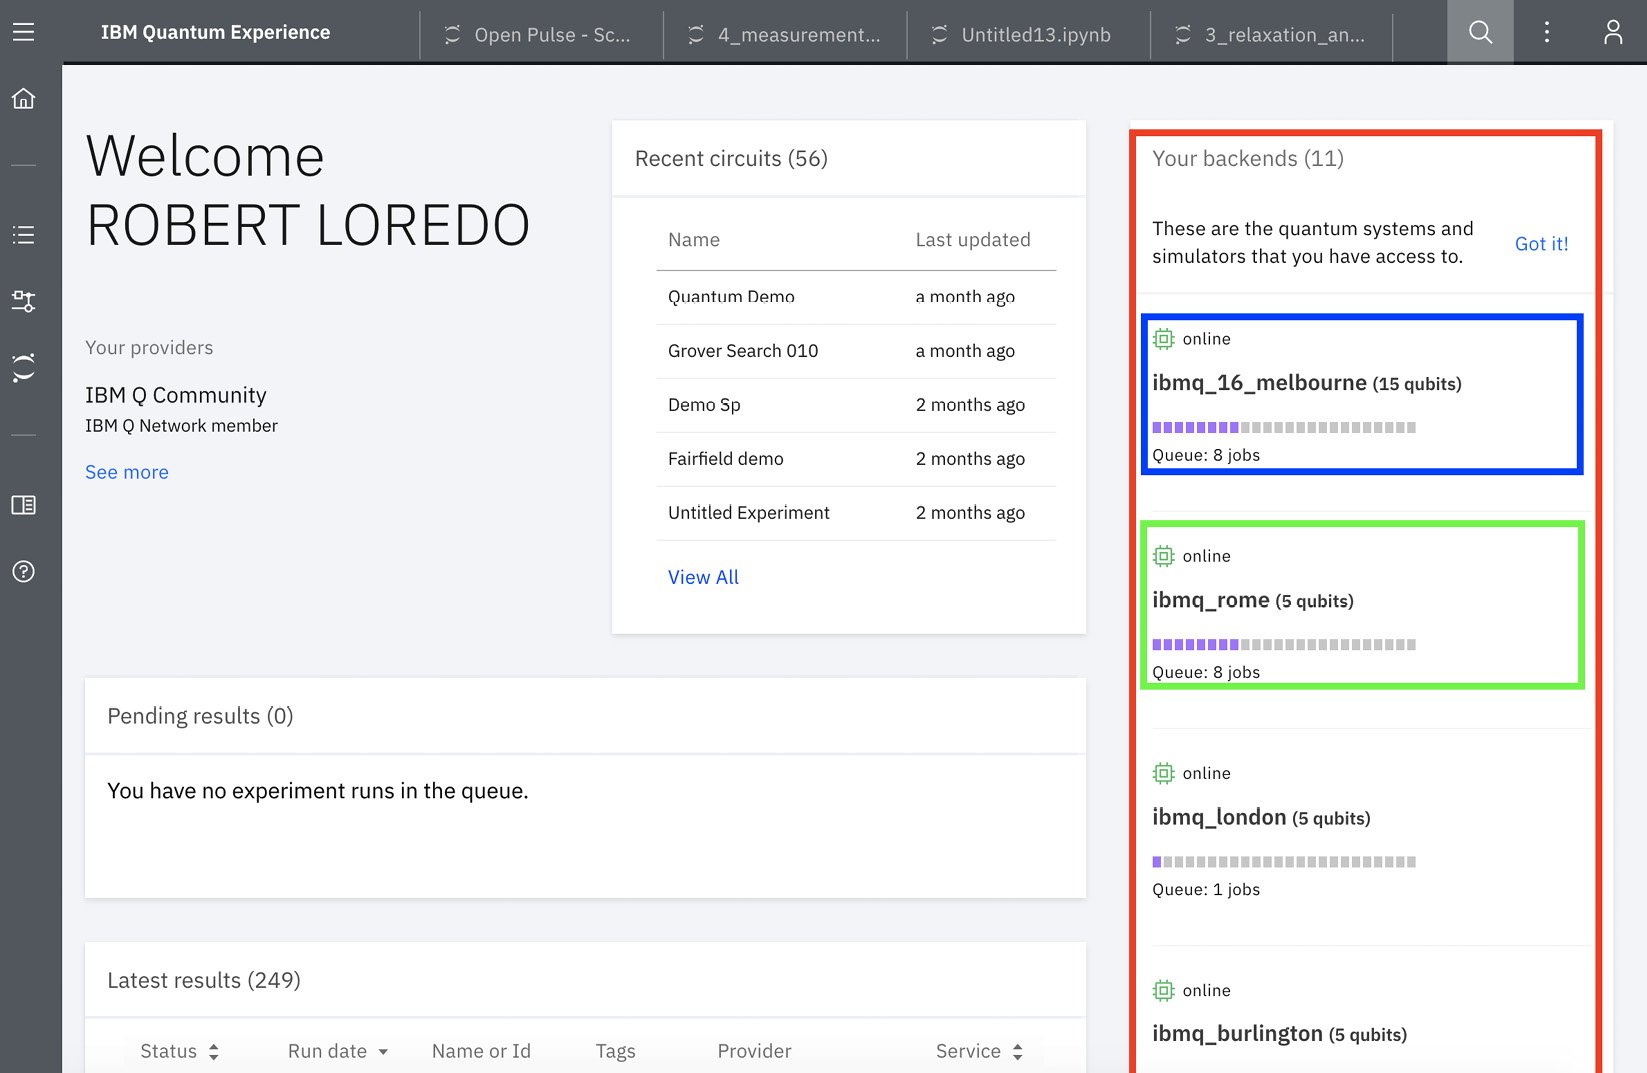
This section lists the available backend quantum systems that are provisioned for your use (as shown in Figure 1.3). It not only provides a list of the available backends but also provides details for each, such as the status of each backend. The status includes whether the device is online or in maintenance mode, how many qubits (quantum bits) each device contains, and how many experiments are in the queue to be run on the device. It also contains a color bar graph to indicate queue wait times, as illustrated between ibmq_16_melbourne and ibmq_rome in the following screenshot. Be aware that the quantum devices listed for you may be different from those listed here:

Figure 1.3 – Provisioned backend simulators and devices
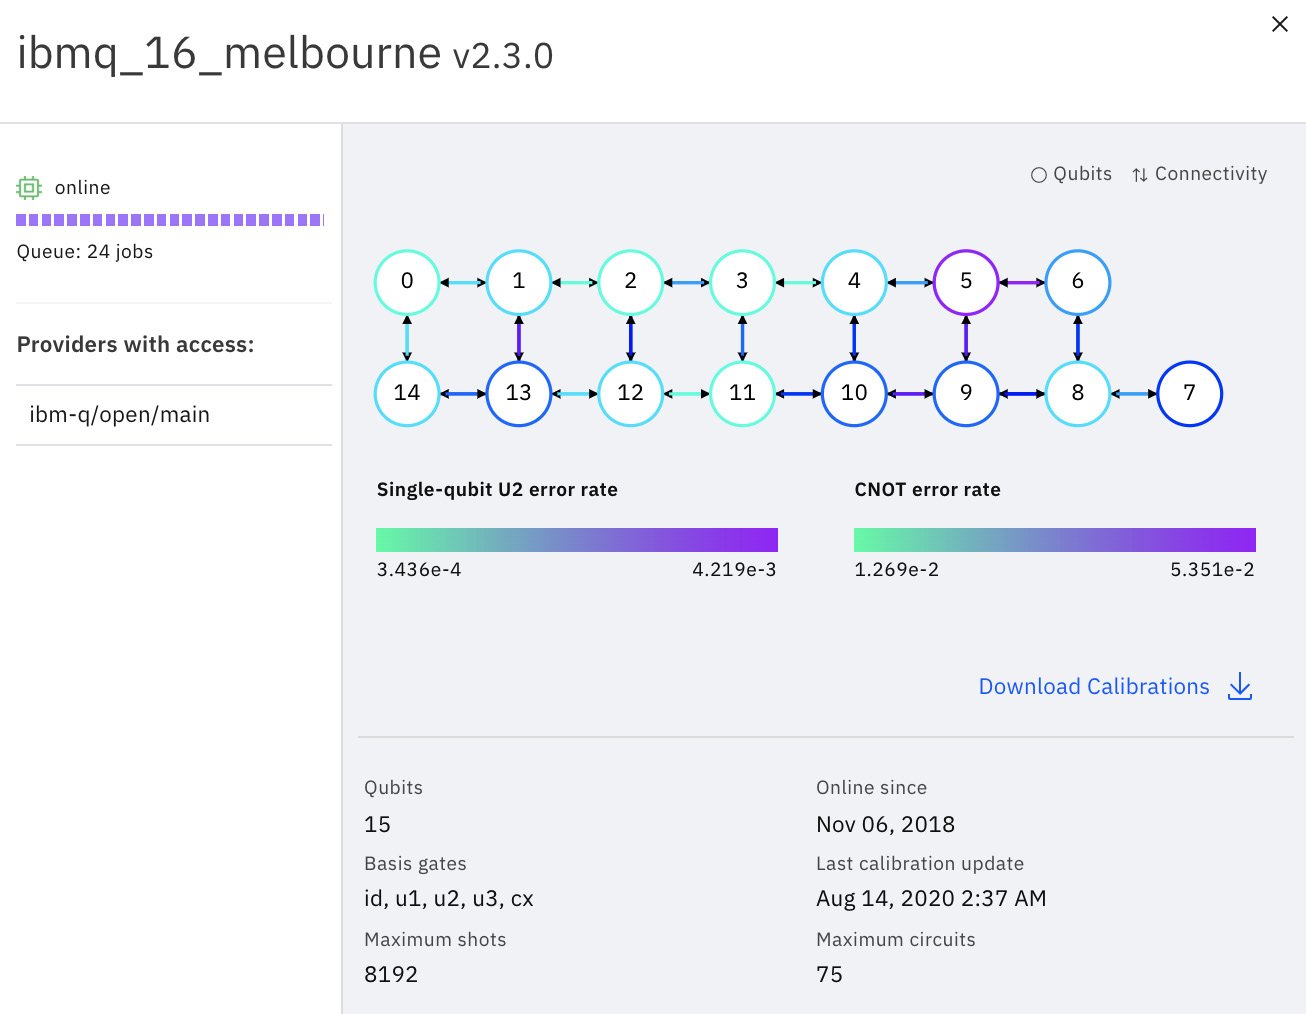
From the preceding screenshot, you can see that another great feature that IQX has with respect to the backend service is the ability to see the hardware details of each real quantum device. If you hover your mouse over each device listed, you will see an expansion icon appear at the top right of the device information block. If you select a device (for example, ibmq_16_melbourne), you will see the device details view appear, as shown in the following screenshot:

Figure 1.4 – Device details view: The status (left) and configuration and error rates (right)
From the previous screenshot, you can see that the device details view contains some very relevant information, particularly if you are working on any experiments that have intricate connectivity between qubits or analyzing error mitigation techniques. On the left of the screenshot (Figure 1.4), you can see the basic status information of the device. This is similar to what you see before expanding the device information. In the square on the right, we get into a little more detail with respect to the devices' configuration, connectivity, and error rates.
As described in the shaded bar area, where the error rate range is illustrated by Single-qubit U3 error rate, and CNOT error rate (single qubit and multi-qubit, respectively), qubits are identified as the circles where the number specifies the qubit number in the device. The arrows in between identify how each qubit is connected to the other qubits. The connections are specific to how the multi-qubit operations are specified.
For example, in the 15 qubit configuration in Figure 1.4 (on the right), you can see that qubit number 4 is the source for target qubits 3 and 10 (we will get into what source and target mean later, but for now just assume that actions to the target qubit are triggered by the source qubit). You can also see that qubit 4 is the target qubit of qubit 5. This visual representation is based on information provided by the device configuration, which you can also access programmatically using Qiskit.
Another piece of information you can get here is the error rates. The devices are calibrated at least once a day or so, and each time they are calibrated, they calculate the average error rates for a single gate (u3) and multi-gates (CNOT). The error rates vary per qubit, or qubits for multi-gates, and therefore, the diagram uses a color heat map to identify where the qubit sits on the error rate scale. Each qubit has a different color associated with it. This color makes it possible to visually identify where on the error rate scale that qubit falls. If you are running an experiment on a qubit that requires low error rates, then you can see from this diagram which of these qubits has the lowest error rate when last calibrated.
Below the qubit configuration, you will see a link that also allows you to download the entire configuration information in a spreadsheet. The details there are very specific to each qubit and they provide more information that isn't visible on the qubit configuration diagram.
Finally, at the bottom of the view are the specifics of the device itself, which includes the number of qubits, the date the device went online, and the basis gates available on the device.
You can now close the device configuration diagram to return to the dashboard, where we will next learn about the quantum programs and how to monitor them.
Learning about pending and latest results
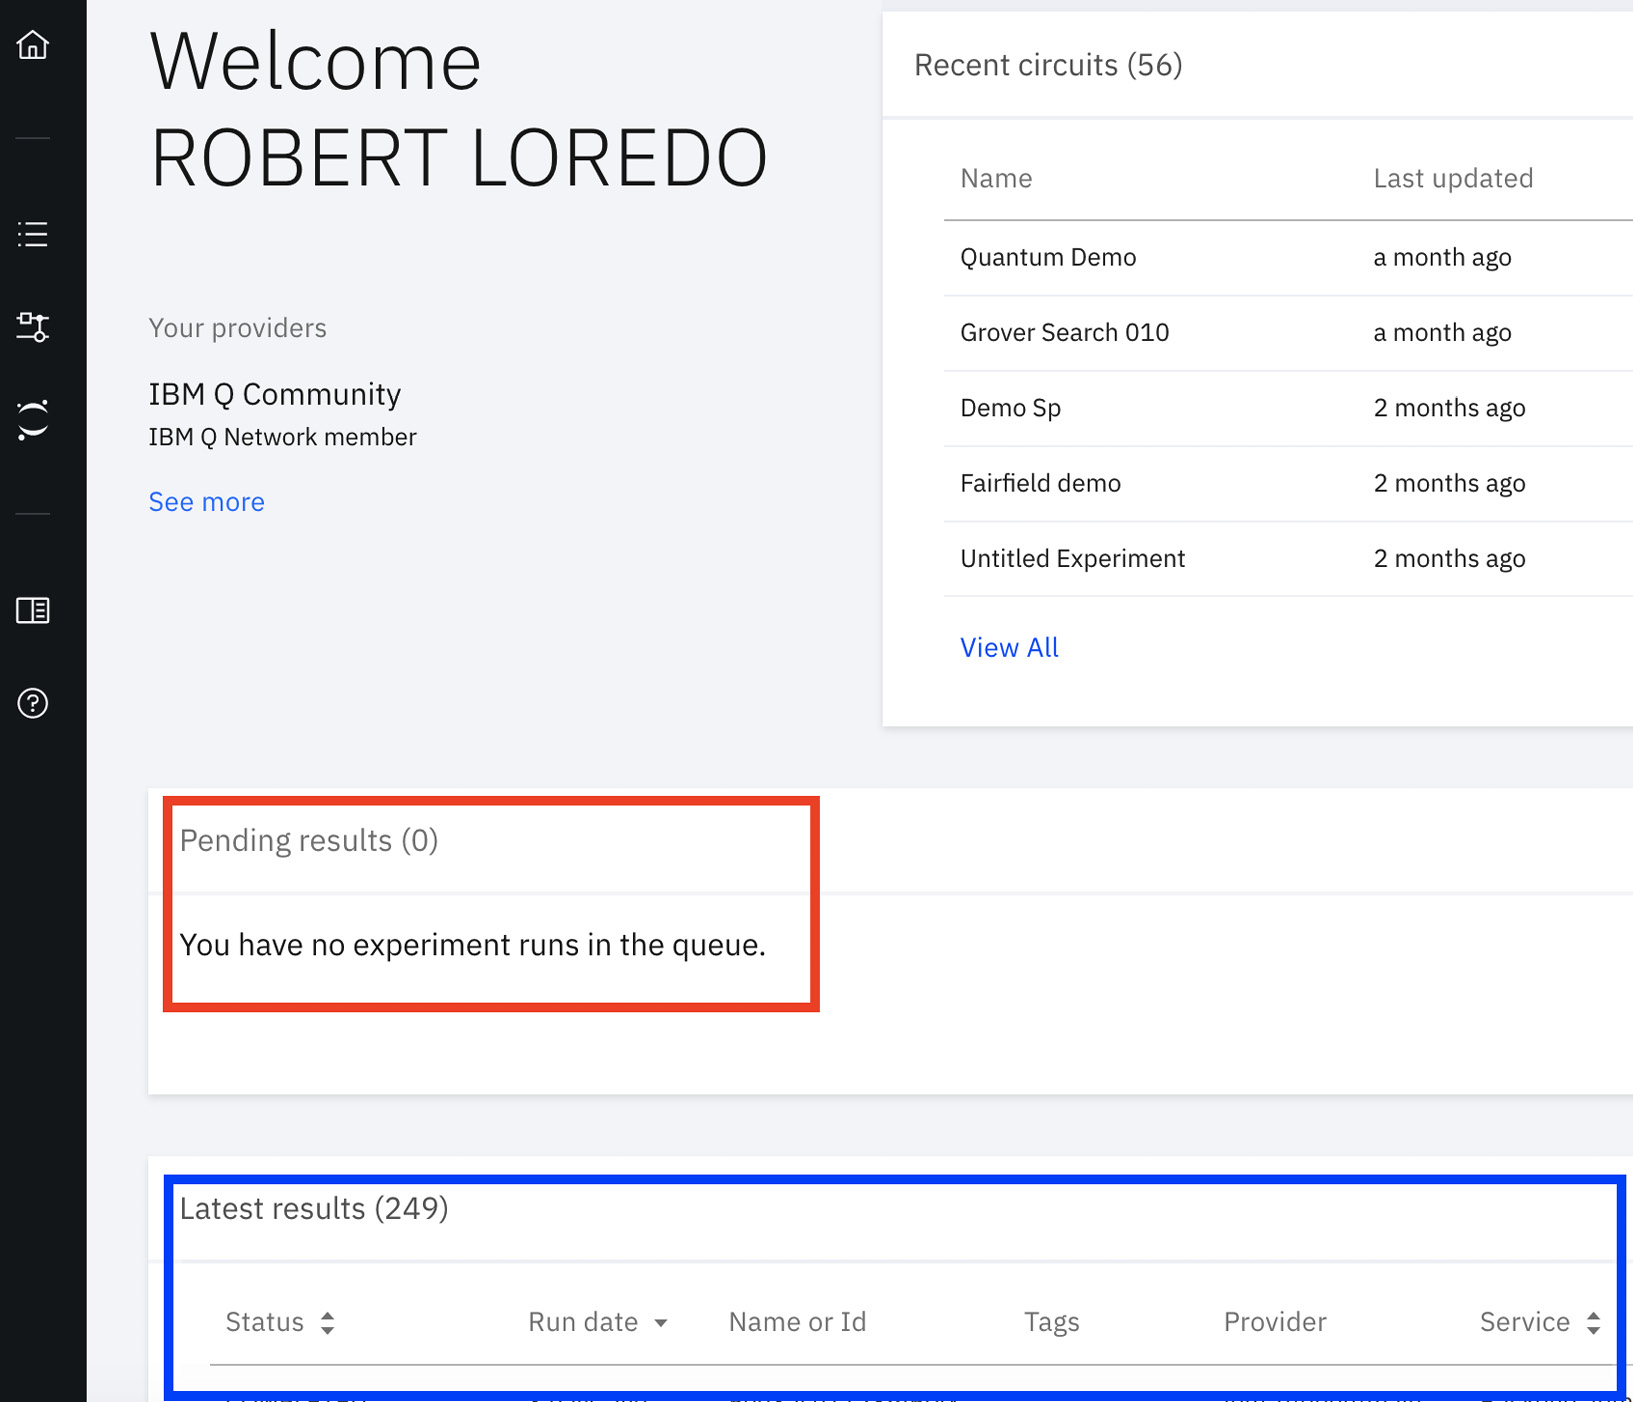
The table shown in Figure 1.5 contains the experiments that are pending completion on the backend devices. You can use this view to quickly see whether your experiments have run, and if not, where in the queue your experiment is set to run next.
Under your pending results table is the table where all your latest results are stored. These are the last few experiment results that were run on either the simulator or real devices on the backend. Each device is initially sorted by creation date but can be sorted by either backend or status, if need be.
Important Note
Details regarding job objects will be covered in Chapter 9, Executing Circuits Using Qiskit Aer.
As well as this, the job ID is listed so that you can call back the details from that job at a later time, as seen in the following screenshot:

Figure 1.5 – Pending results and latest results
In this section, you have learned where to find information about your experiments, hardware details about the simulators and the real quantum devices. Next, we will explore your account profile.


