Networking tools and attacks
In this section, we will start to cover some of the attacks that exist and the tools that you can use to carry them out. As traffic traverses a network, you can perform various attacks, such as capturing the traffic and looking at what it contains, intercepting traffic and misdirecting it, acting as a man in the middle, poisoning results, and more. Let’s begin with capturing packets as they traverse the network.
Packet capturing
Packet capturing is also known as sniffing. This is the process of capturing packets as they traverse the network to look inside and discover any valuable information. By performing packet capturing, you can see all sorts of traffic. This can be both protected and unprotected traffic. Various tools exist that can perform packet capturing. The most common tool that you will hear people talking about is Wireshark. There are more tools, including native tools, within routers and switches that allow you to capture packets. The key is not to understand how each tool works, but rather how packet capturing works and what the benefits are. We will cover packet capturing in more depth in Chapter 2, Capturing and Analyzing Network Traffic.
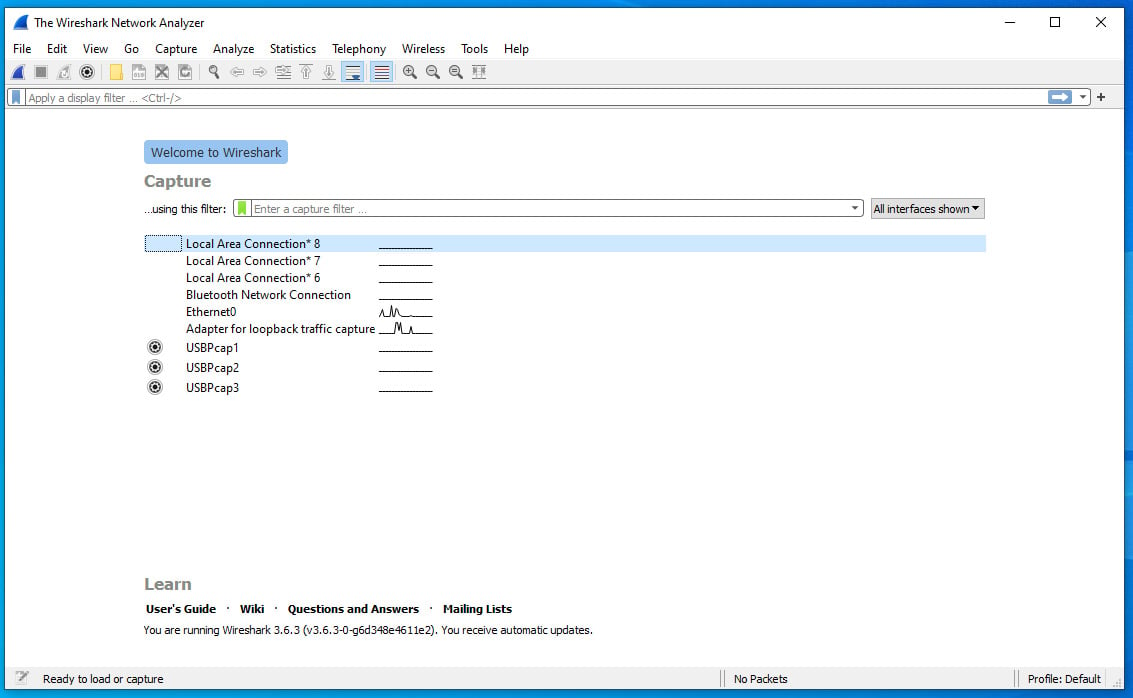
Wireshark can be downloaded from https://www.wireshark.org/download.html and supports almost all operating systems, but best of all, it’s free! Installing Wireshark is straightforward; let’s focus more on the tool itself and how to use it. If you are using Kali Linux, Wireshark will already be installed. The following figure shows the main dashboard of Wireshark:

Figure 1.3 – Wireshark dashboard
The dashboard may seem a bit daunting but let me explain all the components. We will begin with the toolbar, where I will highlight the icons and their functions in the following tables.
In the first table, we will cover the functions that you will interact with when starting a packet capture:
|
Icon |
Name |
Description |
|
|
Start |
This starts a capturing session, using either the defaults or the last set of options from a previous session |
|
|
Stop |
This will stop a currently active capture session |
|
|
Restart |
This can be used to restart the packet capturing session |
|
|
Options |
This button will open Capture Options |
|
|
Open |
This can be used to open a saved capture for analysis |
|
|
Save As |
This button can be used to save your current capture to a file |
|
|
Close |
Use this button to close the currently open capture file |
Table 1.1 – Wireshark icons used for packet captures
The next set of functions enables you to work within the packet capture file:
|
Icon |
Name |
Description |
|
|
Find Packet |
This button can be used to find specific packets based on various criteria that you define |
|
|
Go Back |
This button allows you to go one step back in the packet history |
|
|
Go Forward |
This button allows you to jump one step forward in the packet history |
|
|
Go To Packet |
This will enable you to move to a specific packet |
|
|
Go to First Packet |
Jumps to the first packet in the capture file |
|
|
Go to Last Packet |
Jumps to the last packet in the capture file |
Table 1.2 – Wireshark icons for working with the capture file
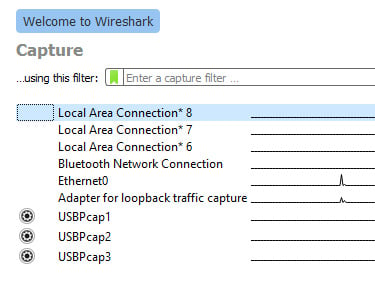
Next, you have the main interface view, as per the following figure. This will show you which interfaces have active traffic on them, and which ones are not seeing any traffic. This is depicted by a line next to the interface number. In the following figure, you can see that the Ethernet0 and Adapter for loopback traffic capture interfaces are seeing traffic:

Figure 1.4 – Wireshark interfaces that have traffic
Starting a packet capture with Wireshark is simple. First, you need to select the interface that you would like to capture traffic on. Next, you must click on the Start button to start capturing packets. You will then see results appear in the main display window. The following figure is an example of ARP requests on the network:
Pro tip
ARP stands for Address Resolution Protocol. It is used to discover the local MAC address of the endpoint by using its IPv4 address.

Figure 1.5 – ARP requests
When you perform packet captures, you need to filter the output to look for your specific results. The display filter within Wireshark does just that. You can see it when you look at Figure 1.5 – specifically the text in the green bar, stating eth.dst == ff:ff:ff:ff:ff:ff:ff:ff. When you type text in the display filter, Wireshark will offer a list of suggestions based on what you have typed in. It also provides a way for you to see if the filter will work or not – for example, if the bar turns yellow, this means that the display filter was accepted but may not work as you expected. If it turns red, it means that the filter was not accepted and will not work. If it turns green, then the filter has been accepted
The following table defines a few useful filters:
|
Filter Syntax |
Description |
|
|
Filter by IP address |
|
ip.dst == or ip.src = = |
Filter by either source or destination IP address |
|
tcp.port == 80 |
Filter by a specific TCP port |
|
tcp.dstport == 80 |
Filter by a specific destination port |
|
frame.time >= “april 28, 2022 13:00:00” |
Filter by a specific timestamp |
|
Tcp.flags.syn == 1 |
Filter to look for a SYN flag |
Table 1.3 – List of useful filters to use
There is an extensive list of filters that are well documented on Wireshark’s documentation page. You can find the complete list here: https://www.wireshark.org/docs/dfref/.
Now that we have an idea of how to capture packets with Wireshark, let’s move on to spoofing. We will focus on MAC address and ARP spoofing techniques.
MAC address spoofing
As we have identified, every network interface has a unique MAC address. MAC address spoofing is a type of computer identity theft that involves altering the MAC address on the NIC. MAC address spoofing techniques are commonly used when attempting to break into a LAN environment by assuming the identity of an authorized computer. For example, some networks may whitelist MAC addresses. If you can discover that whitelisted MAC address, you can assume its identity. You can spoof your MAC address to masquerade as a different device on the network.
Let’s look at how to perform MAC address spoofing. For this, we will use Kali Linux and the macchanger tool.
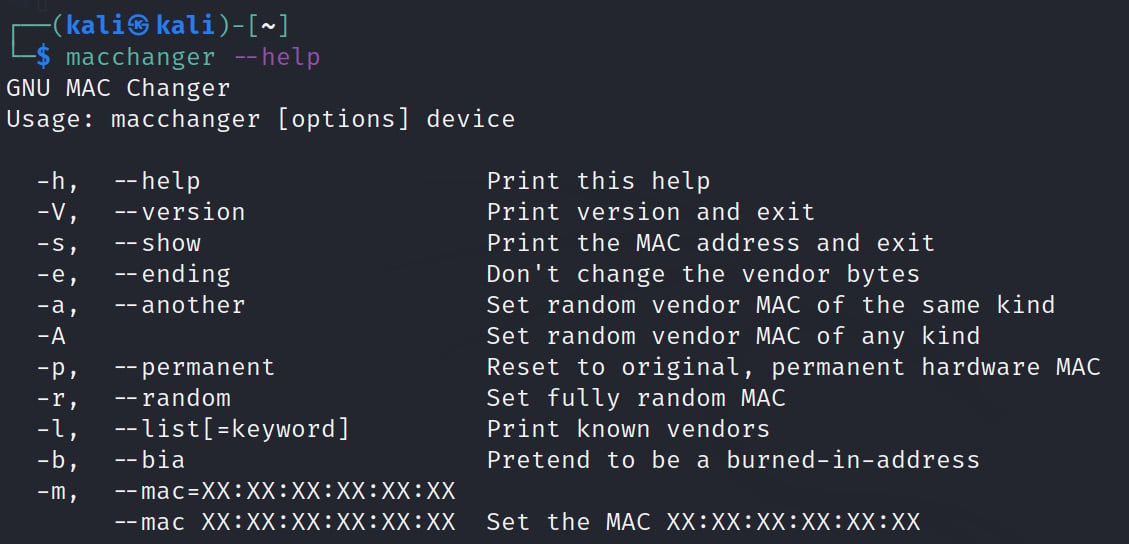
From a Terminal window, issue the macchanger --help command. This will show you all the options that are available to use with the tool, as shown in the following screenshot:

Figure 1.6 – macchanger usage options
Before we use the tool, let’s verify our current MAC address. You can do this by using the ifconfig command, followed by your interface. In my case, this is eth0, as per the following figure:

Figure 1.7 – Current allocated MAC address
Currently, my MAC address (called ether in Linux) is 00:0c:29:77:2c:99. Now, let’s modify this to some random value. This can be done in one easy step:
We will issue the sudo macchanger -r eth0 command. I am using the sudo command since my current user does not have root permissions. You can also make use of the sudo -i command, which will move you to the root user, after which you won’t need to prepend the commands with sudo. -r is used to generate a random MAC address; I could use other options if required. For example, I could set a random MAC address of the same kind using the -a switch, though keep in mind that this switch will keep the same vendor OUI as your current vendor. Lastly, I define my interface, which is eth0.
Tip
If you experience an ERROR: Can’t change MAC: message, then you will need to execute the ifconfig eth0 down command before running the macchanger command (this will switch your network interface OFF).
Once you run the macchanger command, remember to turn the interface back ON by using the ifconfig eth0 up command.
The results presented in the following figure show that the interface now has a new MAC address of 06:1d:9f:2f:db:f6:

Figure 1.8 – Using macchanger to set a random MAC address
If you want to define your own MAC address, you can use the following command:
$ sudo macchanger --mac XX:XX:XX:XX:XX:XX Set the MAC XX:XX:XX:XX:XX:XX
Note
If you are using a Windows environment, some network cards provide the functionality to change your MAC address within the interface properties.
As you have seen, randomizing your MAC address is a simple yet very effective task when it comes to either stealing an identity or masquerading on a network. Now, let’s move on to ARP spoofing.
ARP spoofing
Before we dive into ARP spoofing, let’s put the ARP into perspective. Think of MAC addresses that identify who you are; these are physical identifications. IP addresses are used to identify where you are. ARP tables are used to manage the relationship of who and where you are.
The ARP is used to discover the MAC address related to an IP address. For example, if a router needs to send data to a computer that holds the IP address of 192.168.1.20, it needs to know the MAC address and to discover this, it will send an ARP query. ARP queries are not limited to routers; other devices, such as wireless routers, switches, and computers, all work with the ARP protocol.
In an ARP spoofing attack, the attacker sends fake ARP responses to a victim. These responses essentially tell the victim that the attacker’s MAC address maps to something else, such as a router’s IP. This means that the victim would send packets that were originally destined for the router to the attacker as the router’s MAC address would be replaced with the attacker’s MAC address. ARP spoofing is a typical example of a man-in-the-middle (MITM) attack.
Note
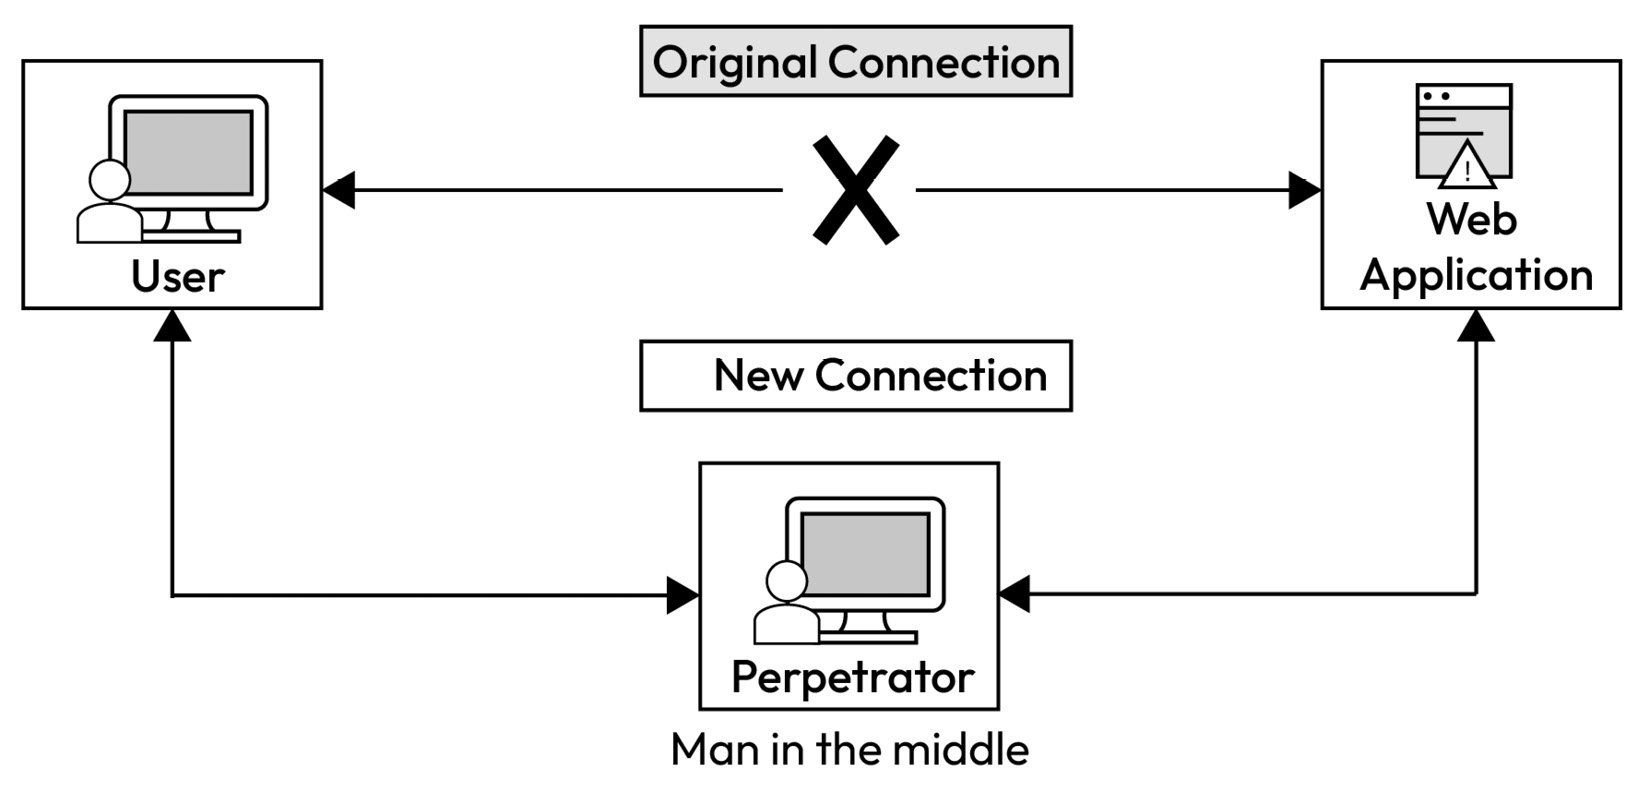
An MITM attack occurs when an attacker listens in on the communication between a user and an application. The intent could be to either spy on the conversation with the intent to gain valuable information or to modify the conversation and redirect the communication to devices that the attacker controls.
The following diagram shows how an MITM attack works:

Figure 1.9 – Man-in-the-middle attack (Source: https://www.imperva.com/learn/application-security/man-in-the-middle-attack-mitm/)
Pro tip
Remember that for Kali Linux to forward packets on behalf of other machines, you need to enable IP forwarding. This needs to be done by issuing the echo 1 > /proc/sys/net/ipv4/ip_forward command as root.
To perform an ARP spoofing attack, you need to leverage additional tools within Kali Linux. The tool suite that we will need to use is called dSniff. dSniff contains several tools that can be used to listen to and create network traffic.
The tool can be installed using the following commands:
- First, we must switch to the root user using the following command:
sudo -i
- Next, we must ensure that we have the latest package updates by issuing the following command:
apt-get update
- Finally, we must install the tool suite using the following command:
apt-get install dsniff
Within the toolset, we will make use of arpspoof, a tool that will execute the ARP spoofing attack.
Let’s break down this command. The -i flag represents the interface that you want to use to spoof ARP requests, while the -t flag specifies the target that you would like to poison. You can leave this option out but then arpspoof will poison all targets on the network.
When you run the command, the output would look like what’s shown in Figure 1.10. Within the output, you will find the first MAC address (0:c:29:77:2c:99), which belongs to the Kali Linux machine. The second MAC address (0:c:29:ec:1e:7b) belongs to the target machine. You then have the type field (0806), which indicates that an ARP packet is contained inside the Ethernet frame. Next, you have the byte size (42) of the Ethernet frame. The ARP reply section shows what the ARP message looks like when it is seen by the target. Essentially, it forces the victim to update its ARP table so that the IP address of the router (192.168.111.2) is now at the MAC address of the Kali Linux machine:

Figure 1.10 – Results of using the arpspoof command
When you perform an ARP spoofing attack, you need to also trick the router into believing that you are the target. To do that, you need to issue the same command but this time, reverse [ROUTER_IP] and [TARGET_IP]. The command would be as follows:
$ sudo arpspoof -i [INTERFACE] -t [ROUTER_IP] [TARGET_IP]
You will get a chance to perform an ARP spoofing attack in the upcoming section. But first, we need to build a working lab environment that we will use throughout this book. As we progress through this book’s chapters, we will add additional components to the lab; these components will be introduced at the start of each chapter.


