Search icon CANCEL
Subscription
0
Cart icon
Your Cart (0 item)
Close icon
You have no products in your basket yet
Save more on your purchases! discount-offer-chevron-icon
Savings automatically calculated. No voucher code required.
Arrow left icon
Explore Products
Best Sellers
New Releases
Books
Videos
Audiobooks
Learning Hub
Free Learning
Arrow right icon
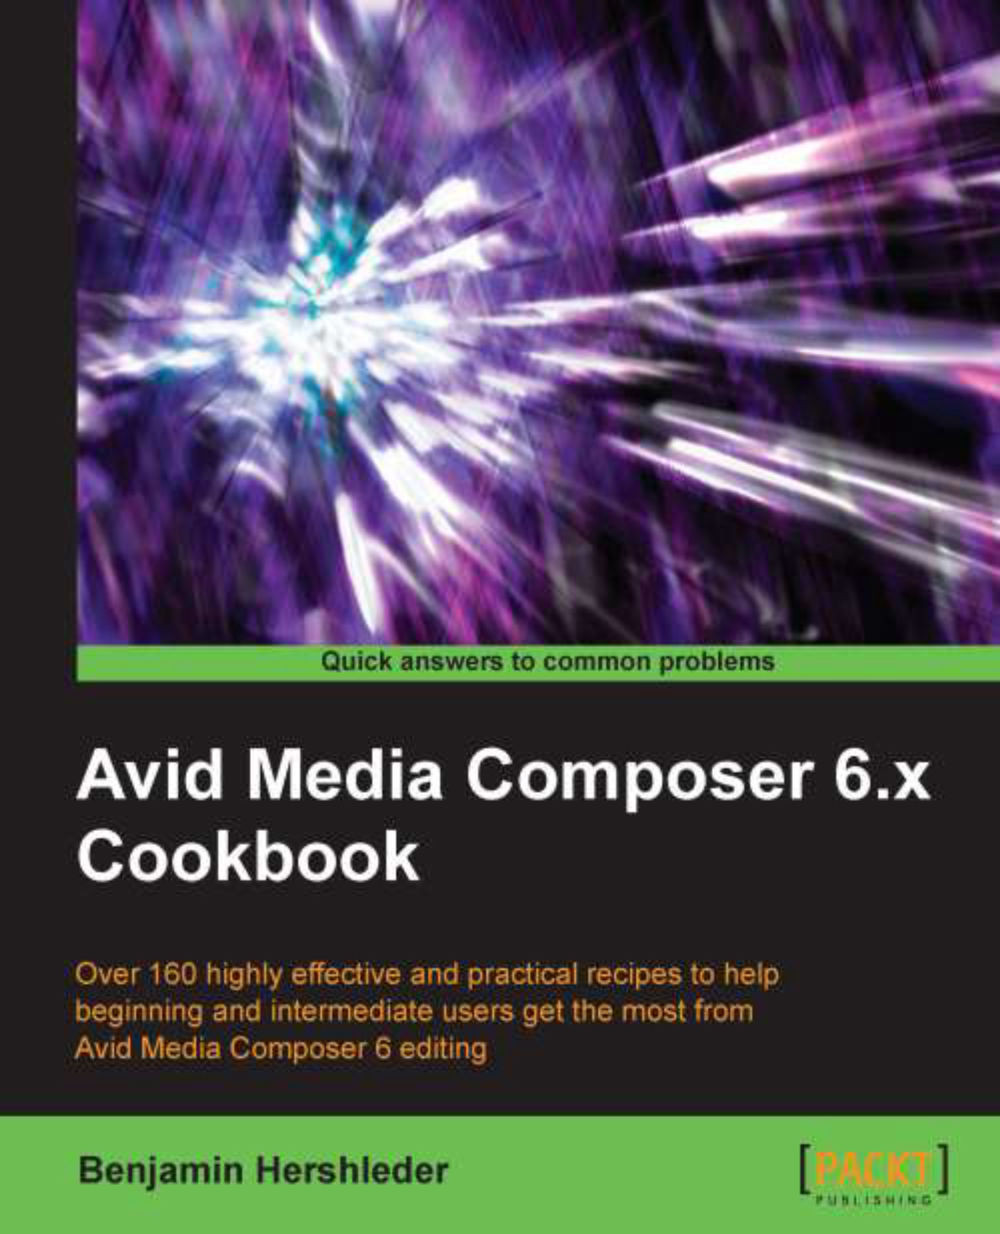
Avid Media Composer 6.x Cookbook

Avid Media Composer 6.x Cookbook: What better way to learn the professional editing possibilities of Avid Media Composer than by trying out practical, real-world examples? This book has over 160 hands-on recipes and guidance covering both basic and advanced techniques.

eBook
$9.99 $32.99
Paperback
$54.99
Subscription
Free Trial
Renews at $19.99p/m

What do you get with Print?

Product feature icon Instant access to your digital eBook copy whilst your Print order is Shipped
Product feature icon Paperback book shipped to your preferred address
Product feature icon Download this book in EPUB and PDF formats
Product feature icon Access this title in our online reader with advanced features
Product feature icon DRM FREE - Read whenever, wherever and however you want
OR
Modal Close icon
Payment Processing...
tick Completed

Shipping Address

Billing Address

Shipping Methods
Table of content icon View table of contents Preview book icon Preview Book

Avid Media Composer 6.x Cookbook

Chapter 1. Getting Assets into Your Media Composer Project

In this chapter we will cover:

  • A strategy for project organization at the desktop level

  • Understanding Media Creation settings

  • Mixing frame rates

  • Tape capture tip: Adding Markers while Capturing

  • Tape capture tip: Making Subclips while Capturing

  • Logging clips tip: Logging from the keyboard

  • Logging clips tip: Keeping the Capture Tool active after logging a clip

  • Quickly calculating total duration of clips (or any items in a bin)

  • Combining available drive space and/or controlling where media is stored

  • Making sure your Batch Capture continues without you

  • Modifying clips before capture

  • Modifying clips after capture: Adding tracks

  • Modifying clips after capture: Deleting tracks

  • Capturing and editing at the same time

  • Preparing to use AMA (Avid Media Access): Getting the plug-ins

  • AMA (Avid Media Access) linking

  • Getting the AMA file's image to display as desired

  • Consolidating (copying) AMA Master Clips

  • Transcoding AMA linked clips before beginning to edit

  • Transcoding AMA Master Clips after editing has begun

  • Consolidating an AMA sequence or subclips

  • Transcoding an AMA sequence

  • Importing stills and video files such as QuickTime

  • Importing audio

  • Adjusting audio levels before editing

  • Adjusting audio pan settings before editing

  • Setting stereo-audio tracks

Introduction


You've created your project, and now comes the sometimes time-consuming task of acquiring your assets. In this chapter, I'll get you thinking about organization, provide you with some common workflows, and give you some tips to hopefully make your work easier and/or more productive.

A strategy for project organization at the desktop level


Some words to the wise to help you avoid some common pitfalls.

How to do it...

Following are the steps for organizing the project at the desktop level:

  1. Determine a location for a folder that will hold items relating to your project that will not require being moved.

  2. Create a folder and name it something that is clear and concise, for example, either [Project Name] Materials or [Project Name] Assets.

  3. Inside that main folder, create additional folders for Avid Project Backups, files you will link to using the Avid Media Access (AMA) feature, Music, Sound Effects, Imports_Stills, Imports_Motion Graphics, Photoshop Masters, Fonts, After Effects Projects, and any others you think you'll need.

How it works...

By keeping everything organized and in a consistent location, you will have a much easier time keeping track of assets and changes to assets. Further, backing up, moving, archiving, or re-importing the assets will be easier.

The trick is to remember to copy assets into this folder before putting them to use in any way within your project. For example, copy music and sound effects from a CD to this folder, then import the audio file that's in the folder (rather than directly off the CD) into a Media Composer, or copy into this folder any fonts that you download before adding them to your operating system.

Understanding Media Creation settings


It's important to spend some time setting up your Media Creation settings. Essentially Media Creation settings allow you to set defaults, which will help ensure that the media files you create (for example, render files, imports, and so on) are stored where you want them and are of the resolution you need. Plus, it will save you time making selections in various dialog boxes and tools throughout the workday.

Getting ready

In your Project Window select the Format tab. Select the format of the media that you will be capturing, importing, and/or rendering. Media Composer will remember your Media Creation settings for each format that you configure. So, for example, if you're mixing SD and HD footage, you'll configure your Media Creation settings for each. Once your preferences are set in the Media Creation tool for each format, Media Composer will automatically switch to your customized settings whenever the format itself is switched.

How to do it...

The following steps will guide you through using the Media Creation Tool:

  1. Go to the Tools menu at the top of your screen.

  2. Select Media Creation.

  3. Proceed section by section to set defaults for the resolution of the media that you create, as well as for the destination for that media. See the following How it works... section for details.

How it works...

The settings are separated by tabs, described as follows:

Drive filtering and indexing

  • Filter Network Drives Based on Resolution: Selecting this will not allow media files to be placed on any network drives that Media Composer feels will not be able to reliably capture or playback files of a particular resolution. For example, you open your Capture Tool and set the resolution to 1:1. Then when you go to select a drive to store your media files on, you may see that one is grayed out and not selectable. If you then change your resolution to 3:1, you may find that it is now selectable as a storage drive.

  • Filter Out System Drive: Selecting this will not allow the media files to be stored on the same drive that your operating system is installed on.

  • Filter Out Launch Drive: Selecting this will not allow the media files to be stored on the same drive that your Media Composer software is installed on.

Video resolution

Under each tab you can select a default resolution. You are not locked into this resolution. Tools and dialog windows will still allow you to override this default whenever you want.

Apply to All: If you'd like to set a specific resolution and have it applied to all the different media type tabs, rather than having to do it one by one, simply click on the Apply to All button.

The benefit of breaking the media types into categories, such as Capture, Render, and Import, is that you can then set different defaults for each. For example, on a project with many hours of taped footage, you might elect to capture all of your footage at a low resolution in order to increase how much media will fit onto your drive(s). This will mean that when the project is creatively finished, you will go through a second process to recapture just the video portions that are being used at a much higher resolution, a process frequently called the Up-Res, so that the image quality will be higher. You may prefer to not have to go through a similar process for all of the titles, still images, and motion graphics, so you could elect to set the default for these media types at the level where you need them to be for the final master (for example, 1:1).

Video drive/Audio drive

Under each tab, you can select a default location for the media types to be stored. You are not locked into this. Various tools and dialog windows will still allow you to override this default when desired.

This selection is helpful for ensuring files go where required, and it allows you to send render files (known in Avid terminology as Precompute files) to a specific drive if required by your facility.

Apply to All: If you want the storage drive to be the same for all the different media type tabs, rather than having to do it one by one, simply click on the Apply to All button.

Media type

Changing this is only possible for SD video, as HD will always be in the MXF format. Media Creation settings will default to the file format called Material Exchange Format (MXF). You should not change this unless you are in the unique situation where you are generating media on one workstation that will have to be used on a much older workstation that can only play the Open Media Framework (OMF) file format.

Mixing frame rates


Yes, it's possible to mix footage with different frame rates. However, at the time of writing, the Media Composer only allows each Project to be at one frame rate. So, here's one method to make the mixing of frames rates possible.

Getting ready

You will create two separate projects, each at the required frame rate. Be sure to label them accordingly to avoid confusion. For example, one project would be named [Project Title]29-97 (project names cannot contain a period) and the other would be named [Project Title] 24p.

How to do it...

The following are the steps to mix footage with different frame rates:

  1. Capture and/or import your video into the corresponding projects based on the frame rates.

  2. Decide which project will be the main/primary project that you will actually work within to edit and craft your movie. Most likely, this will be the project that contains the majority of your footage or matches the final delivery format that is required.

  3. In your main project, ensure that no bins are currently selected in the Project Window.

  4. Go to the File menu and select Open Bin…. (Alternatively, you will find the Open Bin... selection under the Project Window's Fast Menu as well as in the menu that will appear when you right-click in the Project Window.)

  5. In the dialog window, navigate to the project that's at the other frame rate and contains the bin file that you want to open.

  6. Select the bin and either double-click on it or click on the Open button in the dialog window.

  7. The bin will open in your Project and you can access the contents.

  8. Once the bin is open, it will be inside a folder created by Media Composer labeled Other Bins. This is short for other projects' bins. It means that the bin file does not reside inside the same folder as your Project's bin files.

At this point you can elect to begin editing right from those bins, or you may elect to copy the clips into a bin that does reside in your Project folder. See the next There's more... section for two methods of copying clips, called Duplicating and Cloning.

There's more...

There are two methods you can use to copy the clips (making a Duplicate or a Clone), each with a unique behavior. Whether you Duplicate or Clone a clip, you will never create any new media files, but will simply create an additional clip that refers (or you could say points) to the media file(s). Media Composer calls this reference a link and would say that the clip is linked to the media file(s).

  • Duplicating a clip: Each clip acts independently of the other. For example, one clip could be named Horse and contain several Markers while the Duplicated clip could be named White Horse Runs and have no Markers. Making changes to the name, adding/removing I/O marks, and adding/removing Markers to one Duplicated clip does not have any affect on the other. Further, the creation date of a Duplicated clip will reflect the new date and time it was created.

  • Cloning a clip: Cloned clips are able to communicate to their cloned brethren. For example, if you change the name of one Cloned clip, the other's name will also change. The same is true for adding and removing Markers as well as In and Out points. The creation date for all Cloned clips will be the same (the original date).

Duplicating clips

The following are the steps for duplicating clips:

  1. Select the clips you want to Duplicate.

  2. Go to the Edit menu.

  3. Select Duplicate. Alternatively, you could right-click on one of the selected clips and choose Duplicate from the Contextual menu, or use the keyboard shortcut cmd + D (Mac) or Ctrl + D (PC).

  4. New clips will be created and will have .copy added to the end of their names.

  5. Create a new bin by clicking on the New Bin button in your Project Window, or go to the File menu and select New Bin.

  6. Move the clips that you just created to the new bin.

  7. If you no longer want to have the borrowed bin appear in the Other Bins folder, select the borrowed bin and either press the Delete key or right-click and select Delete Selected Bins from the Contextual menu. It's helpful to note that you are not actually permanently deleting the bin file, but rather just telling Media Composer that you no longer want to use it. The bin is still intact inside the other project's folder. For emphasis, this only applies to bins that are inside the Other Bins folder. Deleting a bin created within the currently open Project will place it into the Trash.

Cloning clips

The steps for Cloning the clips are as follows:

  1. Create a new bin by clicking on the New Bin button in your Project Window, or go to the File menu and select New Bin.

  2. Select the clips you want to Clone.

  3. Press and hold the Alt/option key while you drag the selected clips to the new bin.

  4. New clips will be created in the desired bin when you release the mouse button. These clips will not have .copy added to them.

  5. If you no longer want to have the borrowed bin appear in the Other Bins folder, select it and either press the Delete key or right-click and select Delete Selected Bins from the Contextual menu. It's helpful to note that you are not actually deleting the bin file, but rather just telling Media Composer that you no longer want to use it. The bin is still intact inside the other Project's folder.

Sequences will never be Cloned

On a related topic, you can use either of the methods mentioned previously on a sequence. Both of the methods will produce a Duplicate of the sequence. In other words, both of the methods will make a sequence with the word .Copy added to it, and no matter which method you used to create that sequence, it will never, ever, communicate with another sequence in any way. They will always be totally independent. The changes made to one sequence will never be replicated in another.

Motion Adapters

Note that when you edit mixed frame rate clips into your Sequence, they are automatically adjusted. You'll see a small green dot on the clip that indicates that it contains what Avid calls a Motion Adaptor. The method used to adjust the image (for example, Blended Interpolated or Both Fields) can be changed by promoting the clip to a Timewarp effect. The Motion Adaptor is applied only to the video and preserves the original duration of the clip; further, the audio is not altered in any way.

Tape capture tip: Adding Markers while Capturing


This simple feature allows you to accomplish multiple tasks at the same time. As you capture material off tape, you can simultaneously add Markers to help you locate the takes you like and the takes that the members of the creative team like. For example, while Capturing and watching the footage with your director, you might use red Markers for what you deem to be useful takes and yellow Markers for the ones that the director likes.

Getting ready

This tip works when you're actively Capturing from the tape (the red light is blinking). Note that this tip does not work when Batch Capturing.

How to do it...

The steps that follow indicate how to add a Marker while Capturing:

  1. Open the Capture Tool by going to Tools menu | Capture Tool.

  2. Begin the Capture from tape (the red light is blinking).

  3. While the capture is in progress, press any of the keys F3 or F5 through F12 on your keyboard. F3 or F5 = Red Marker, F6 = Green, F7 = Blue, F8 = Cyan, F9 = Magenta, F10 = Yellow, F11 = Black, and F12 = White.

  4. See the There's more... section of this recipe for details.

How it works...

When the Capture Tool is active, it takes control of your F keys. Whatever you've mapped there for editing is replaced with several different functions, including the ability to add Markers.

There's more...

You can even add notes inside a Marker while capturing.

Adding notes in a marker during capture

  1. While the capture is in progress, add a Marker using one of the F keys mentioned in the previous How to do it... section.

  2. Press the Tab key to tell Media Composer you want to add a comment to that Marker (rather than naming the clip).

  3. Type your comment.

  4. Press the F4 key to tell the Capture Tool that the Marker entry is completed. This will return the Capture Tool to its previous behavior of allowing you to name and comment on Master Clips and Subclips.

  5. The markers will be visible once the capture is finished and the bin is saved.

Tape capture tip: Making Subclips while Capturing


While Capturing a long Master Clip, you have the ability to divide it into Subclips at the same time, which will save you time since you won't have to perform the Subclipping and labelling in a separate step. For example, you have a tape of an interview with the President of the United States and you need to get it into your Media Composer immediately. You can begin capturing from the start of the tape and by using the tip that follows in the next recipe, you'll also be able to create Subclips of each question and answer.

Note that this tip produces different types of subclip behavior depending on whether you are in a film Project or a video Project. If you set up your Project as a film project (for example, 16 mm or 35 mm) when you first created it, then the Subclips will be locked in their duration and cannot be trimmed longer in the Sequence. This is intentional in order to protect vital Key Code/Key Number information that is specific to film projects.

Getting ready

This tip works while you're actively capturing from the tape (the red light is blinking). Note that this tip does not work when Batch Capturing.

How to do it...

The steps that follow help us make Subclips while capturing:

  1. Begin capturing (red light is blinking).

  2. Press the F1 key when you want to begin a new Subclip. If you want to update the location for the beginning of that Subclip to a later point, press the F1 key again. You can update the In point at any time. It is not locked in until the F2 key is pressed.

  3. Begin typing to name the Subclip, if you want to.

  4. You, optionally, can also press the Tab key to move the cursor into the Comment Entry Box and begin typing to add a comment.

  5. Press the F2 key to end the Subclip. If you want to update the location for the end of that Subclip to a later point, then press the F2 key again. You can update the Out point at any time. It is not locked in until the F1 key is pressed again.

  6. Press the F1 key to begin a new Subclip and repeat the preceding steps.

How it works...

During this process, you are creating one Master Clip that will refer to, point to, or, as Avid says, link to the media file(s) of video and/or audio. The Subclips do not create new media files; they are just shorter references to, or subsections of, the longer Master Clip.

Logging clips tip: Logging from the keyboard


This is a quick tip to aid in the faster logging of Master Clips from a tape during the Batch Capture process.

You may be aware that when the Capture Tool is selected and is in Capture Mode, that pressing the F4 button will begin the Capture from the tape. Many are not aware that when the Capture Tool is in Log Mode, the F4 key will send the logged clip into your designated bin. Further, this button can be mapped to wherever you prefer on your keyboard.

How to do it...

The following steps indicate how to log from the keyboard:

  1. Open or create a bin.

  2. Open the Tools menu | Capture Tool.

  3. In the Capture Tool there is a pull-down menu labeled as Bin. From that menu, select the bin where you'd like your logged clips to be placed.

  4. At the top of the Capture Tool, change the tool's mode from Capture to Log. To do this, click on the button near the Trash Can icon that says CAP so that it reads LOG and displays a pencil icon.

  5. Log clips using the keyboard. You can control the following features using the keyboard keys:

    • Control the deck with the J, K, and L keys

    • Mark the start and end of your Master Clips with the I and O, or E and R keys

    • Use the Tab key to navigate to the name and comment entry boxes

    • Select/deselect the V1, V2, A1, A2, A3, and A4 keys using the 7, 8, 9, 0, -, and = keys respectively

  6. Use the F4 key to log a clip into your selected bin.

There's more...

You can map this logging feature to another location on your keyboard.

  1. Go to the Project Window.

  2. Click on the Settings tab.

  3. Open your Keyboard settings by double-clicking on it.

  4. Go to the Tools menu.

  5. Select the Command Palette.

  6. Click on the tab labeled Play.

  7. In the bottom-left of the Command Palette, select Button to Button Reassignment.

  8. Drag the Record button to your desired location.

    Note

    If you use the J, K, and L keys to control the tape deck, consider mapping the Record button to either the H or colon/semicolon key.

See also

  • The Logging clips tip: Keeping the Capture Tool active after logging a clip recipe in this chapter

  • Chapter 2, Customizing Your Work Environment includes an additional discussion of keyboard mapping as well as interface and work environment customization

Logging clips tip: Keeping the Capture Tool active after logging a clip


This is a quick tip to help with logging Master Clips from tape during the Batch Capture process.

When you are logging, once the clip is sent to the bin, the bin becomes active. This allows you to immediately begin naming the clip in the bin. However, what if you already named the clip in the Capture Tool, or are in a hurry to log, and plan on naming the clips more precisely later? In such cases, you may prefer that the Capture Tool always stays selected, so that you can log the clip to the bin and quickly return to shuttling the tape and logging more clips without having to select the Capture Tool again. The following setting will allow that.

How to do it...

These are the steps to keep the Capture Tool active after logging a clip:

  1. Open the Capture Settings by either of the following methods:

    • In the Project Window, select Settings tab | Capture Settings

    • Right-click on Capture Tool and select Capture Settings…

  2. In the Capture Settings window, click on the tab labeled as General.

  3. Deselect the setting labeled as Activate bin window after capture.

    Note

    Even though the name of the setting refers to capturing, this works for logging as well (that's why it's a bit of a hidden tip).

See also

  • The Logging clips tip: Logging from the keyboard recipe earlier in this chapter

Quickly calculating total duration of clips (or any items in a bin)


After logging many clips you'll Batch Capture them. However, it's helpful to know the total duration of all the clips added together so you can make sure that your drive can accommodate that amount of media.

How to do it...

Below are the steps to calculate the total duration of selected clips:

  1. Select all the clips that you want to calculate the duration for. Methods include Shift + clicking to select a range of clips, or going to the Edit menu and choosing the Select-All command.

  2. Right-click on one of the selected Master Clips.

  3. From the menu select Get Bin Info.

  4. The Console window will open.

  5. There will be an entry in the Console that reads Total duration of selected items:. The duration is displayed as Hours:Minutes:Seconds:Frames (refer to the screenshot below).

There's more...

This is also useful for calculating the total duration of multiple sequences (for example, if your movie or TV program is still divided into separate sequences for each act).

Combining available drive space and/or controlling where media is stored


The Capture Tool has a feature that lets you create a Drive Group that designates more than one drive for Media Composer to be used for media storage. This is helpful in the following situations:

  • You want to make sure that the media files go to the drive(s) that you want when one becomes full, rather than Media Composer simply selecting the drive that happens to have the most free space

  • You have a large amount of media to capture but there is not one single drive that has enough space

  • Making a Drive Group is especially helpful when you want to leave the Capture process unattended

How to do it...

  1. Open the Tools menu | Capture Tool.

  2. Click on the Drive Selection menu. It's located directly below the Bin Selection menu and the Resolution Selection menu (refer to the next screenshot).

  3. From the Drive Selection menu select Change Group….

  4. A dialog window will open, listing all the available drives.

  5. Press cmd/Ctrl and click to select your desired drives.

  6. Press the OK button.

See also

  • If you're Batch Capturing, also see the Making sure your Batch Capture continues without you recipe

  • The Quickly calculating total duration of all logged clips (or any items in a bin) recipe may be helpful as you'll generally want to determine how much space is required for your media

Making sure your Batch Capture continues without you


You've logged many clips and are ready to begin Batch Capturing. You'd like to start the capture process and then run out for lunch. You just need to make sure that if the drive you've selected becomes full before capturing all the clips' media, that Media Composer won't stop and wait for you to tell it which drive to switch to. Further, you want to make sure that, if it has trouble capturing a clip, it will try a couple of times and then move on, rather than stopping on that one clip and waiting for you to tell it what to do.

How to do it...

Following are the steps to make sure your Batch Capture continues without you:

  1. Open the Capture Settings by either of the following methods:

    • From the Project Window select Settings tab | Capture Settings

    • Right-click on the Capture Tool and select Capture Settings…

  2. In the Capture Settings window, click on the tab labeled as Batch.

  3. Enable the selection labeled Switch to emptiest drive if current drive is full.

  4. Enable the selection labeled Log errors to the console and continue capturing.

There's more...

As an added measure and for more control, you may also want to create what Avid calls a Drive Group as discussed in the Combining available drive space and/or controlling where media is stored recipe.

Modifying clips before capture


There will come a time when something needs to be changed before a clip is captured (modifying clips after they have been captured is covered in the next section). The following are the typical issues:

  • The clips were logged by hand using the incorrect type of Timecode

  • The clips were associated with the wrong tape

  • The clips were created with the wrong tracks

How to do it...

Below are the steps to modify clips before capture:

  1. Select the clips. Some methods include Shift + clicking to select a range of clips or going to the Edit menu and choosing the Select-All command.

  2. Open the Modify window by using either of the following methods:

    • From the Clip menu, select Modify

    • Right-click on any of the selected Master Clips and choose Modify

  3. In the Modify window, click on the pull-down menu.

  4. In order to change the:

    • Type of Timecode, choose Set Timecode Drop/Non-Drop

    • Tape association, choose Set Source

    • Add or remove tracks, choose Set Tracks

Modifying clips after capture: Adding tracks


It's possible that you don't discover that you need additional tracks off the tape until after the capture is completed. You'll find that once a clip is captured, some modifications, such as setting tracks, are not possible without a little extra work called Unlinking.

Before we go through the process, an overview will be helpful. Unlinking is temporarily breaking the connection (in Avid terminology, the Link) between the clips and their media files. After Unlinking, you'll modify the clips to add the tracks you want. Then, you'll Relink the clips to the existing media. After the Relink, you'll capture the media that's missing.

How to do it...

Here are the steps to modify clips (adding tracks) after capture:

  1. Select the clips. Some methods include Shift + clicking to select a range of clips, or going to the Edit menu and choosing the Select-All command.

  2. Press the Shift key and the cmd/Ctrl key at the same time. As you're pressing these modifier keys, it changes the menu selection from Relink to Unlink.

  3. Select the Unlink command by either:

    • Selecting Clip menu | Unlink

    • Right-clicking on any of the selected Master Clips and choosing Unlink

  4. If the clips have become unselected, be sure to select them.

  5. Open the Modify window by either:

    • Selecting Clip menu | Modify...

    • Right-clicking on any of the selected clips and choosing Modify…

  6. In the Modify window, click on the pull-down menu.

  7. Choose Set Tracks.

  8. Select the tracks you want to add.

  9. Click on OK.

  10. If the clips have become unselected, be sure to select them.

  11. Open the Relink window by either:

    • Selecting Clip menu | Relink…

    • Right-clicking on any of the selected Master Clips and choosing Relink…

  12. Relink the clips.

  13. If the clips have become unselected, be sure to select them.

  14. Begin the Batch Capture process by either:

    • Selecting Clip menu | Batch Capture

    • Right-clicking on any of the selected Master Clips and choosing Batch Capture

  15. Optionally, if you only want Media Composer to capture the media that's missing, then in the Batch Capture dialog window, enable the selection that says Offline media only.

  16. Optionally, if you also need to capture new media files and at the same time get rid of the previous ones, then in the Batch Capture dialog window, deselect the option that says Offline media only. For example, you realize that you need to recapture the video at a different resolution.

    Note

    Deselecting this option deletes the existing media before it recaptures the new media.

See also

  • If you need to delete tracks rather than add tracks, there are a few more important steps involved. See the Modifying clips after capture: Deleting tracks recipe.

Modifying clips after capture: Deleting tracks


It's possible you don't discover that you have tracks that you don't need until after the capture is completed. In this case you'll want to:

  • Delete the unnecessary media to free up the drive space and ensure that you don't have orphan media files that are not linked to any clips.

  • Modify the clips so they no longer refer to media files that don't exist (since you deleted them). This will help avoid confusion during the editing process.

Before we get into the specifics, here is an overview of the process. First you're going to use the Media Tool to delete the specific media files that you don't need. Then you'll find that once a clip has been captured, some modifications, such as setting tracks, are not possible without a little extra work called Unlinking. This temporarily breaks the connection (in Avid terminology, the Link) between the clips and their media files. After Unlinking, you'll modify the clips to remove the unnecessary tracks, and, finally, you'll relink the clips to the media that remains.

How to do it...

The following are the steps to modify clips (deleting tracks) after capture:

  1. First, you're going to determine where the media files have been stored. Select the bin that contains all of your clips in order to make it active.

  2. Change the bin display to Text View from the Bin Display menu at the bottom-left of the Bin window.

  3. Open the Bin Column Selection window using any of the following methods:

    • In the Clip menu, choose Columns

    • Right-click in the bin and select Choose Columns

    • Right-click in the Column Headings section at the top of the bin and select Choose Columns from that menu

  4. The Bin Column Selection window opens. From the list of possible columns of information types, select Drive and click on OK.

  5. Take note of the media drive(s) your clips are referring to.

  6. Open the Media Tool by going to the Tools menu and selecting Media Tool.

  7. In the Media Drives column of the Media Tool, select only the media drive(s) that your clips are referencing (those listed in the Drive column in your bin).

  8. Click on the button labeled as Current Project, since you'd generally want to display media that belongs only to the currently open project and no other. If you did want to display media from other projects, you can Shift + click to select the additional project names.

  9. Select the Master Clips checkbox. Note that in the end, you'll still be looking at media files. It's just that they will be displayed in a more familiar way, as Master Clips.

  10. Deselect both the check boxes for Precompute Clips and Media Files and click on OK.

  11. A window will open titled Media Tool. This window has all the features of a bin.

  12. Arrange your Bin window and the Media Tool window so you can see both of them at the same time.

  13. The next few steps are going to ensure that only the correct clips become selected in the Media Tool. Start by selecting the clips in your bin.

  14. Go to the Bin Fast Menu at the bottom-left corner of the bin and choose Select Media Relatives. Note that the clips in your Media Tool have become selected.

  15. Click on the top title portion of the Media Tool so that it is selected/active. Make sure that when you select the Media Tool, you don't mistakenly deselect the clips.

  16. Press the Delete key on your keyboard.

  17. The Delete Media dialog window will open.

  18. Enable the check box for each track of media you want to permanently delete and click on OK.

  19. Another dialog window will open. If you are positive that you want to permanently delete the media files you've selected, click on OK.

  20. Close the Media Tool.

  21. The unnecessary media is now deleted, but you are left with clips in your bin that are still looking for that media even though it isn't there or, in other words, is Offline. This can be very confusing during editing, so the next set of steps will fix that. If the clips have become unselected in your bin, be sure to select them before continuing.

  22. In order to modify the clips, we have to temporarily break the connection (the Link) between the clip(s) and the media file(s), which is called Unlinking. To do this, press and hold the Shift key and the cmd/Ctrl key at the same time (this changes the Relink menu selection to Unlink).

  23. Select the Unlink command by either:

    • Selecting Clip menu | Unlink

    • Right-clicking on any of the selected Master Clips and choosing Unlink

  24. If the clips have become unselected, be sure to select them.

  25. Open the Modify window by either:

    • Selecting Clip menu | Modify

    • Right-clicking on any of the selected Master Clips and choosing Modify

  26. In the Modify window, click on the pull-down menu and choose Set Tracks.

  27. Deselect the tracks that no longer have media to link to, since you just deleted it. In other words, make sure only the tracks that still have media available on the drive(s) are selected. Click on OK.

  28. If the clips have become unselected, be sure to select them.

  29. Open the Relink window by either:

    • Selecting Clip menu | Relink…

    • Right-clicking on any of the selected Master Clips and choosing Relink…

  30. Relink the clips. Additional information on Relinking is available in the Avid Media Composer Help.

Left arrow icon Right arrow icon

Key benefits

  • Hands-on recipes in a step-by-step logical approach to quickly get started with Avid Media Composer and gain deeper understanding
  • Learn Avid Media Composer in a completely new wayó gain intensive exposure with various editing options to develop your abilities, become even more creative, and acquaint yourself with various methods that you never thought were possible
  • Understand not only why it works, but also how it works and browse through lots of tips and techniques to perform professional quality editing

Description

Avid Media Composer has become the tool of choice by editing professionals worldwide. Whether your project involves editing television programming, independent films, corporate industrials or commercials, this cookbook shows you exactly how to do so in a step-by-step and practical manner, and get the most out of Avid Media Composer editing. "Avid Media Composer 6.x Cookbook" is an expert, clear and logically-sequenced resource with highly effective recipes for learning Avid Media Composer essentials and beyond. It's task-based approach will help users at all experience levels gain a deeper, more thorough understanding of the software. It will help you master the essential, core editing features as well as reveal numerous tips and tricks that editors can benefit from immediately. Just some of the topics include understanding Import settings, mixing frame rates and understanding AMA (Avid Media Access), along with thorough explanations of Trim Mode, Segment Mode, and the Smart Tool. You will learn to customize your work environment with Workspaces, Bin Layouts, Timeline Views, Bin Views, Keyboard Mapping, and much more. The recipes inside are packed with practical examples, time-saving tools and methods to get you working faster and more confidently so that you can spend less time dealing with technical and operational issues and instead focusing on being creative.

Who is this book for?

If you are new to editing with Avid, this book will help you get the most out of Avid Media Composer right from the start. Even if you are intermediately experienced with Avid, you will discover new methods and gain a deeper understanding to take your Avid experience to the next level, with greater confidence.

What you will learn

  • Hands-on recipes with cutting edge methods and techniques to effectively learn Avid Media Composer 6
  • Understand Import settings and how to mix frame rates
  • Extensive coverage of trimming
  • Detailed recipes on staying in sync with complicated sequences and multiple tracks
  • Master the essentials to develop your media management skills and projects at your own pace
  • Customize your work environment with Workspaces, Bin Layouts, Timeline views, Keyboard Mapping, and more
  • Get the most out of Replace Edit, Sync Point Edit, the Clipboard, and much more
  • Get to the grips with different methods of mixing audio
  • Learn how to use group clips and perform multi cam editing like never before
Estimated delivery fee Deliver to Taiwan

Standard delivery 10 - 13 business days

$12.95

Premium delivery 5 - 8 business days

$45.95
(Includes tracking information)

Product Details

Country selected
Publication date, Length, Edition, Language, ISBN-13
Publication date : Dec 20, 2012
Length: 422 pages
Edition : 1st
Language : English
ISBN-13 : 9781849693004
Vendor :
Avid
Concepts :

What do you get with Print?

Product feature icon Instant access to your digital eBook copy whilst your Print order is Shipped
Product feature icon Paperback book shipped to your preferred address
Product feature icon Download this book in EPUB and PDF formats
Product feature icon Access this title in our online reader with advanced features
Product feature icon DRM FREE - Read whenever, wherever and however you want
OR
Modal Close icon
Payment Processing...
tick Completed

Shipping Address

Billing Address

Shipping Methods
Estimated delivery fee Deliver to Taiwan

Standard delivery 10 - 13 business days

$12.95

Premium delivery 5 - 8 business days

$45.95
(Includes tracking information)

Product Details

Publication date : Dec 20, 2012
Length: 422 pages
Edition : 1st
Language : English
ISBN-13 : 9781849693004
Vendor :
Avid
Concepts :

Packt Subscriptions

See our plans and pricing
Modal Close icon
$19.99 billed monthly
Feature tick icon Unlimited access to Packt's library of 7,000+ practical books and videos
Feature tick icon Constantly refreshed with 50+ new titles a month
Feature tick icon Exclusive Early access to books as they're written
Feature tick icon Solve problems while you work with advanced search and reference features
Feature tick icon Offline reading on the mobile app
Feature tick icon Simple pricing, no contract
$199.99 billed annually
Feature tick icon Unlimited access to Packt's library of 7,000+ practical books and videos
Feature tick icon Constantly refreshed with 50+ new titles a month
Feature tick icon Exclusive Early access to books as they're written
Feature tick icon Solve problems while you work with advanced search and reference features
Feature tick icon Offline reading on the mobile app
Feature tick icon Choose a DRM-free eBook or Video every month to keep
Feature tick icon PLUS own as many other DRM-free eBooks or Videos as you like for just $5 each
Feature tick icon Exclusive print discounts
$279.99 billed in 18 months
Feature tick icon Unlimited access to Packt's library of 7,000+ practical books and videos
Feature tick icon Constantly refreshed with 50+ new titles a month
Feature tick icon Exclusive Early access to books as they're written
Feature tick icon Solve problems while you work with advanced search and reference features
Feature tick icon Offline reading on the mobile app
Feature tick icon Choose a DRM-free eBook or Video every month to keep
Feature tick icon PLUS own as many other DRM-free eBooks or Videos as you like for just $5 each
Feature tick icon Exclusive print discounts

Frequently bought together


Stars icon
Total $ 164.97
Final Cut Pro X Cookbook
$54.99
Avid Media Composer 6.x Cookbook
$54.99
Mastering Adobe Premiere Pro CS6 Hotshot
$54.99
Total $ 164.97 Stars icon
Banner background image

Table of Contents

9 Chapters
Getting Assets into Your Media Composer Project Chevron down icon Chevron up icon
Customizing Your Work Environment Chevron down icon Chevron up icon
Polishing Gems Chevron down icon Chevron up icon
Creating Split Edits Chevron down icon Chevron up icon
Maintaining and Regaining Sync Chevron down icon Chevron up icon
Managing Your Media Files Chevron down icon Chevron up icon
Mono and Stereo Audio Mixing Chevron down icon Chevron up icon
Editing with Group Clips and MultiCamera Mode Chevron down icon Chevron up icon
Output Tips and Tricks Chevron down icon Chevron up icon

Customer reviews

Top Reviews
Rating distribution
Full star icon Full star icon Full star icon Full star icon Full star icon 5
(19 Ratings)
5 star 100%
4 star 0%
3 star 0%
2 star 0%
1 star 0%
Filter icon Filter
Top Reviews

Filter reviews by


Alex Nov 25, 2015
Full star icon Full star icon Full star icon Full star icon Full star icon 5
Great book for those looking to learn or improve their skills on Avid Media Composer. Clear walkthroughs and examples of real world usage. Love this book and I give it out as a gift on a regular basis.
Amazon Verified review Amazon
Dave Jul 02, 2015
Full star icon Full star icon Full star icon Full star icon Full star icon 5
Keeping the 5 star rating going here because I read this book from cover to cover and it 100% helped me prepare to be an assistant editor in the film and tv business
Amazon Verified review Amazon
Andi Apr 02, 2013
Full star icon Full star icon Full star icon Full star icon Full star icon 5
Having had a chance to get through this I found it to be excellently written with a good emphasis on basics but also, through the "There's more..." sections, a good amount of in depth tips that many seasoned users will find useful. It is indeed a cookbook, with well laid out recipes for how to complete specific tasks and good emphasis on what to do in preparation for these tasks. A great guide to have around for beginners and a useful reference for the more advanced. Thanks Ben!!
Amazon Verified review Amazon
Pasquale Moscatello Jun 16, 2013
Full star icon Full star icon Full star icon Full star icon Full star icon 5
An easy read an aid to understanding and learning MC 6.x. a step by step how to accessible to all. A real MUST READ
Amazon Verified review Amazon
bravesfanjd Jan 09, 2021
Full star icon Full star icon Full star icon Full star icon Full star icon 5
Fantastic book, a friend got this for me as a gift as I am starting out on an avid. The information in this book is absolutely amazing i appreciate my friend’s thoughtfulness in getting me this book, as well as the author for putting together an amazing book in such a usable and understandable way
Amazon Verified review Amazon
Get free access to Packt library with over 7500+ books and video courses for 7 days!
Start Free Trial

FAQs

What is the delivery time and cost of print book? Chevron down icon Chevron up icon

Shipping Details

USA:

'

Economy: Delivery to most addresses in the US within 10-15 business days

Premium: Trackable Delivery to most addresses in the US within 3-8 business days

UK:

Economy: Delivery to most addresses in the U.K. within 7-9 business days.
Shipments are not trackable

Premium: Trackable delivery to most addresses in the U.K. within 3-4 business days!
Add one extra business day for deliveries to Northern Ireland and Scottish Highlands and islands

EU:

Premium: Trackable delivery to most EU destinations within 4-9 business days.

Australia:

Economy: Can deliver to P. O. Boxes and private residences.
Trackable service with delivery to addresses in Australia only.
Delivery time ranges from 7-9 business days for VIC and 8-10 business days for Interstate metro
Delivery time is up to 15 business days for remote areas of WA, NT & QLD.

Premium: Delivery to addresses in Australia only
Trackable delivery to most P. O. Boxes and private residences in Australia within 4-5 days based on the distance to a destination following dispatch.

India:

Premium: Delivery to most Indian addresses within 5-6 business days

Rest of the World:

Premium: Countries in the American continent: Trackable delivery to most countries within 4-7 business days

Asia:

Premium: Delivery to most Asian addresses within 5-9 business days

Disclaimer:
All orders received before 5 PM U.K time would start printing from the next business day. So the estimated delivery times start from the next day as well. Orders received after 5 PM U.K time (in our internal systems) on a business day or anytime on the weekend will begin printing the second to next business day. For example, an order placed at 11 AM today will begin printing tomorrow, whereas an order placed at 9 PM tonight will begin printing the day after tomorrow.


Unfortunately, due to several restrictions, we are unable to ship to the following countries:

  1. Afghanistan
  2. American Samoa
  3. Belarus
  4. Brunei Darussalam
  5. Central African Republic
  6. The Democratic Republic of Congo
  7. Eritrea
  8. Guinea-bissau
  9. Iran
  10. Lebanon
  11. Libiya Arab Jamahriya
  12. Somalia
  13. Sudan
  14. Russian Federation
  15. Syrian Arab Republic
  16. Ukraine
  17. Venezuela
What is custom duty/charge? Chevron down icon Chevron up icon

Customs duty are charges levied on goods when they cross international borders. It is a tax that is imposed on imported goods. These duties are charged by special authorities and bodies created by local governments and are meant to protect local industries, economies, and businesses.

Do I have to pay customs charges for the print book order? Chevron down icon Chevron up icon

The orders shipped to the countries that are listed under EU27 will not bear custom charges. They are paid by Packt as part of the order.

List of EU27 countries: www.gov.uk/eu-eea:

A custom duty or localized taxes may be applicable on the shipment and would be charged by the recipient country outside of the EU27 which should be paid by the customer and these duties are not included in the shipping charges been charged on the order.

How do I know my custom duty charges? Chevron down icon Chevron up icon

The amount of duty payable varies greatly depending on the imported goods, the country of origin and several other factors like the total invoice amount or dimensions like weight, and other such criteria applicable in your country.

For example:

  • If you live in Mexico, and the declared value of your ordered items is over $ 50, for you to receive a package, you will have to pay additional import tax of 19% which will be $ 9.50 to the courier service.
  • Whereas if you live in Turkey, and the declared value of your ordered items is over € 22, for you to receive a package, you will have to pay additional import tax of 18% which will be € 3.96 to the courier service.
How can I cancel my order? Chevron down icon Chevron up icon

Cancellation Policy for Published Printed Books:

You can cancel any order within 1 hour of placing the order. Simply contact customercare@packt.com with your order details or payment transaction id. If your order has already started the shipment process, we will do our best to stop it. However, if it is already on the way to you then when you receive it, you can contact us at customercare@packt.com using the returns and refund process.

Please understand that Packt Publishing cannot provide refunds or cancel any order except for the cases described in our Return Policy (i.e. Packt Publishing agrees to replace your printed book because it arrives damaged or material defect in book), Packt Publishing will not accept returns.

What is your returns and refunds policy? Chevron down icon Chevron up icon

Return Policy:

We want you to be happy with your purchase from Packtpub.com. We will not hassle you with returning print books to us. If the print book you receive from us is incorrect, damaged, doesn't work or is unacceptably late, please contact Customer Relations Team on customercare@packt.com with the order number and issue details as explained below:

  1. If you ordered (eBook, Video or Print Book) incorrectly or accidentally, please contact Customer Relations Team on customercare@packt.com within one hour of placing the order and we will replace/refund you the item cost.
  2. Sadly, if your eBook or Video file is faulty or a fault occurs during the eBook or Video being made available to you, i.e. during download then you should contact Customer Relations Team within 14 days of purchase on customercare@packt.com who will be able to resolve this issue for you.
  3. You will have a choice of replacement or refund of the problem items.(damaged, defective or incorrect)
  4. Once Customer Care Team confirms that you will be refunded, you should receive the refund within 10 to 12 working days.
  5. If you are only requesting a refund of one book from a multiple order, then we will refund you the appropriate single item.
  6. Where the items were shipped under a free shipping offer, there will be no shipping costs to refund.

On the off chance your printed book arrives damaged, with book material defect, contact our Customer Relation Team on customercare@packt.com within 14 days of receipt of the book with appropriate evidence of damage and we will work with you to secure a replacement copy, if necessary. Please note that each printed book you order from us is individually made by Packt's professional book-printing partner which is on a print-on-demand basis.

What tax is charged? Chevron down icon Chevron up icon

Currently, no tax is charged on the purchase of any print book (subject to change based on the laws and regulations). A localized VAT fee is charged only to our European and UK customers on eBooks, Video and subscriptions that they buy. GST is charged to Indian customers for eBooks and video purchases.

What payment methods can I use? Chevron down icon Chevron up icon

You can pay with the following card types:

  1. Visa Debit
  2. Visa Credit
  3. MasterCard
  4. PayPal
What is the delivery time and cost of print books? Chevron down icon Chevron up icon

Shipping Details

USA:

'

Economy: Delivery to most addresses in the US within 10-15 business days

Premium: Trackable Delivery to most addresses in the US within 3-8 business days

UK:

Economy: Delivery to most addresses in the U.K. within 7-9 business days.
Shipments are not trackable

Premium: Trackable delivery to most addresses in the U.K. within 3-4 business days!
Add one extra business day for deliveries to Northern Ireland and Scottish Highlands and islands

EU:

Premium: Trackable delivery to most EU destinations within 4-9 business days.

Australia:

Economy: Can deliver to P. O. Boxes and private residences.
Trackable service with delivery to addresses in Australia only.
Delivery time ranges from 7-9 business days for VIC and 8-10 business days for Interstate metro
Delivery time is up to 15 business days for remote areas of WA, NT & QLD.

Premium: Delivery to addresses in Australia only
Trackable delivery to most P. O. Boxes and private residences in Australia within 4-5 days based on the distance to a destination following dispatch.

India:

Premium: Delivery to most Indian addresses within 5-6 business days

Rest of the World:

Premium: Countries in the American continent: Trackable delivery to most countries within 4-7 business days

Asia:

Premium: Delivery to most Asian addresses within 5-9 business days

Disclaimer:
All orders received before 5 PM U.K time would start printing from the next business day. So the estimated delivery times start from the next day as well. Orders received after 5 PM U.K time (in our internal systems) on a business day or anytime on the weekend will begin printing the second to next business day. For example, an order placed at 11 AM today will begin printing tomorrow, whereas an order placed at 9 PM tonight will begin printing the day after tomorrow.


Unfortunately, due to several restrictions, we are unable to ship to the following countries:

  1. Afghanistan
  2. American Samoa
  3. Belarus
  4. Brunei Darussalam
  5. Central African Republic
  6. The Democratic Republic of Congo
  7. Eritrea
  8. Guinea-bissau
  9. Iran
  10. Lebanon
  11. Libiya Arab Jamahriya
  12. Somalia
  13. Sudan
  14. Russian Federation
  15. Syrian Arab Republic
  16. Ukraine
  17. Venezuela