Creating custom brushes from images
Creating custom brushes can be a lot of fun, as well as rewarding. You can use objects and other subjects that you may have photographed or found on stock image websites, and combine different objects from images to make custom brushes, giving you limitless possibilities. Let’s create our very own brush from an image step by step:
- Find some photos you would like to sample. For example: clouds, leaves, grass, or rocks.
- Create a new document with a size of 1500 px x 1500 px.
- You can drag your image onto the newly created document and resize the image to fit slightly smaller within the 1500 px x 1500 px template.
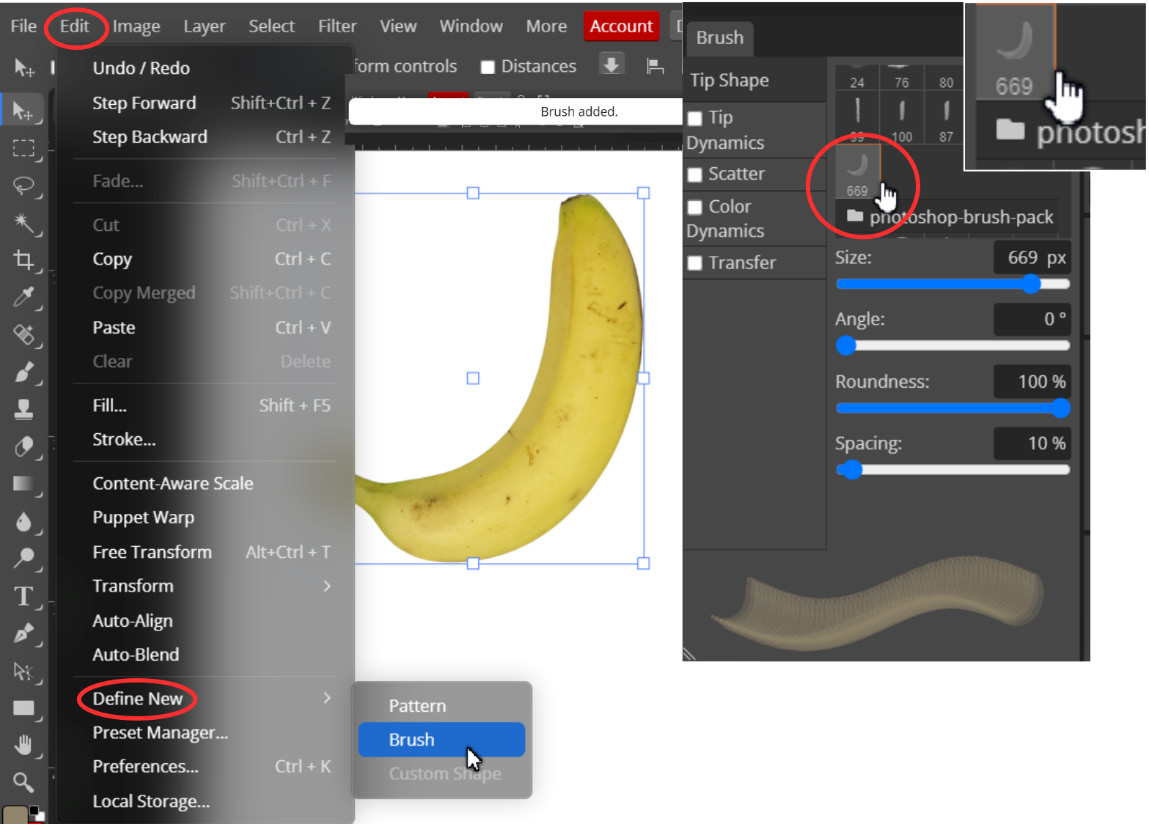
- Next, while the image is selected (with the Selection Tool), go to the Edit menu, choose Define New, and select Brush.
The image is created as a Brush instantly and activated for use. You can find the new brush in the Brush panel. See Figure 7.22:

Figure 7.22 – Create custom brushes...


