Creating thumbnails with Grease Pencil
Creating a finished animation in 3D isn't usually a quick task. We have to model, create materials, textures, rig controls, light setups, animate, and render. It may take a very long time until you see something moving on your screen.
That's why it's useful to quickly sketch our poses to see if what we have in mind will work on screen. Those sketches are great to test the poses and timing in a matter of minutes, and lots of animators draw them on paper or 2D animation programs to use as reference.
Fortunately for us, Blender has a great feature called Grease Pencil, which allows us to sketch directly over the interface. It's very useful not only for creating thumbnails, but also for the director to annotate the corrections directly over the scene as reference for the animators.
Note
The name Grease Pencil is based on the wax writing tool used by some directors to draw over the physical CRT monitors to annotate over the work of the animators of early CG productions. Since it can be easily removed, that was a quick way to make corrections and annotations over early digital work.
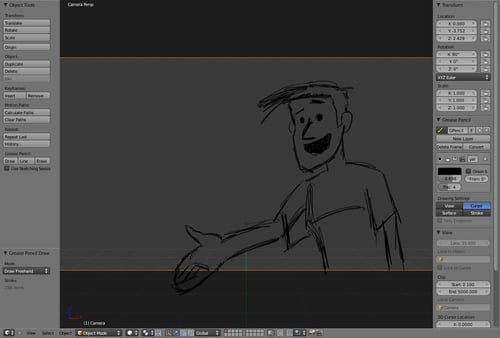
Drawing with Grease Pencil over the 3D View is as easy as holding D and sketching with the left mouse button. If you have a drawing tablet, Blender interprets the pressure applied to the drawing. You can erase the lines by holding D and pressing the right mouse button. The next screenshot shows a quick sketch with Grease Pencil's default settings:

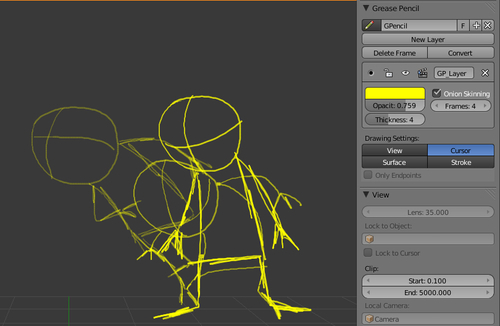
In the previous screenshot, you can also see the Grease Pencil section on the Properties panel (N). There you can add new layers, change the color and thickness of the drawing, and enable Onion Skinning . This last feature indicates you can animate with Grease Pencil!
When you draw something in a frame, it's just a matter of sketching. A new keyframe drawing is created automatically at the new frame, and you can see a translucent version of the previous and next drawings with the Onion Skinning feature, as you can see in the next screenshot:

After you create a few keyframes with Grease Pencil, you can adjust the timing on the DopeSheet window by selecting the Grease Pencil mode on the window header. In this mode, everything works exactly like regular keyframes for objects in the 3D view; you can select and move them around. Every drawing is held on the screen until the next keyframe.
The Grease Pencil drawings are not visible to the internal renderer, but you can transform those sketches in images using the OpenGL render feature, by clicking on the clapperboard icon in the 3D View window header.
Since we're drawing on the 3D View, we can set how the drawing will be positioned on the 3D space by using the options in the panel section; the drawings can be aligned to your current view, to the cursor position, to the surface of existing objects, or to the surface of existing Grease Pencil drawings.
The lines you create can even be converted to Blender Paths or Bézier curves, so you can edit them and even make a vector based animation! One advantage of that is converting your drawings into something visible by Blender renderer, so you can even use Blender for producing 2D-ish animations.


