Adding a user to Azure AD
Now that we have our Azure AD tenant in place, we can add our first user to it. For this, you have to take the following steps:
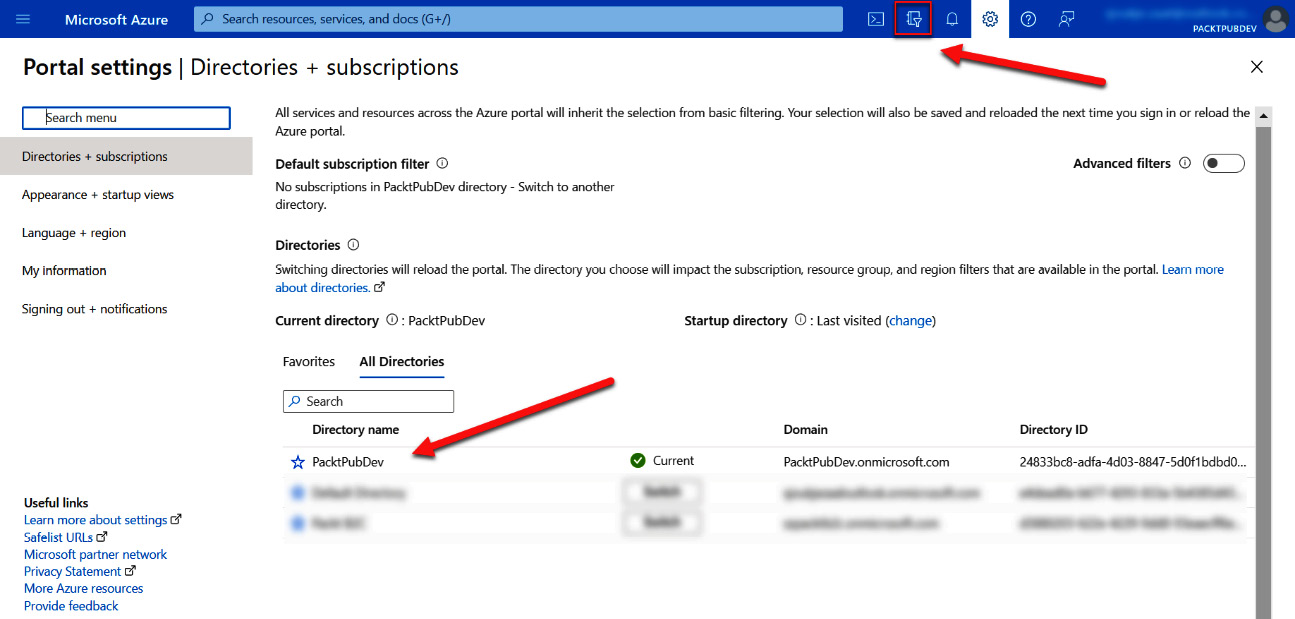
- We first need to ensure that the new directory that was created in the previous step is active. For this, we need to select the directory icon in the top-right menu, and then select the Azure AD tenant that we have just created:

Figure 1.6 – Selecting the new Azure AD tenant
Tip
If the directory is not yet available in the list, you need to log out and log in again. Then, open the directory menu again and select the directory.
- Now that we have selected the right directory, we can navigate to the Azure AD tenant.
- On the Overview page of the Azure portal, type
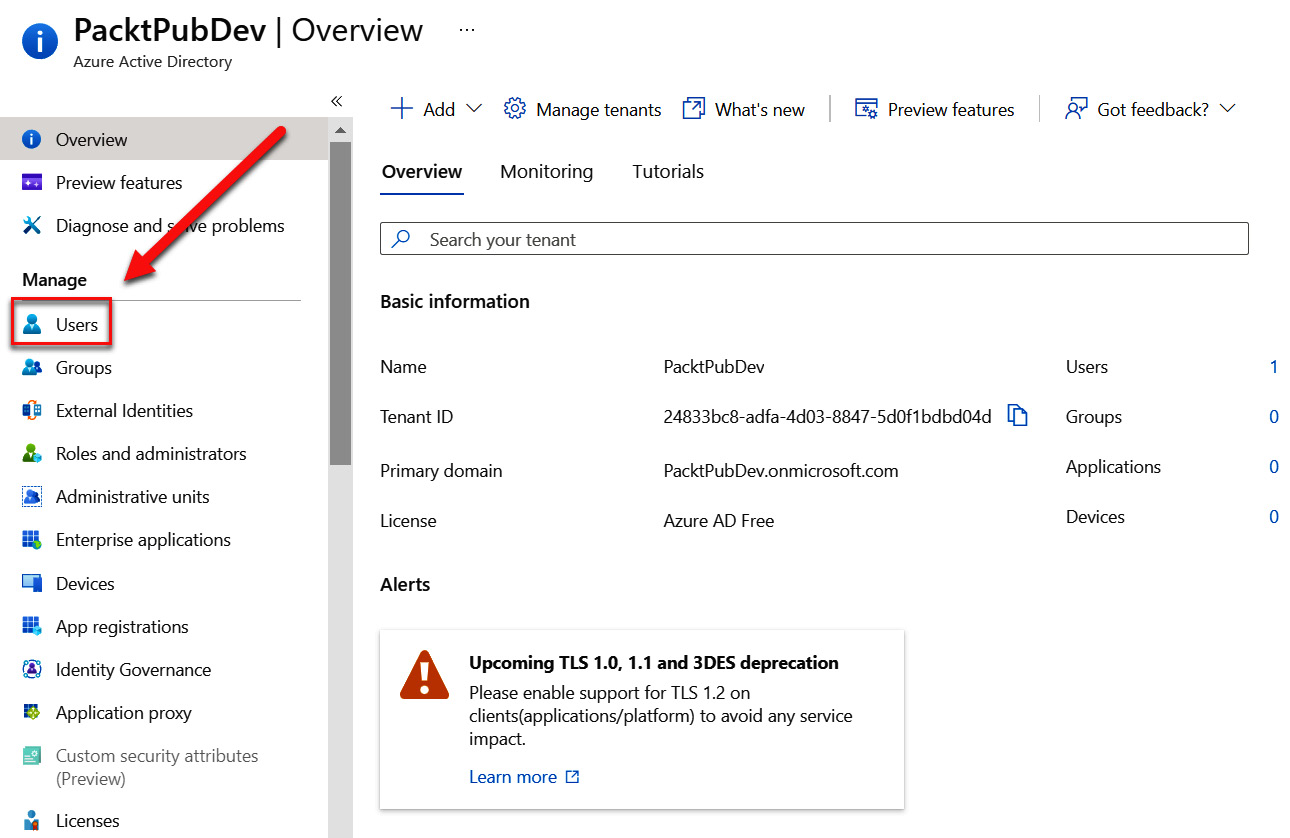
Azure Active Directoryin the top search box and select it. The Azure AD Overview page will be displayed. - In the left menu, under Manage, select Users:

Figure 1.7 – Selecting Users in the menu
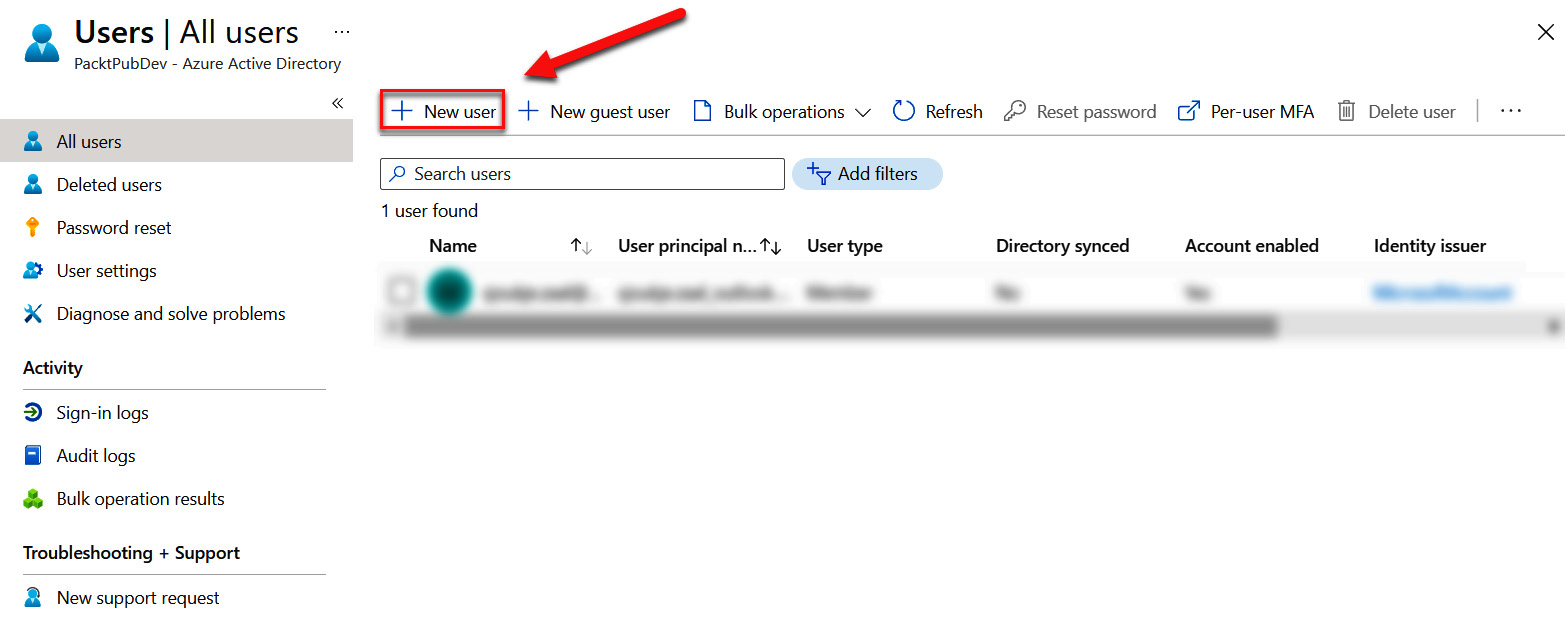
- In the top menu, select + New user:

Figure 1.8 – Creating a new user
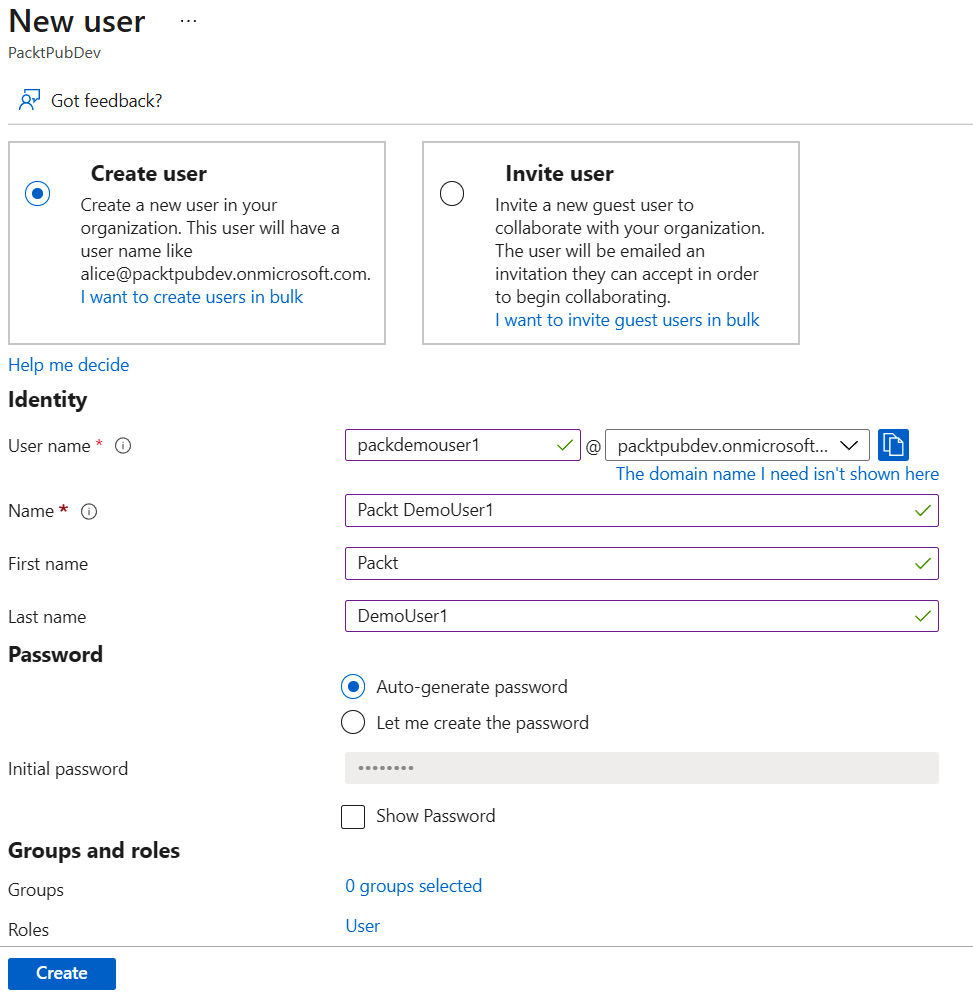
- Specify the required values as follows:
- Username:
packdemouser1. - Name:
Packt DemoUser1. - First name:
Packt. - Last name:
DemoUser1. - Password: You can choose between letting Azure auto-generate a password or creating your own password. In this case, leave the default value.
- Username:
This will look like the following screenshot:

Figure 1.9 – Specifying the user values
- Click Create.
We have now created a new user in our Azure AD tenant. In the next section, we are going to cover how you can delete the Azure AD tenant when it is not needed anymore.


