Installing Photopea and Setting up an Account
Now that we understand the benefits and technical requirements using Photopea, we can setup up an account, in addition, we can install it on the desktop. (Neither option is required, you can start working on a new document immediately).
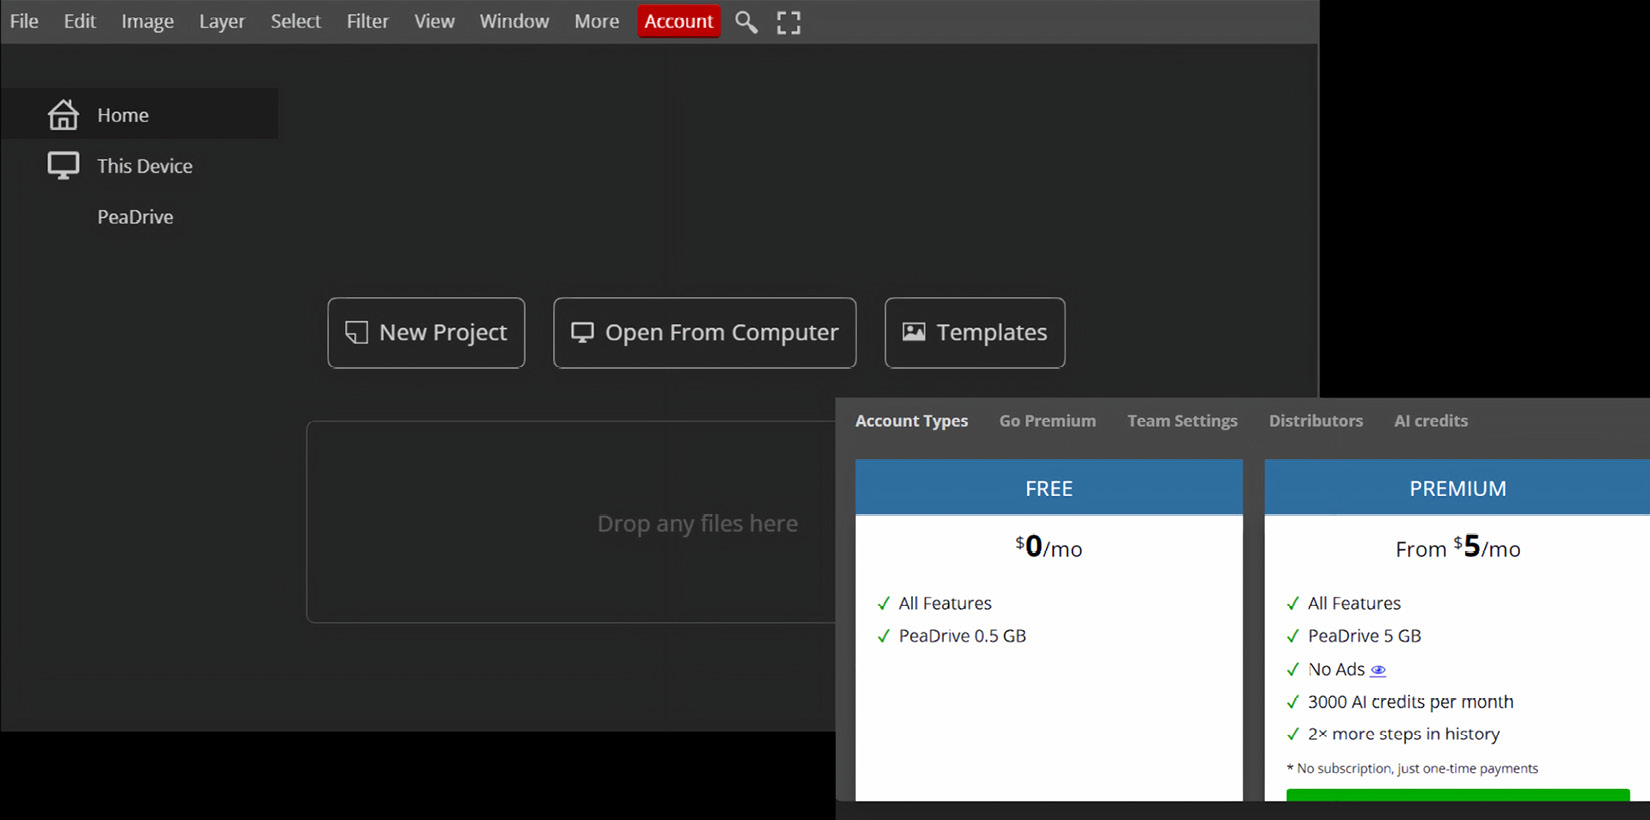
- To setup an account for Photopea, go to (https://www.photopea.com) select Account, choose free version, and login with your email, (see Figure 1.1).
- Next, select which platform you prefer to sign-in with. I chose my Gmail email account to sign-up, and started working directly in my web browser.

Figure 1.1 – Setting up an Account
So, in the previous steps, we created an account on Photopea, and understand that we can work and access it from the browser, as well as open and work on our projects from any computer with our registered account.
Next, we will learn how to install it to work on a desktop computer. This will enable to use Photopea with more power, faster response, and less delays, since we’re not totally dependent on a browser to operate it; but we still need to be connected to the internet to run the software.
To access Photopea from your desktop, do the following:
- Open Google Chrome and type (https://www.photopea.com/).
- The Photopea app will load in the web browser.
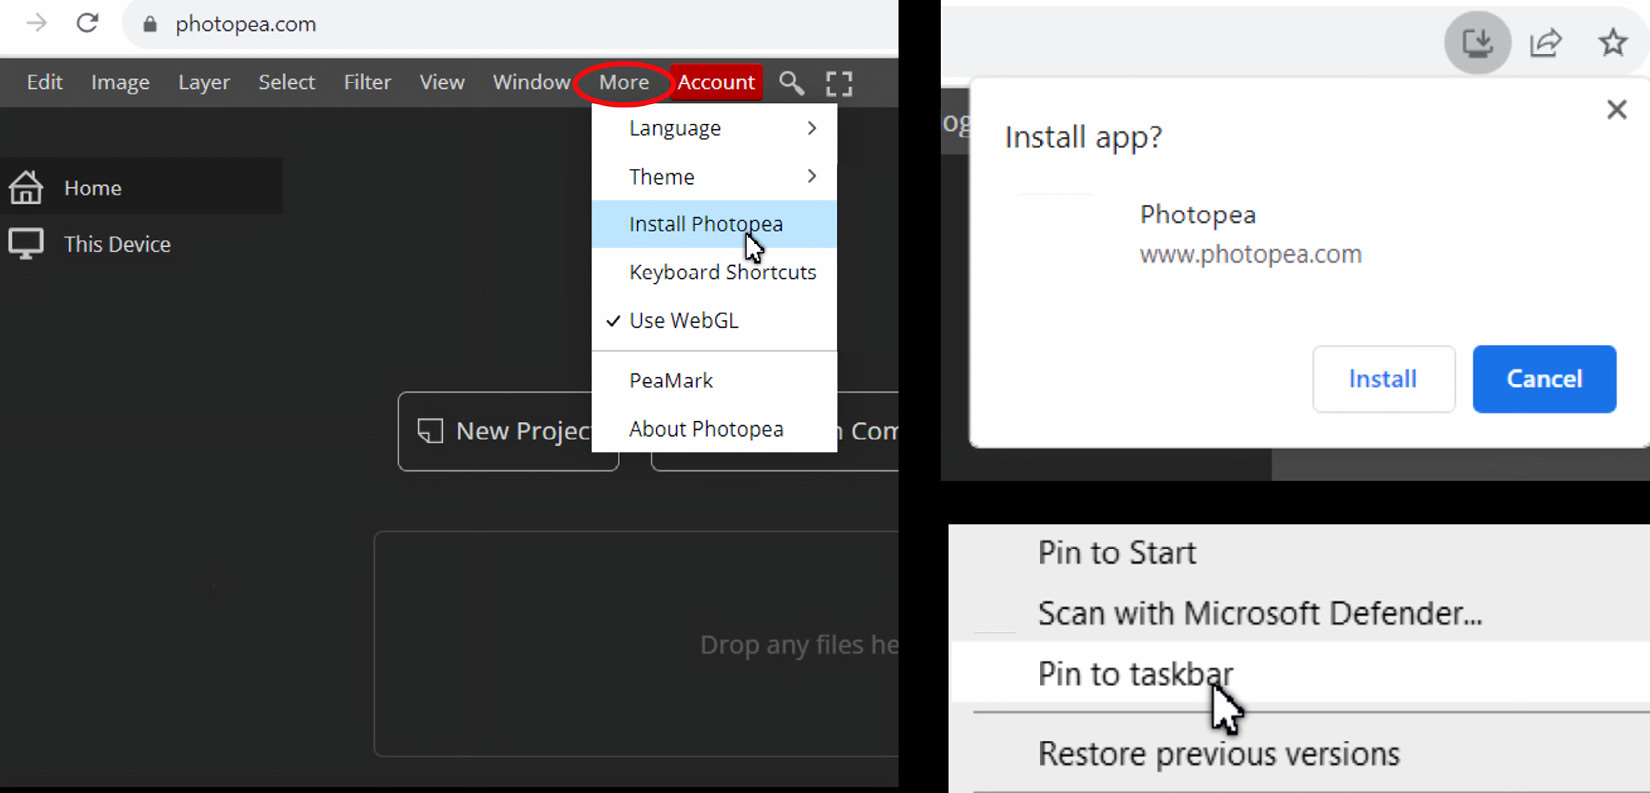
- Click on More at the top of the Photopea Menu bar and select Install Photopea.
- Once Photopea is installed, it will create a shortcut icon on your desktop screen.
- Right-click on the Photopea shortcut icon and choose, Pin to Start, or Pin to Taskbar. This makes it is easy to access Photopea and begin working..

Figure 1.2 – Install Photopea on the Desktop
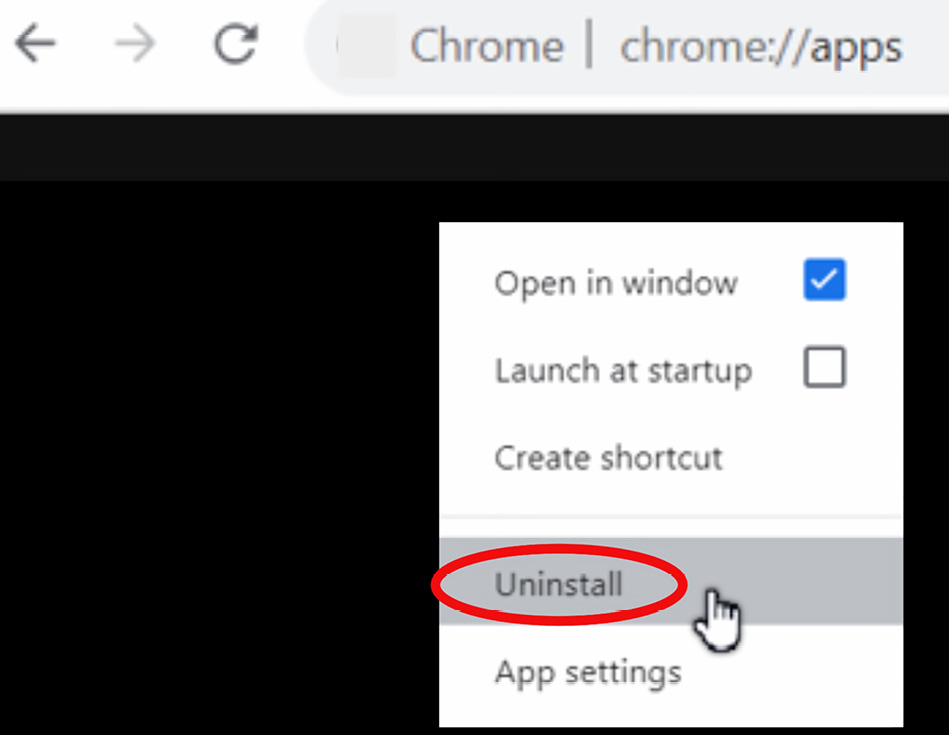
- If you need to Uninstall Photopea, type in the google chrome apps link in your browser: (
chrome://apps/). - You will see all of the Chrome apps installed. Right-click over Photopea and select Uninstall:

Figure 1.3 – Uninstall Photopea
Now that we’ve installed Photopea to the desktop, and learned how to Uninstall It; we can move on to the next section.


