Looking at a simple sample of a Lightroom Classic workflow
You might say, "That sounds great, but how does all this work?" In this section, you will find a small example of how a Lightroom workflow can be used in a real-life situation. This is a "quick and dirty" example of how I might use Lightroom on a daily basis. To make this as real as possible, I grabbed my pocket camera and went out to make a few photos—luckily, it had just started to snow, which hardly ever happens here. As you will see in this example, a Lightroom workflow is a very organic process, and as you read this book and practice a bit, it will become a very natural process for you as well.
Let's get started:
- The first step is to move photographs from a memory card into Lightroom by importing them. We will be covering this in Chapter 2, Bring It All In – Importing Photographs into Lightroom, but please also see the following screenshot:
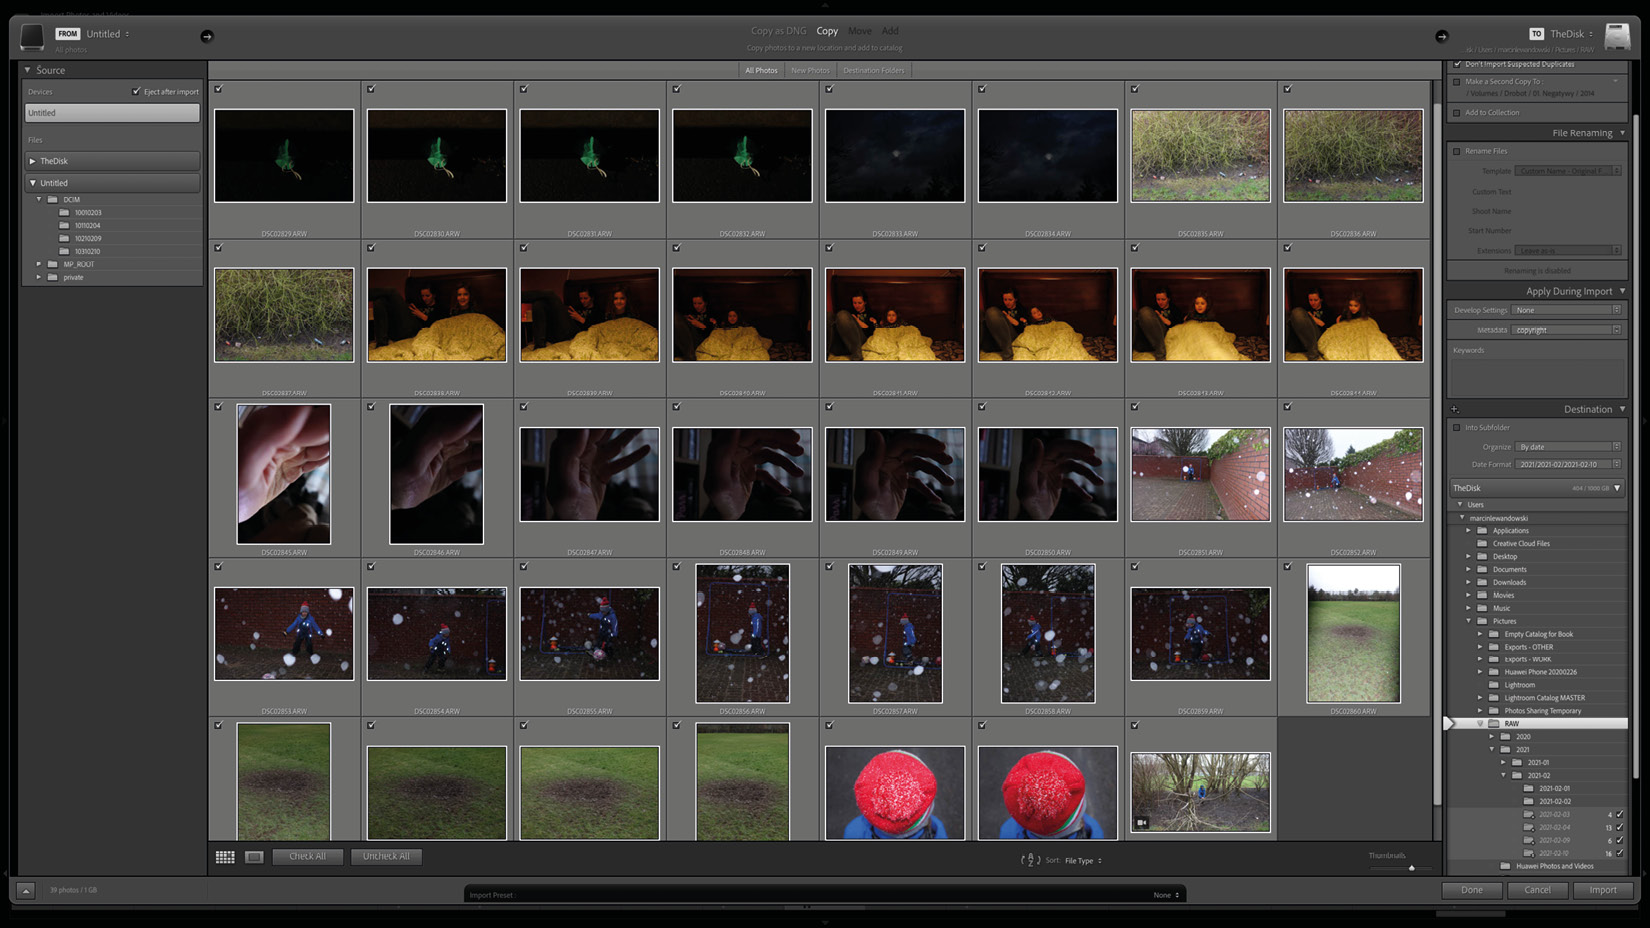
Figure 1.1 – Importing images: sub-module view
It's a fairly simple process where we will choose where to save our photographs, in which structure, and how to rename them. We will also choose any presets that we might want to see applied, add keywords, and more.
- Once all images are imported, it's a matter of selecting our favorites, which is quickly achieved with a very flexible built-in system for rating and filtering—you will learn all about this in Chapter 3, Tools Available Within the Library Module, but in a nutshell, while looking through each important image, we will apply a star rating of one to five stars, add "pick/reject" flags, and include color labels. We will apply filters to see our top picks and further narrow down our selection with additional ratings. Here, you can see the Library module view after filtering for images rated with one star:
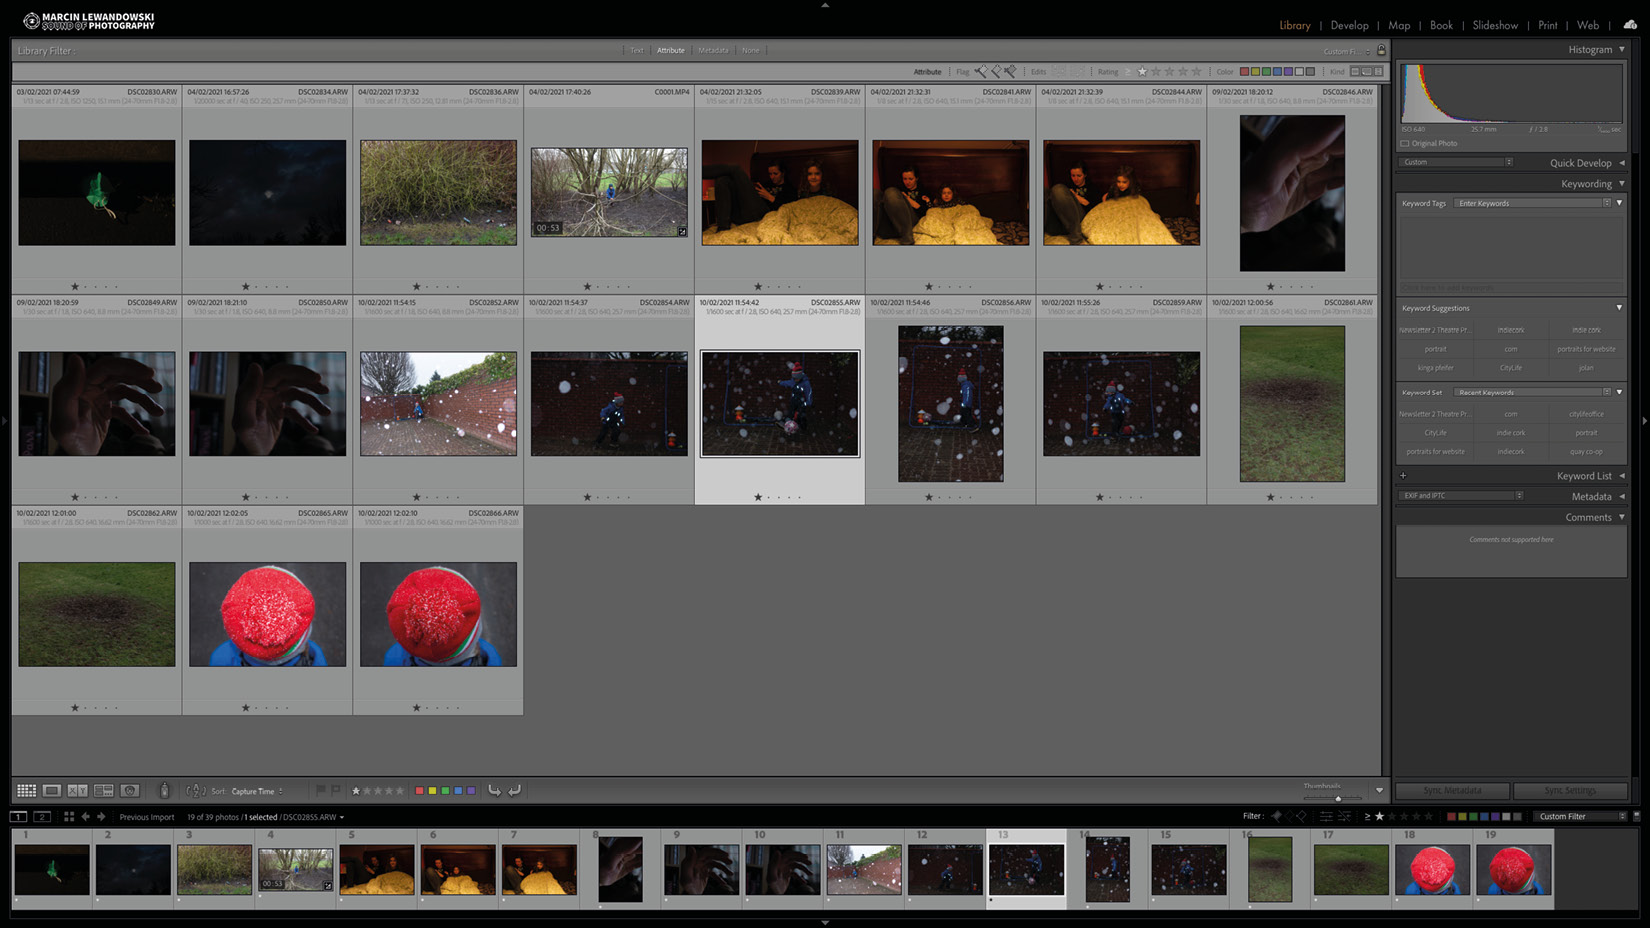
Figure 1.2 – Library module view after filtering for images rated with one star
- Once all of the "looking through" is done and we have a selection of our absolute favorites, it's time to give them the desired look. For that, we move to the Develop module (covered in detail in Chapter 5, An Introduction to the Develop Module). In this module, we will make adjustments, compare different looks, and pick the one we like most.
First, let's have a peek inside the Develop module, where we can make all desired adjustments and later compare the finished version to the original file. You can see an overview of this here:
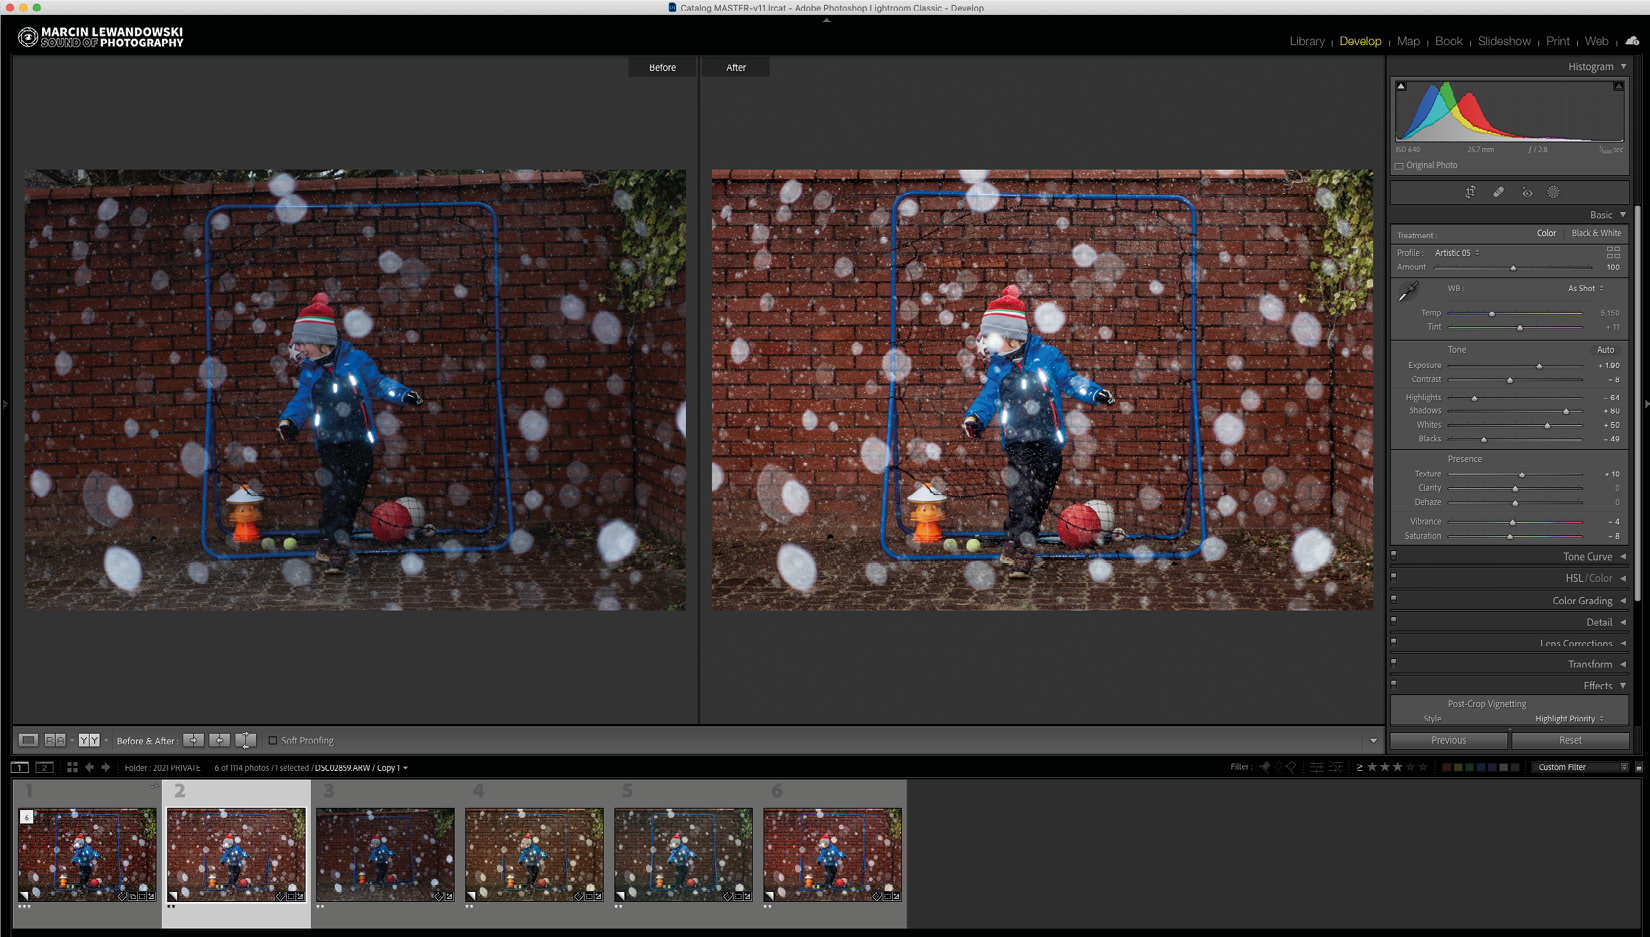
Figure 1.3 – Comparing finished/developed photograph to the original file (please note all the adjustments I made on the right side and multiple versions with a different look in the filmstrip)
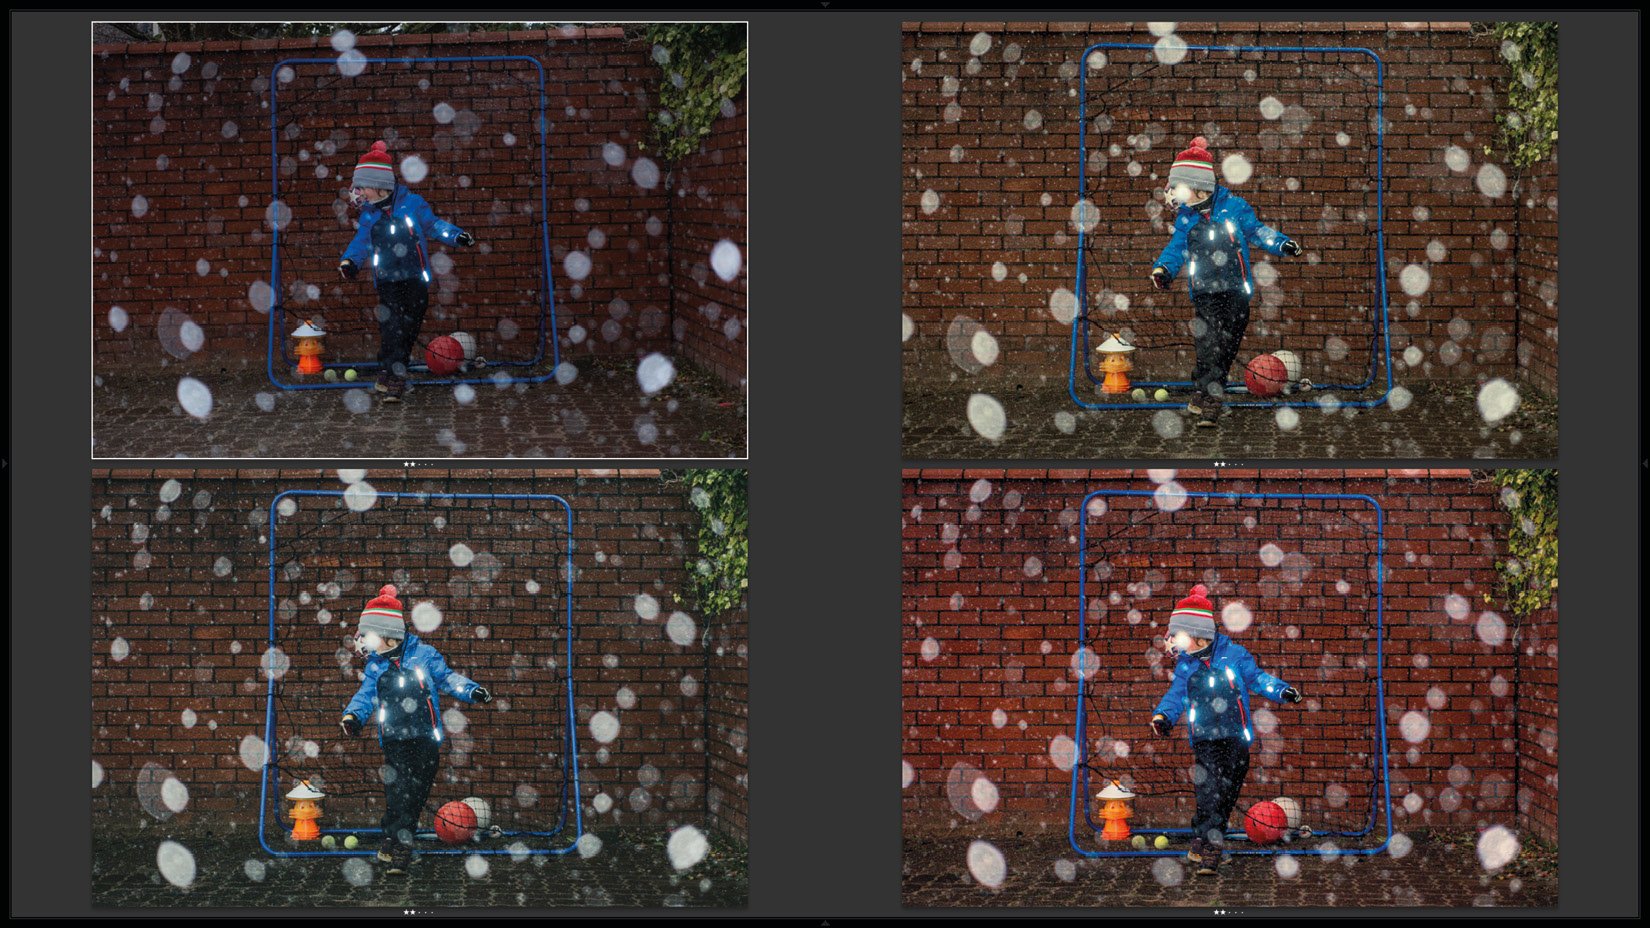
Figure 1.4 – Comparing a few different versions in Survey mode to pick a favorite
- Options within the Develop module are vast; we will cover all of this in Chapter 5, An Introduction to the Develop Module, and Chapter 6, A Detailed View of the Develop Module's Functions. Once we are finished, there is also a lot of flexibility regarding what can be done next. Let's say that we want to post this photograph on Instagram. In that case, we can sync with Lightroom for mobile devices, which is included in the package, by simply marking them for syncing (which is covered in Chapter 10, Final Notes and Summary) and from there, share to Instagram, as illustrated in the following screenshot:

Figure 1.5 – On the left is a screen from Lightroom Mobile showing the synced photo; on the right is my Instagram feed where I posted this photo directly from within Lightroom
Figure 1.5 is just a simple workflow example that I based on a small series of photographs quickly made to illustrate this chapter. As you can see, working within Lightroom is simple to follow once we know what we are doing. There are many options to choose from along the way to get to the desired final result. Whatever this final result might be for everyone, the principle always remains the same: import, edit, develop, and go from there.
You should now have a better idea of what Lightroom can do for you and what you can do with Lightroom. Please read on to learn a little bit more about how to control all of this functionality.
Starting with the Library module, Lightroom's layout revolves around photographs that are always the central point of all operations, regardless of whether we choose to view one photo or a selection of them. For example, please see the following screenshots of the same selection of photographs viewed in a few different ways within the Library module:
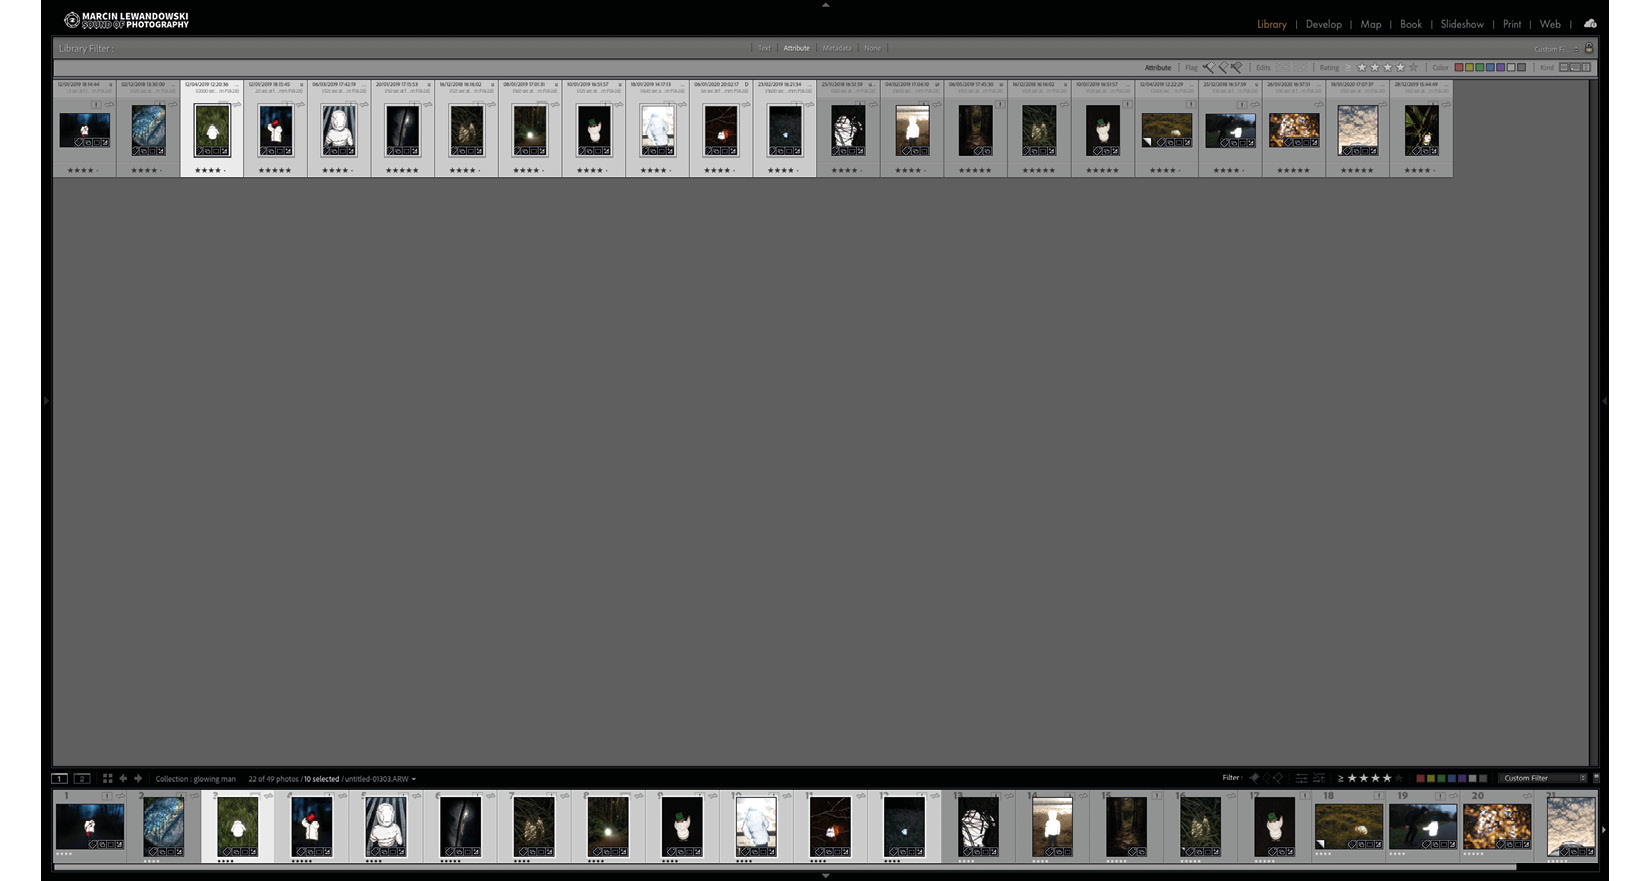
Figure 1.6A – Tiny cells in grid view with filmstrip and no side panels
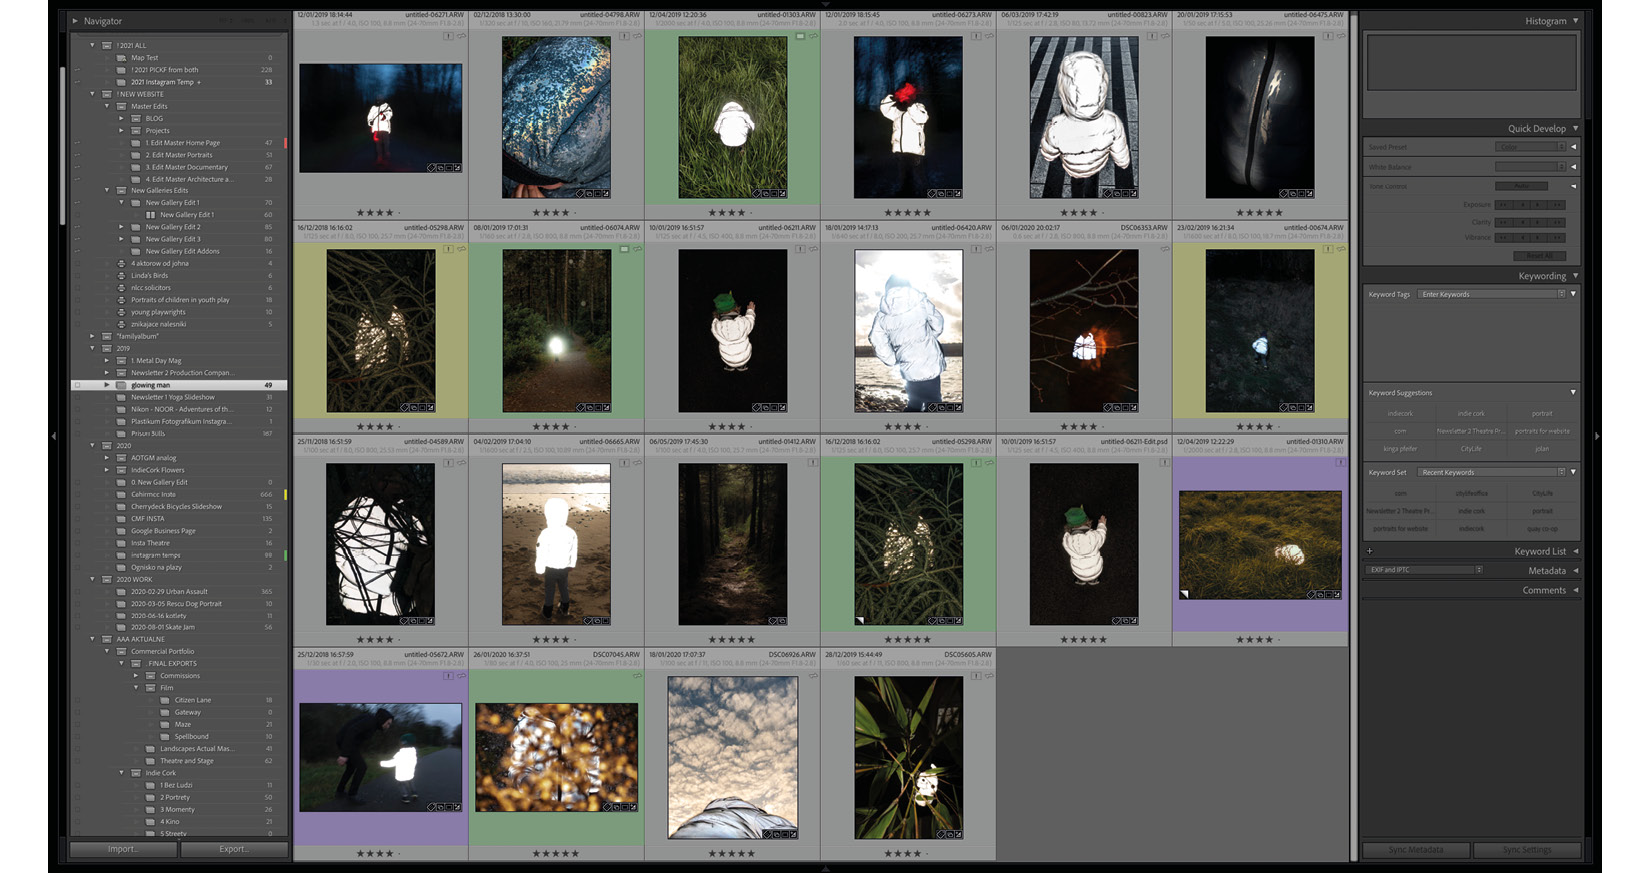
Figure 1.6B – Bigger cells in grid view with color-label tinted cells, side panels, and no filmstrip

Figure 1.6C – Selected photographs only with "lights out"; Selected photographs in Survey mode, all panels closed
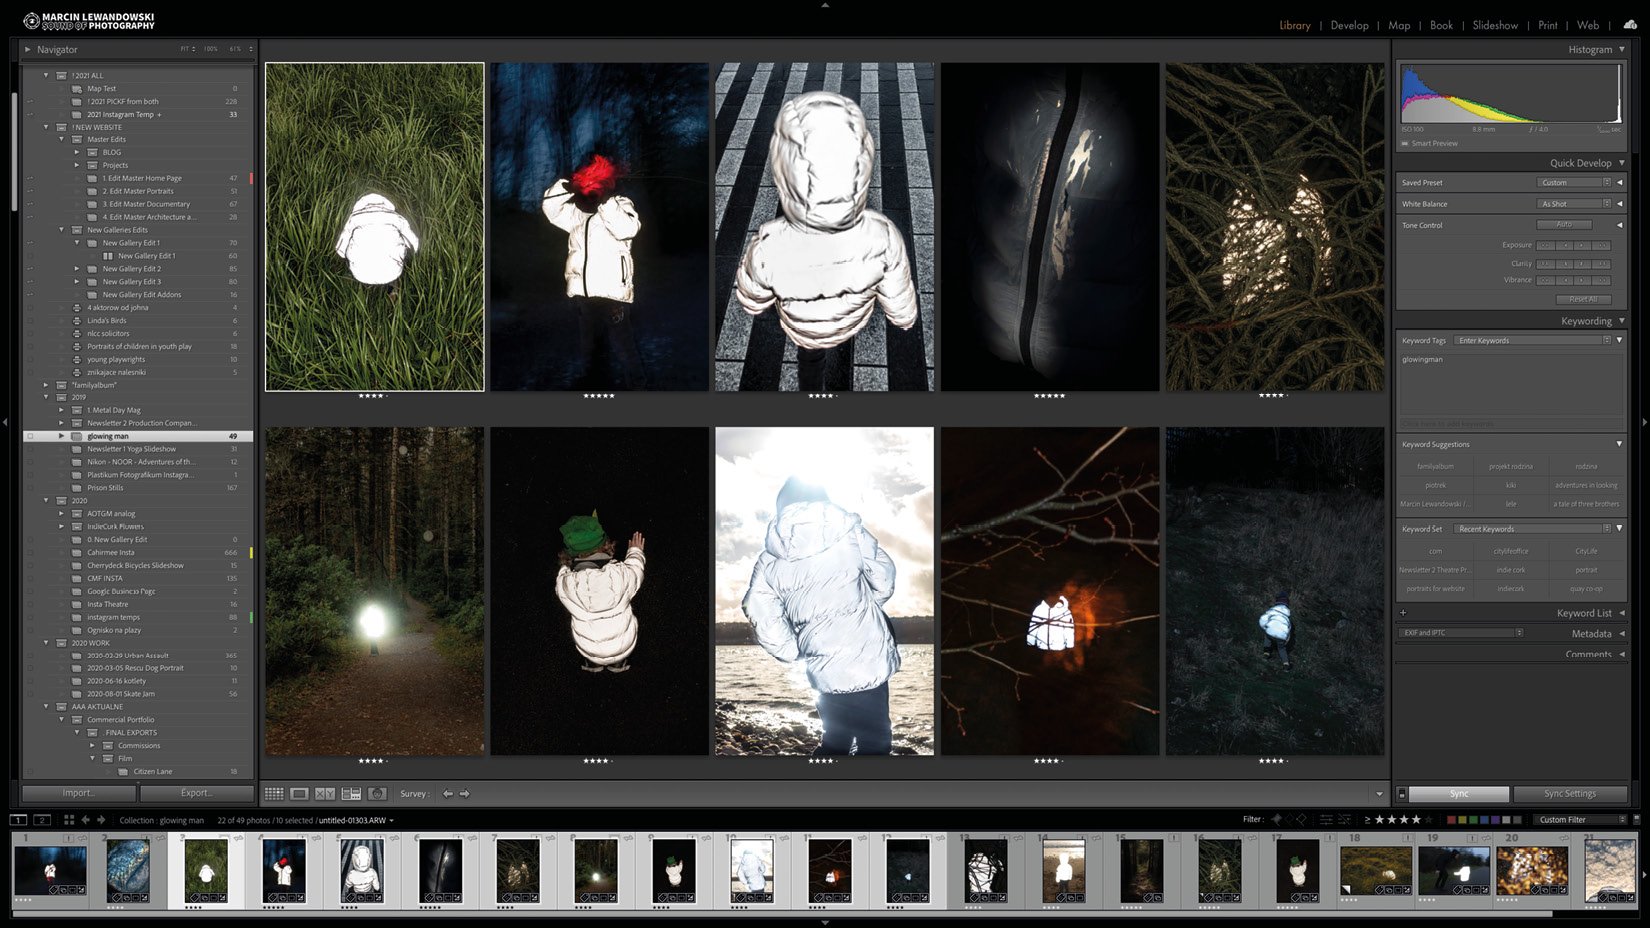
Figure 1.6D – Selected photographs in Survey mode, all panels opened
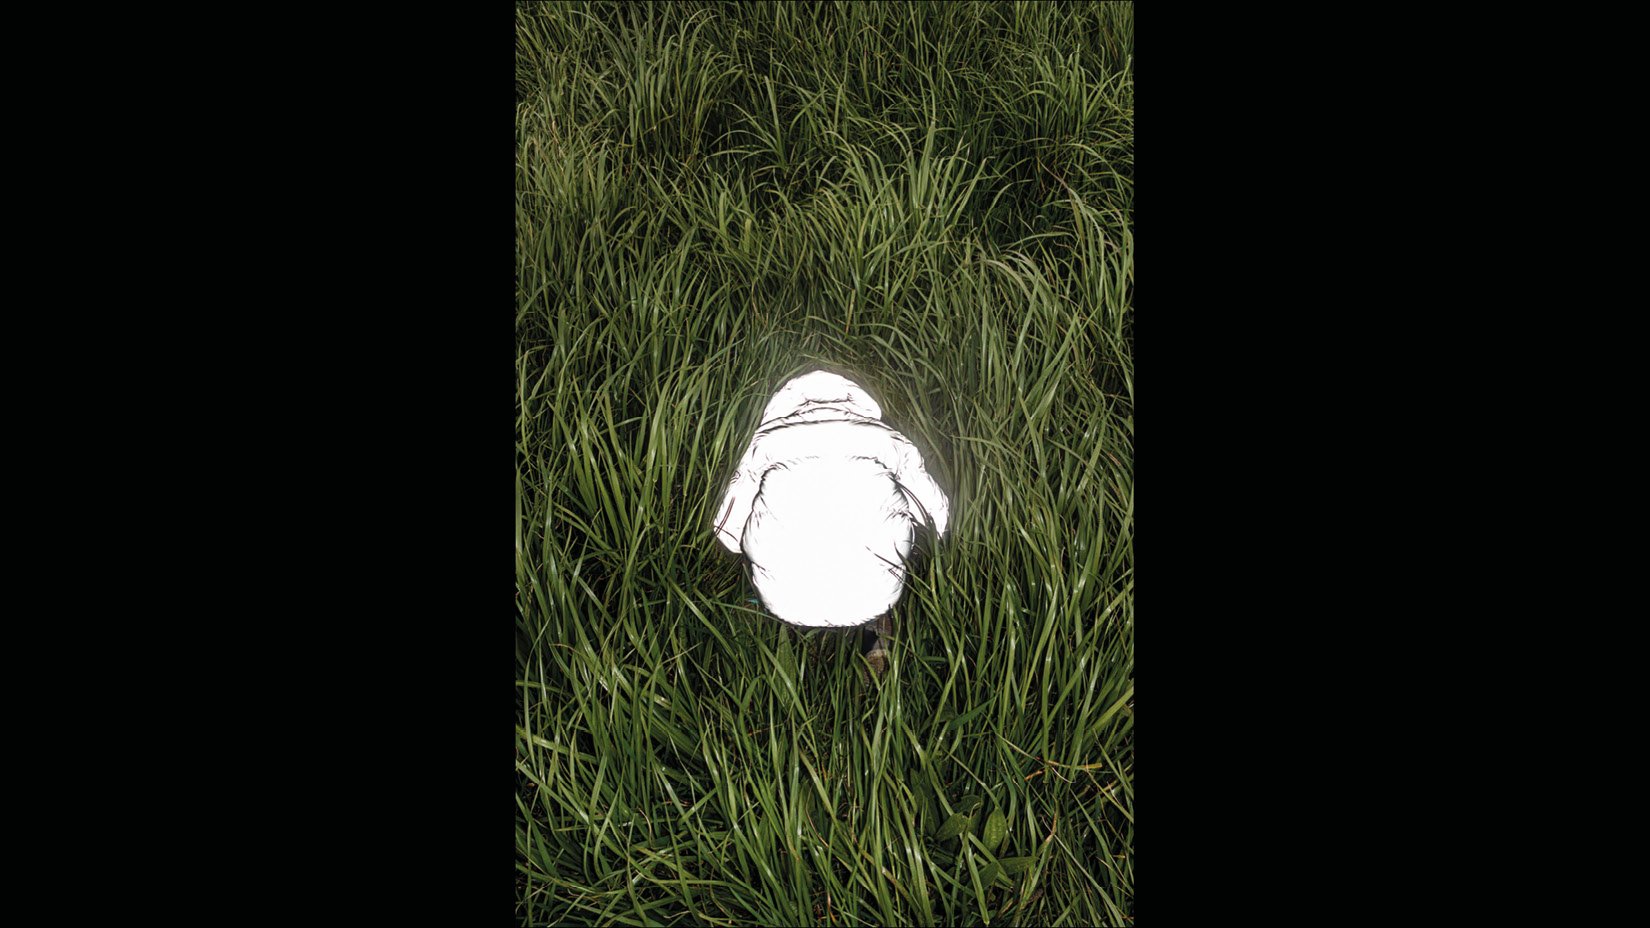
Figure 1.6E – Selected photograph in fullscreen mode
All these different views are only a click of a mouse button or a simple keyboard shortcut away. By the end of this book, you will be moving effortlessly between all viewing options, knowing exactly how to tailor each of them to your needs. You will understand their advantages and recognize differences in using each of them. Most of this information is available in Chapter 2, Bring It All In – Importing Photographs into Lightroom, and some module-specific options will be distributed throughout the book.
Whether we work on an extensive edit from a multiple-day photoshoot or choose a selection from a family meeting, Lightroom provides several tools to make this as easy as possible. We will cover this and more in the next section.


