Editing a list
Implementing the EditButton component in a list is very similar to implementing the delete button in the previous recipe. An edit button offers the user the option to quickly delete items by clicking a minus sign to the left of each list row.
Getting ready
Let's start by creating a SwiftUI app called EditListApp.
How to do it…
We will reuse some of the code from the previous recipe to complete this project. Take the following steps:
- Replace the
EditListAppapp'sContentViewstruct with the following content from theDeleteRowFromListapp:struct ContentView: View { @State var countries = ["USA", "Canada", "England","Cameroon", "South Africa", "Mexico" , "Japan", "South Korea"] var body: some View { NavigationView{ List { ForEach(countries, id: \.self) { country in Text(country) } .onDelete(perform: self.deleteItem) } .navigationBarTitle("Countries", displayMode: .inline) } } private func deleteItem(at indexSet: IndexSet){ self.countries.remove(atOffsets: indexSet) } } - Add a
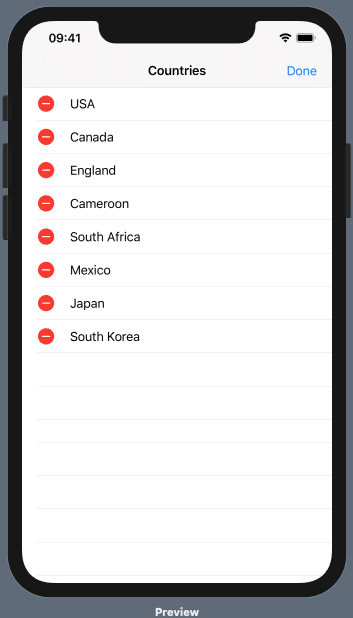
.navigationBarItems(trailing: EditButton())modifier to theListview, just below the.navigationBarTitle("Countries", displayMode:.inline)modifier.Run the preview and click the Edit button at the top-right corner of the screen. Minus (-) signs enclosed in red circles appear to the left of each row:

Figure 2.7 – EditListApp preview execution
Run the app live preview and admire the work of your own hands!
How it works…
The .navigationBarItems(trailing: EditButton()) modifier adds an edit button to the right corner of the display that, once clicked, creates the view shown in the preceding screenshot. A click on the delete button executes the .onDelete(perform: self.deleteItem) modifier. The modifier then executes the deleteItem function, which removes/deletes the selected row.
There's more…
To move the edit button to the right of the navigation bar, change the modifier to .navigationBarItems(leading: EditButton()).


