After creating and adjusting the settings for the paper space tabs, drawing the title block, and creating the viewports with different shapes as desired, as well as tweaking their settings properly, the drawing is now ready to be printed. The details for using the different settings of the print command are discussed in the following sections.
Understanding the printing process
Starting the print command
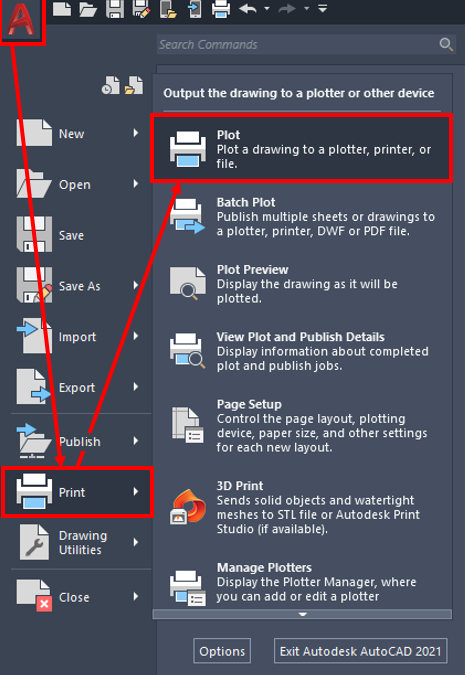
To print, you can click on the application menu and choose the Plot option on the Print submenu, or you can press Ctrl + P to initialize the print command, as shown:

Figure 15.30: The location of the Plot command button
This will open the Plot window, which will be discussed in the next section.


