The Extend command works in a completely opposite way. It extends the drawing up to the selected boundary. The workflow of the extend command is also the same and in this case, you also need a boundary that another geometry will extend to:

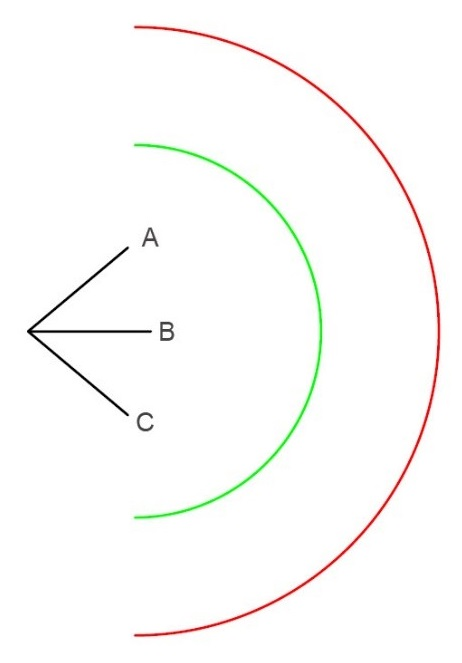
To explain the extend command, I will use this diagram shown in the preceding figure. Here, we will extend the lines up to the next boundaries using different extend options:
- Type EX and press Enter, or click on the Extend tool from the Modify panel to start the extend command.
- Simply click on the line you want to extend. In this example, click on the A line and it will extend up to the green arc.
- Click on the A line again and it will again extend up to the red arc this time. If you click on the A line a third time, it will have no effect as there is no further boundary to extend the line.
This is the workflow for extending a command in the 2021 version of AutoCAD, but if you are using older versions of AutoCAD, the workflow once again will be slightly different. Here is the workflow of the Extend command from the older versions:
- Type EX and press Enter or click on the Extend tool from the Modify panel to start the Extend command.
- Now, the command line will prompt you to select the object to extend to. Click the red arc and press the Enter key.
- Now, click on the A line and it will extend up to the red arc, ignoring the green arc that is before it.
If you want to include all the objects to be included as a boundary for the Extend command, then follow this workflow:
- Start the Extend command again by using the EX command or click on the extend icon from the Modify panel of the Home tab.
- When the command line prompts you to select the objects, press the Enter key without selecting anything. This will ensure all objects in the drawing area are selected as the extend boundary:

- Now, click on the A line and it will extend to the green arc. Click on the A line again and it will extend further up to red arc.
Similarly, if you click on other lines, they will also extend up the first boundary, that is, the green arc, and then clicking on them again will extend it further to the red arc.
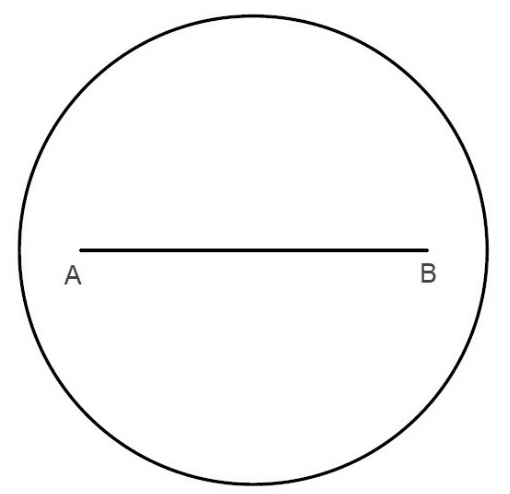
Let’s consider this situation where we have a boundary on both the sides of the AB line:

In this case, if you use Extend on the AB line, the line will extend either to the left or the right side to touch the circle. The side to which the line extends will depend on the point where you click on the line. If you click close to the A point, the line will extend to the left and similarly, if you click close to the B point, then the line will extend to the right. It's obviously not possible to click exactly at the center.
If you are not happy with the way the trim and extend commands work in the 2021 version of AutoCAD and want to switch back to the legacy behavior, then follow this workflow:
- Select the Trim command from the Modify panel or use its command, TR.
- Select the Mode option from the command line.
- Change the option from Quick to Standard and you will have the standard behavior of the trim tool restored.
You can follow the same workflow for restoring the Extend command's behavior, too.
So, now we are equipped with the basic drawing tools that are required to make simple geometries in AutoCAD. I recommend you try making a simple drawing yourself with the tools learned about in this chapter.


