We initialized our code repository. It is time to create a project. Start Android Studio and choose the following:
Start a new Android Studio Project or File | New | New Project.
Create New Project and a window appears.
Fill the application information:
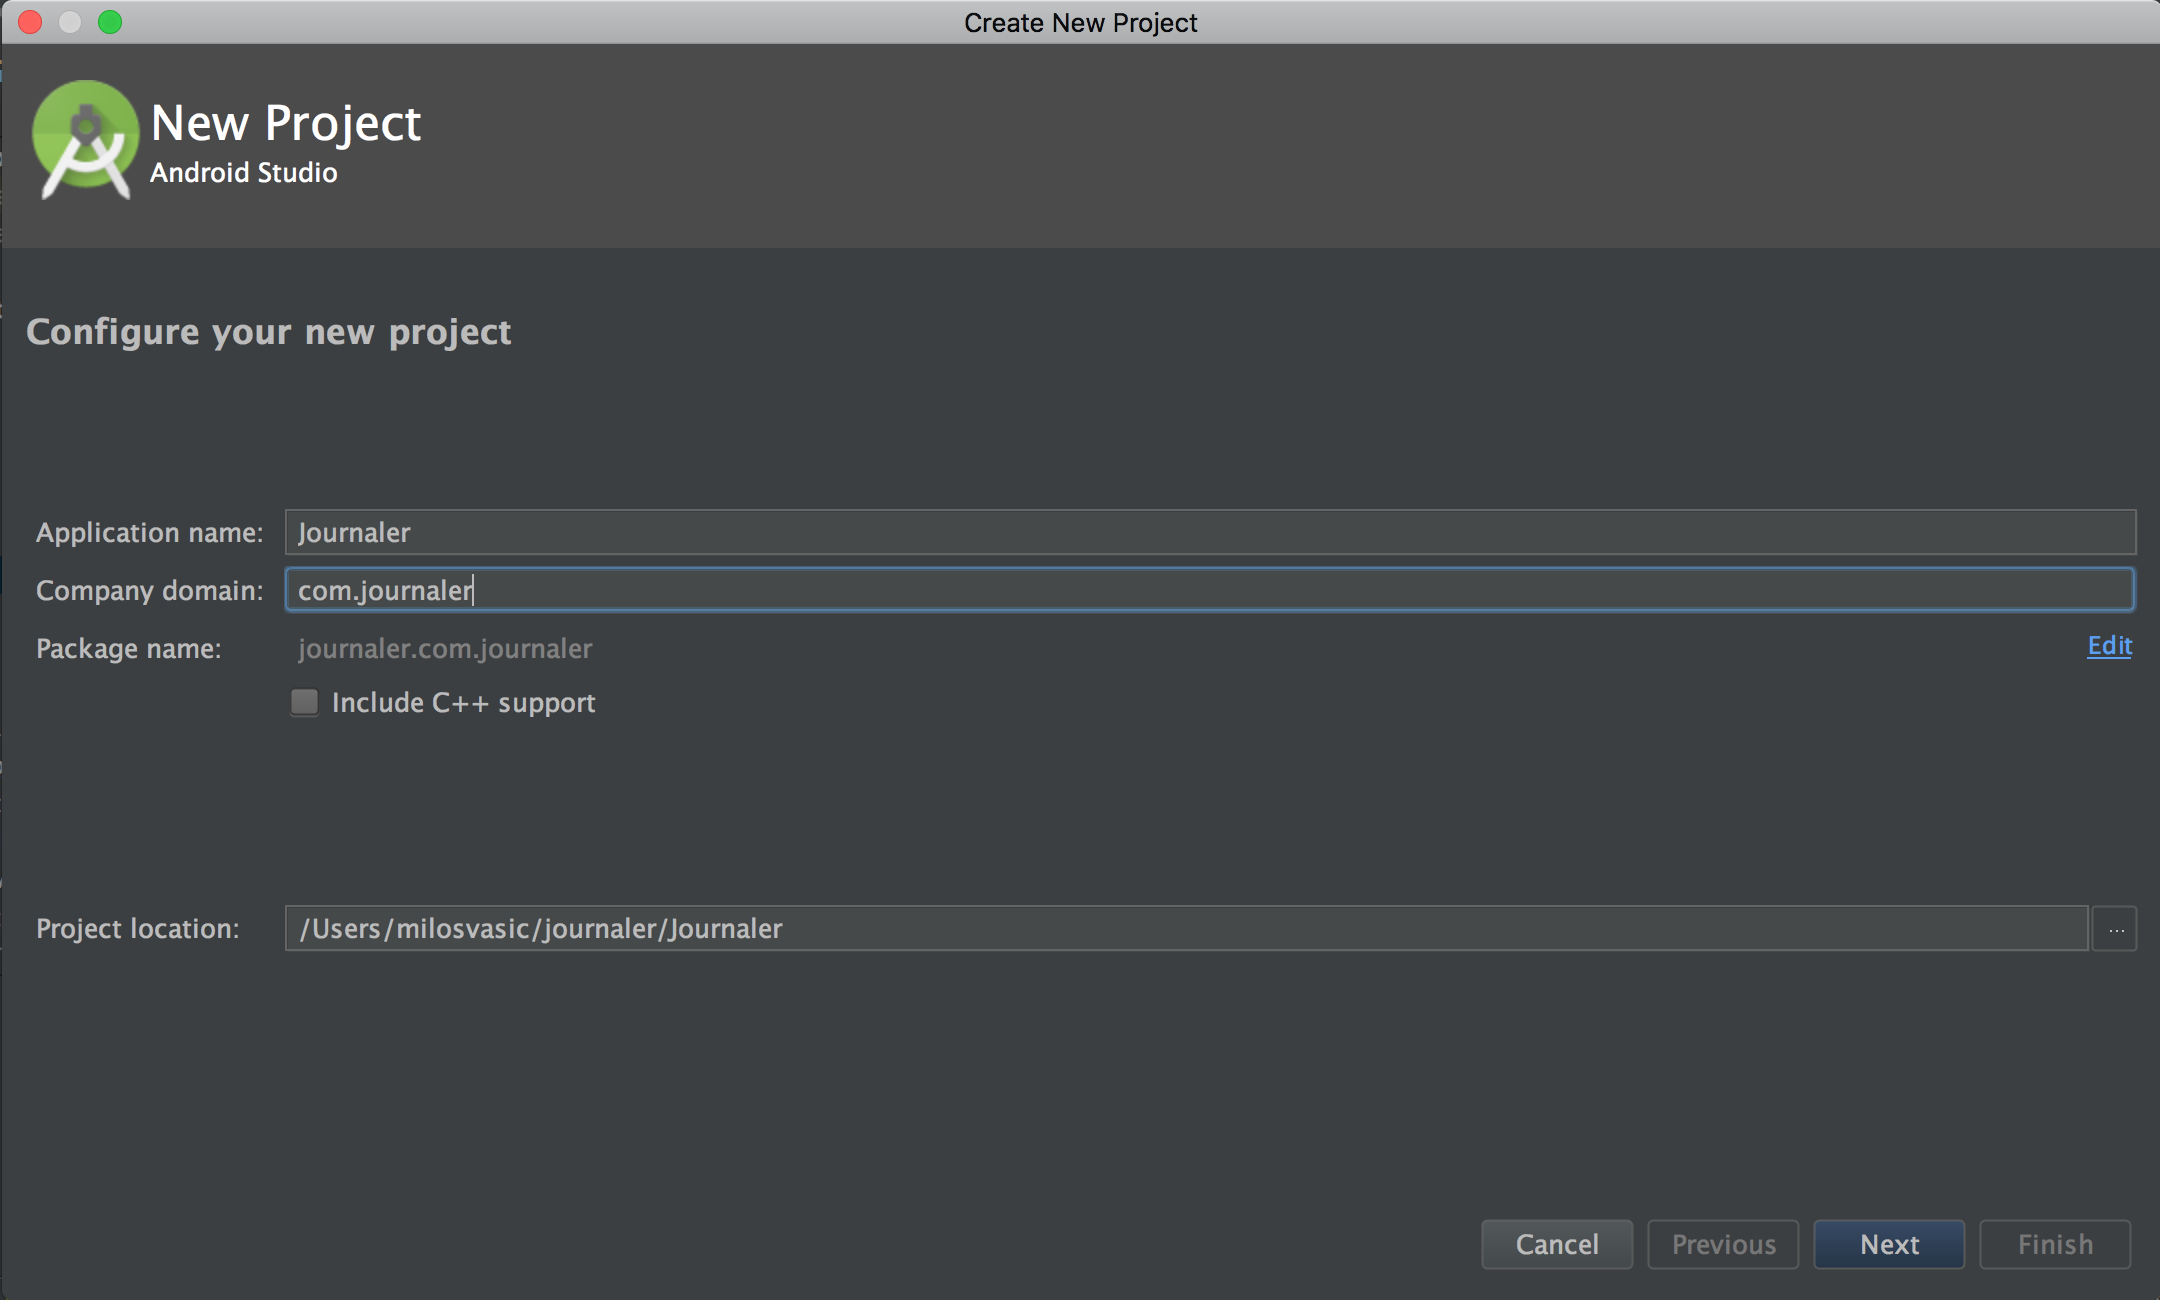
Then, click on Next.
Check the Phone and Tablet option, and then choose Android 5.0 as the minimum Android version as follows:
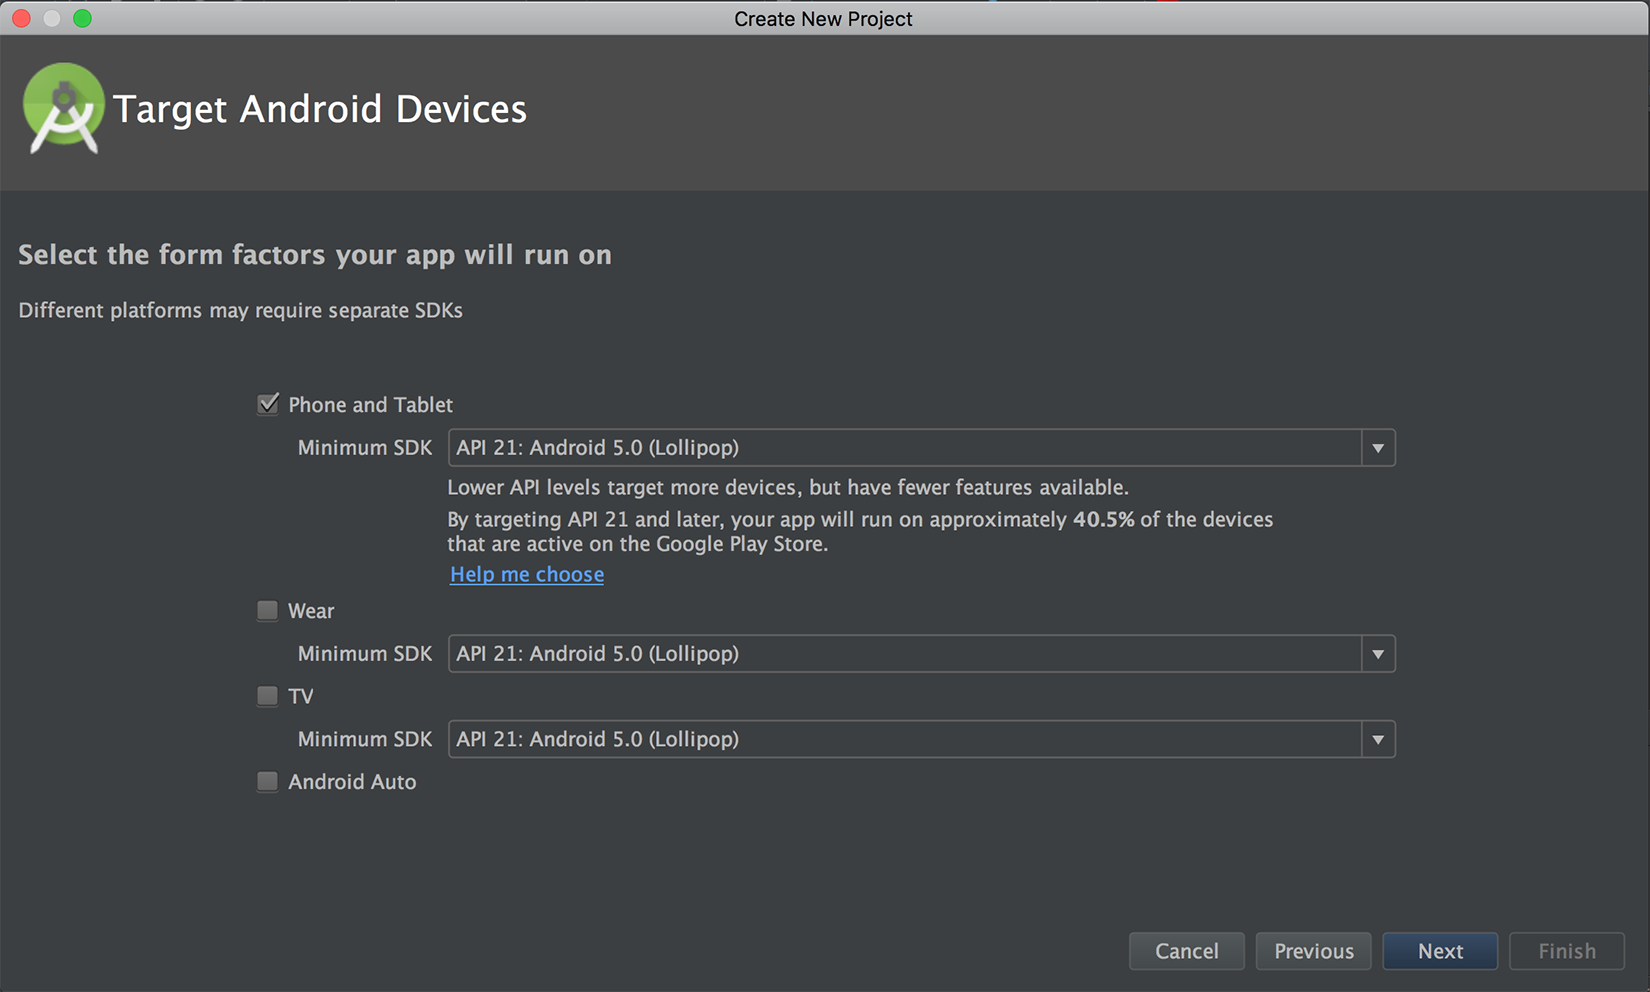
Click on Next again.
Choose Add No Activity and click on Finish, as follows:
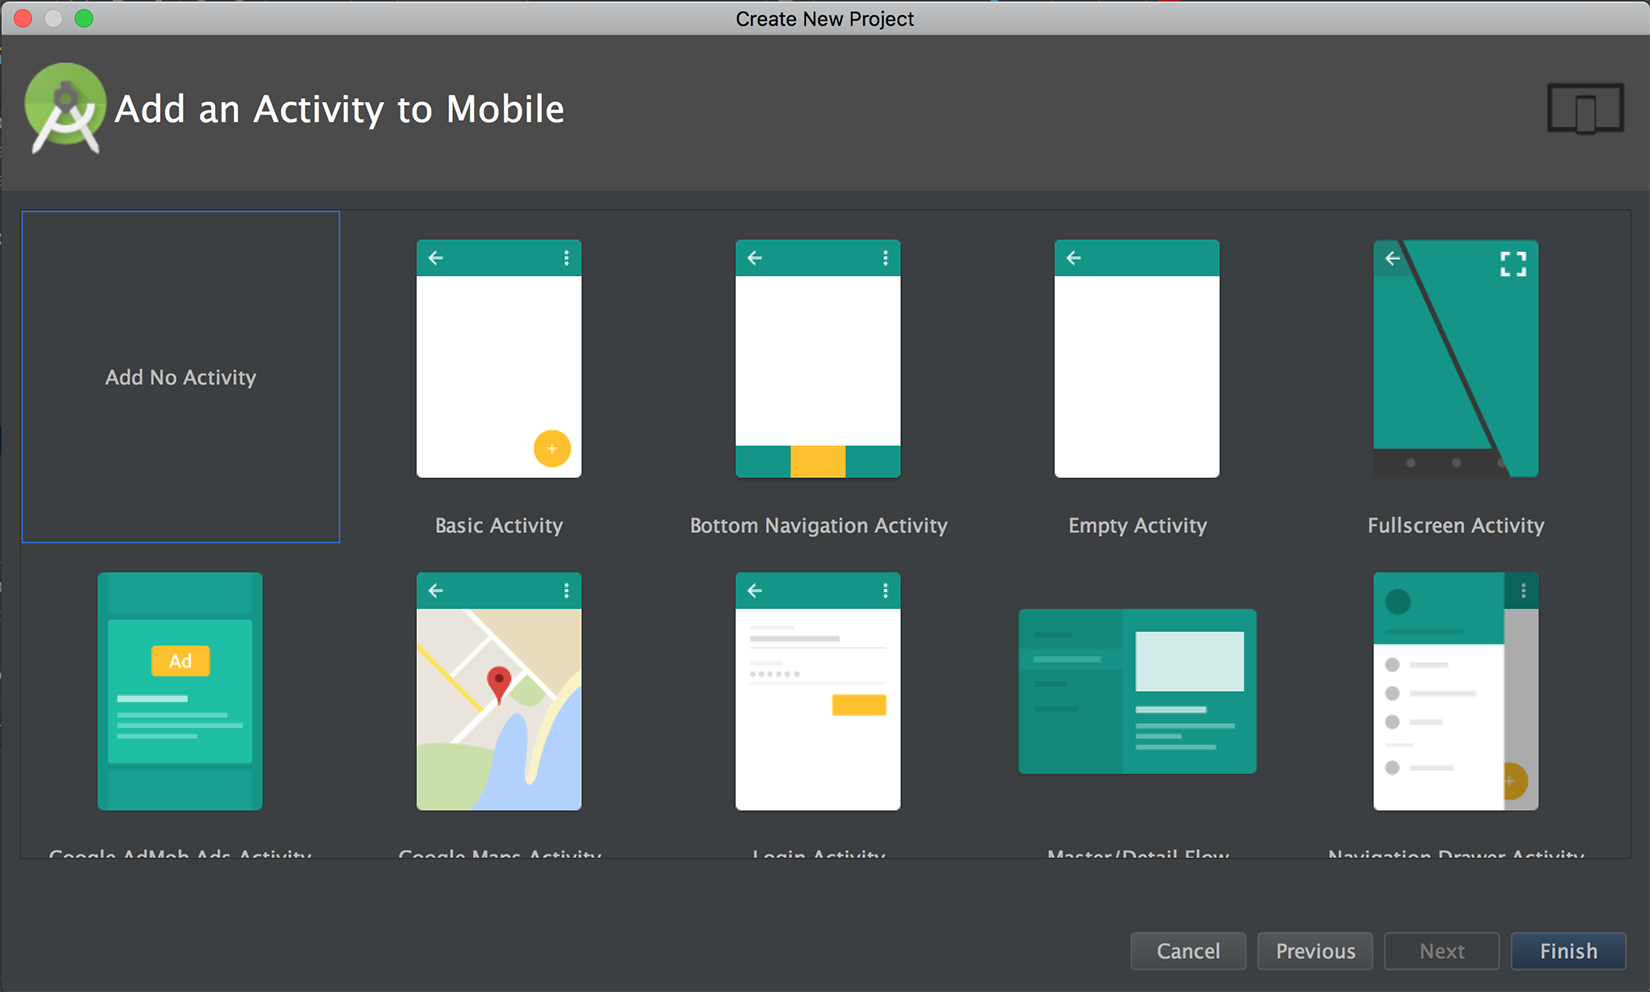
Wait until your project is created.
You will notice a message about Unregistered VCS root detected. Click on add root or go to Preferences | Version Control | , and then select our Git repository from the list and the click on then + icon, as shown in the following screenshot:
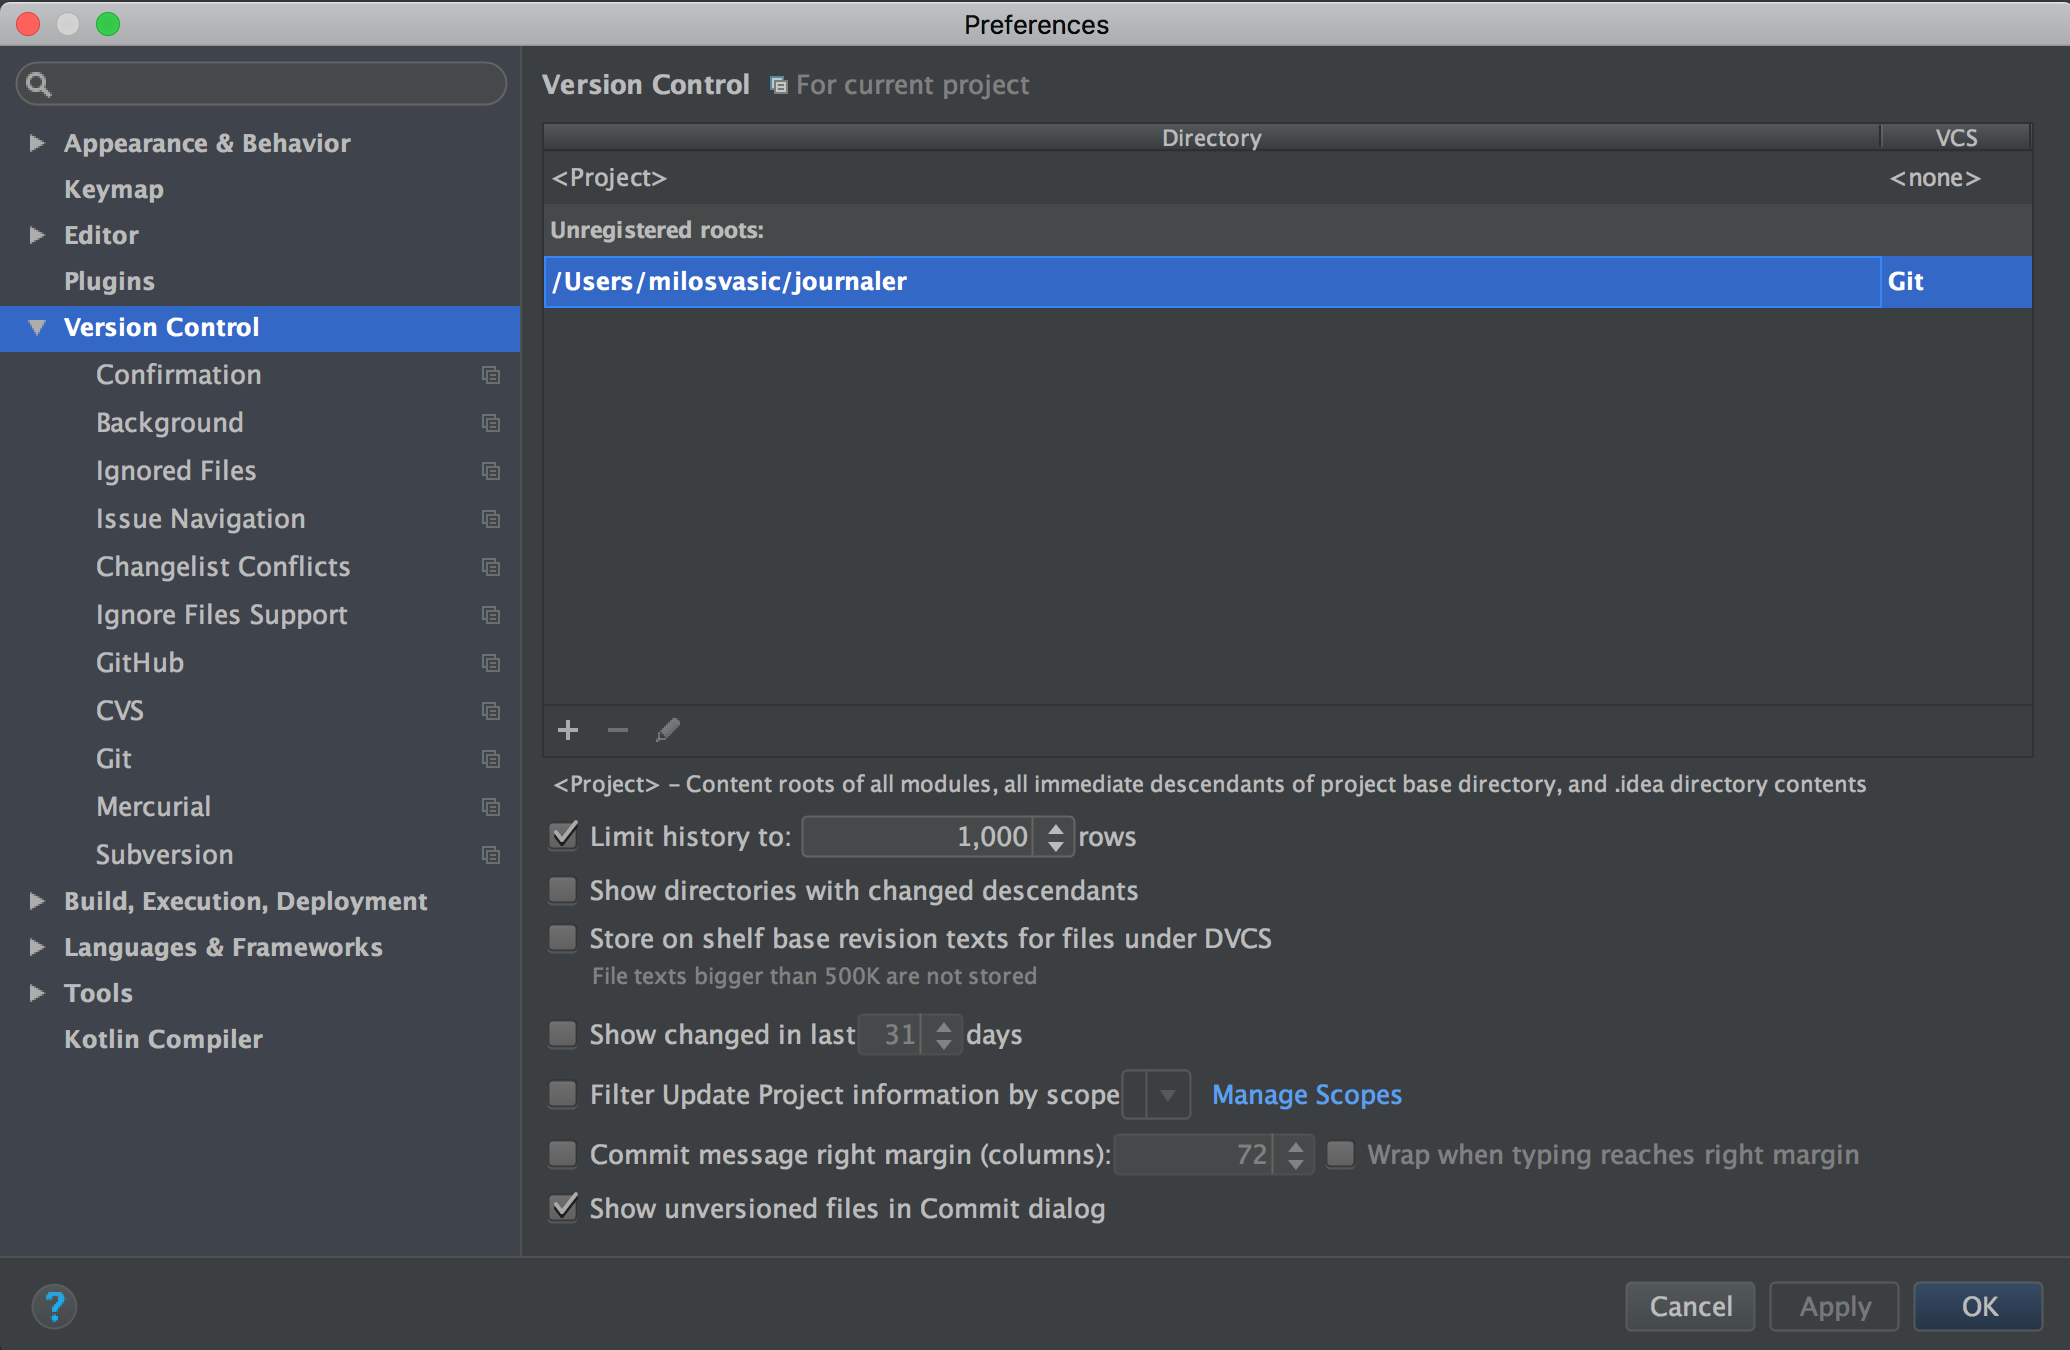
To confirm everything, click on Apply and OK.
Before committing and pushing, update your .gitignore files. The purpose of the .gitignore file is to allow you to ignore files, such as editor backup files, build products, or local configuration overrides that you never want to commit into a repository. Without matching the .gitignore rules, these files will appear in the untracked files section of the Git status output.
Open .gitignore located in your project root directory and edit it. To access it, expand Project by clicking on Project on the left side of Android Studio, and then, from the drop-down menu, choose Project, as shown in the following screenshot:
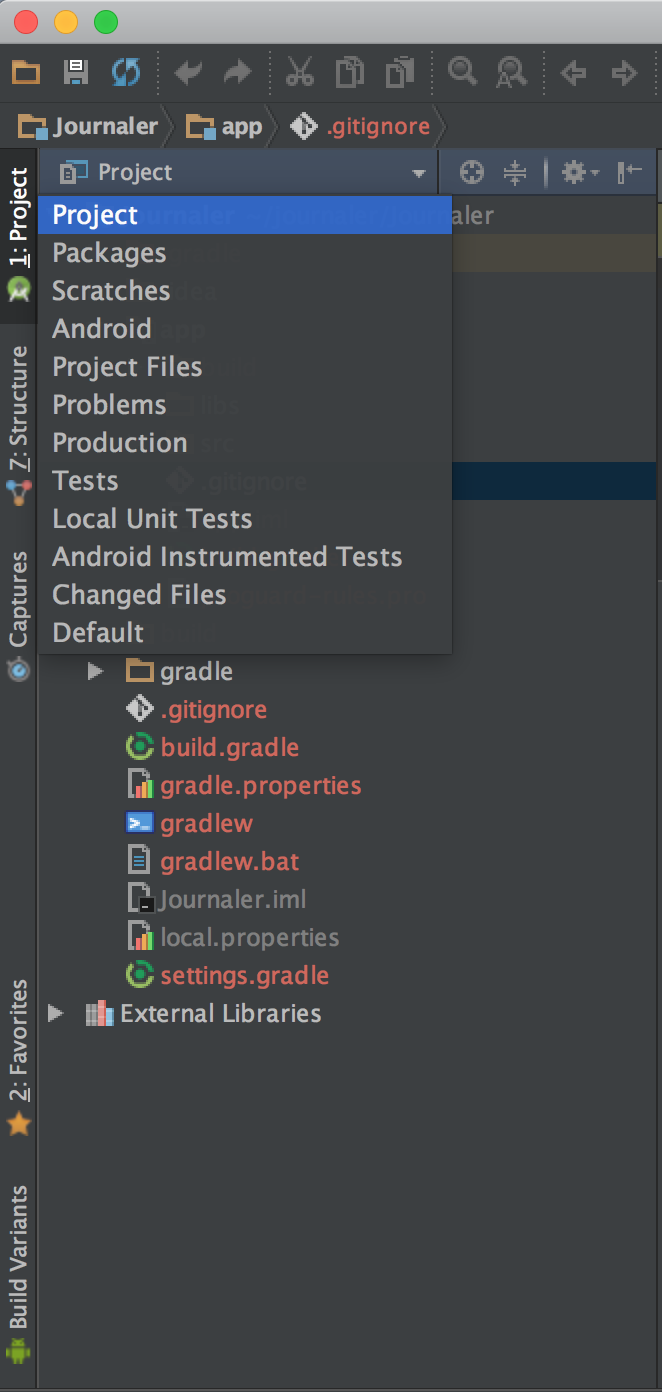
Let's add some lines:
.idea
.gradle
build/
gradle*
!gradle-plugins*
gradle-app.setting
!gradle-wrapper.jar
.gradletasknamecache
local.properties
gen
Then, edit .gitignore, which is located in the app module directory:
*.class
.mtj.tmp/

*.jar
*.war
*.ear
 hs_err_pid*
.idea/*
.DS_Store
.idea/shelf
/android.tests.dependencies
/confluence/target
/dependencies
/dist
/gh-pages
/ideaSDK
/android-studio/sdk
out
tmp
workspace.xml
*.versionsBackup
/idea/testData/debugger/tinyApp/classes*
/jps-plugin/testData/kannotator
ultimate/.DS_Store
ultimate/.idea/shelf
ultimate/dependencies
ultimate/ideaSDK
ultimate/out
ultimate/tmp
ultimate/workspace.xml
ultimate/*.versionsBackup
.idea/workspace.xml
.idea/tasks.xml
.idea/dataSources.ids
.idea/dataSources.xml
.idea/dataSources.local.xml
.idea/sqlDataSources.xml
.idea/dynamic.xml
.idea/uiDesigner.xml
.idea/gradle.xml
.idea/libraries
.idea/mongoSettings.xml
*.iws
/out/
.idea_modules/
atlassian-ide-plugin.xml
com_crashlytics_export_strings.xml
crashlytics.properties
crashlytics-build.properties
fabric.properties
target/
pom.xml.tag
pom.xml.releaseBackup
pom.xml.versionsBackup
pom.xml.next
release.properties
dependency-reduced-pom.xml
buildNumber.properties
.mvn/timing.properties
!/.mvn/wrapper/maven-wrapper.jar
samples/*
build/*
.gradle/*
!libs/*.jar
!Releases/*.jar

credentials*.gradle
gen
You can use this .gitignore configuration from the preceding. Now we can commit and push cmd + 9 on macOS or ctrl + 9 on Windows/Linux (shortcut for View | Tool Windows | Version Control). Expand unversioned files, select them, and right-click on Add to VCS.

Press Cmd + K (or Ctrl + K on Windows/Linux), check all files, enter commit message, and, from the Commit drop-down menu, choose Commit and Push. If you get Line Separators Warning, choose Fix and Commit. The Push Commits window will appear. Check Push Tags and choose Current Branch, and then Push.


