Rigging and using keyframes
Now that we have a good idea what tools we will need, let's talk about creating keyframes!

The Timeline is used to add keyframes in a similar fashion to Timelines in Unreal 4
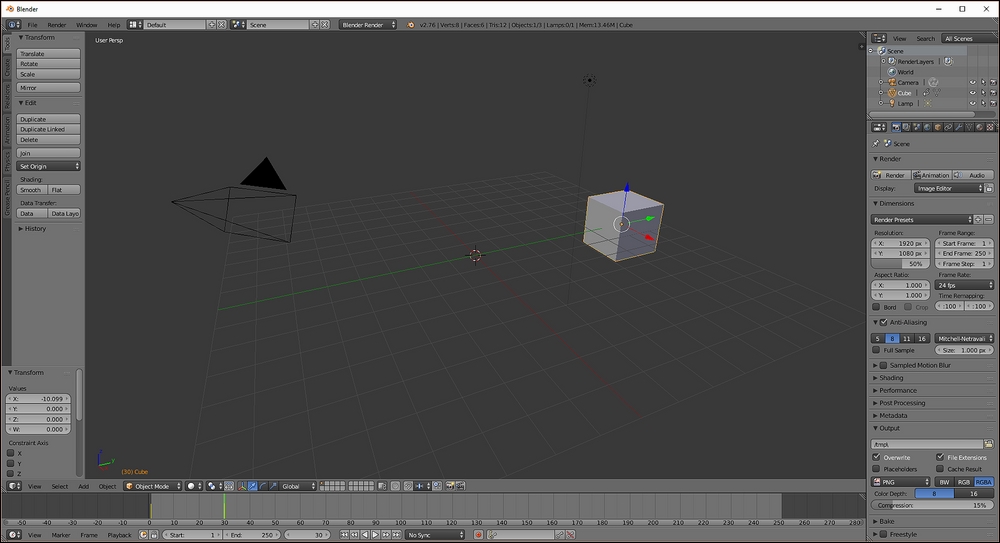
Similar to Unreal 4, the keyframes we create will be displayed in the Timeline. This area is located directly under the 3D viewport. Keyframes are represented as simple yellow lines, and the amount of time we are viewing can be adjusted by using the mouse wheel.
Now let's start with a basic cube and create some keyframes:

A simple animation of a sliding box
To make a simple animation where our cube moves, we need to create two keyframes:
Create the first keyframe by selecting the cube, pressing I to open the Insert Keyframe Menu, and selecting Location at the top of the list.
Now slide the time slider in the Timeline window to frame
30. This can be done by right clicking on the Timeline near 30 and then holding the button to slide it along the Timeline. The box highlighted in the image shows the...


