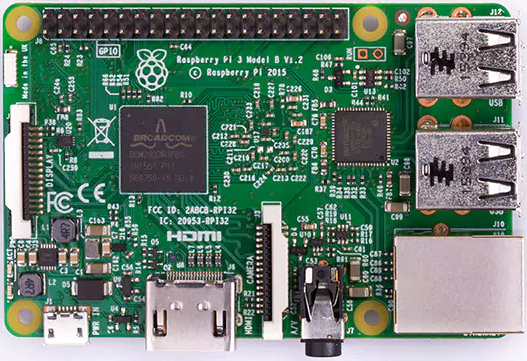
The Raspberry Pi is a credit-card-sized single-board computer that was developed by the Raspberry Pi Foundation in 2012. The foundation's main goal is to promote computer literacy across the globe by offering an affordable and mutable bit of hardware to the masses. It's become a huge hit among the maker communities and is paving its way through education as a cheap, practical, and convenient way to teach digital and physical making. As we move through the text, I will be centering my conversation on the base model and necessities of a Raspberry Pi 3, as this is the most current version of the Raspberry Pi on the market. If you're using a Raspberry Pi 2 or B+, I’ll make sure to point out the differences in hardware usage as we move along.
While taking a closer look, the Raspberry Pi 3 boasts of some impressive specs for its size:
- A 1.2 GHz 64-bit quad-core ARMv8 CPU
- 802.11n Wireless LAN
- Bluetooth 4.1
- Bluetooth Low Energy (BLE)
- 1 GB RAM
- Four USB ports
- 40 GPIO pins
- Full HDMI port
- Ethernet port
- Combined 3.5mm audio jack and composite video
- Camera Interface (CSI)
- Display Interface (DSI)
- Micro SD card slot
- VideoCore IV 3D graphics core
Furthermore, the Raspberry Pi 3 has the same form factor as the earlier models, the Raspberry Pi 2 and the B+, allowing you to reuse the casing and accessories.
Raspberry Pi Model 3:

You will need the following materials for this project:
- Project materials:
- Raspberry Pi 2/3
- Micro USB charging cable
- Wi-Fi dongle (if you are using Pi 2)
- A microSD card
- Monitor (HDMI/VGA)
- Two-way glass/acrylic
- Wooden frame
- Optional materials:
- PIR motion sensor
- Pi Camera Module
- Ultrasonic sensor—HC-SR04
- HDMI-to-VGA converter


