Search icon CANCEL
Arrow left icon
Explore Products
Best Sellers
New Releases
Books
Videos
Audiobooks
Learning Hub
Conferences
Free Learning
Arrow right icon
Arrow up icon
GO TO TOP
Photorealistic Materials and Textures in Blender Cycles

You're reading from   Photorealistic Materials and Textures in Blender Cycles Create impressive production-ready projects using one of the most powerful rendering engines

Arrow left icon
Product type Paperback
Published in Oct 2023
Publisher Packt
ISBN-13 9781805129639
Length 394 pages
Edition 4th Edition
Tools
Concepts
Arrow right icon
Author (1):
Arrow left icon
Arijan Belec Arijan Belec
Author Profile Icon Arijan Belec
Arijan Belec
Arrow right icon
View More author details
Toc

Table of Contents (21) Chapters Close

Preface 1. Part 1: Materials in Cycles FREE CHAPTER
2. Chapter 1: Creating Materials in Blender 3. Chapter 2: Introducing Material Nodes 4. Chapter 3: Mapping Images with Nodes 5. Part 2: Understanding Realistic Texturing
6. Chapter 4: Achieving Realism with Texture Maps 7. Chapter 5: Generating Texture Maps with Cycles 8. Chapter 6: Creating Bumpy Surfaces with Displacement Maps 9. Part 3: UV Mapping and Texture Painting
10. Chapter 7: UV-Unwrapping 3D Models for Texturing 11. Chapter 8: Baking Ambient Occlusion Maps 12. Chapter 9: Introducing Texture Painting 13. Chapter 10: Creating Photorealistic Textures on a 3D Model 14. Part 4: Lighting and Rendering
15. Chapter 11: Lighting a Scene in Cycles 16. Chapter 12: Creating Photorealistic Environments with HDRIs 17. Chapter 13: Preparing the Camera for Rendering 18. Chapter 14: Rendering with Cycles 19. Index 20. Other Books You May Enjoy

Applying the Ambient Occlusion map with nodes

We will now learn how to apply an AO map to a material and use it to improve our textures.

First, let’s plug the Image Texture node with the AO map into the Base Color input of the Principled BSDF node, as shown in Figure 8.10.
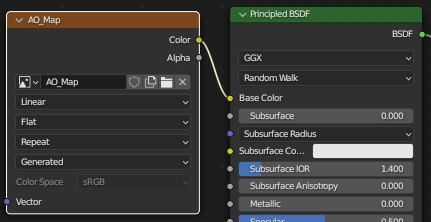
Figure 8.10 – Plugging the AO map into the Principled BSDF node

Figure 8.10 – Plugging the AO map into the Principled BSDF node

This will add some shading to the 3D model, as shown in Figure 8.11.
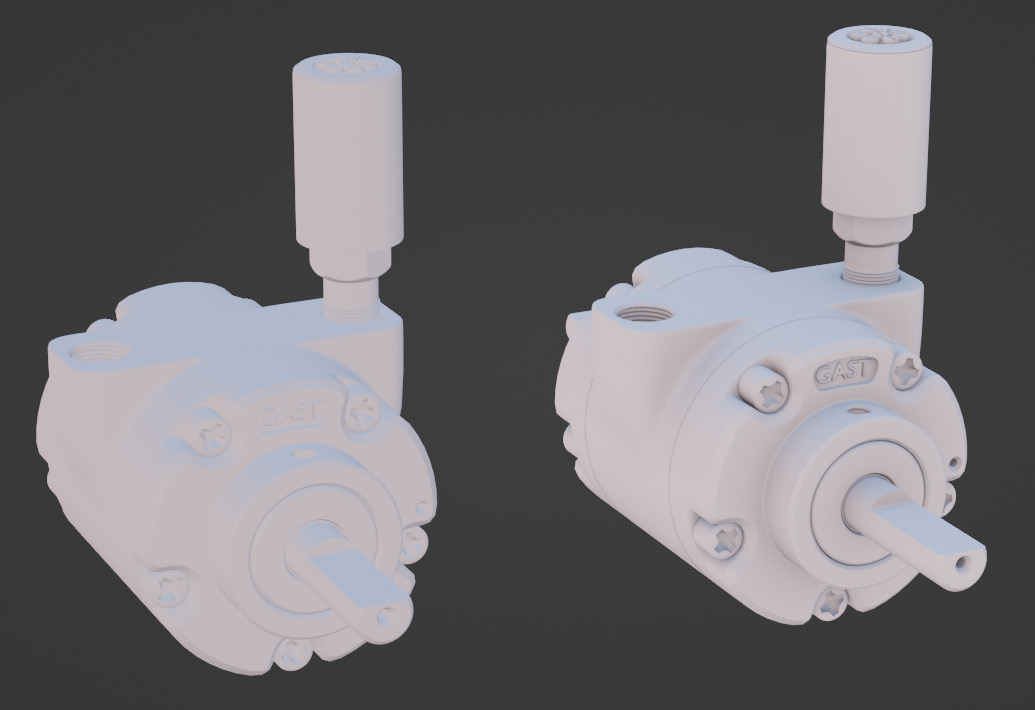
Figure 8.11 – The effect of an AO map as visible in the viewport

Figure 8.11 – The effect of an AO map as visible in the viewport

Currently, the shading is not very noticeable and makes a minimal difference. In the next few steps, we will add some nodes so that we can tweak the result:

  1. Add a Bright/Contrast node and tweak the values to change the darkness and width of the shadows to your preference. This is demonstrated in Figure 8.12.
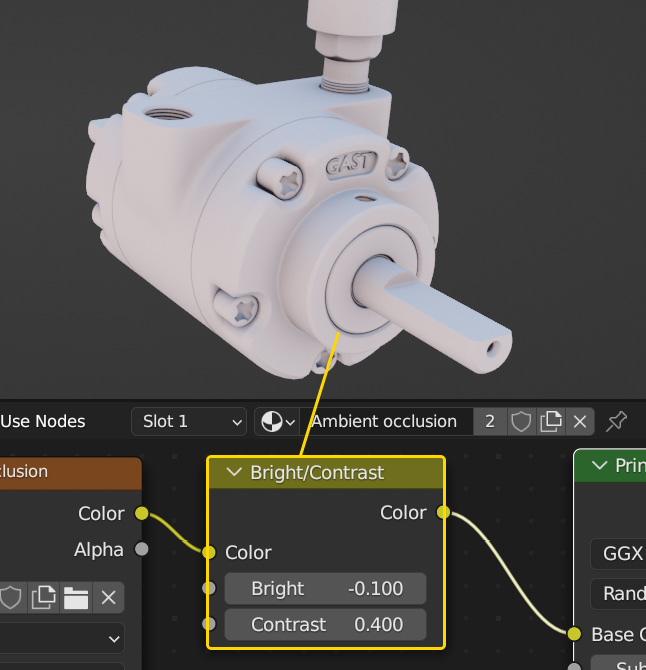
Figure 8.12 – Controlling the AO map with a Bright/Contrast node

Figure 8.12 – Controlling the AO map with a Bright/Contrast node

  1. Add a ColorRamp...
lock icon The rest of the chapter is locked
Register for a free Packt account to unlock a world of extra content!
A free Packt account unlocks extra newsletters, articles, discounted offers, and much more. Start advancing your knowledge today.
Unlock this book and the full library FREE for 7 days
Get unlimited access to 7000+ expert-authored eBooks and videos courses covering every tech area you can think of
Renews at €18.99/month. Cancel anytime