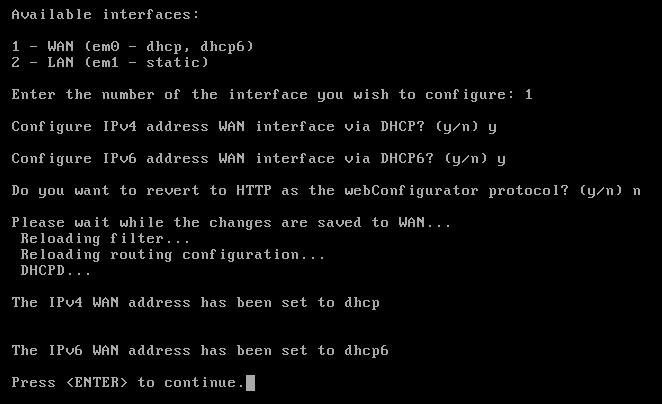
This recipe describes how to configure the WAN interface from the Console menu.
Configuring a WAN interface from the console
Getting ready
In order to complete this recipe, the WAN interface must have previously been assigned to one of the available network interfaces.
How to do it...
- On the console menu, type 2 and press Enter.
- pfSense will prompt you for the number of the interface you want to configure. For the WAN interface, this will be 1, so type 1 and press Enter.
- pfSense will ask you if you want to configure the IPv4 WAN address through DHCP. In most cases, you will want to type y, because the WAN interface address will be assigned by your ISP via DHCP. Type y and press Enter. If you enter n, pfSense will prompt you for a WAN IPv4 address, and then the subnet bit count:

- pfSense will ask you whether you want to configure the IPv6 WAN address through DHCP6. You can type y if your ISP supports IPv6 addressing, or type n, in which case IPv6 addressing for the WAN interface will be disabled.
- pfSense will ask you whether you want to revert to HTTP for the webConfigurator protocol. Unless you have a reason for not using HTTPS for the web GUI, type n and press Enter.
- The configuration process is now complete. The settings will be saved and pfSense will reload them.
How it works...
This recipe describes how to configure the WAN interface via the console instead of through the web GUI. Note that the options are much more limited than they are in the web GUI. For example, you only have the option to configure an IPv4 address via DHCP or use a static address. None of the other options, such as PPP or PPPoE are available. Also, with IPv6, the only option is DHCP6. If you require more options that are available here, use the web GUI.
See also
- The Assigning interfaces from the console recipe
- The Configuring a LAN interface from the console recipe
- The Configuring optional interfaces from the console recipe
- The Configuring VLANs from the console recipe
- The Configuring a WAN interface recipe


