This recipe describes how to access the console from any Linux, macOS, or Windows computer.
Accessing the SSH
Getting ready
The SSH server must be enabled and configured on your pfSense box. You must have an SSH client on your computer. An SSH client is installed by default on Linux and macOS. If you are using Windows, you need to install an SSH client such as PuTTY.
How to do it...
In Linux or macOS, follow these steps:
- Launch a Terminal window and type the following: ssh admin@192.168.1.1.
- If you are using the default configuration, you will be prompted for a password.
- If you are using RSA key authentication, the client will directly connect to the server, or you may be asked for a passphrase. If asked for a passphrase, use the one you created when creating the RSA key.
- If you configured SSH to use a different port, you can specify it using the -p option; for example, ssh -p 12345 admin@192.168.1.1.
In Windows, follow these steps:
-
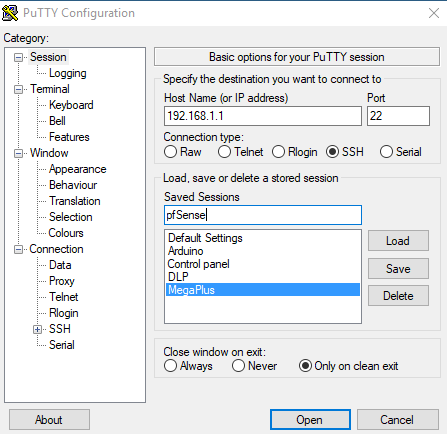
Launch PuTTY and, on the initial screen, enter the hostname or IP address of pfSense:

- Specify an alternate port if necessary.
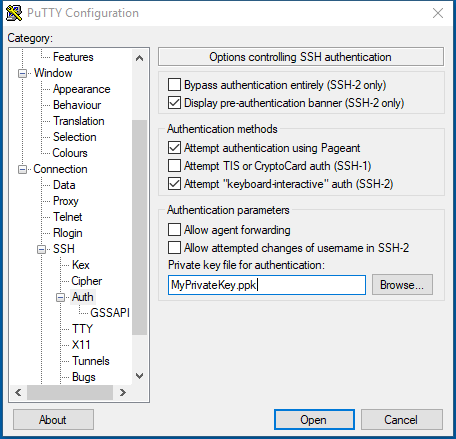
- If you are using RSA key authentication, navigate to Connection | SSH | Auth | Private key file for authentication:

- You'll connect and be prompted for a username.
- You will then be prompted for a password, or if RSA authentication is used, you will connect directly, or be prompted for a passphrase.
How it works...
SSH allows access to the pfSense console from any computer or device that has an SSH client installed on it.
See also
- The Enabling SSH access recipe
- The Generating authorized RSA keys recipe
- The Configuring SSH RSA auhentication recipe


