Search icon CANCEL
Subscription
0
Cart icon
Your Cart (0 item)
Close icon
You have no products in your basket yet
Arrow left icon
Explore Products
Best Sellers
New Releases
Books
Videos
Audiobooks
Learning Hub
Conferences
Free Learning
Arrow right icon
Arrow up icon
GO TO TOP
Learning Tableau

You're reading from   Learning Tableau Leverage the power of Tableau 9.0 to design rich data visualizations and build fully interactive dashboards

Arrow left icon
Product type Paperback
Published in Apr 2015
Publisher Packt
ISBN-13 9781784391164
Length 340 pages
Edition 1st Edition
Tools
Arrow right icon
Author (1):
Arrow left icon
Joshua N. Milligan Joshua N. Milligan
Author Profile Icon Joshua N. Milligan
Joshua N. Milligan
Arrow right icon
View More author details
Toc

Table of Contents (13) Chapters Close

Preface 1. Creating Your First Visualizations and Dashboard FREE CHAPTER 2. Working with Data in Tableau 3. Moving from Foundational to Advanced Visualizations 4. Using Row-level and Aggregate Calculations 5. Table Calculations 6. Formatting a Visualization to Look Great and Work Well 7. Telling a Data Story with Dashboards 8. Adding Value to Analysis – Trends, Distributions, and Forecasting 9. Making Data Work for You 10. Advanced Techniques, Tips, and Tricks 11. Sharing Your Data Story Index

Using background images


In addition to using maps, you can also use background images. This allows you to plot data on any image.

Consider the possibilities. You could plot ticket sales by seat on an image of a stadium, room use on the floor plan of an office building, the number of errors by a piece of equipment on a network diagram, or meteor impacts on the surface of the moon.

You may specify images for each data source using the menu and navigating to Map | Background Images, and then selecting the data source for which the image applies. On the Background Images screen, you can add one or more images that will be shown as the background of scatterplots.

When you add or edit an image, you may browse for the image file and then specify which numeric fields in the data source are used to determine the X and Y locations for the plots on the image. Additionally, you can specify how the values of these fields correspond to the width and height of the image:
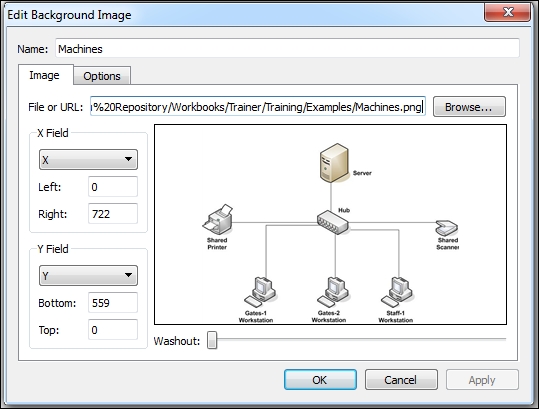
In the preceding screenshot, you can...

lock icon The rest of the chapter is locked
Register for a free Packt account to unlock a world of extra content!
A free Packt account unlocks extra newsletters, articles, discounted offers, and much more. Start advancing your knowledge today.
Unlock this book and the full library FREE for 7 days
Get unlimited access to 7000+ expert-authored eBooks and videos courses covering every tech area you can think of
Renews at $19.99/month. Cancel anytime
Banner background image