Creating a story based on a template
Templates consist of one or more slides with design elements and functional elements such as animations and interactions. Storyline ships with templates that you can leverage to kick start the development of your e-learning projects.
Storyline templates have the file extension of .storytemplate and are located in My Documents | My Articulate Projects | Storyline Templates on your local hard drive. This folder will also contain any templates you download or create yourself.
Two templates ship with Storyline: Character Panels and Top Interactions.
There are two ways to create a story from a template:
- Choose From project template from the Storyline launch screen or double-click on a
.storytemplatefile in Windows Explorer to open a new story based on the template chosen.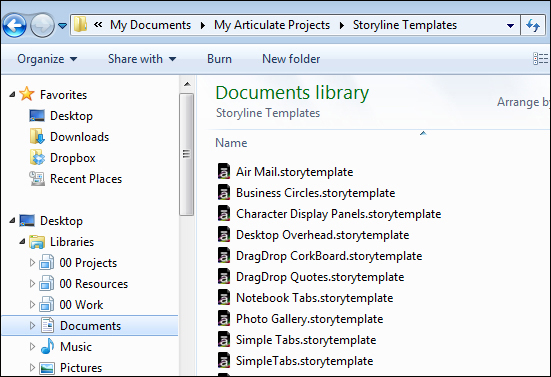
From the Insert tab, choose New Slide | Templates to add new content based on a template into an existing story and then follow these steps to insert the template's content into a story:
- From the Template drop-down menu, select a template.
- One or more slides will appear. Click to select a slide template or hold down the Ctrl key and click to select more than one slide template. You can also use Ctrl + A to select all slide templates.
- From the Insert into scene drop-down menu, choose how you would like the slides to be inserted into the existing story. There are three choices:
- Current scene: Places new slides directly after the current slide
- Same as imported template: Inserts the slides into the current story in the same way they were originally named and organized.
- New scene: Places the new slides into a scene of their own
- Click on Import.

After creating a story from a template or inserting slides based on a template into an existing story, the template used will be added into your template library and will appear in the Templates drop-down menu the next time you use the menu.
Templates are located in My Documents | My Articulate Projects | Storyline Templates. You can rename templates, copy templates into this folder, or delete templates that you no longer use, just like you would with any Windows folder. Changes made here will be reflected in the Templates drop-down menu.
Tip
File Open versus From project template
If you choose File | Open to open a template, Storyline will open the template and you can make changes to the content, formatting, and interactions within the template. If you save the template, you will be overwriting the original template. If you would rather create a new story or new content from a template (as opposed to editing the formatting and functionality of a template) choose one of the two preceding methods instead.
Importing content from external sources
Storyline offers features that help you leverage work you've already done in PowerPoint, Articulate Studio '09, and even other Storyline files. Although Storyline does a very good job at accurately transitioning content from other sources, there are variances. The variances are largely related to different formatting and feature support between the products.
There are two main methods of importing content; from the launch menu at start-up or from within an open project:
- Choose Import PowerPoint or Import Quizmaker from the Storyline launch screen.
- From within an open project, select the Articulate menu and choose Import. There are more import options available here including Engage and Storyline.
Importing PowerPoint content
Importing PowerPoint content is a great time saver. You won't need to recreate your content from scratch. Articulate does not support importing from the 64-bit version of PowerPoint 2010. You will also want to ensure your version of Office has the latest updates applied.
PowerPoint and Articulate Presenter features are not 100 percent converted into Storyline using the Import feature. For example, annotations, branching, attachments, presenter bios, learning games, and player template settings are not imported (a complete and current list of considerations when importing from PowerPoint can be found on the Articulate support website at http://www.articulate.com/support/kb_article.php?product=st1&id=catmp4tjk9r8). Most of these features can be manually recreated after importing. It's recommended you look at the PowerPoint Import option as a way to bring content into Storyline more than a functionality of PowerPoint or Presenter into Storyline.
The content conversion isn't quite one to one. There are some differences you can expect as noted here:
- Some variations in font size, line spacing, alignment, colors, and bullets (Storyline doesn't support embedded PowerPoint fonts)
- If the PowerPoint presentation is of a different size to the Storyline size, some adjustments will be needed to be made in graphic and text size and alignment
- Entrance and exit animations along with emphasis and motion paths are not supported in Storyline
- Border and line thickness may appear different in Storyline
- 3D rotations and GIF images aren't supported in Storyline
- Smart Art objects, tables, and equations are imported as non-editable images
Even with features that are not 100 percent supported, you may find it faster to import content in, rather than manually replacing or manually recreating the content.
Tip
When importing Articulate Presenter content into Storyline, you will need to make sure that the .ppta file as well as any embedded Quizmaker (.quiz) and Engage (.intr) interactions are all located in the same folder.
Selecting slides
After selecting a PowerPoint file, Storyline will display thumbnail images for all slides in the presentation. By default, all slides are selected, as indicated by a yellow border around each selected slide. You can change this by clicking on and selecting just one slide, or by using Shift + click or Alt + click, or you can select all slides again using Ctrl + A. The imported content will appear in the current scene or a new scene depending on your Insert into scene selection.
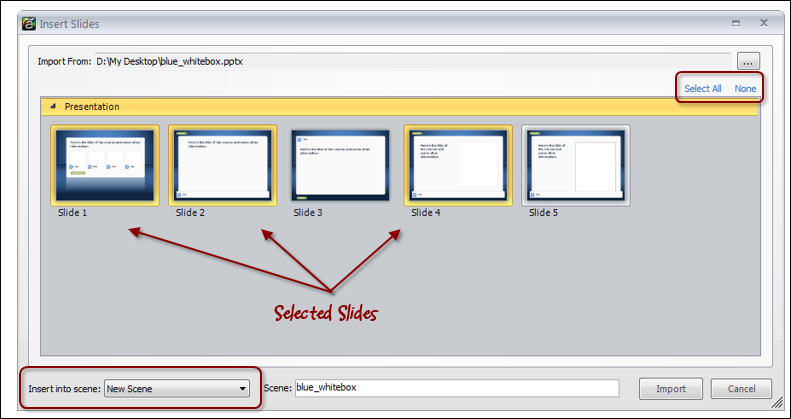
Once done, slides will appear in Storyline and you can freely edit the objects on the slides and apply formatting and functionality to them.
Importing Articulate Quizmaker content
Importing a Quizmaker file is straightforward and works well. Storyline maintains most of the original formatting and functionality, making it a snap to rapidly incorporate existing quizzes into your Storyline projects.
One consideration is that Quizmaker has a default slide size of 686 px x 424 px whereas Storyline defaults at 720 px x 540 px. For that reason, you can expect some minor formatting to tweak the alignment of text and graphics.
Articulate Quizmaker files have an extension of .quiz. After selecting a .quiz file to import, Storyline will display thumbnail images for all the slides in that quiz, divided into sections based upon the question groups they are in. As with other methods of importing, you can select one, a few, or all of the slides to import into Storyline.
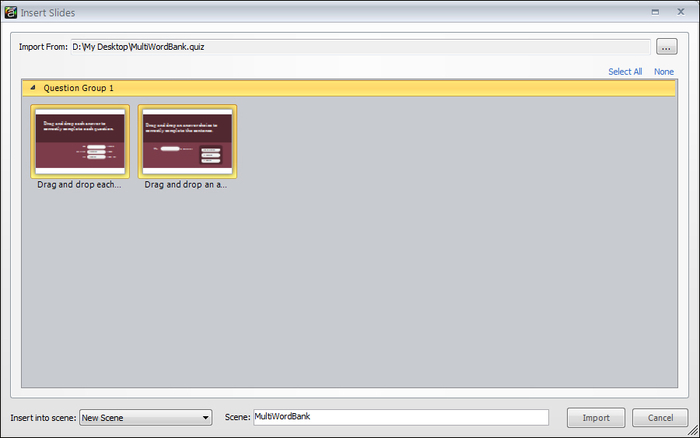
Once done, the questions, feedback, and results are 100 percent editable in Storyline.
Importing Articulate Engage content
Unlike importing PowerPoint slides and Quizmaker files, Engage content cannot be modified within Storyline except for resizing the interaction on the slide. In order to modify Engage content, you must be working in Articulate Engage.
Importing Engage interactions provides the ability to playback previously created interactions without having to rebuild them in Storyline. However, you may want to rebuild them, as Storyline contains all of the features of Engage plus some that take interactions to the next level in terms of look, feel, and functionality. Another reason to rebuild them is that they are Flash interactions and Flash does not playback on most mobile devices or the iPad.
The steps to import an Engage interaction are the same as with PowerPoint and Quizmaker.
Importing Storyline content
This sounds unusual but it's a really neat feature of Storyline. Being able to import Storyline files lets you combine content in a smart way; you can pick and choose specific slides from certain project files to import. The look, feel, and functionality are imported. This is a great feature for re-usability where you create a library of your own interactions and layouts, then re-use them inside many different projects.
Saving a story
It won't take long to start to accumulate content in your story, especially when working with pre-built templates or importing content from external sources. It's a good idea to save your work often and it is recommended that Articulate files are saved locally instead of on network drives or USB sticks, to prevent file errors.
There are three ways in which you can save your story:
- The quickest way to save your work is to press Ctrl + S on your keyboard. If this is the first time you are saving a file, you will be prompted for a filename and location. Subsequent presses of Ctrl + S will save the file under the same name without additional prompts.
- You can also save a project by clicking on the Save button on the quick access tool bar.
- You can choose the File menu and select Save or Save As….
Storyline files are saved with a .story extension.
Tip
Shortcuts
Shortcut keys are a time saver. A complete listing of shortcut keys, such as Ctrl + S to save a story are listed in the Appendix.
Give it a try
Now it's your turn. This exercise gives you a chance to practice some of the key points covered in this chapter. You'll continue to build upon this example file as you progress through the book.
- If you've been following along with the practices in this chapter you'll likely have a blank story file already open. Close this file by clicking on the File menu in the upper-left corner and selecting Close. When prompted to save, choose Don't Save. From the Storyline launch screen, choose From project template.
- Navigate to My Documents | My Articulate Projects | Storyline Templates.
- Select
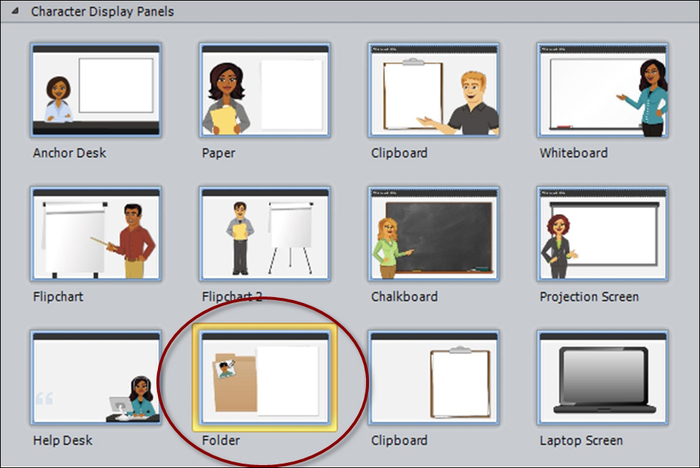
Character Panels.storytemplateand click Open. - Various character templates appear. Look for the one titled Folder, select it, and click on the Import button.
- After the template opens, notice there is a single scene with a single slide. Both should be renamed to be more descriptive. Follow these steps:
- Right-click on the scene (grey boundary around the slide) and select Rename. Type the new name as
Starting Sequence.
- Right-click on the slide, select Rename, and type the new name as
Home.

- Right-click on the scene (grey boundary around the slide) and select Rename. Type the new name as
- Click on the Fit to Window button to the right of the zoom slider in the lower-right corner of the scene. This will enlarge the Story View display to make content on the slide viewable.
- Double-click on the slide to switch to Normal View.
- Change the aspect ratio of the project to widescreen by choosing the Design tab and then Story Size. Change the size to 720 px x 405 px (16:9). Choose Scale to fit and click OK.
- Save the story by pressing Ctrl + S, typing
Exercise 1 – Workplace Compliancein the filename box and clicking on the Save button.
Summary
This chapter introduced some of the basics of the Storyline interface, including two new concepts for PowerPoint and Articulate Presenter users: Story View and scenes.
Story View is a powerful new way of looking at your project content. You can see how slides are grouped into scenes, and the navigational relationships between slides and scenes.
With these basics in hand, including configuring story size, working with templates, and importing content from external sources, you're now ready to add text and images into your story and make it sparkle and shine using Storyline formatting and animation techniques.


