Creating a new app with the Angular CLI
In the previous sections, we've spent a good amount of time reviewing and learning the structure of the sample Angular app created by Visual Studio's ASP.NET and Angular default template. However, there are other – and arguably even better – ways to create a sample Angular app from scratch; as a matter of fact, the approach recommended by the Angular development team is entirely based on creating the app through the Angular Command-Line Interface, better known as the Angular CLI.
For reasons of space, we'll only scratch the surface of the Angular CLI throughout the whole book, limiting its usage to what we need here and there. Those who want to know more about this powerful tool can take a look at the following URL: https://cli.angular.io/
In this paragraph, we'll see how to take this alternative route, so that we can compare the resulting apps and highlight their similarities and differences. More specifically, here's what we're going to do:
- Install the Angular CLI (unless we've done that already)
- Create a new Angular app using the
ng createcommand - Compare the Angular CLI generated source code files with those generated by Visual Studio
- Modify the .NET's
Startup.csfile so that we can choose which Angular app to run - Take a look at the alternative Angular app
Are we ready? Let's do this!
Installing the Angular CLI
If we haven't installed the Angular CLI yet, we can do so using the following command:
> npm install -g @angular/cli@11.0.1
The -g option will ensure that the CLI is installed globally, which will allow us to run the ng command-line tool in any folder; the @11.0.1 at the end will force npm to install the specific version used by this book.
Those who are bold enough to use the latest version can do that by running the following command:
npm install -g @angular/cli@latest
However, since we'll use the CLI to create a new Angular app that we'll mostly use for code review, it's strongly advisable to install the specific version used by this book.
Creating a new Angular app
When the Angular CLI has been installed, open a command prompt and navigate to the root-level folder of our existing HealthCheck app, such as /Projects/HealthCheck/.
Once there, issue the following command:
> ng new HealthCheck
This command will start a terminal wizard that will ask you the following questions:
Do you want to enforce stricter type checking and stricter bundle budgets in the workspace? This setting helps improve maintainability and catch bugs ahead of time. For more information, see https://angular.io/strict.
Answer NO by typing the N key.
Would you like to add Angular routing?
Answer YES by typing the Y key.
Which stylesheet format would you like to use? (use the arrow keys)
Select SCSS using the keyboard's arrow keys.
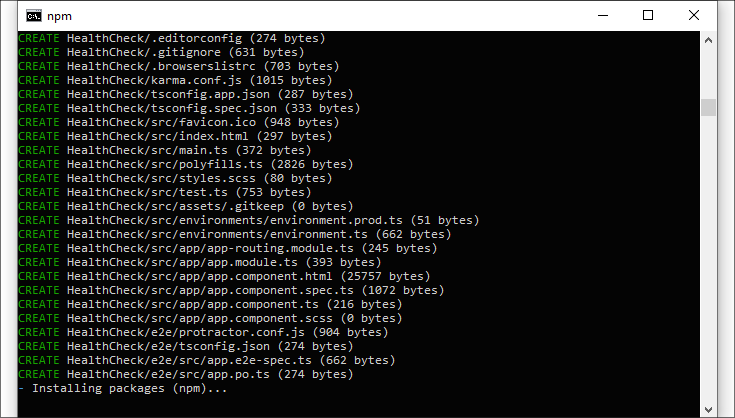
Right after that, the code generation process will start, with all the required npm packages being downloaded and installed accordingly:

Figure 2.13: Creating a new Angular app
Wait for the tool to complete the task, and then do the following:
- Type
cd HealthCheckto enter the newly created folder - Execute the
npm installandnpm updatecommands to update the npm packages
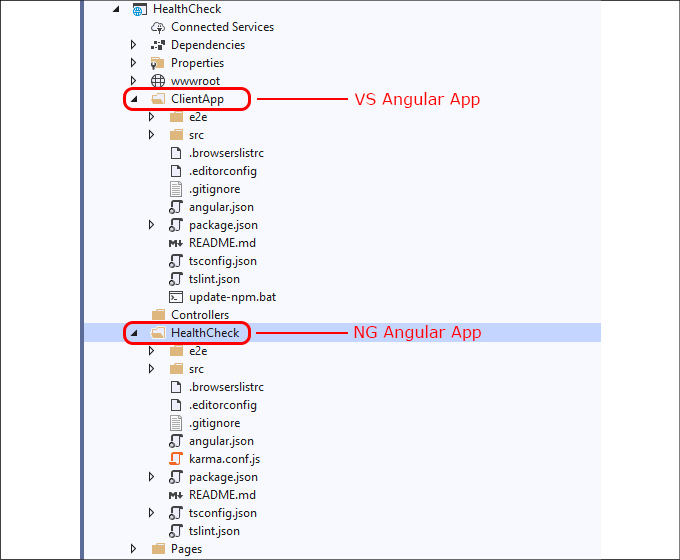
At the end of these tasks, reload your Visual Studio project and include the new /HealthCheck/ folder so that you'll be able to access it from the VS GUI, as shown in the following screenshot:

Figure 2.14: Examining our VS and NG Angular app folders
Now we have two differently generated Angular apps that we can compare; for the sake of convenience, we'll call them the VS app (Visual Studio app) and the NG app (Angular CLI app) from now on.
Comparing the Angular apps
If we take a look at the filesystem structure, we'll immediately be able to see a lot of similarities between the two apps: both of them feature roughly the same set of configuration files, with some minor differences related to the folder nesting level. For example, the NG app has the karma.conf.js file and all the various tsconfig.json files in the root folder, while the VS app has them within the /src/ folder, and so on. However, for the most part, the two apps seem very similar in terms of overall structure: this is definitely a good thing, because it means that our front-end code review is still valid!
If we take a closer look and start to compare the various file contents, we'll see that the major differences are in the following files:
package.json, which will potentially contain different package versions (the Angular CLI command will always use the latest Angular version available)tsconfig.json, which will definitely contain some small differences in terms of TypeScript configuration and won't likely have theangularCompilerOptionssection that we've added early on- All the files contained in the
/app/folder, due to the fact that the two sample apps have a very different look and feature set - The NG app features a separate
app-routing.module.tsfile (AppRoutingModule) that contains Angular'sRouterModule, while the VS app implements the routing patterns within the mainapp.module.tsfile (AppModule).
Loading and configuring the router in a separate, top-level module dedicated to routing and imported by the root AppModule has been an Angular best practice since Angular 10. Hence, we can definitely say that the NG app has a better approach; we'll use it to our advantage later on.
Luckily enough, none of these differences will prevent our project from running, as we'll be able to see in a short while.
Updating the Startup.cs file
If we want to launch the NG app instead of the VS app, we need to perform some changes to the Startup.cs file, which, as we know, is responsible for loading the front-end.
Open that file, scroll down to the ConfigureServices method, and change the following line (line 27 or so):
configuration.RootPath = "ClientApp/dist";
in the following way:
configuration.RootPath = "HealthCheck/dist";
Right after that, scroll down to the Configure method and do the same with the following line (line 66 or so):
spa.Options.SourcePath = "ClientApp";
Change it as follows:
spa.Options.SourcePath = "HealthCheck";
Alternatively, you can declare a new ClientApp read-only variable at the top of the file:
public class Startup
{
    /// <summary>
    /// The name of the folder that hosts the Angular app
    /// </summary>
    public static readonly string ClientApp = "HealthCheck";
[...]
And then change the above literals into more convenient references in the following way:
configuration.RootPath = string.Format("{0}/dist", ClientApp);
[...]
spa.Options.SourcePath = ClientApp;
Both of these approaches achieve what we want: they tell ASP.NET to run the NG app instead of the VS app.
Testing the NG Angular app
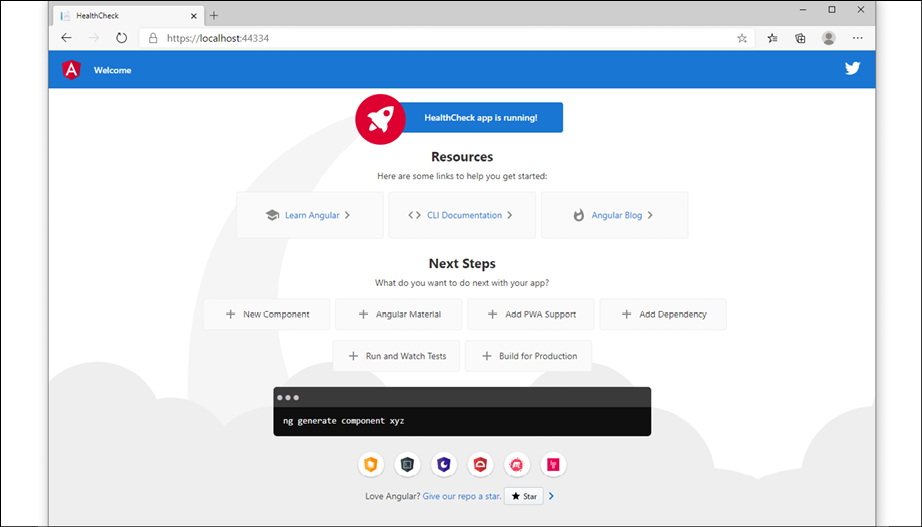
Let's now take a look at the NG app by hitting F5 to issue a debug run. If we've done everything properly, we should be greeted by the following welcome screen:

Figure 2.15: Testing the Angular app
Here we go: truth be told, the app created by the Angular CLI looks much prettier than the Visual Studio sample!
However, for the sake of simplicity, we'll just revert the changes that we just made to the Startup.cs file and switch back to the /ClientApp/, which will also be the app that we'll be using in the next chapters.
Those who want to keep using the new NG app are free to do that. All the code samples, updates and exercises that we'll encounter throughout the whole book are fully compatible with both apps… after all, we've just seen that they're basically the same thing! The only real difference will involve some minor path-related differences, which shouldn't be an issue for most readers. That said, the choice is yours: if you don't mind such additional work and a minor risk of headaches, you might as well stay with the NG app and keep your Startup.cs file as it is, otherwise switch back to the ClientApp literal before going further.


