Technical requirements
Before we delve into the topics in detail, you will need to set a few things up. Let’s look at what they are.
Setting up GitHub access
You will need a free GitHub account in order to access some of the code that will be provided throughout this book. Please sign up for a free account at https://github.com/. We will be utilizing the code found in the following repository throughout the course of this book: https://github.com/PacktPublishing/Red-Hat-Certified-Specialist-in-Services-Management-and-Automation-EX358-. We will be utilizing the code snippets found in the ch1 folder of this code repository (aka repo) for our iSCSI automation hands-on exercises, which can be found here: https://github.com/PacktPublishing/Red-Hat-Certified-Specialist-in-Services-Management-and-Automation-EX358-Exam-Guide/tree/main/Chapter01. The code placed here will allow you to check your work and ensure you are on the right track when writing your playbooks within Ansible. Please keep in mind these are one person’s way of writing tested playbooks that will meet the exam objectives; however, there are many ways of writing successful playbooks to meet these objectives.
Setting up your lab environment
All of the demonstrations of VirtualBox and coding will be shown on macOS but can be performed on Windows as well as Linux OSs. We will be setting up some iSCSI block devices. First, you will need a machine that can run VirtualBox with enough memory to run your machine and three VMs that each have 2 GB of memory, one 10 GB hard drive, and one 5 GB hard drive, which equals 15 GB of required hard drive space per VM, as can be seen in the following screenshot:
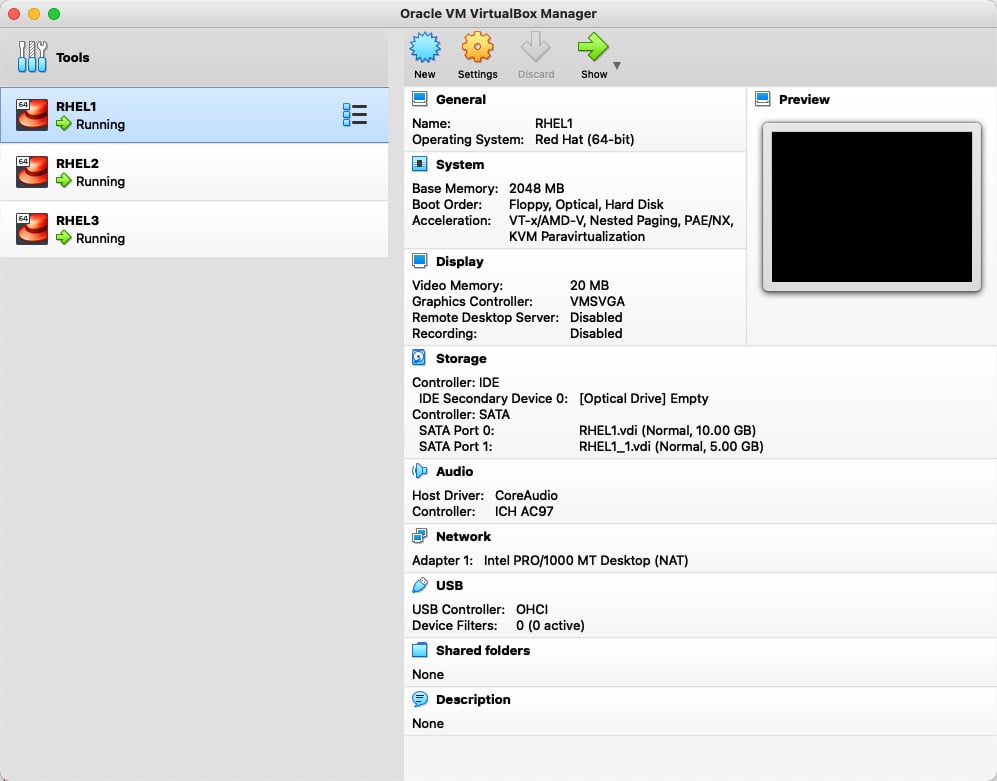
Figure 1.1 – Layout of the VirtualBox deployment
This is mainly for the storage hands-on labs, and you can revert to one 10 GB hard drive for exercises. RHEL 8.1 requires at least 9.37 GB of space to run. Using a Red Hat Developer account (https://developers.redhat.com/), you can access real Red Hat software to develop your skills as well as the software in order to set this up:
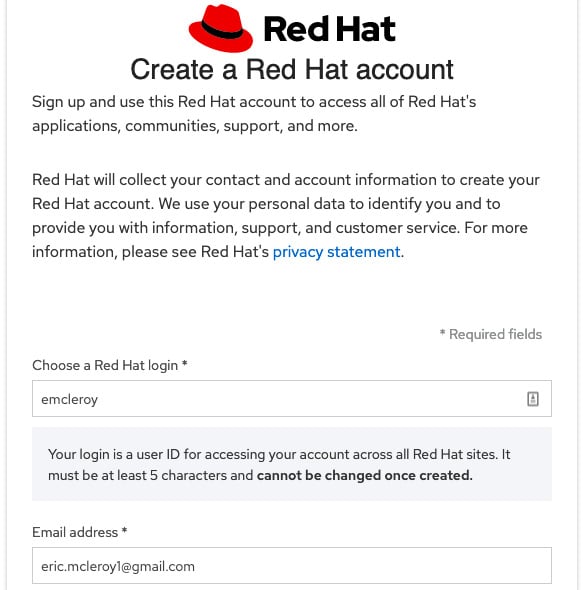
Figure 1.2 – Signup is simple!
Because the exam is set for RHEL 8.1, I recommend using this version for your studying needs in order to get the most authentic exam-like infrastructure possible. In the following screenshot, the correct version you should download is the first option:
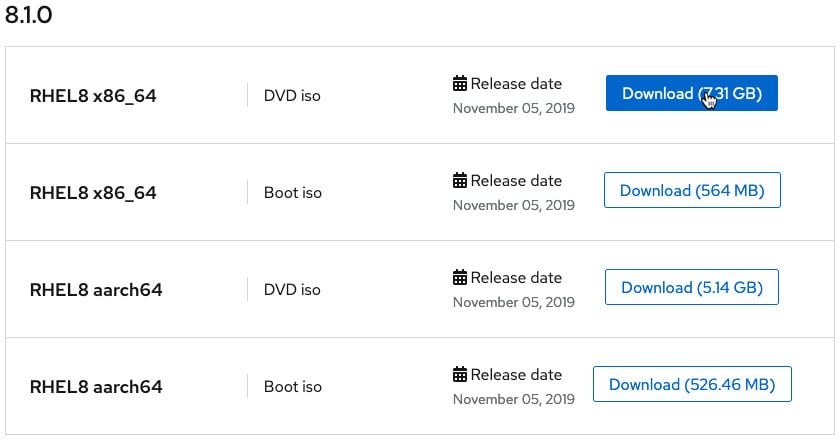
Figure 1.3 – The correct version for the exam and for you
This will be true for the entirety of the book, including the comprehensive review and lab at the end. Before installing the OS, you can create a second hard drive in VirtualBox from the settings, as can be seen in the following screenshot:
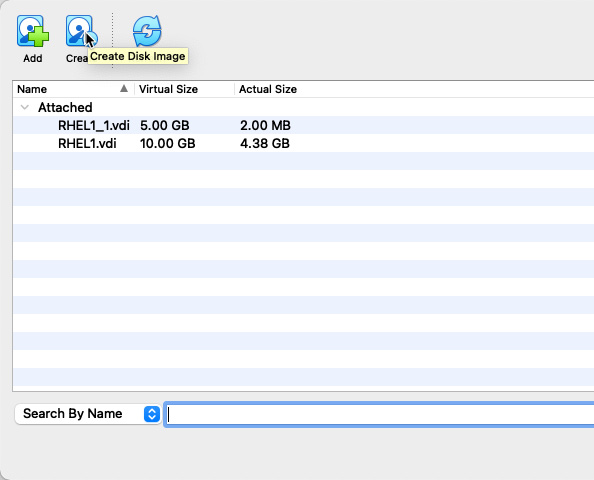
Figure 1.4 – Creating a second hard drive for your VM
You also need to ensure that you choose Bridged Adapter mode for your network Attached to option. The Promiscuous Mode option is also allowed so that it can reach the internet and other adapters. One caveat to keep in mind is that bridged-over Wi-Fi does not always play nice, so try to ensure you have a wired connection if you are setting up your lab in this manner:
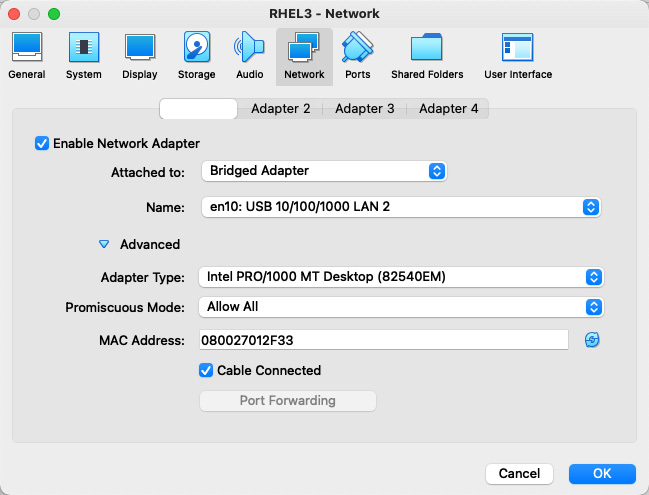
Figure 1.5 – Bridged adapter with Promiscuous Mode option
From here, you can then mount the downloaded ISO and kick off the installation:
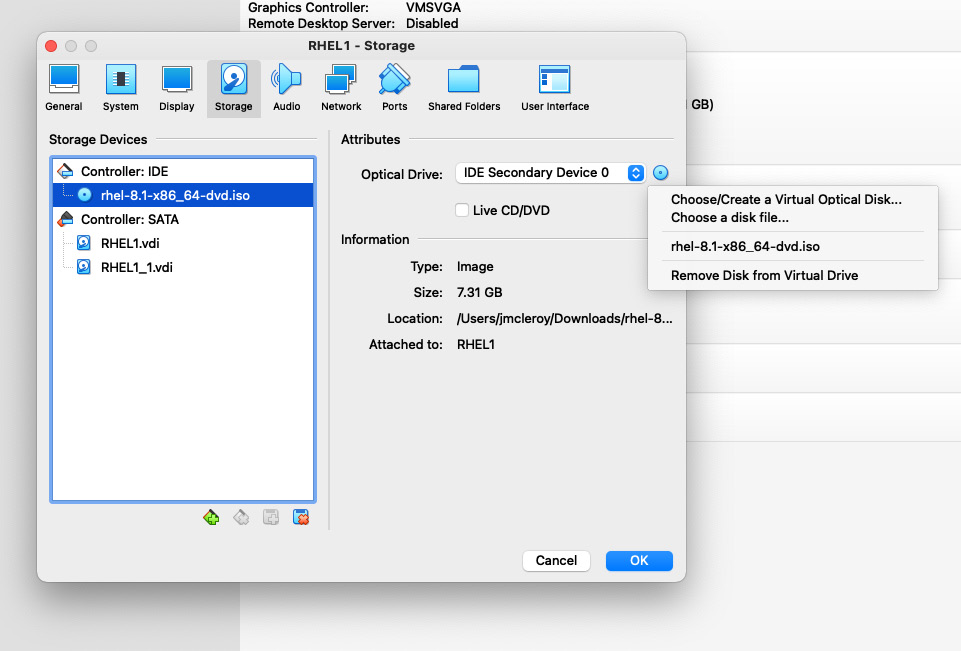
Figure 1.6 – Mounting RHEL DVD ISO that was downloaded previously
There are some best practices you need to keep in mind. We will be installing the Server with the GUI option. Make sure to create yourself an administrator account as well as keeping your root account as you will want to do everything as sudo and not directly as root for security purposes and all-around good habits. The user creation screen, as follows, allows you to set up your root password and any users you would like to create:
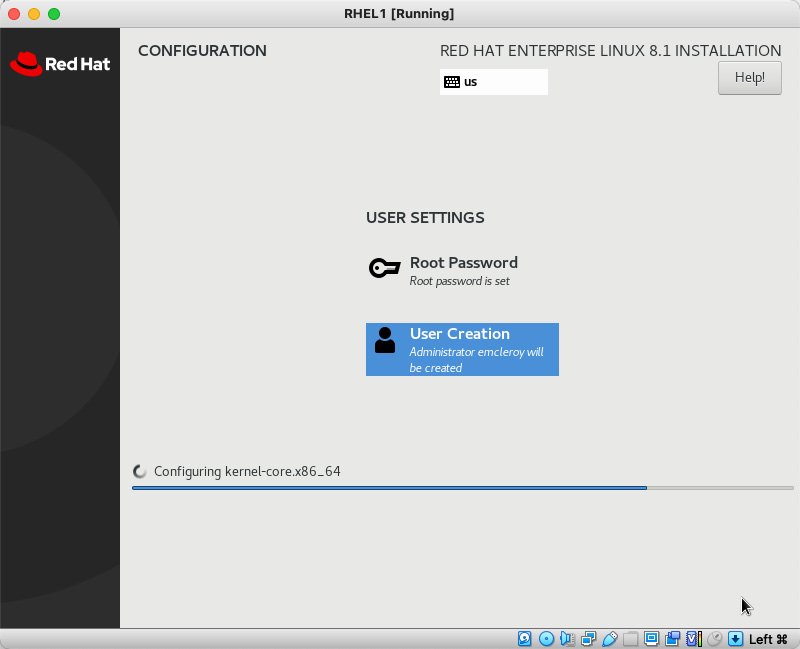
Figure 1.7 – Administrator accounts are best practices; sudo over root is always preferred
Next, you will need to use the login for your Red Hat Developer account and license the VMs using the account credentials. See the following screenshot for how to correctly apply a Red Hat subscription license:
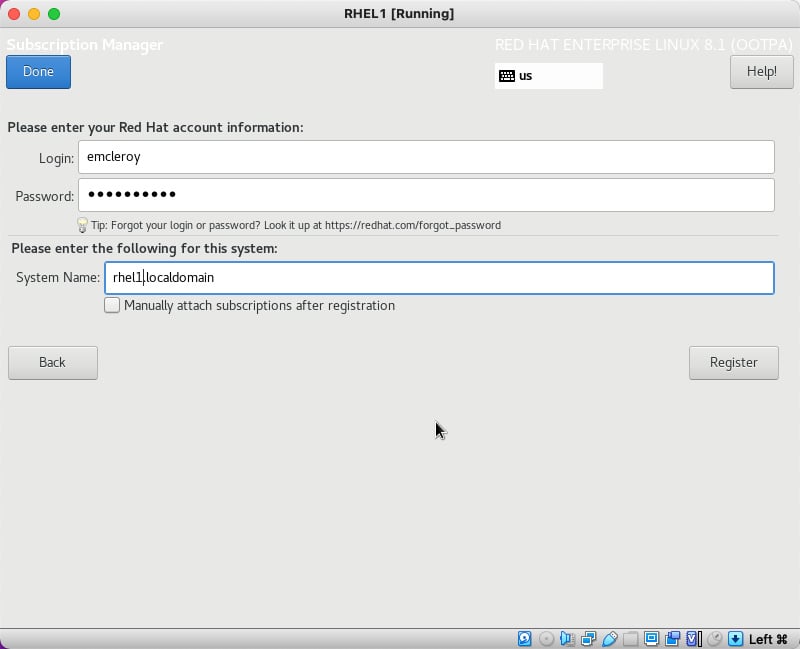
Figure 1.8 – Red Hat Developer credentials or an active Red Hat account needed
You can create one machine and then clone it into the other two you need. Make sure you choose to generate new MAC addresses and to make a full clone to ensure that no overlap causes network or storage issues, as shown in the following screenshot:
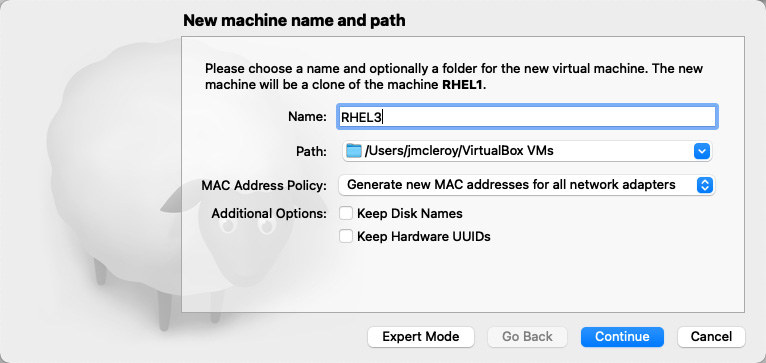
Figure 1.9 – Full clones with new MAC generation and a new name for the VM
Next, we will set up the host file with the domain of example.com in order to route correctly to and from the different systems. You will need to do the following on the servers in a command line to get your IP addresses and then go to each device and set up the host file with the same information:
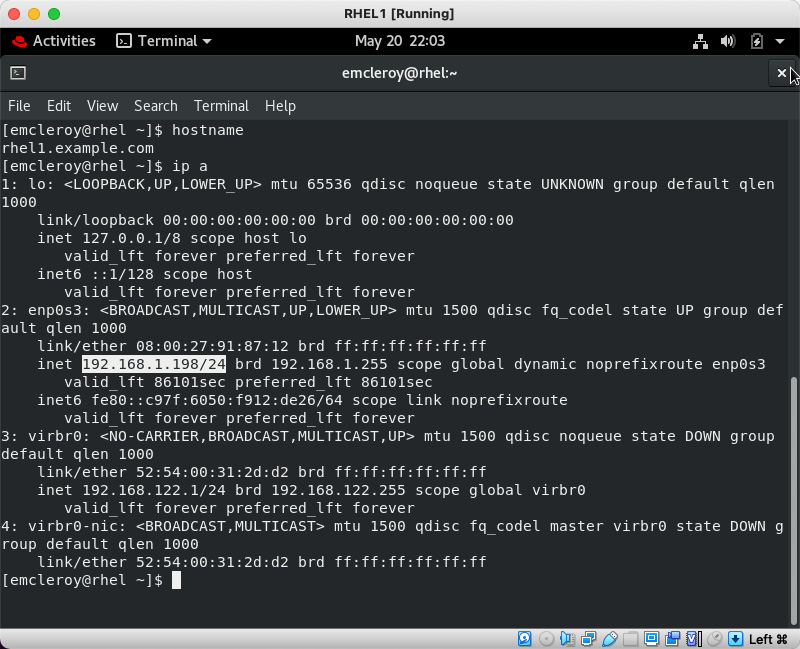
Figure 1.10 – Hostname and IP of rhel1.example.com system
Next, let’s gather the hostnames or change them to what you would like them to be using the following commands and review the output in this case, which is rhel1.example.com:
[emcleroy@rhel1 ~]$ sudo hostnamectl set-hostname rhel1.example.com
[emcleroy@rhel1 ~]$ hostname
 rhel1.example.com
Use the hostnames and the IP addresses to build the inventory for the host file. After you do this, make sure that you shut down the system for it to save the changes permanently. Next, you’re going to want to add these as noted to the host file on all three VMs using the following command:
$ sudo vi /etc/hosts
Here is an example of the completed /etc/hosts file:
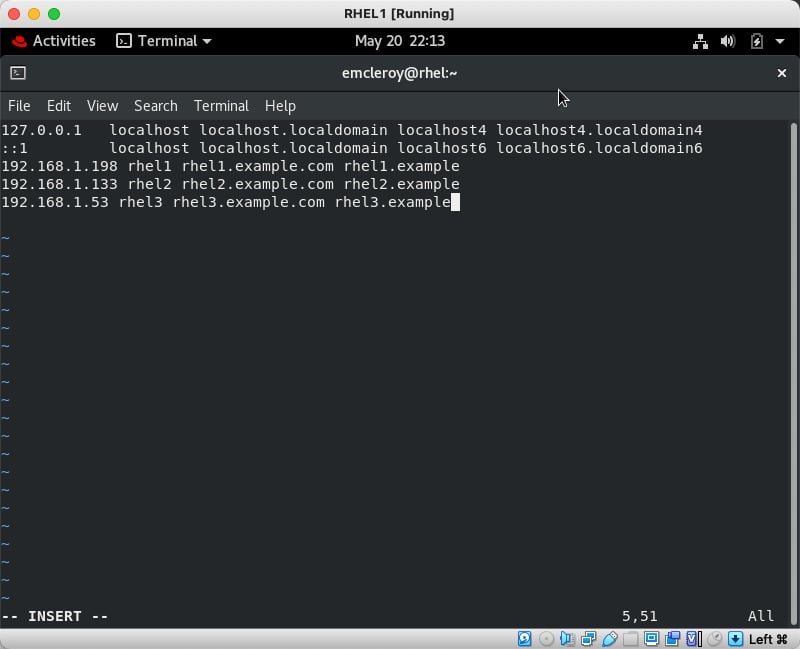
Figure 1.11 – Finished /etc/hosts file
Keep in mind your /etc/hosts file will look different based on your IPs. You should now be able to ping via the hostname and IP of all of the different VMs from one to another:
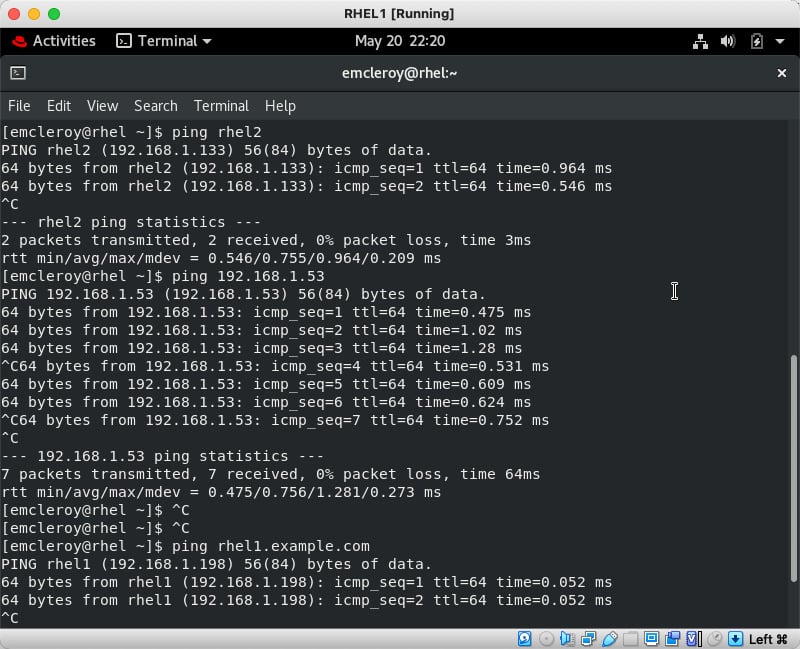
Figure 1.12 – Example of working networking environment
Next, for ease of use, let’s set up passwordless sudo for our user account, which in my case would be emcleroy.
We will start by running the following command:
$ sudo visudo
Next, we will locate the lines of code highlighted in the following screenshot and add the highlighted lines of text. Also, note that if you are allowing administrators, you can simply uncomment # in front of the %wheel line as well:
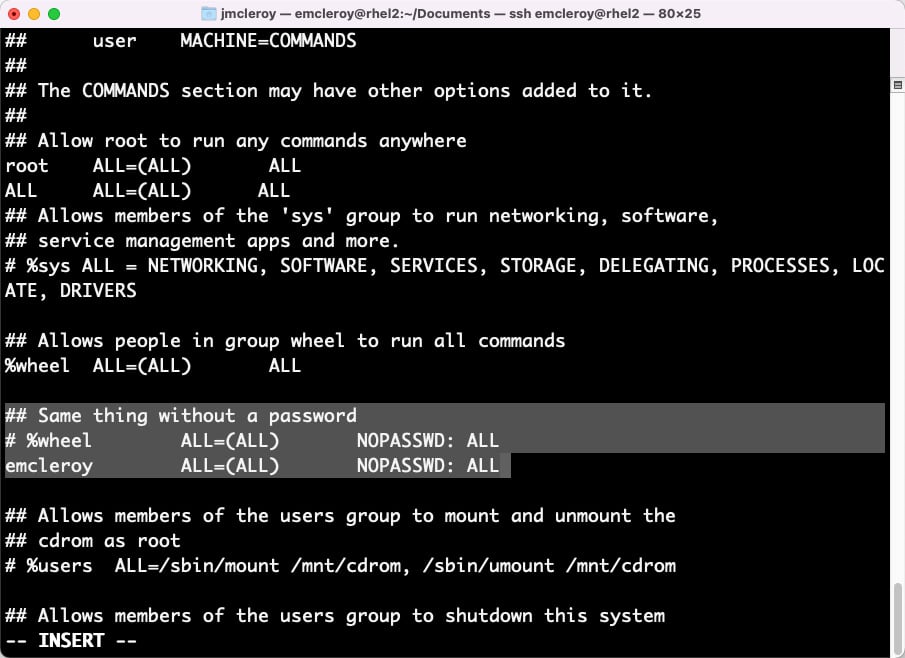
Figure 1.13 – Highlighted lines of text to be added, substituting your username for mine
You will need to do this for all three of the servers.
Finally, we will add SSH keys across the servers to allow for fast connectivity so that we do not have to type passwords every time we need to log in from one server to another. Start by generating SSH keys with the following command on your rhel1 VM:
$ ssh-keygen
Just leave the defaults and keep hitting Enter, and then once that is generated, you will want to do the following:
$ ssh-copy-id -i ~/.ssh/id_rsa.pub username@server
This will push the keys to the servers and allow all the servers to talk bi-directionally. You will want to do that for all three servers, so you will do the following (including for the server you are currently on to ensure that the keys are pushed to the known host file for all of the servers):
$ ssh-copy-id -i ~/.ssh/id_rsa.pub emcleroy@rhel1
$ ssh-copy-id -i ~/.ssh/id_rsa.pub emcleroy@rhel2
$ ssh-copy-id -i ~/.ssh/id_rsa.pub emcleroy@rhel3
From here, you have full access to a three-VM lab running RHEL 8.1 with secondary HDDs for use with this iSCSI hands-on exercise. The only minor differences will come up in the networking hands-on labs where we will go over adding additional network interface controllers (NICs) for network teaming. This will be another topic that you need to understand in order to ace the EX358 exam.
Congratulations! You have now successfully set up your lab environment. Pat yourself on the back and take a break. We will now be talking about the manual steps to build out iSCSI block devices and use them. This will be followed by putting that lab environment you just built to the test and getting hands-on experience with the technology.


