


Generating Displacement maps in Blender
We will now learn how to generate Displacement maps inside Blender, without using an image texture or an external image-editing program. In the following steps, we will learn how to make surfaces appear more natural using Blender-generated Displacement maps:
- Create a cube, and add a Subdivision Surface modifier to it.
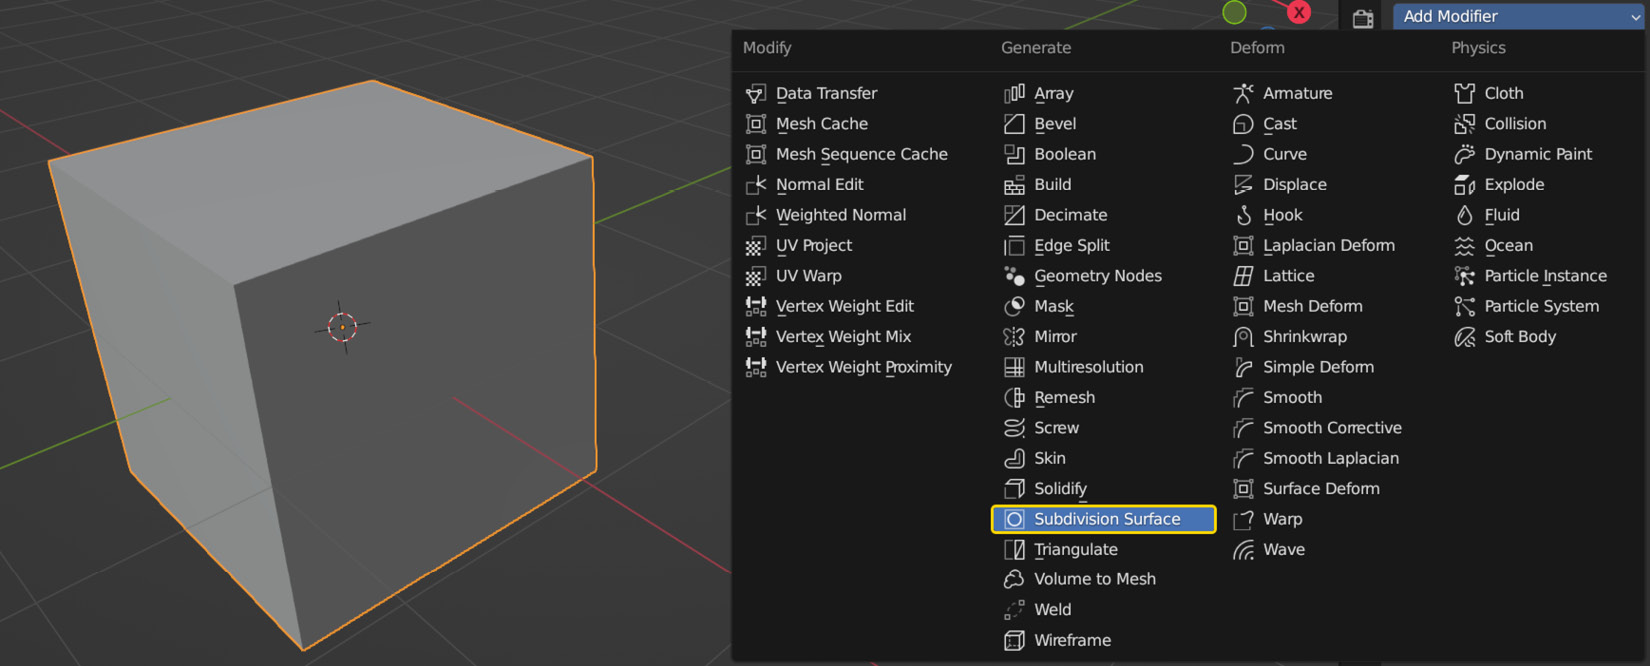
Figure 6.25 – Adding a Subdivision Surface modifier to a cube
- Set the Levels Viewport value to
5or6.Keep in mind that subdividing objects to this level may make Blender slower, or even cause crashes.
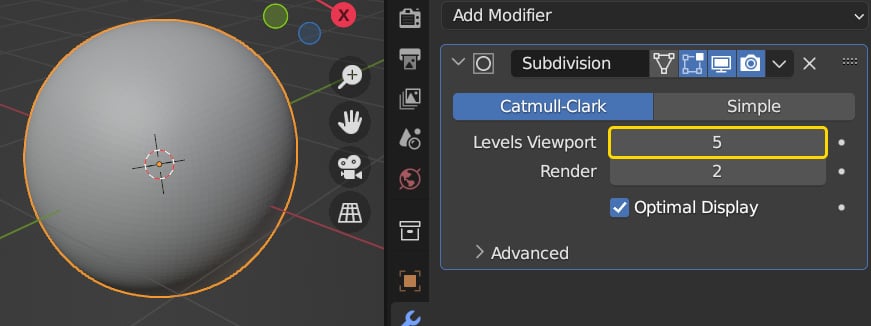
Figure 6.26 – Increasing the subdivision level
- Use the arrow symbol marked in Figure 6.27 to collapse the Subdivision Surface modifier menu, and then add a Displace modifier.
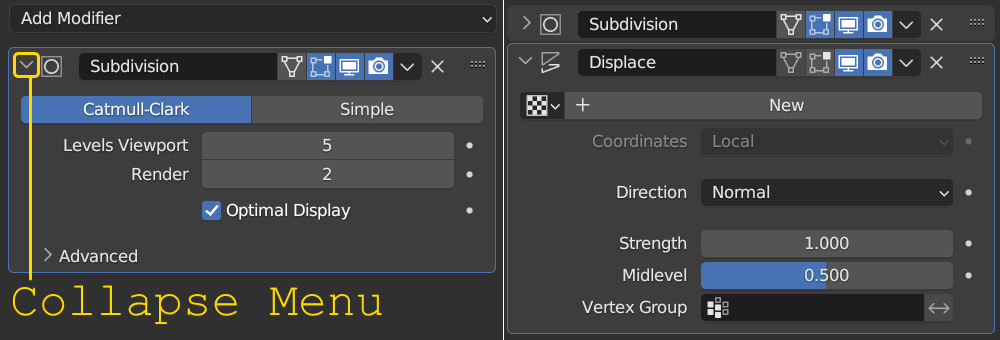
Figure 6.27 – Collapsing a modifier (left) and adding a Displace modifier (right)
- In the Texture Properties tab,...


