The Apple headline for WWDC 2019 was We are going to blow your mind and, indeed, they weren't wrong. As expected, many rumors floated around WWDC, with heavy conversations around Project Marzipan (which came to be announced as Catalyst), but no-one could have foreseen the announcement of a new UI framework—specifically, one built around Swift.
Introducing SwiftUI
What is SwiftUI?
SwiftUI is a brand-new developer toolkit written in Swift for Swift. It presents a declarative syntax, allowing for more fluid and natural development along with more human-readable code.
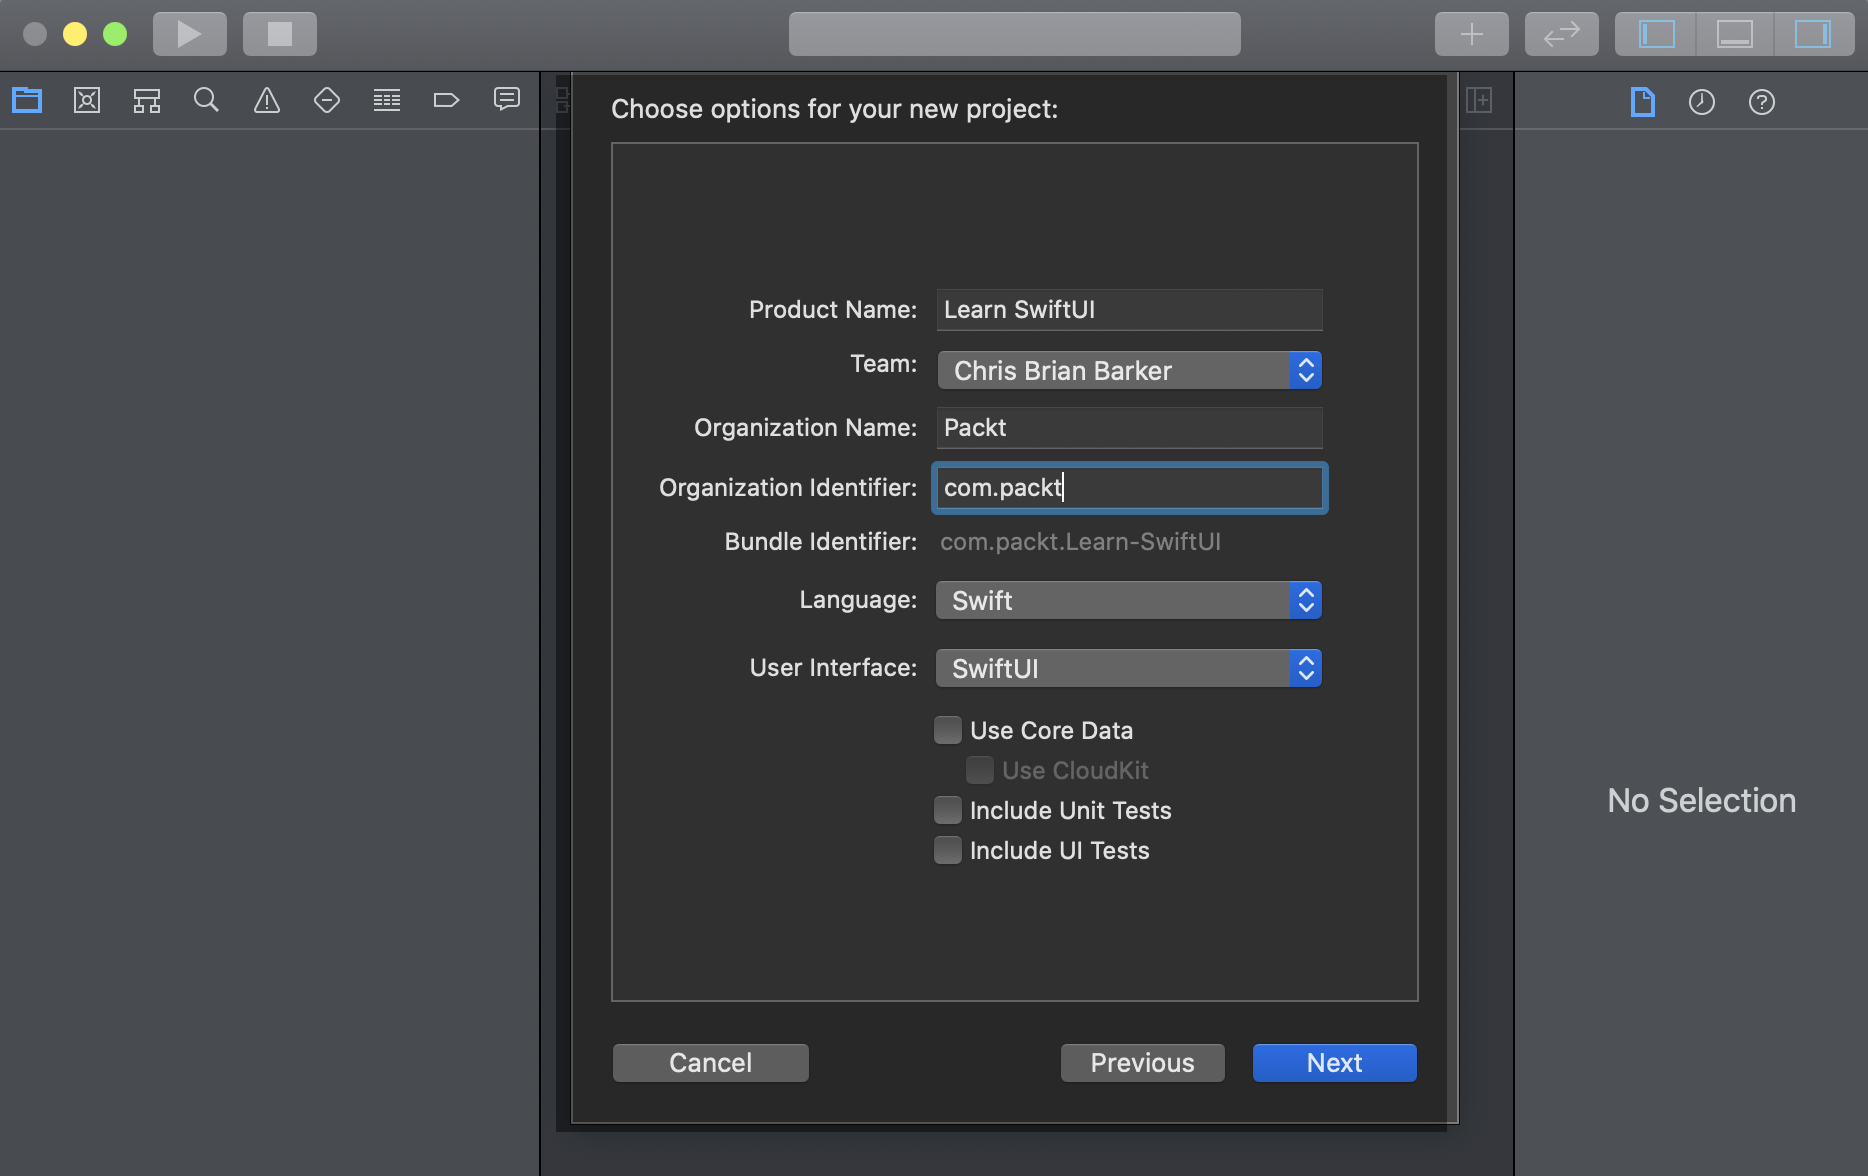
It comes built into Xcode 11 and can be selected as an alternative to Storyboards when creating a new project. To include SwiftUI in your project, simply select this from the User Interface dropdown, as seen in the following screenshot:

Compared to UIKit, SwiftUI allows you to move away from imperative programming (programmatically creating UILabel and UIButton, or dragging and dropping objects around Interface Builder) and gives you powerful interfaces that can be supported across iOS, iPadOS, macOS, watchOS, and even tvOS.
This approach to app development is a true cross-Apple platform and, along with the introduction of Catalyst, in just a few clicks your iPadOS app now becomes a true native macOS app—an option that simply wasn't available with UIKit.
Syntax in SwiftUI
SwiftUI makes full use of declarative syntax, which we'll go into further in much more detail in the next chapter, but the burning question on everyone's mind was What's so special about declarative syntax? Well, quite a lot, actually. Declarative syntax brings a whole new paradigm to writing and structuring UI-based code: no more dragging and dropping elements into NIBs and Storyboards, or complex constructors and properties to set, but more of an instruction (to the compiler)-based approach to generating and displaying UI elements.
First of all, forget about previous architecture patterns used in mobile apps (or any other object-oriented) development, such as Model-View-Controller (MVC), Model-View-ViewModel (MVVM), Model-View-Presenter (MVP), and so on. Delegate patterns commonly used in iOS/macOS development are no longer needed, as declarative syntax now makes use of States.
States and updating the UI
We'll touch on States in a later chapter but, as a general overview, if you assign @State to a property, SwiftUI will monitor this property and, if it is mutated or changed, will invalidate the current layout and reload.
Think of it in terms of a collection of data in a list. The data changes and the list is automatically updated and refreshed—no need to invoke a refresh call (or a reloadData(), as you might have previously seen in CollectionViews and TableViews).
Tools and features
Another powerful feature of SwiftUI is hot reloading—or the preview window, as it's called in Xcode. This allows you to make changes to your UI code in real time, without the need to build and rerun the app.
By creating a Preview struct inside your SwiftUI class, you can build and inject mock data, mock navigation, and images straight into your Xcode preview window. So, for example, a SwiftUI project might have a list that is dynamically populated by external data. This would allow you to inject dummy data into the preview window without running your app and calling an API.
Building for multiple devices
Whether you're building for iOS, macOS, iPadOS, tvOS, or watchOS, SwiftUI has you covered. All the features of SwiftUI can be built once and can support multiple devices, thus eliminating the need to write code multiple times.
In this book, we'll start by building an iOS app, which can be easily turned into an iPadOS app, followed by a watchOS app.
With UIKit, we had many options to build a cross-device UI right within Interface Builder, but this could often lead to complicated AutoLayout constraints, traits, or even size classes (which no-one ever really understood...).
Next, we'll talk about the circumstances in which we may want to use or benefit from SwiftUI.


