Apple Macintosh provides a graphical interface that runs on the OS/X operating system. OS/X includes running BSD under the hood. BSD is a version of Unix originally developed at Berkeley. As a version of Unix, it has all the standard developer tools expected by Jupyter to install and upgrade the software; they are built-in tools.
Installing Jupyter on the Mac
Getting ready
Jupyter can be installed on the Mac using Anaconda (as before for Windows) or via the command line.
How to do it...
In this section, we will go through the steps for installing Jupyter on Mac.
Installing Jupyter on the Mac via Anaconda
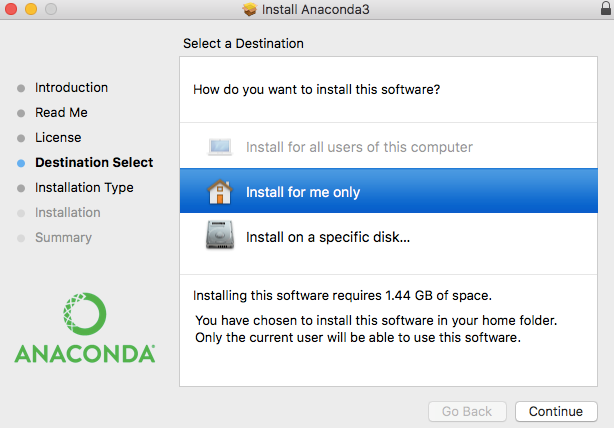
Just as with Windows earlier, we download the latest version of Anaconda and run the installation program. One of the screens should look like this:

The Anaconda install is very typical for Mac installs: users can run the program and make sure they want to allocate so much storage for the application to install.
Once installed, Jupyter (and Anaconda Navigator) is available just like any other application on the system. You can run Jupyter directly, or you can launch Jupyter from the Anaconda Navigator display.
Installing Jupyter on the the Mac via the command line
Many Mac users will prefer using the command line to install Jupyter. Using the command line, you can decide whether to install Jupyter with the Python 2 or Python 3 engine. If you want to add the Python 2 engine as a choice in Jupyter, you can follow similar steps for doing so in the earlier Windows command line installation section.
The script to install Jupyter on Mac via the command line with the Python 3 engine is:
bash ~/Downloads/Anaconda3-5.0.0-MacOSX-x86_64.sh
Similarly, the command to install with the Python 2 engine is as follows:
bash ~/Downloads/Anaconda2-5.0.0-MacOSX-x86_64.sh
In either case, you will be prompted by some regular install questions:
- Review and agree to the license agreement
- Specify whether the standard install directory is OK (if not, you can specify where to install the software)
- Specify whether to prepend the Anaconda location in your user path (Anaconda recommends this step)
At this point, you should be able to start Jupyter with the command line and see the appropriate engine choice available:
jupyter notebook


