Installing VS 2022
The VS installation process has improved with each new version that has been released. Today, it is even possible to reuse the same installer to perform upgrades or workload modifications to create different types of projects.
In this section, you will learn how to do the following:
- Get the installer from the VS website
- Install VS
Let's see how to carry out the installation process in detail.
Getting the installer from the website
VS is easy to install, and you don't need an account or to take a lot of steps to get the installer. By typing Visual Studio community Download in any browser, you can easily find the link to download VS from the official page.
From the following link, you can directly get the installer:
https://visualstudio.microsoft.com/downloads/
On the webpage, go to the Visual Studio section, click on the drop-down control marked Download Visual Studio, and select the Community option (see Figure 1.1):
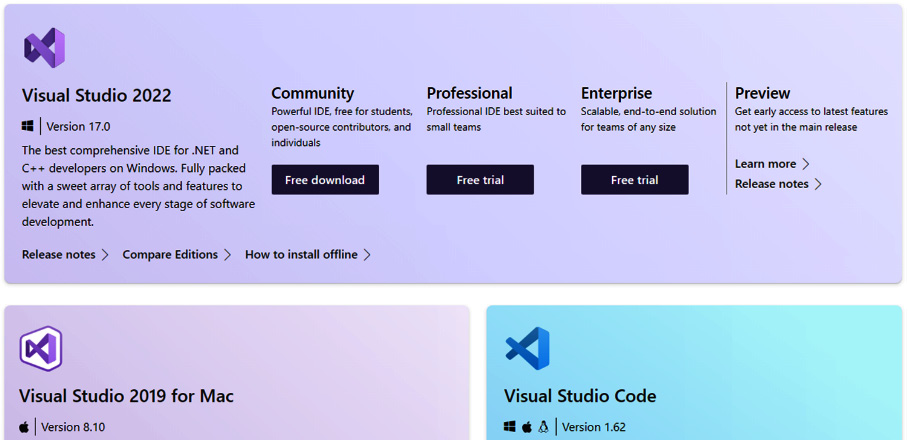
Figure 1.1 – Downloading VS
Installation process
Once you have downloaded the VS installer, you must run it to start the update process of the installer itself, as shown in Figure 1.2:
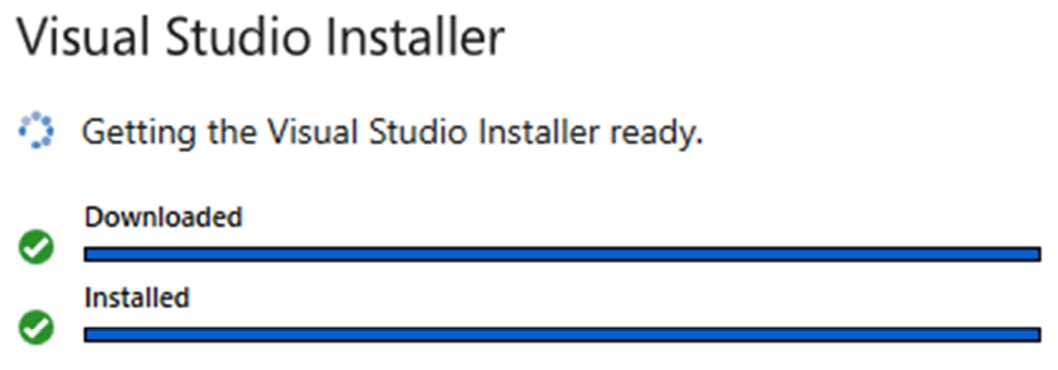
Figure 1.2 – Updating the VS installer
VS is an IDE that is constantly updated by the development team, so the installer will always look for the latest available update to perform the corresponding installation.
When the installer update has been completed, the initial screen of the installer will be presented, which is composed of four main sections, with the Workloads section the one that is displayed by default.
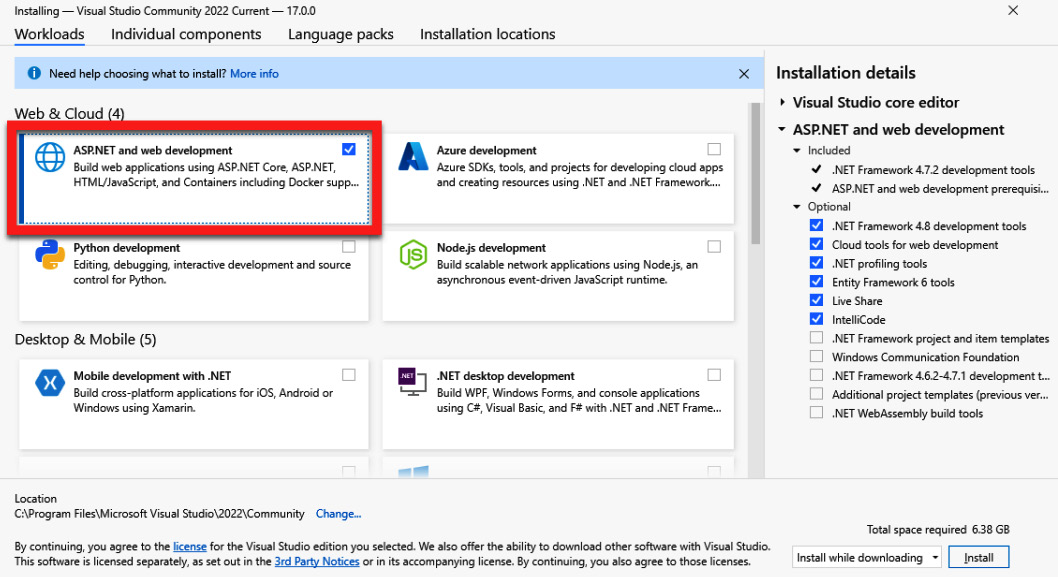
Figure 1.3 – The VS Workloads tab
It is possible to find workloads for different types of projects – for example, mobile projects, desktop-focused projects, and Python-focused projects, among others.
To install the templates and tools related to web development, you must select the workload called ASP.NET and web development, as shown in Figure 1.3.
Each workload includes a set of tools and components associated with the technology selected.
However, it is also possible to select these components individually, within the tab called Individual components, as shown in Figure 1.4:
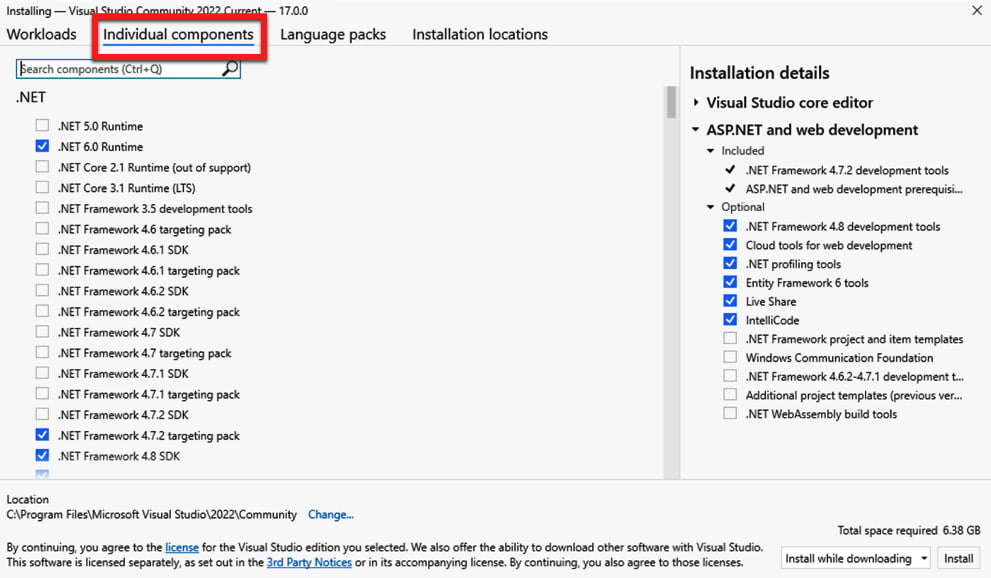
Figure 1.4 – The VS Individual components tab
These components are grouped into categories, such as .NET, clouds, databases, and servers, among others, and you only need to select a component to add it to the installation.
Within the tab called Language packs, you will be able to select the language or languages of the VS interface, as shown in Figure 1.5:
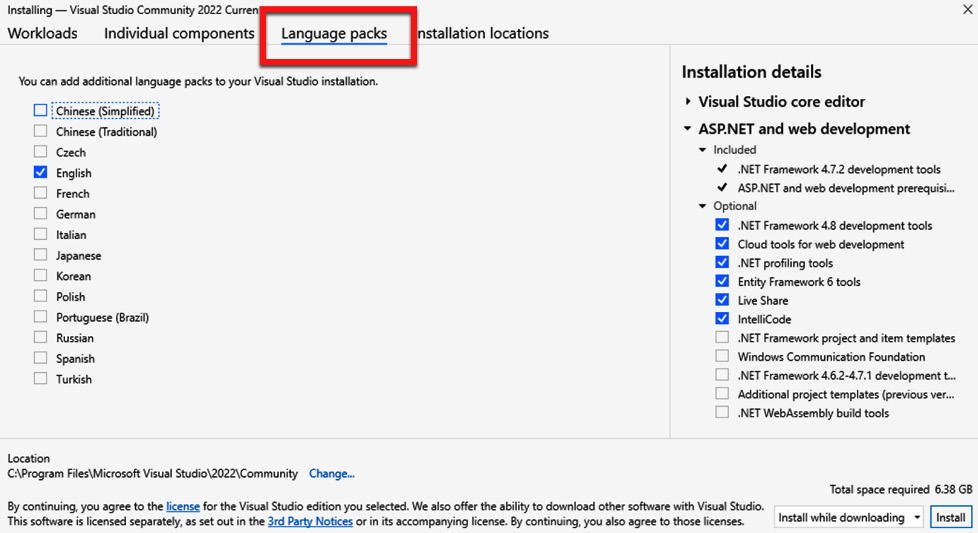
Figure 1.5 – The VS Language packs tab
This is very useful, since the default language usually corresponds to the language in which the VS installer has been downloaded. From here, you will be able to deselect the default language and select a different one or multiple languages to switch between in your development process.
In the last tab called Installation locations, you can configure the system paths of both the VS IDE and the download cache, as shown in Figure 1.6:
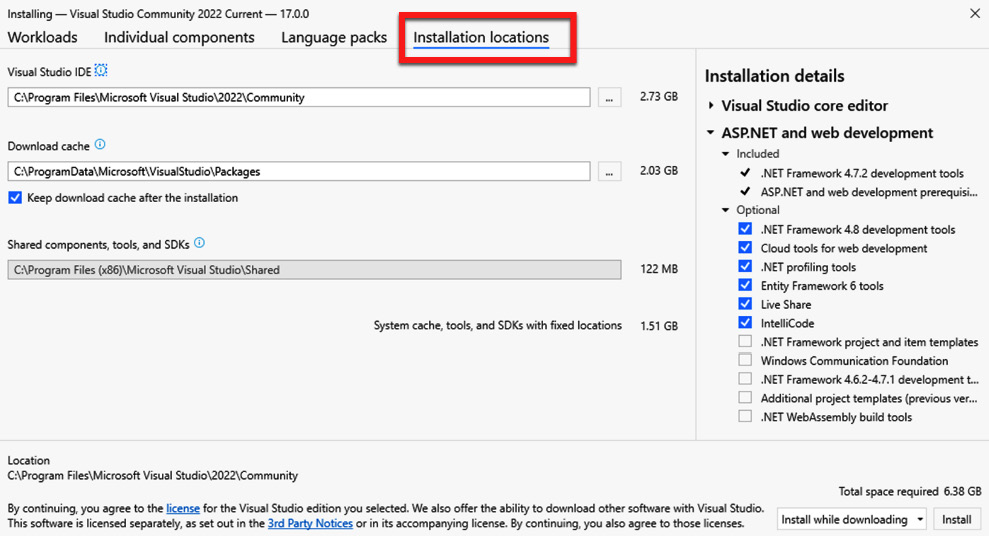
Figure 1.6 – The VS Installation locations tab
In this tab, you will be able to see how much space is needed in each of the paths to perform a correct installation.
Finally, there is a list of options to choose the installation method – whether you want to proceed to download all the components and install them at the same time, or you want to download all the necessary components first and install them later (Figure 1.7):
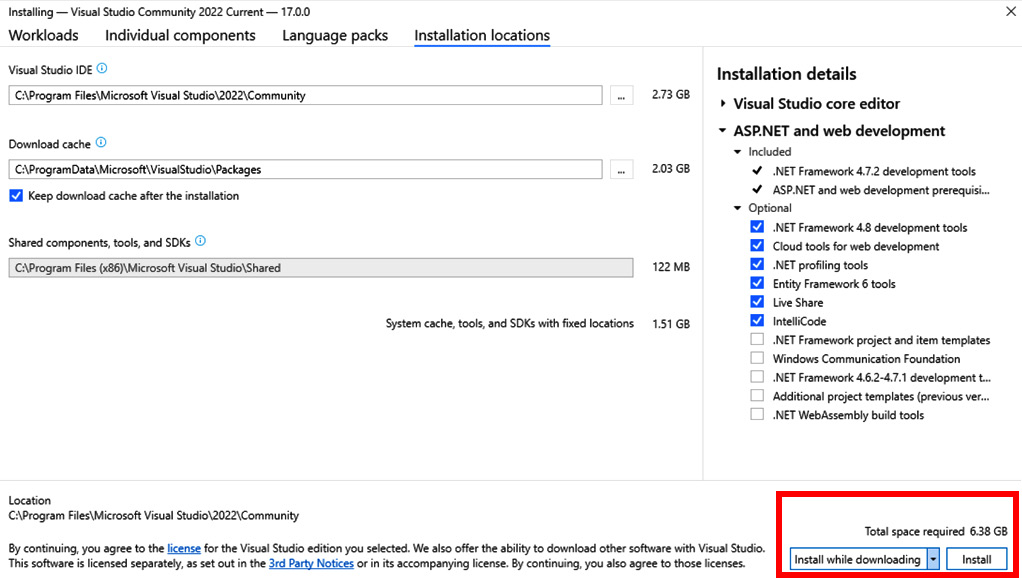
Figure 1.7 – The VS Install button
If you agree with the details and size of the installation, you can proceed to start the process by clicking on the Install button.
Once you have clicked the button to start the installation, a window will appear showing the details of the download and installation of the components, as shown in Figure 1.8:
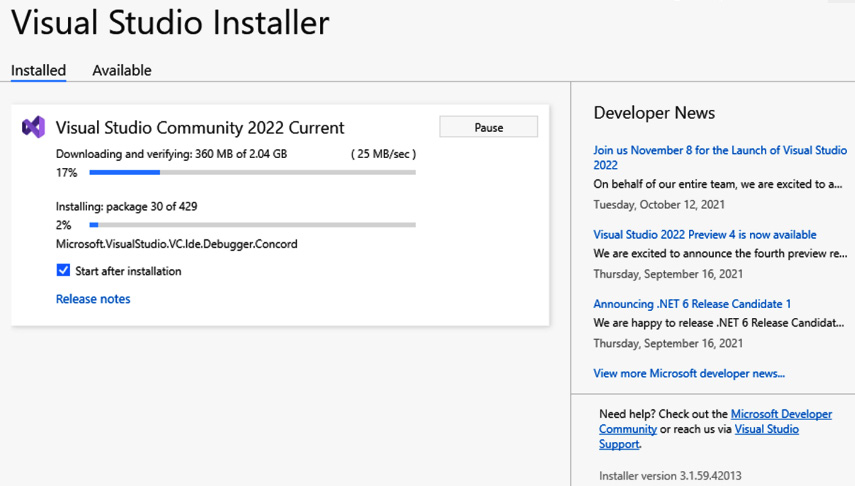
Figure 1.8 – The VS installation in process
Once the installation process has finished, a window will appear, suggesting that you log in with a Microsoft account to get a license for the use of the tool. It is recommended that you log in at this time so that you do not lose access to the tool in the future, as shown in Figure 1.9:
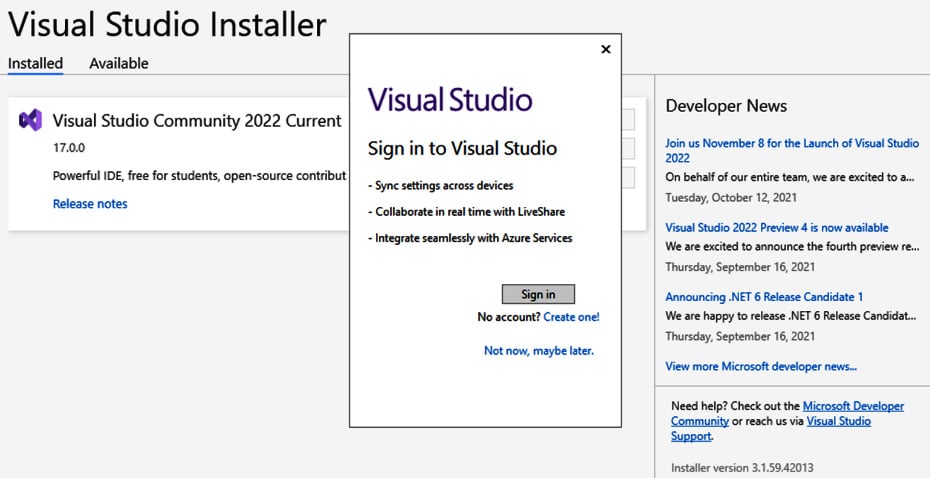
Figure 1.9 – The VS login window
After you have obtained a license to use VS 2022, you will be shown the startup screen for creating, cloning, and opening projects, so you can check that the installation has been successful, as shown in Figure 1.10:
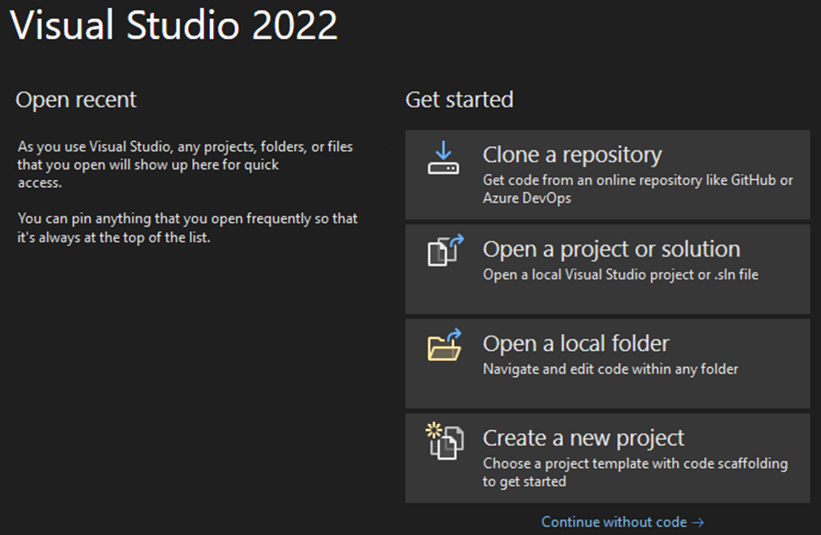
Figure 1.10 – The VS startup window
Important Note
You can have different versions of VS on the same machine; for compatibility with all technology, sometimes we need to keep old versions – for example, VS 2010 to work with Silverlight (an unsupported framework used to create web applications with C# and XAML, which was executed through a plugin in the browser).
After installing VS and getting the first screen, you can open VS using the Continue without code option.
You will now see the main screen in VS without having opened or created any project. For now, you only need to know that you can check the version and VS documentation using the Help menu (Figure 1.11):
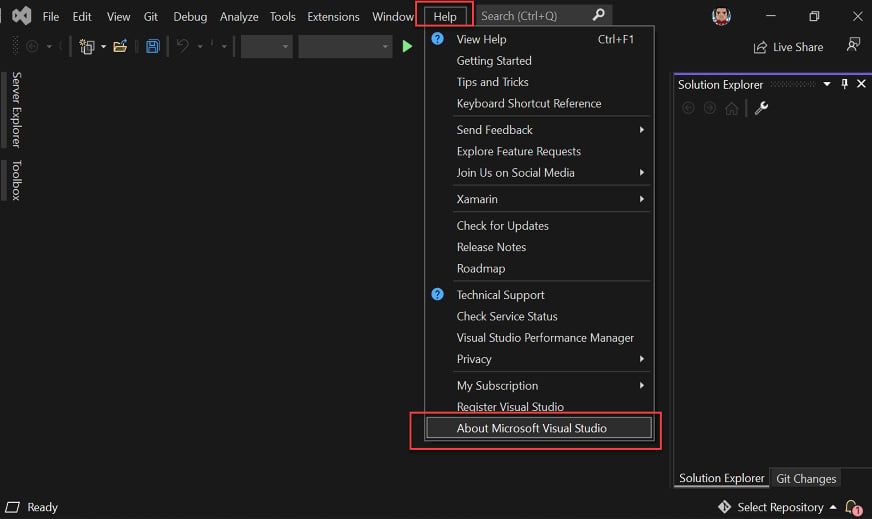
Figure 1.11 – The VS main screen and help menu
In Figure 1.11, the About Microsoft Visual Studio option is highlighted; by clicking on it, you will know the version being used and whether there is any update to install.
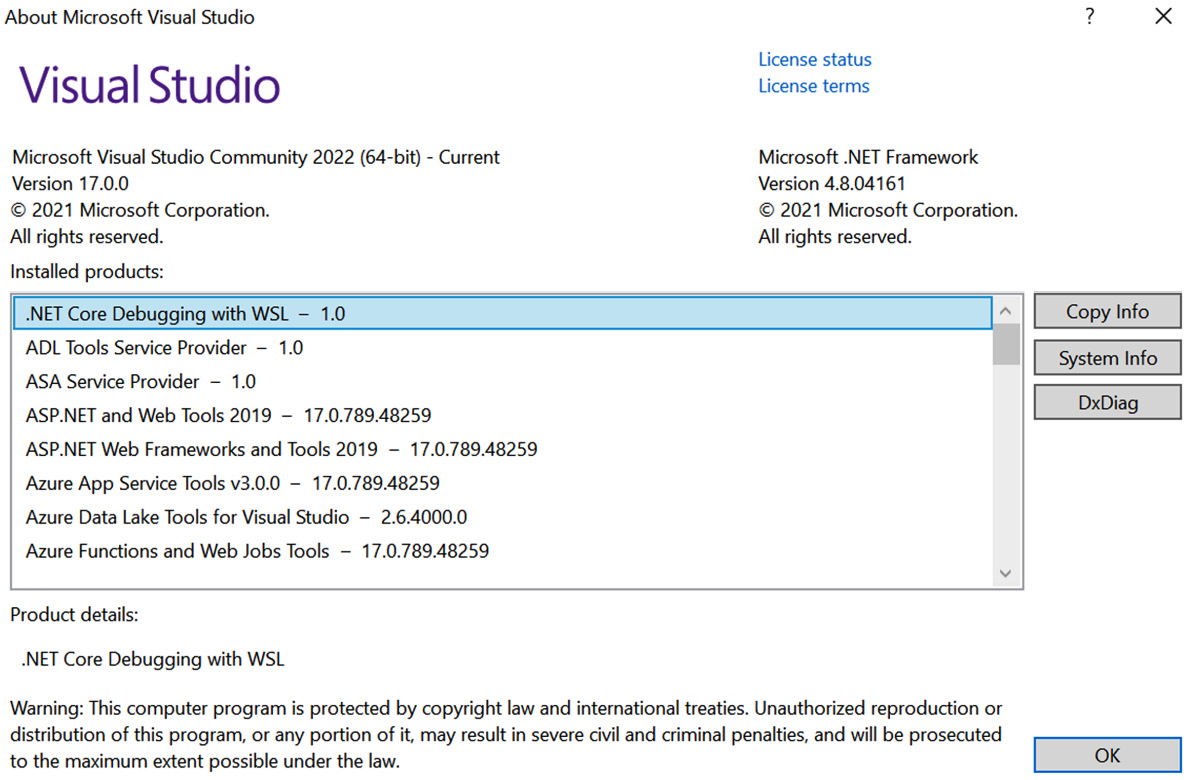
Figure 1.12 – The About Microsoft Visual Studio screen
Finally, if you need to repair, modify, or uninstall VS, you can use the VS installer that you downloaded earlier, or search for the term Visual Studio Installer in Windows Explorer at any time. Also, it will find updates and show you other versions that you can install or try (Figure 1.13):
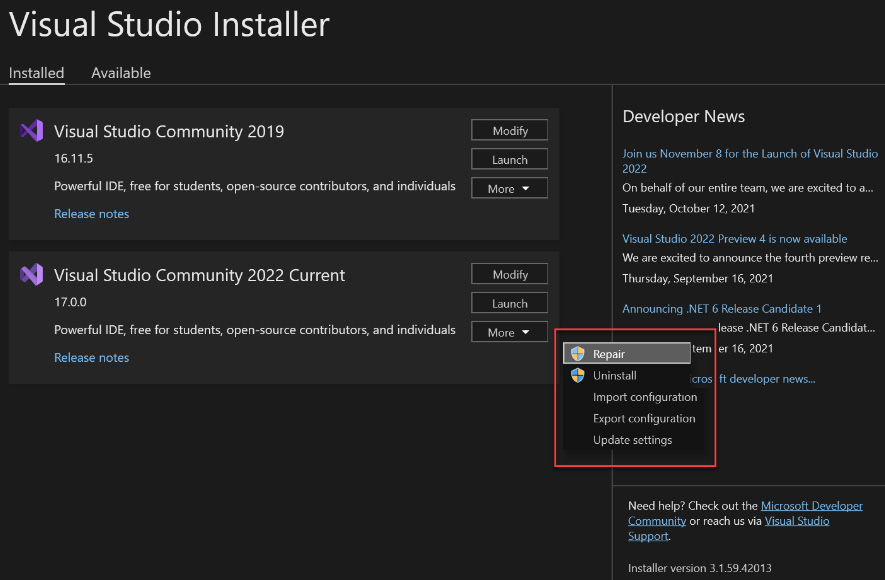
Figure 1.13 – The VS Installer options
Now that we know the VS 2022 installation process, let's explore VS for Mac users.


